Enrollments
Creating an enrollment starts with selecting a course or a learning track. Furthermore, enrollments allow the gathering of different types of content together and enrolling learners in them.
Select a course to assign to your students in one of four ways:
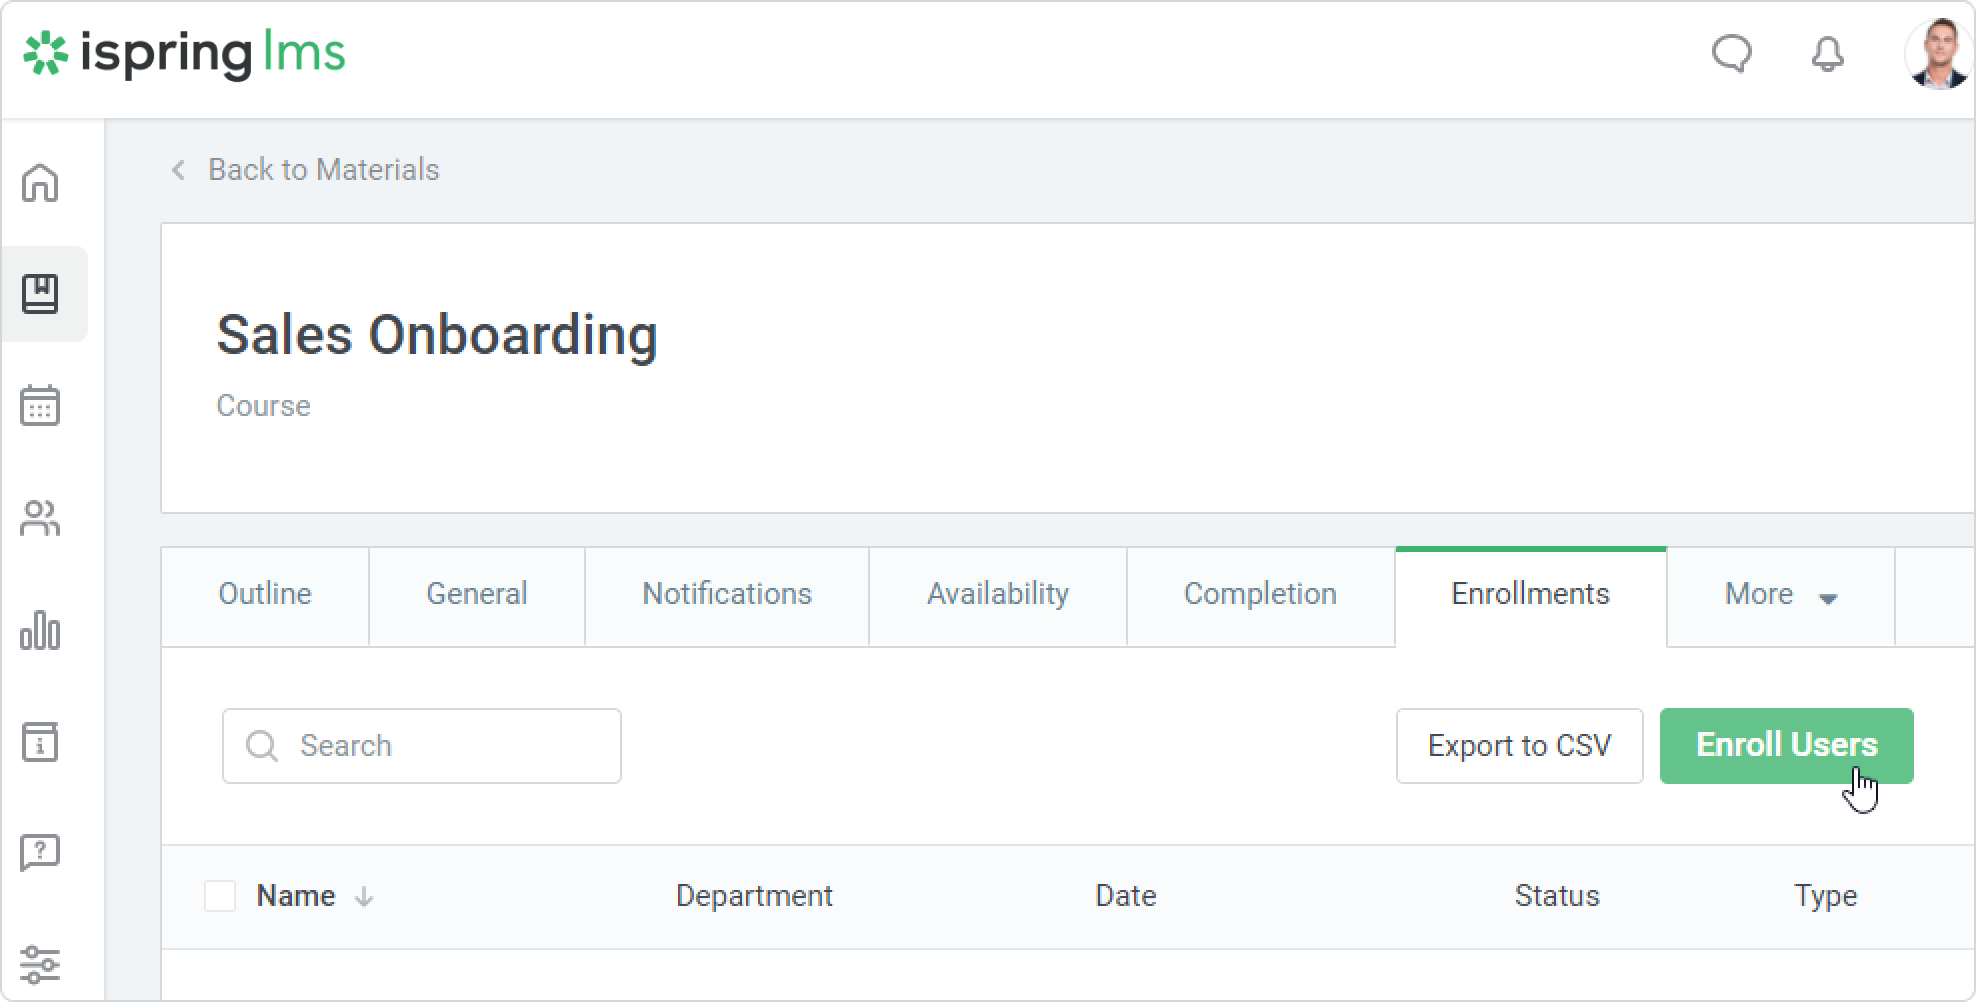
- On the Edit Course page, open the Enrollments tab. Then, click the Enroll Users button.
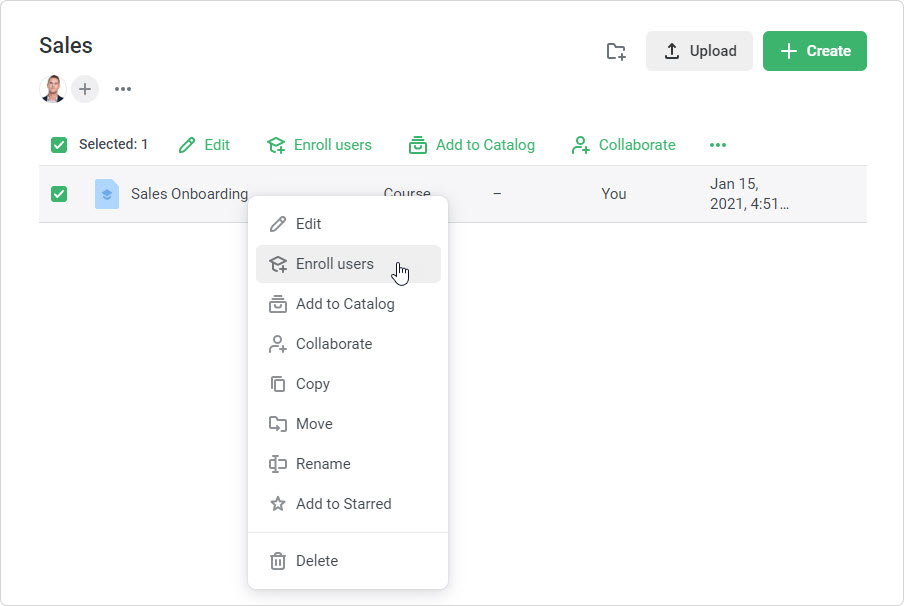
- The alternative is to select one or more courses in the Courses section and click the Enroll Users link in the upper menu. This method will be useful in case you want to choose multiple items for enrollment.

- The third way is to right-click a course and select Enroll Users in the context menu. You can also choose multiple courses and click Enroll Users in the context menu.
The fourth option is to assign a course on a user's page. In this case, the order of the enrollment stages will be different.
Learn how to assign a course on a user's page- Go to the Users section and click on a user's name.
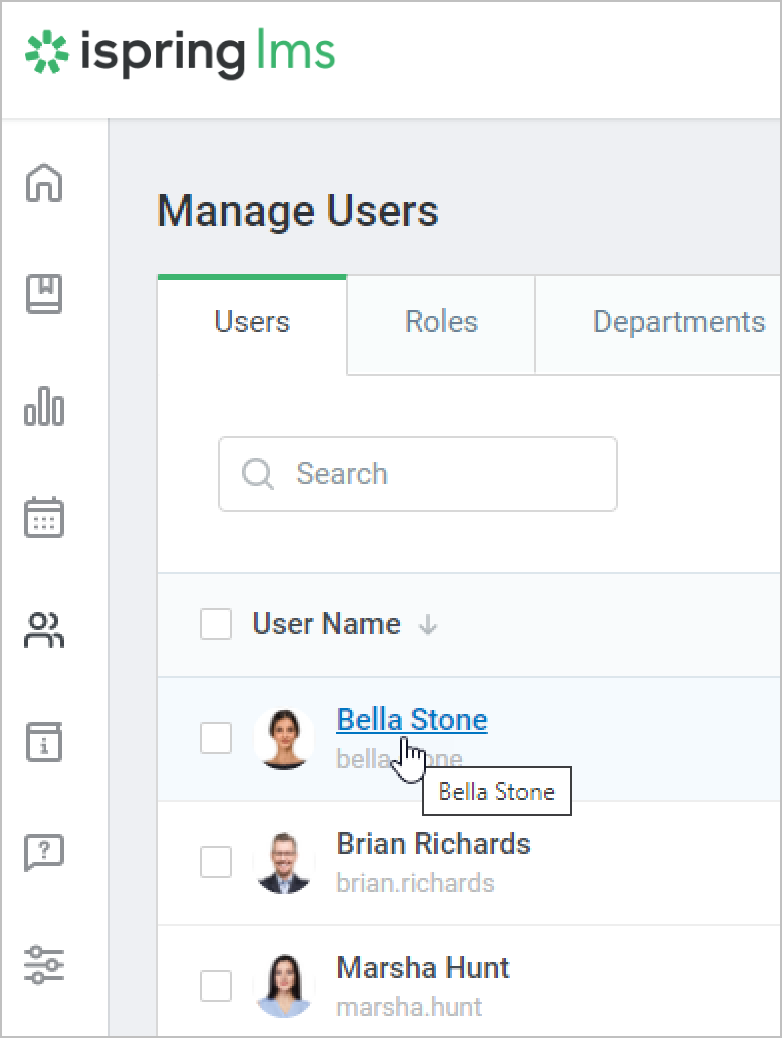
- Open the Enrolled Learning tab. Next, click on the Enroll: Course/Training menu and select Enroll Course.
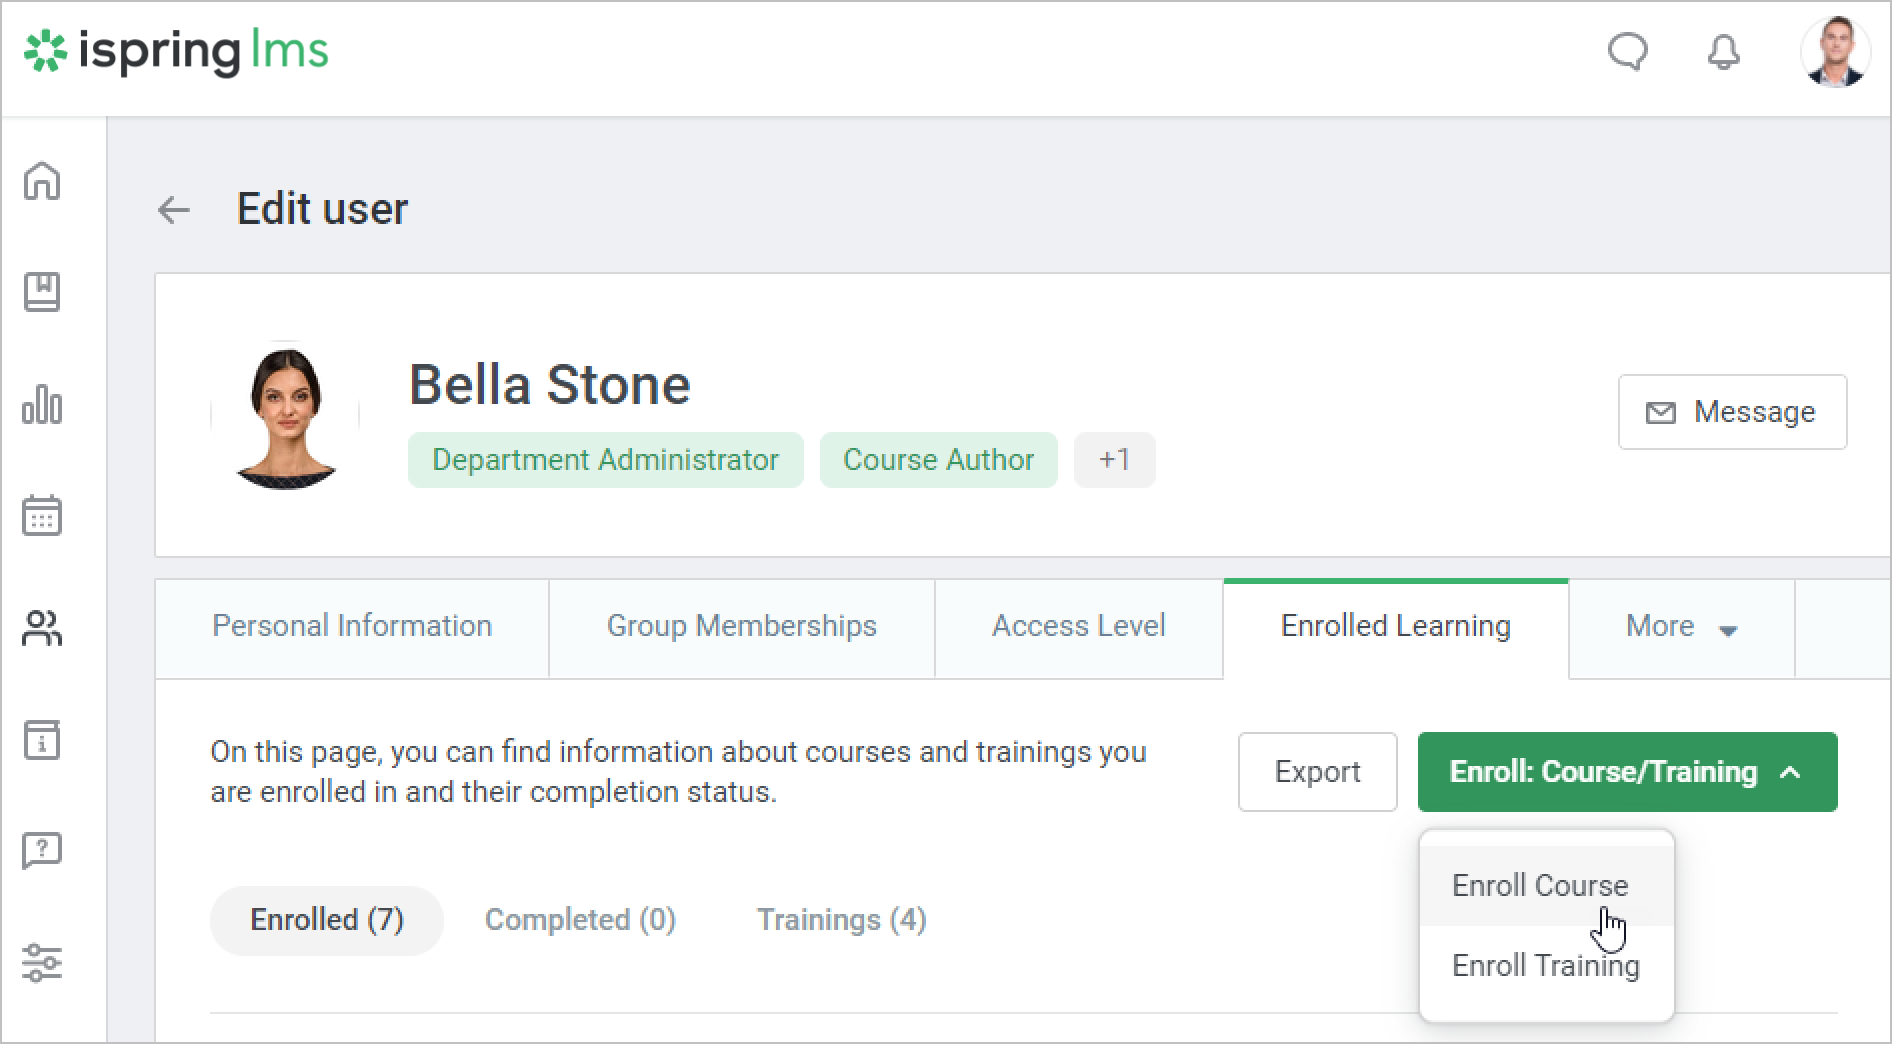
- There will be three stages in the enrollment window: Users → Courses → Parameters.
If you return to the Users stage, you’ll see that one user is already selected. But you can add more users: just start entering a name, login, or email and click on the matching user that appears.
Click the Advanced Search button to select an entire department or group, or filter users by any of the profile fields.
As soon as the user list is ready, click Next.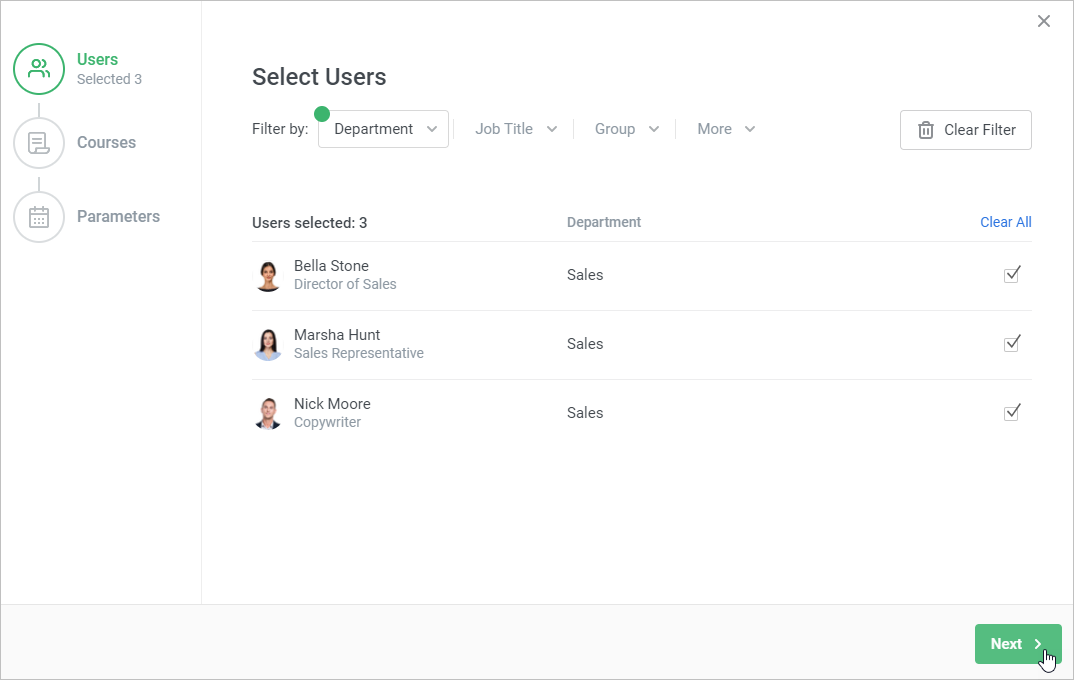
- In the next step, select a course or a learning track. Enter a course name in the search bar, choose a matching option, and click Add.
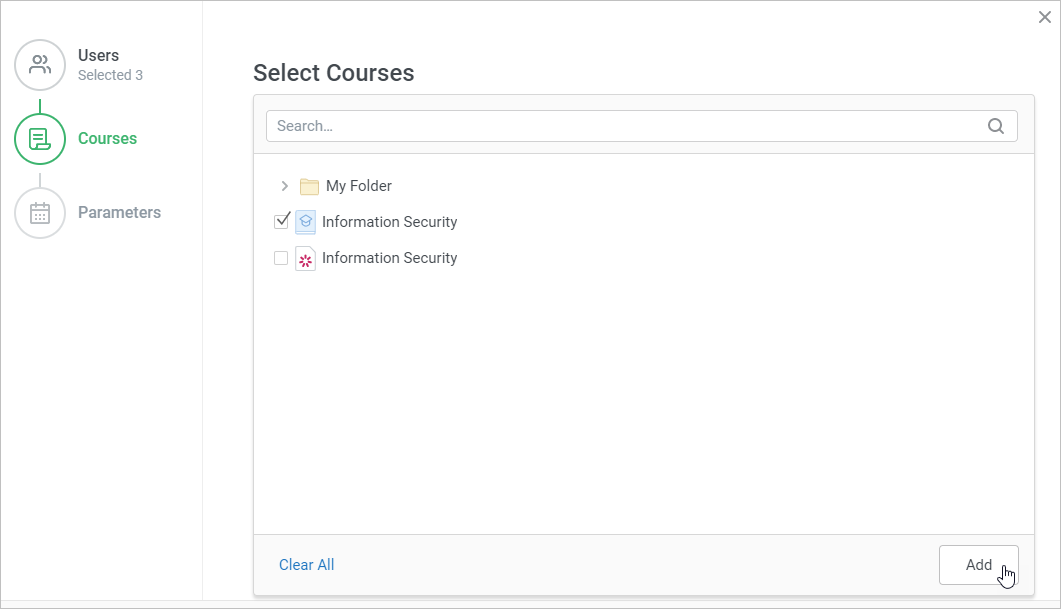
When the course list is ready, click Next.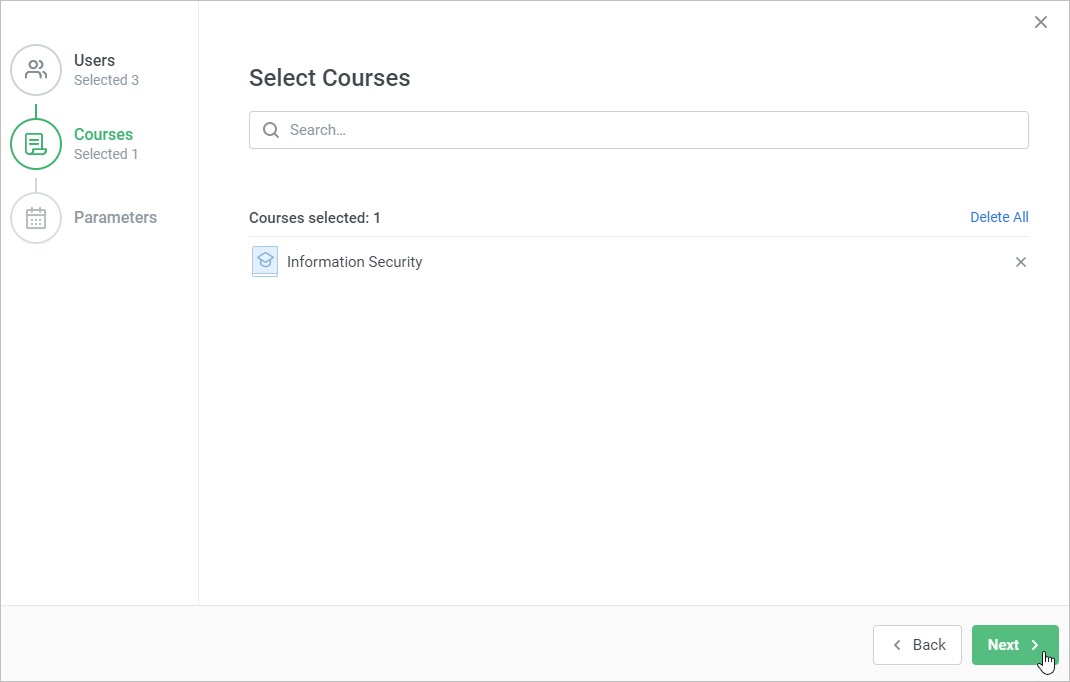
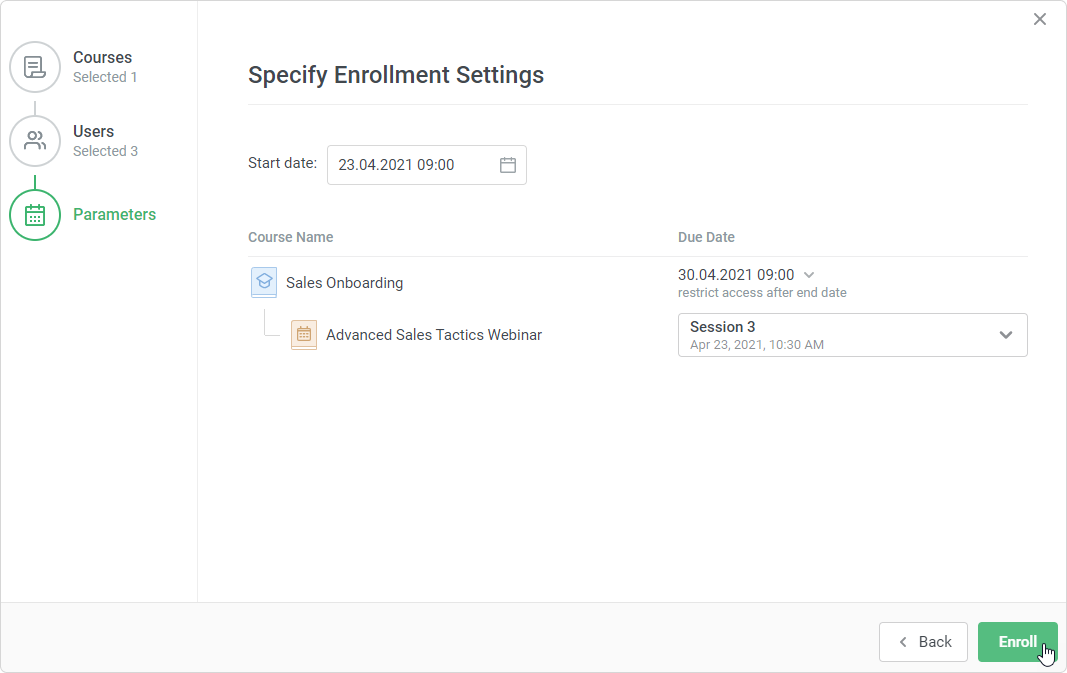
In the Parameters step, you can set up the learning start date and time, and specify the due date.
- Click the calendar icon in the Start date field. In the opened calendar, select the date and time, and click OK.
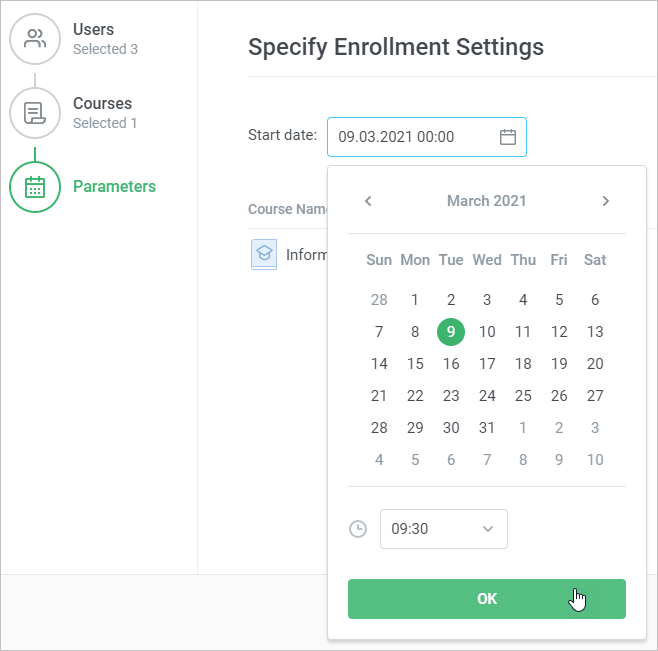
- The second parameter you can change in this window is the due date. The following options are available:
Use course settings — the value from the Availability tab is auto-populated.
By Date — set up the time and date by which the content item should be completed.
For a period — specify the number of days, weeks, months, or years your learners can take to complete the course. Note: a month always has 30 days, and a year always has 365 days.
No Due Date — the content item is not time-limited, and your students can take as long as they wish to complete it.
For the By Date and For a period options, you can select the Restrict access after due date option. In this case, learners won't be able to take the course after the due date expires.
If you need to apply the completion settings to all assigned items, select Apply to All.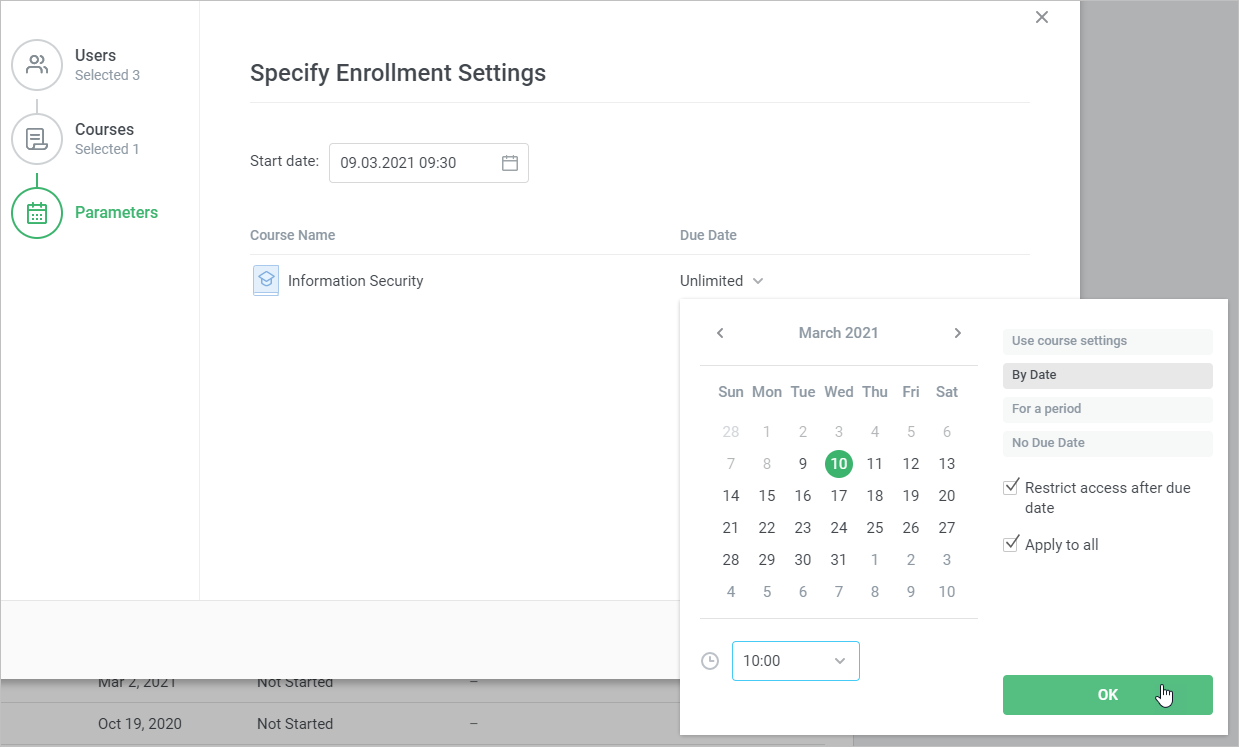
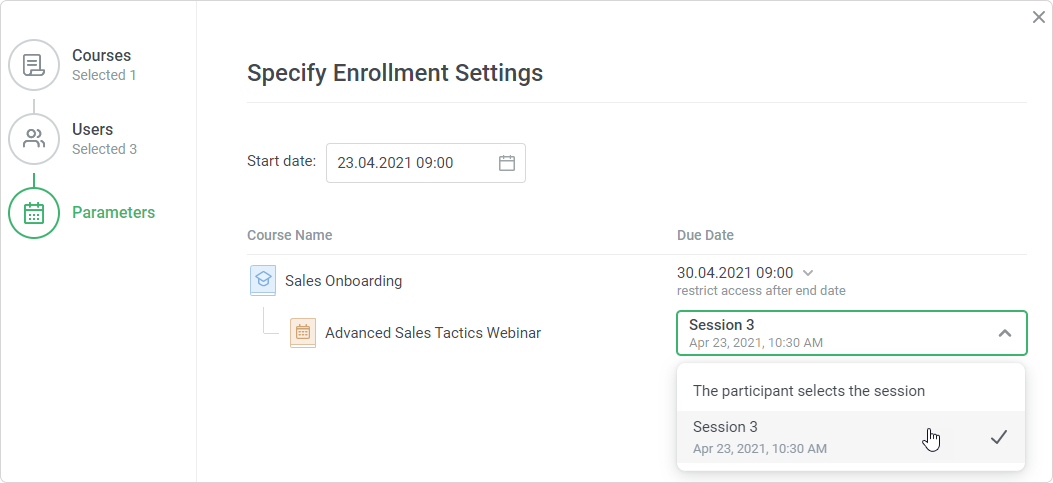
- If a course includes a training, select a session in which users will be enrolled. If you choose The participant selects the session, that will mean users will select a session in the user portal on their own.
- Click the calendar icon in the Start date field. In the opened calendar, select the date and time, and click OK.
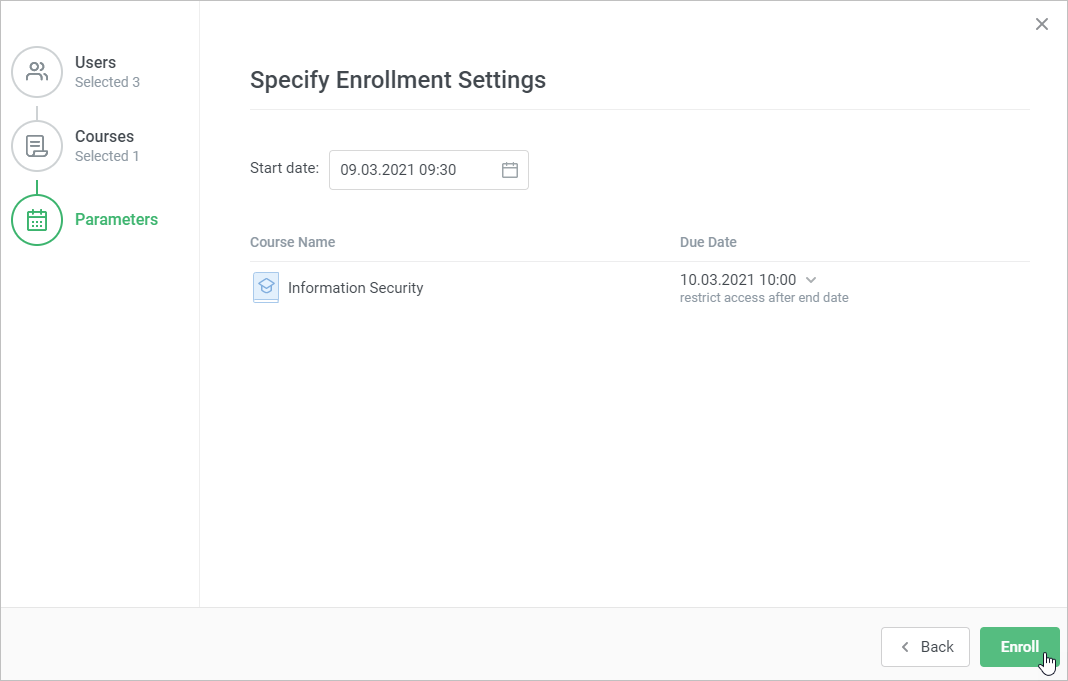
When you complete all these steps, click the Enroll button. Now all of your students will receive a notification in the user portal and to their email addresses. Also, the assigned content will appear in the My Courses section of the user portal, and learners can begin studying it.
You can also edit and cancel enrollments, reset their progress, or export all of them to a CSV file.
- Go to the Users section and click on a user's name.
In the opened window, create the enrollment.
Step I: Courses
At this step, the following actions are available:
- Viewing content items that you have chosen to assign.

- Adding extra courses to the list of assigned items.
To do this, click the search bar, choose needed content items, and hit the Add button.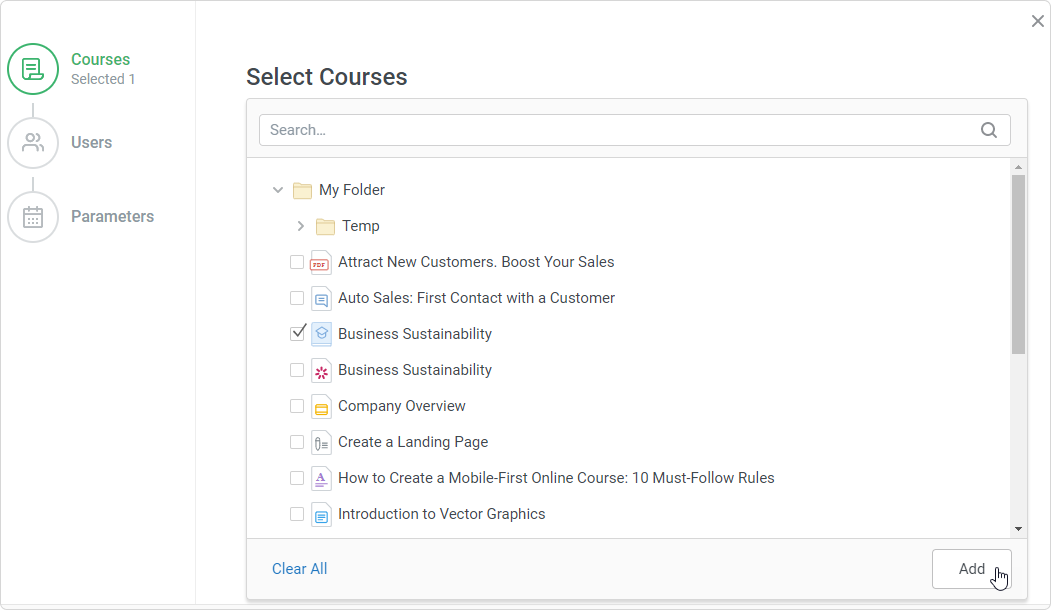
- Deleting content from the list. Select a course by hitting a cross or click the Delete All link if you want to empty the list completely.

As soon as the content list is ready to be assigned, click Next or select the Users step.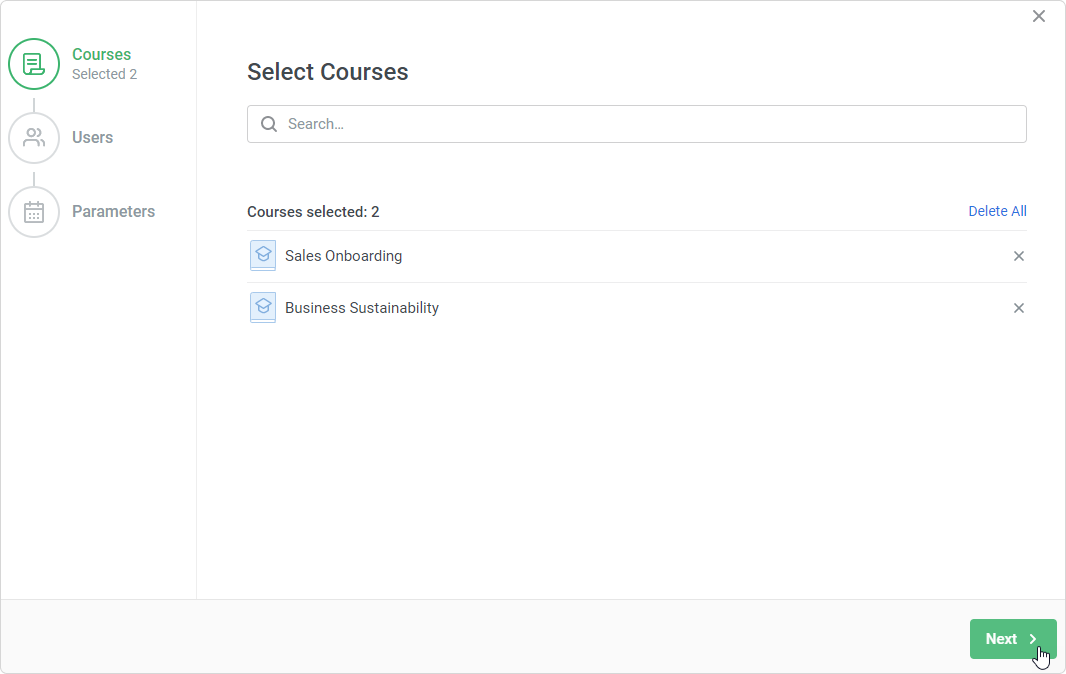
Step II: Users
At the Users step, build a list of learners who will study the content.
Start entering the first name, last name, login, or email of a user and left-click the matching option.

- If you can’t locate the learner, use the Advanced Search option.

Here, the following filters are available:
• Department
• Position
• Group
• Login
• Email
• First Name
• Last Name
• Country
• Other required profile fields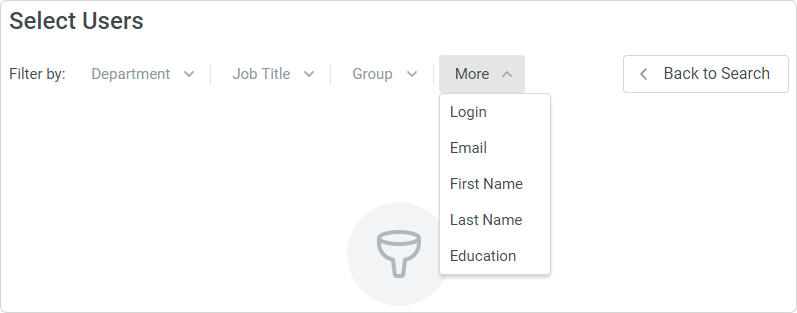
Assign courses to users belonging to a specific department or multiple departments. For instance, assign the Rules of Effective Negotiating course to the entire Sales department.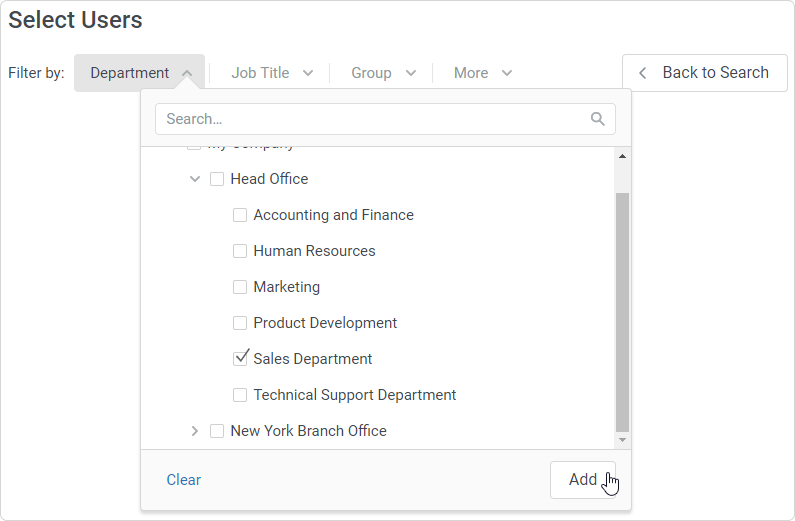
Also, you can enroll an entire group of users in a course. Let’s say you want to enroll all learners of the SMM group in the Setting Up Ad Targeting course.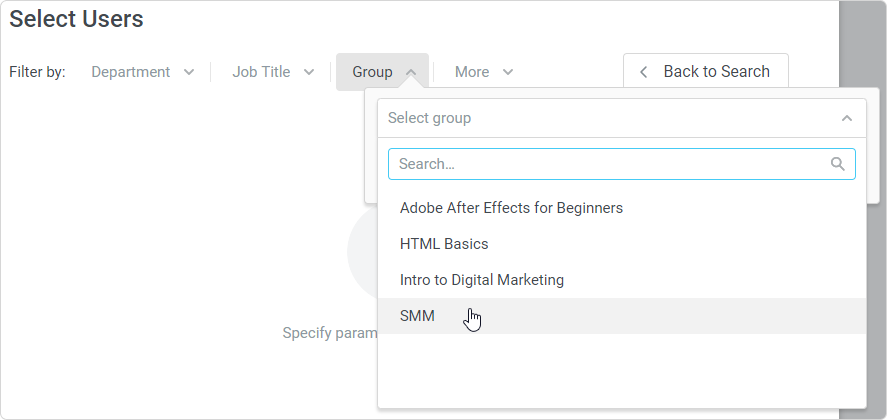
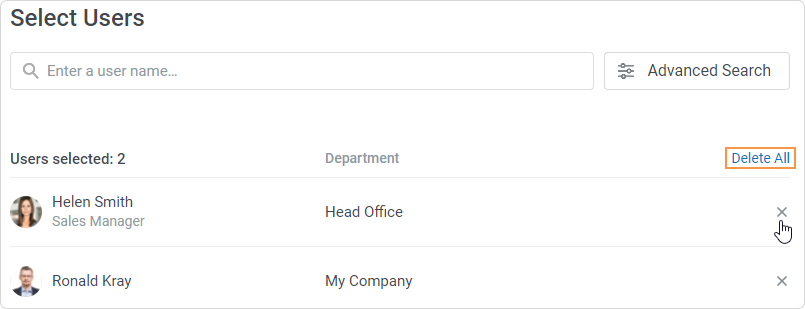
Filtering by other parameters works the same way. Sort users by a specific value and assign the courses to be taken. - To remove (deselect) a user from the list, click the “x” next to their name. If you want to empty the list completely, click Delete All.
To go on to the next step, hit Next or click the Parameters step.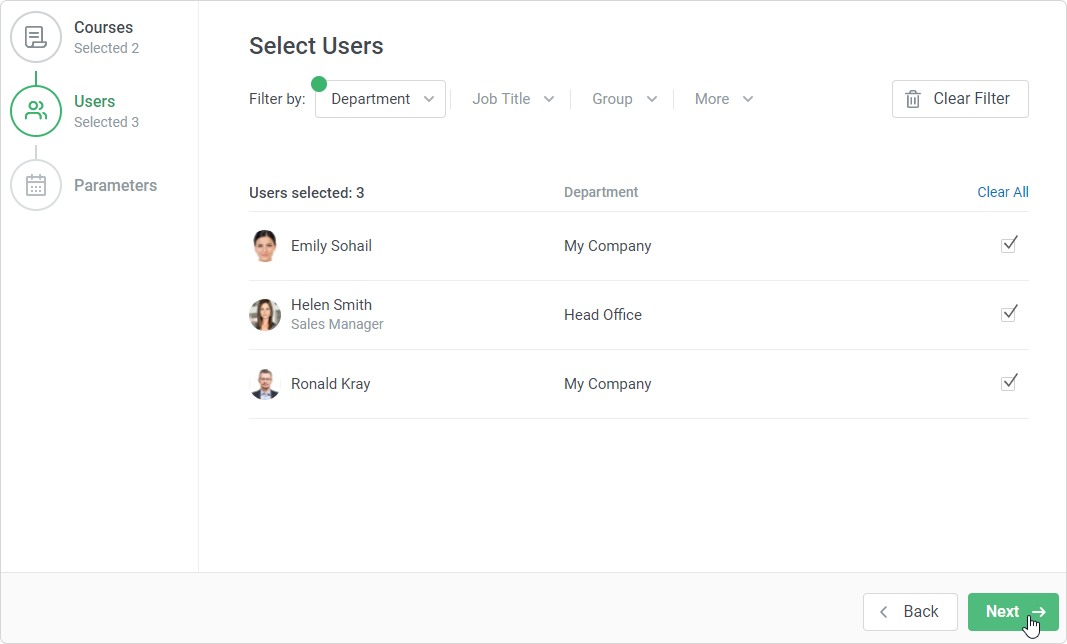
Step III: Parameters
In this step, you can set up the start date and time to start studying the content, specify the completion date, select a training session if a training is included in a course, or allow learners to choose a session on their own.
- Click the calendar icon in the Start date field. In the opened calendar, select date and time and click OK.
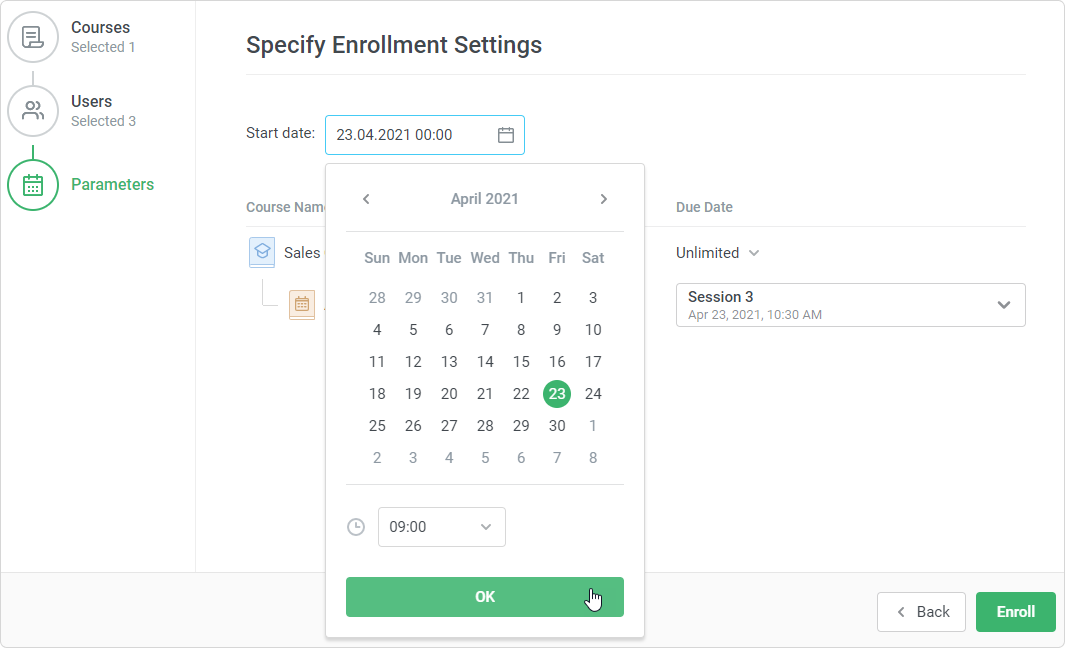
The second parameter that you can change in this window is the due date. The following options are available:
Use course settings — the value from the Availability tab is auto-populated.
By Date — you set the time and date by which the content item should be completed. By default, the time is set to 00:00 (midnight) on the selected date.
For a period — specify the number of days, weeks, months, or years your learners can take to complete the course. Note: a month always has 30 days, and a year always has 365 days.
No Due Date — the content item has no time limitation and your students can take as long as they wish to study it.
For the By Date and For a period options, you can select the Restrict access after due date option. In this case, learners won't be able to study the content after the course’s due date has passed.
If you need to apply the completion settings to all assigned items, select Apply to All.
Finally, click OK.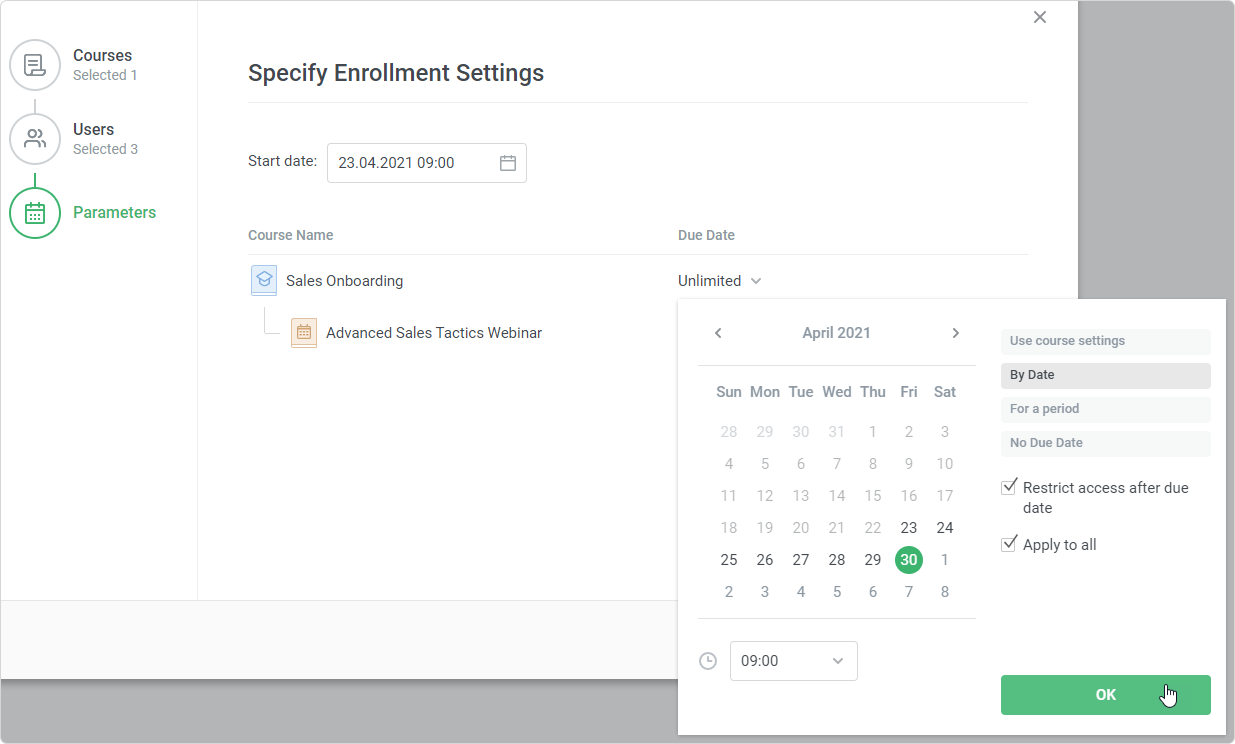
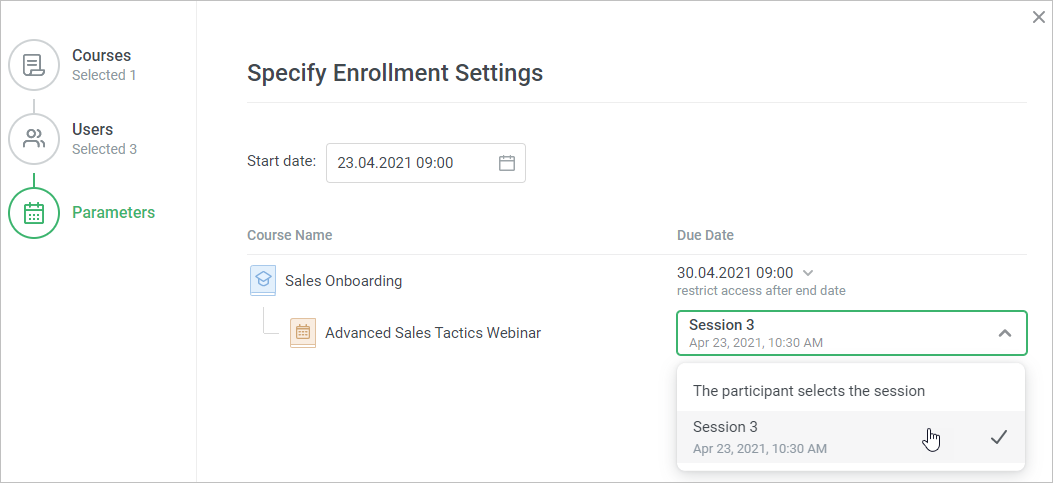
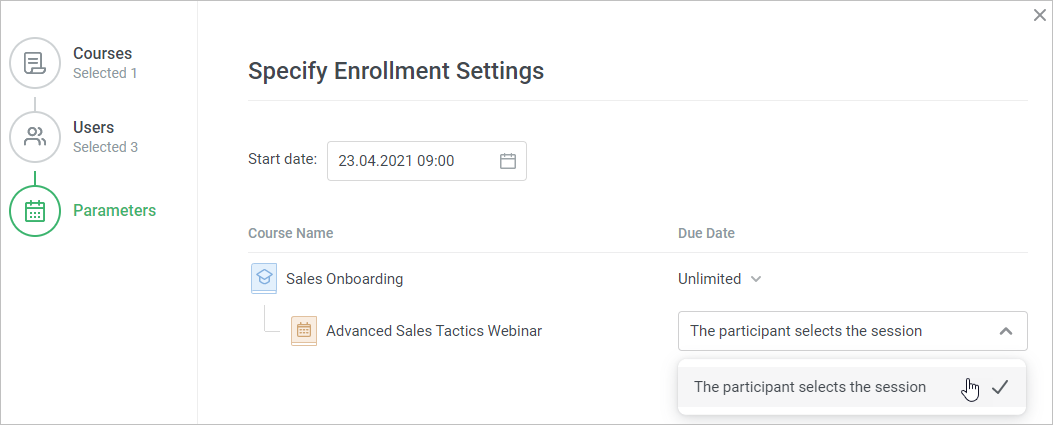
If a course includes a training, select a session in which users will be enrolled. If you choose The participant selects the session, the users will be able to select a session in the user portal by themselves.
 Important to know when assigning a course with a training
- If an assigned course includes a training, the users who enrolled in the course don't receive notifications about a training being assigned.
- The training start date coincides with the course start date.
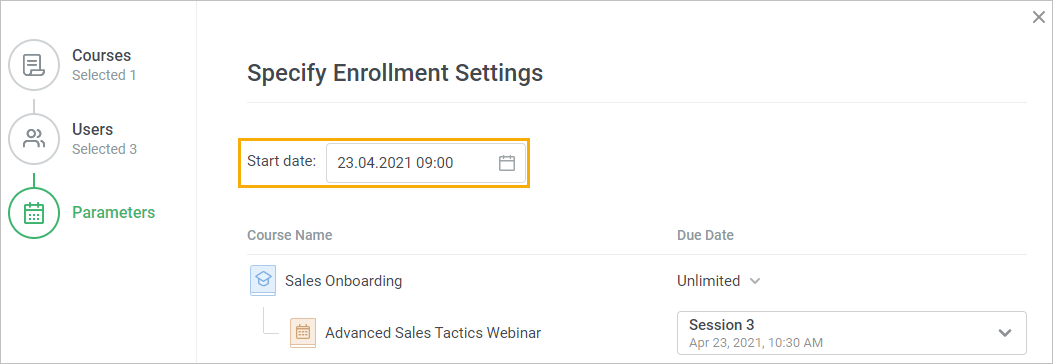
- Sometimes a training doesn't have any sessions that start after the course start date. In that case, the only available option will be The participant selects the session.
- Let's suppose that you assigned the learner a course that includes a training and enrolled them in a specific session.
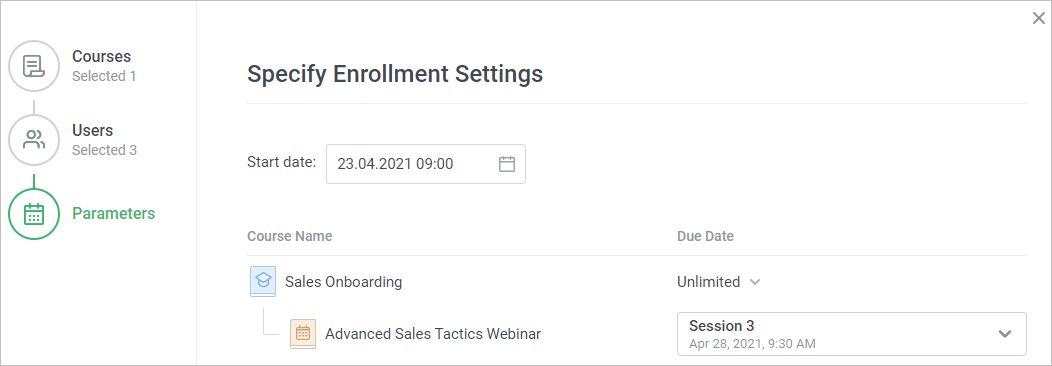
And you made the course start date later than the start date of the selected session. In that case, you’ll see an error because the learner won't be able to open a training in their portal.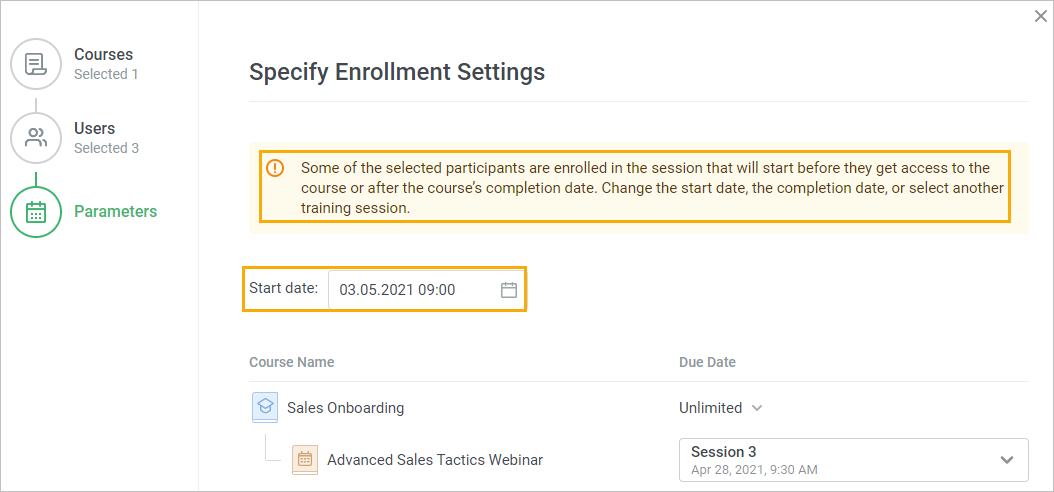
To resolve this error:
• Make the course start date earlier than the start date of the selected session.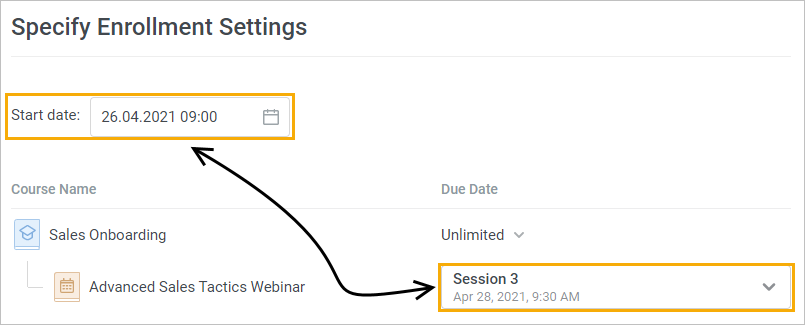
• Change the start date of the selected session so it will start later than the course.
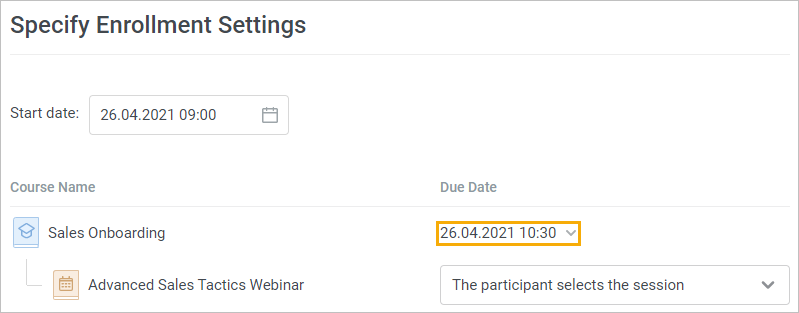
- If a course has a due date, then sessions taking place later than the course completion date won't be displayed in the menu.
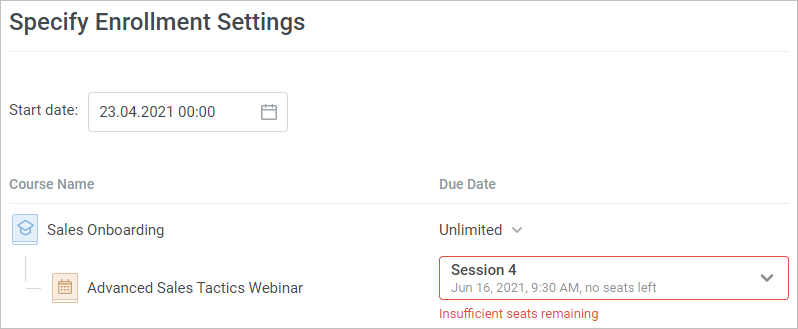
- If, after the administrator clicks on the Enroll button, it turns out that there aren't enough available seats in the session, then an error message will appear. In this case, the administrator should enroll learners in another session or increase the number of available seats in the training session.
After being enrolled in a course including a training, the learner receives the following notifications:
• about the course being enrolled
• about a training session approaching (a reminder sent out X days before the session start date) — if a training session was selected (the administrator chose the session when enrolling the learner in the course or the learner selected the session on their own)
• about the training session being started — if a training session was selected (the administrator chose the session when enrolling the learner in the course or the learner selected the session on their own)
• course notifications
• notifications about the training being changed
• notifications about the training being canceled (these aren't sent out if the administrator deleted a training from a course)
- If an assigned course includes a training, the users who enrolled in the course don't receive notifications about a training being assigned.
When you complete all these steps, click the Enroll button. Now, all your students will receive a notification in the user portal and in their email inbox. Also, the assigned content will appear in the My Courses section of the user portal, and students can start studying it.
You can also edit and cancel enrollments, reset their progress, or export all of them to a CSV file.
