Sync from a File
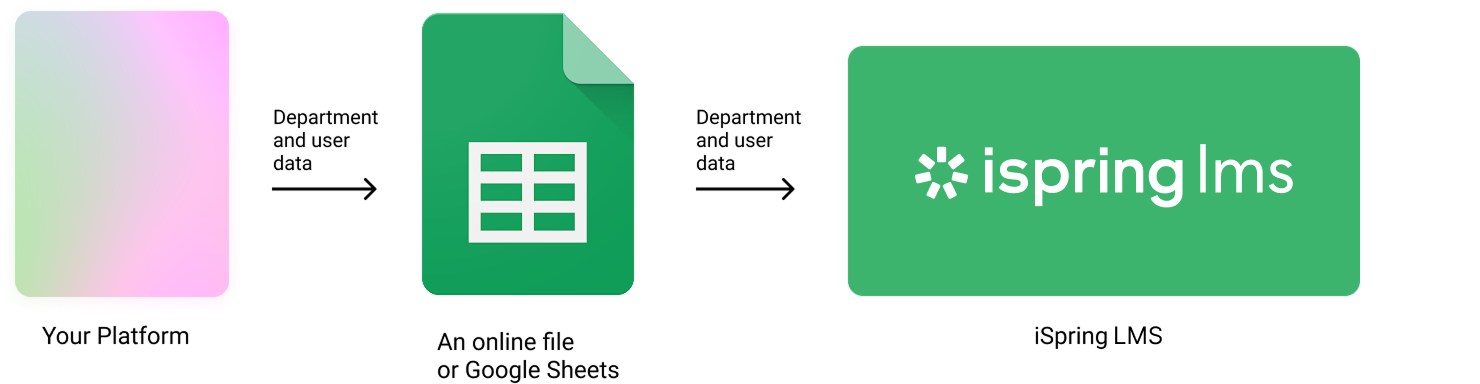
You can sync user and department data with iSpring LMS sync data using online spreadsheet files.
Please note that this is a paid add-on functionality.
Here’s how it works
- You can export user and department data from your platform into an online spreadsheet, such as Google Sheets.
- This file is then easily linked to iSpring LMS.
- The data in the spreadsheet will sync instantly with iSpring LMS.
- Updates or changes made to the spreadsheet will automatically reflect in iSpring LMS based on a synchronization schedule set by Administrators within iSpring LMS.
How to Enable Sync from a File
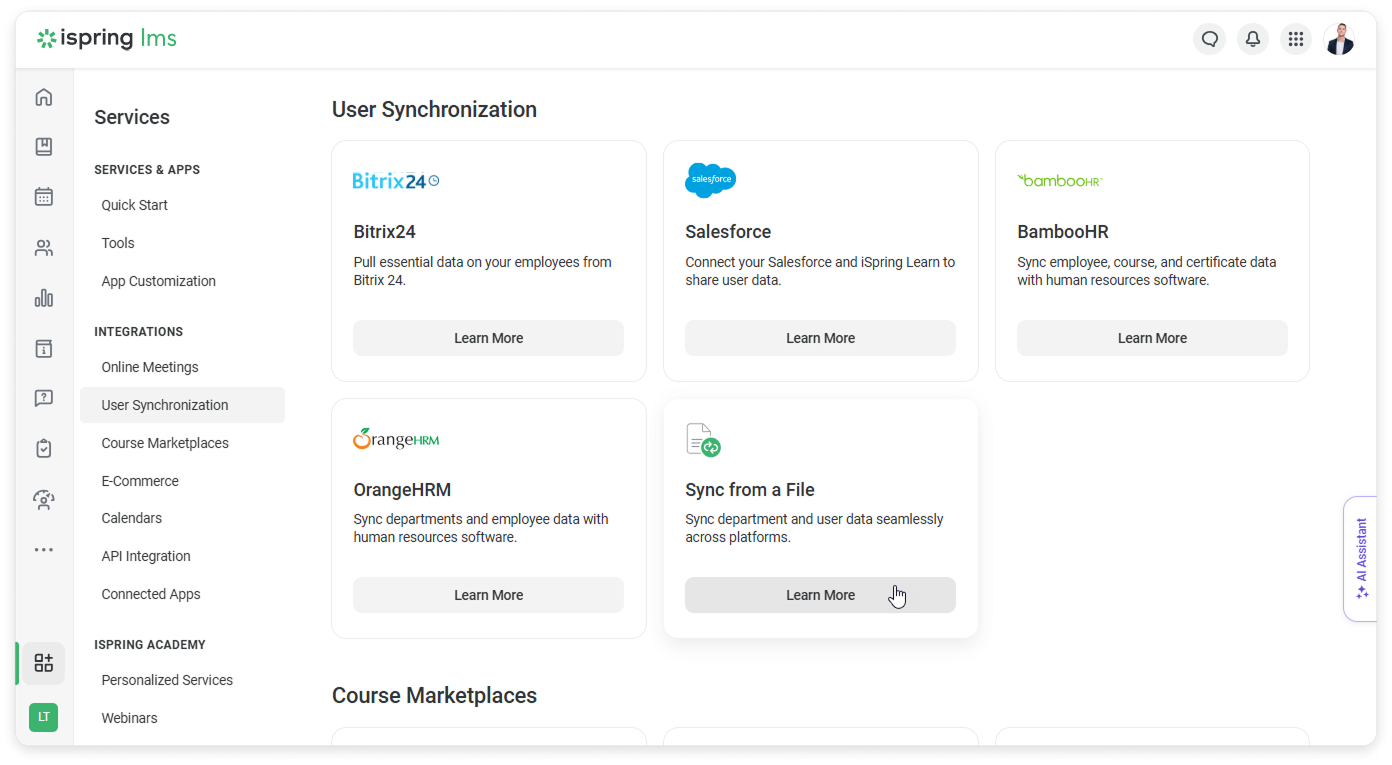
- Go to the iSpring LMS Services section. Navigate to User Synchronization > Sync from a File, and click on Learn More.
- Read the information about the integration and click on Request Service.
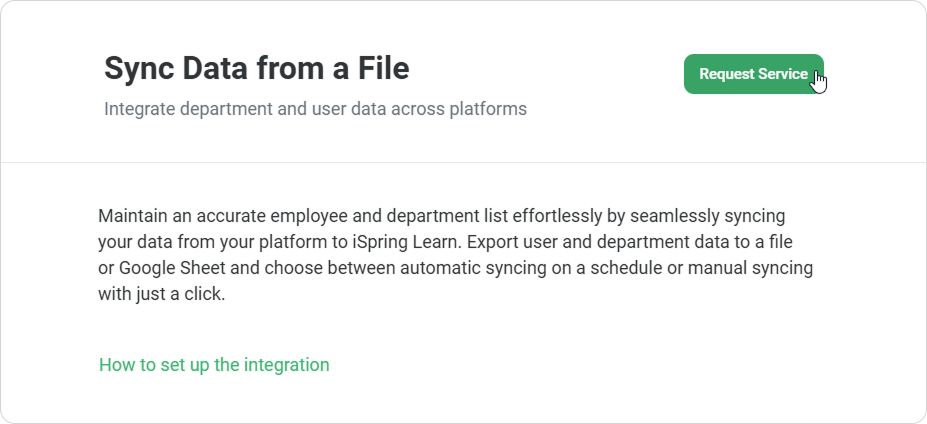
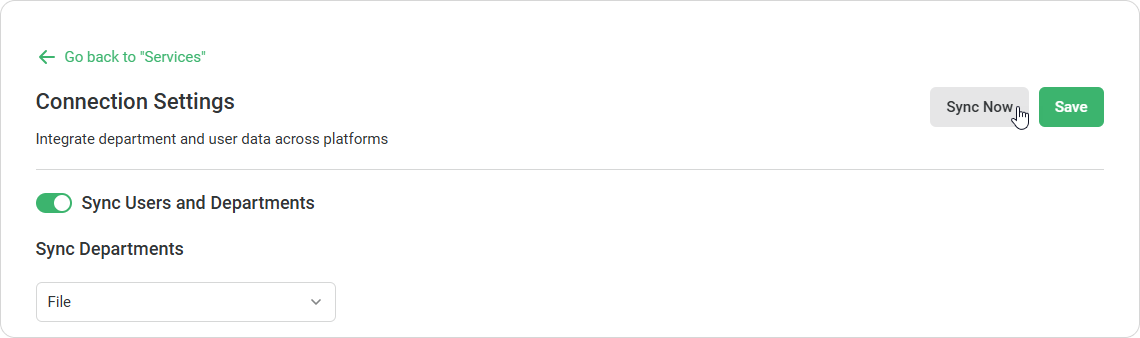
- Once payment has been confirmed, a "Connection Settings" page will be available in your iSpring LMS account.
Now you can set up the synchronization.
Setting up Synchronization
Activate the Sync Users and Departments option using the toggle switch.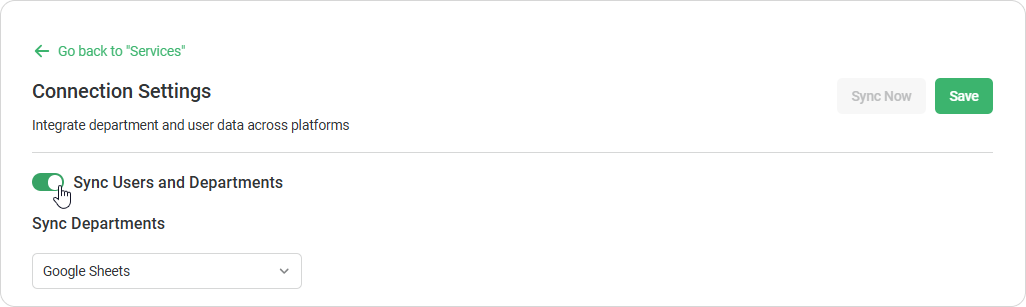
Then, set up the synchronization of departments and users.
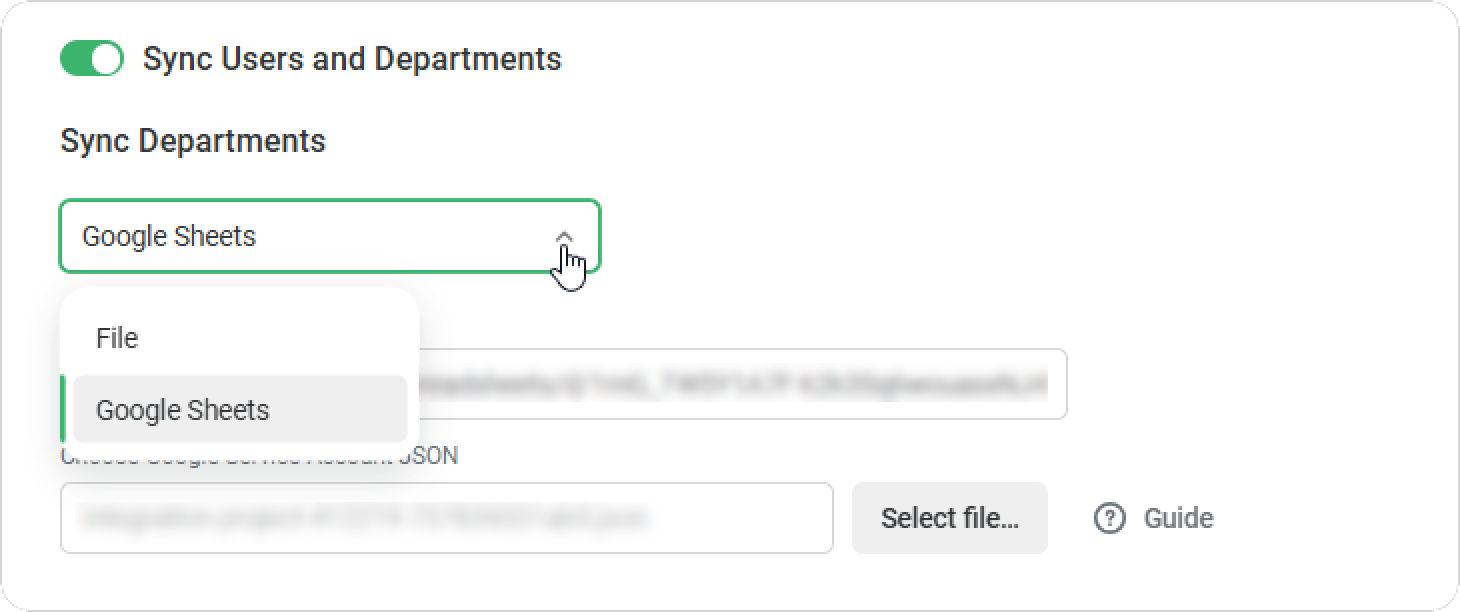
Department Synchronization
- Select what you will synchronize iSpring LMS departments with; you can choose File or Google Sheets.
- If you choose File:
- Paste in the XLSX or CSV file URL.
- Enter the username and password to access the file.
- If you choose Google Sheets:
- Paste the link into the sheet.
- Choose “Google Service Account JSON.”
You can learn how to create a Google Service Account JSON here.
- If you choose File:
- Set up field mapping.
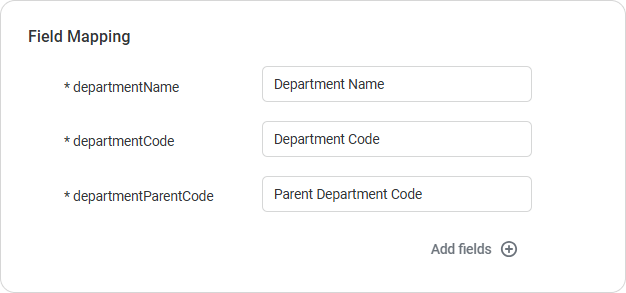
The fields should be identical to the column names in the sync file or Google Sheets. Here is an example of columns in Google Sheets: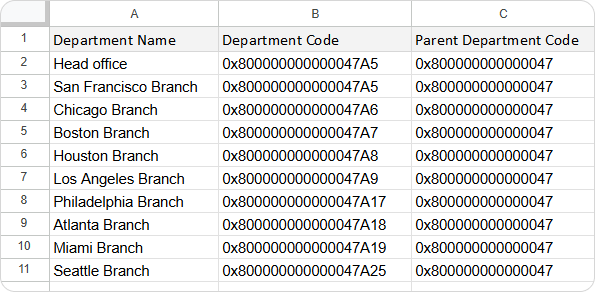
When you start the synchronization, the departments in the file and in iSpring LMS are compared by department code. If matching by department code doesn't work for you, you can add a departmentUniqueKey — a unique identifier.
If you've added a departmentUniqueKey, the system will use that to match departments. Otherwise, it will use the department code.
The first example:
Your company might use multiple systems for management, such as an ERP and an HR system. In these systems, the codes for departments could be different. To make sure everything matches up, you’ll need to use a unique key for each department, called the departmentUniqueKey.
The second example:
If your company changes how it organizes departments, the department codes might change too. If you used the department code to match things up, you might have issues when you try to sync. For example, if you change a department code in your system and then try to sync with iSpring LMS, the system might not find the updated code and could create a duplicate of the department.
Deleting Departments in the file
- If you delete a department that doesn't have any users, the department will be removed in iSpring LMS during the next synchronization.
- If you delete a department that does have users, an error will occur. To fix this error, you can either add the department back into the file or add users to the file and change their department code.
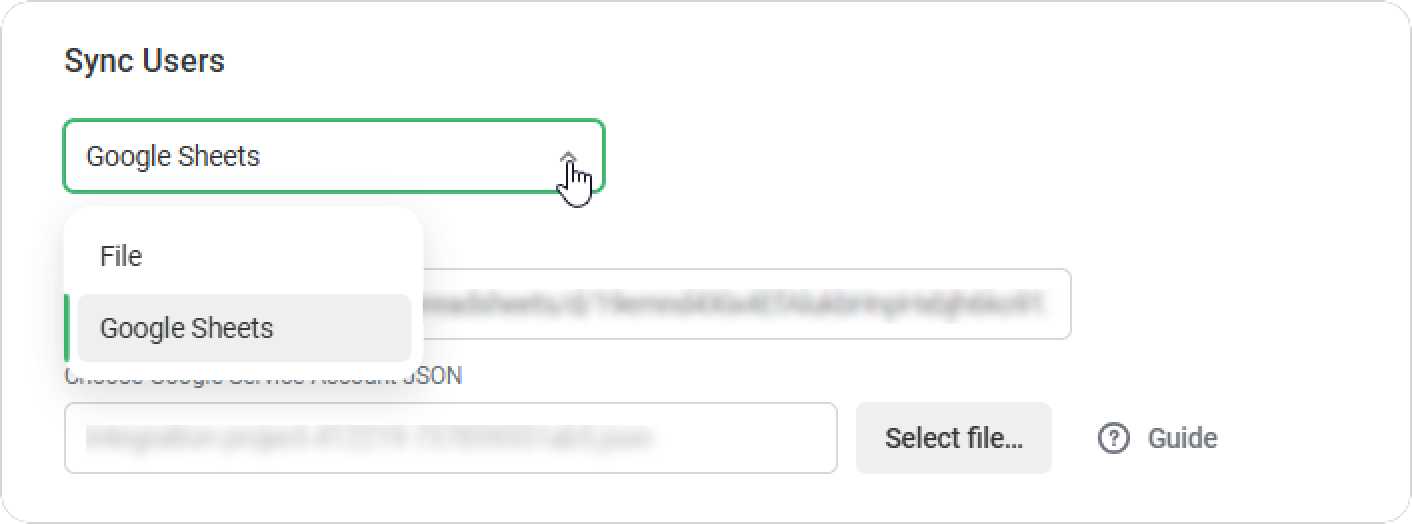
User Synchronization
- Choose what you will synchronize iSpring LMS users with: a file or Google Sheets.
- If you choose File:
- Paste in the XLSX or CSV file URL.
- Enter the username and password to access the file.
- If you choose Google Sheets:
- Paste the link into the Sheet.
- Choose “Google Service Account JSON.”
You can learn how to create a Google Service Account JSON here.
- If you choose File:
Set up the field mapping.
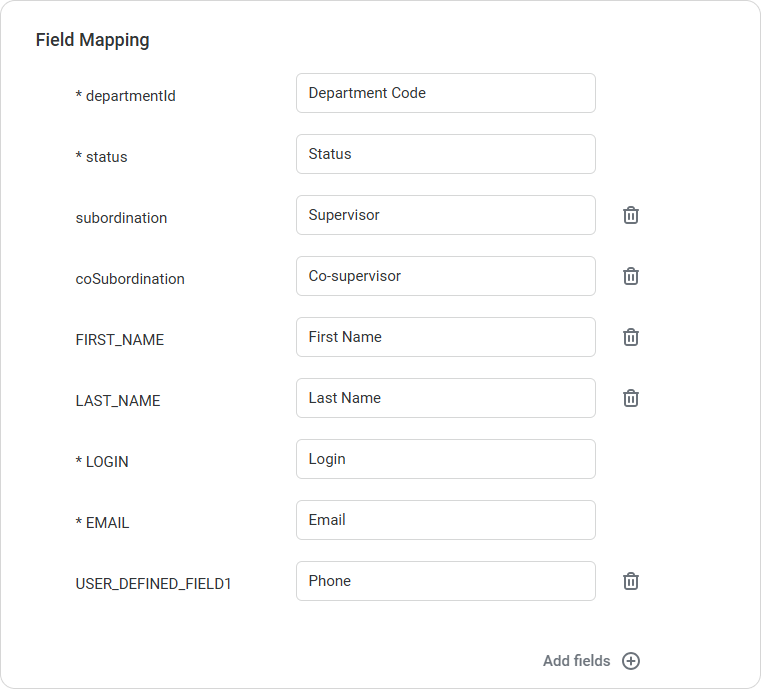
The fields should be identical to the column names in the sync file. It's important to fill in the required fields that are marked with an asterisk. Fill in the rest if necessary. Here is an example of columns in Google Sheets: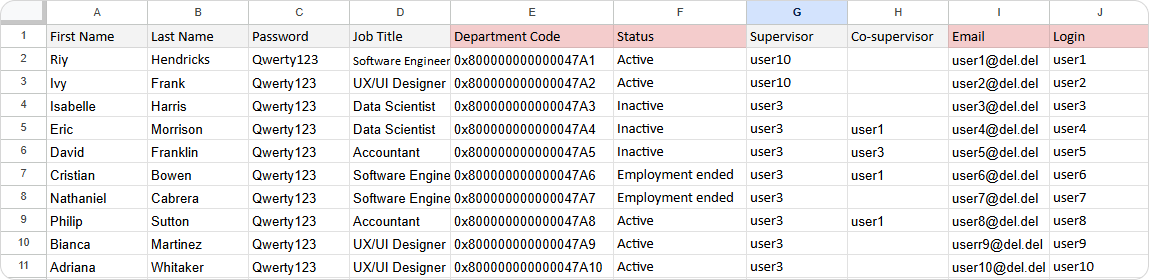
departmentId Department code to which the user belongs status User status. The status can be:
If the user is removed from the file, they will be inactive in iSpring LMS at the next synchronization.
subordination User's Supervisor login.
If you leave this field blank, the Supervisor in iSpring LMS will be inherited from the parent department.
coSubordination Login of the user's Functional Manager.
If you leave this field blank, then in iSpring LMS, the Functional Manager will be inherited from the parent division.
You can add more fields.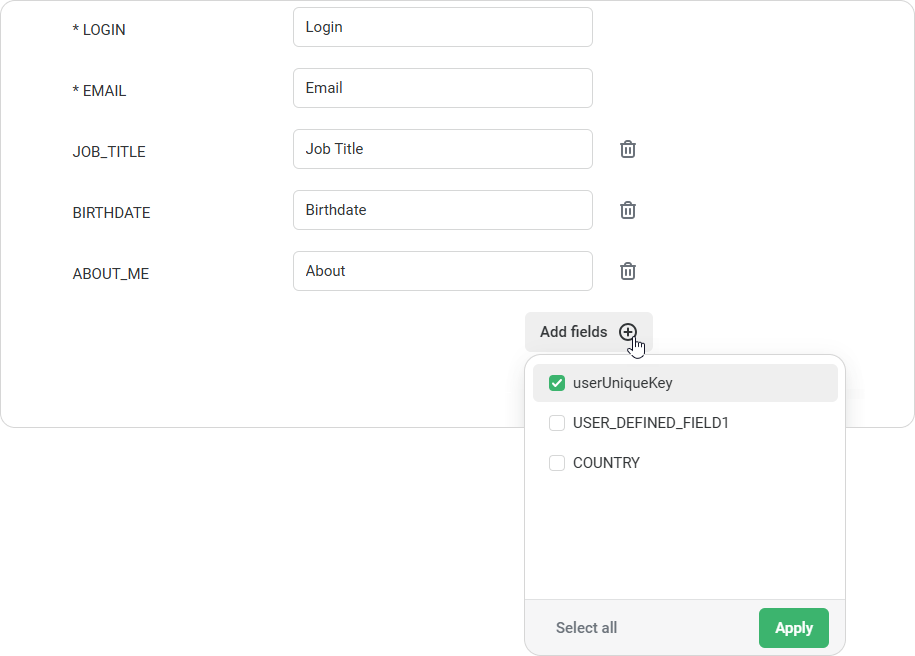
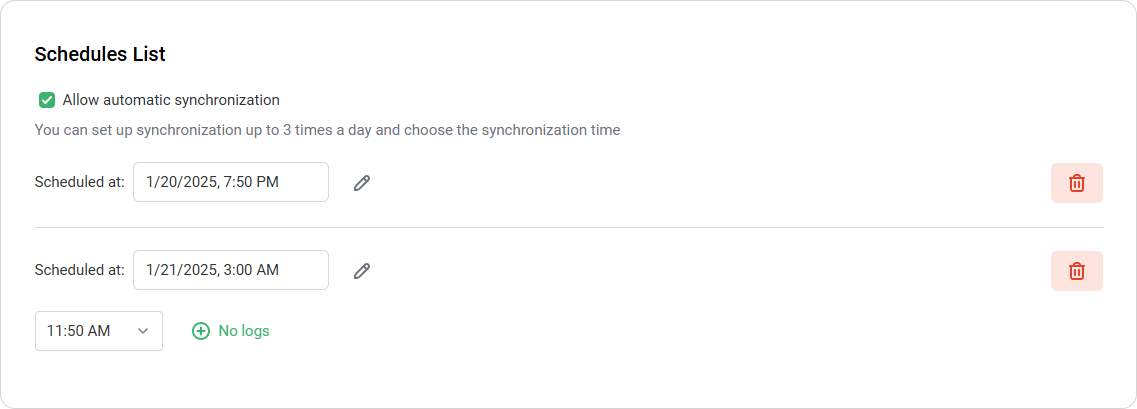
- Set up a synchronization schedule – this can be up to three times a day.
- Click on Save.
- To synchronize users and departments, click on Synchronize now, and the list of users and departments will be updated. Any users or departments that are not in the file won't be affected.
Done! You have set up synchronization.
User Identification and UserUniqueKey
userUniqueKey – a unique user identifier.
How Users are Identified in iSpring LMS
The system compares user fields in the file and in iSpring LMS and identifies the user in the following order:
- By UserUniqueKey + LOGIN, if data mapping is set up and the corresponding fields in the file or table contain values.
- By LOGIN + EMAIL, if UserUniqueKey is not provided.
If the user is found, it updates their data in iSpring LMS. If it can't find them, it creates a new user.
When you can use the UserUniqueKey
The UserUniqueKey is beneficial in the following scenarios:
- Your system has a stable external identifier that doesn't change over time.
- Your company uses multiple-user accounting systems where logins and emails may differ. The UserUniqueKey links a specific user across these different systems.
Limitations of UserUniqueKey
It's important to note that you cannot change LOGIN and EMAIL simultaneously, even with a UserUniqueKey. If both fields are changed at once, iSpring LMS will create a duplicate user, because it won't be able to identify them.
To avoid this:
- First, change the EMAIL and synchronize.
- Then, change the LOGIN and synchronize again.
This process ensures that iSpring LMS updates the user data correctly without creating duplicates.
Implementing UserUniqueKey
Here are some recommendations to implement UserUniqueKey effectively:
- Determine whether your company will use UserUniqueKey before conducting the first synchronization to avoid errors.
- If you've already set up “Sync from a File” and wish to add UserUniqueKey, contact our technical support team first. They'll guide you through the process and help you avoid data mapping errors.
You can reach out to iSpring Tech Support any time at support@ispring.com.