How to Configure SSO with Microsoft AD FS
System Requirements
- A server running Microsoft Server 2019/ 2016/ 2012 R2
- AD FS 5.0/4.0/3.0 installed on your server
- An SSL certificate to sign your ADFS login page and the fingerprint for that certificate
- An iSpring LMS account
- An LMS user with the Account Owner or Account Administrator role
This guide covers SAML SSO setup using AD FS 4.0 on Windows Server.
Step 1. Verify AD FS settings
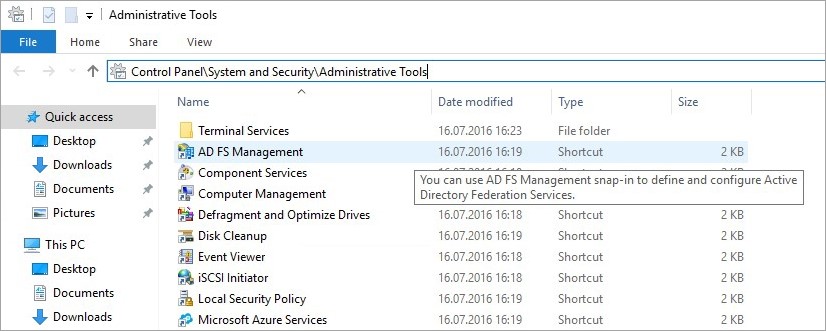
- Login in to your AD FS server and launch the ADFS Management Console via the shortcut in Control Panel → System and Security → Administrative Tools.
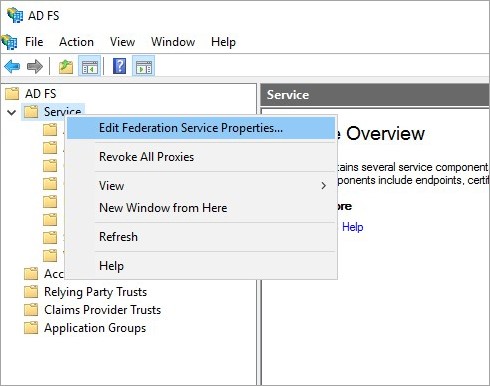
- Right-click on Service and select Edit Federation Service Properties.
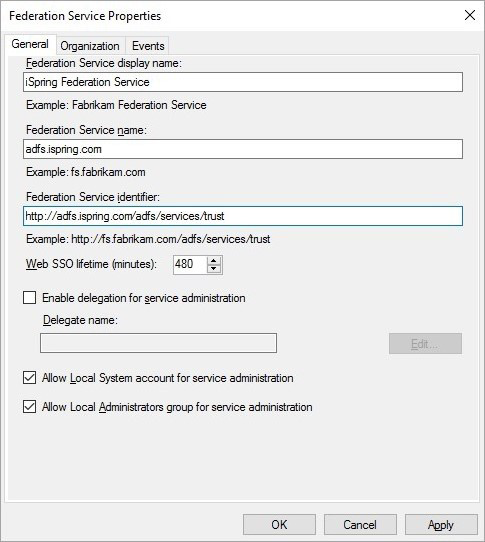
- Verify that the General settings match your DNS entries and certificate names. Make a note with the Federation Service Identifier, since that is used in the iSpring LMS SAML 2.0 configuration settings.
- In the Federation Service name field, use a third-level domain, such as, adfs.ispring.com.
Step 2. iSpring LMS Settings
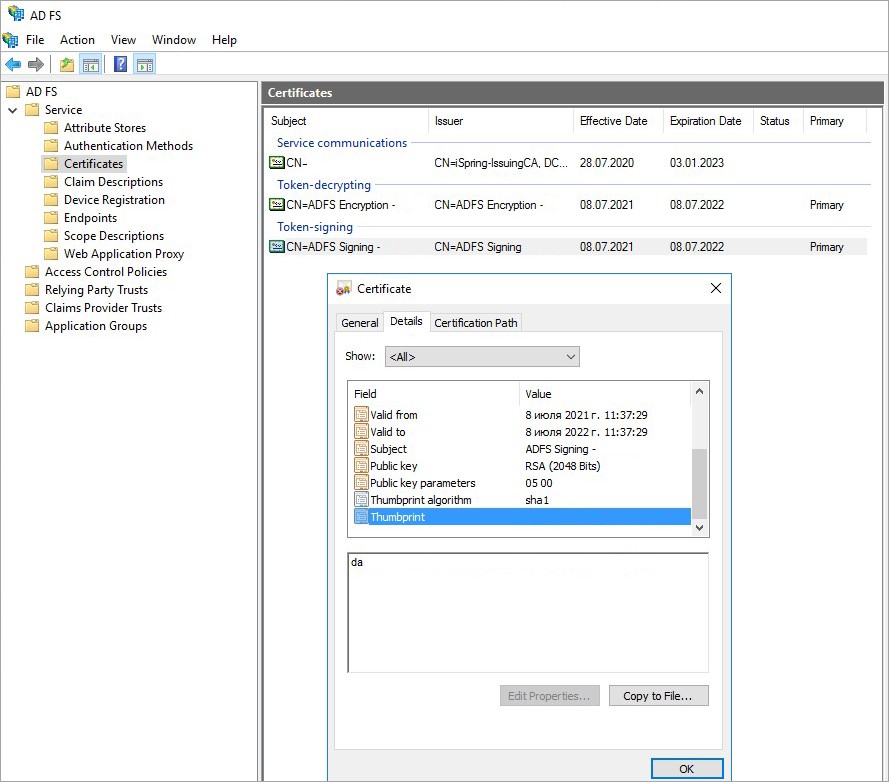
- Browse to the certificates.
- Right-click on the certificate and select View Certificate.
- Go to the Details tab.
- Find the Thumbprint field and copy the contents.
- Log in to your iSpring LMS account. Then go to the Services → SSO Settings and click SAML.
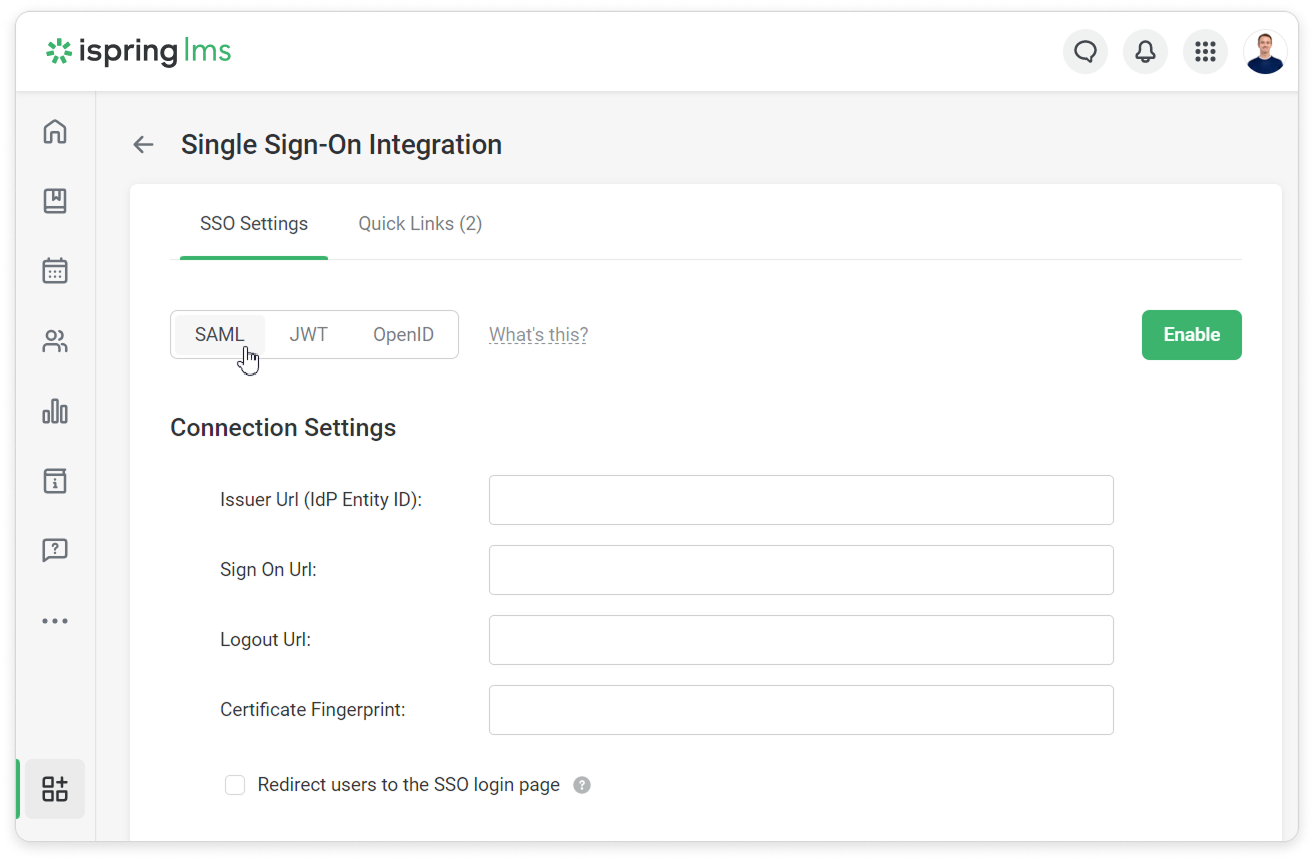
- Insert your Thumbprint into the Certificate Fingerprint field and remove all spaces between characters.
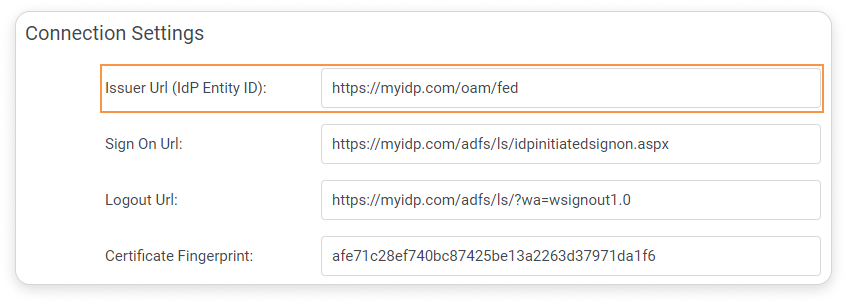
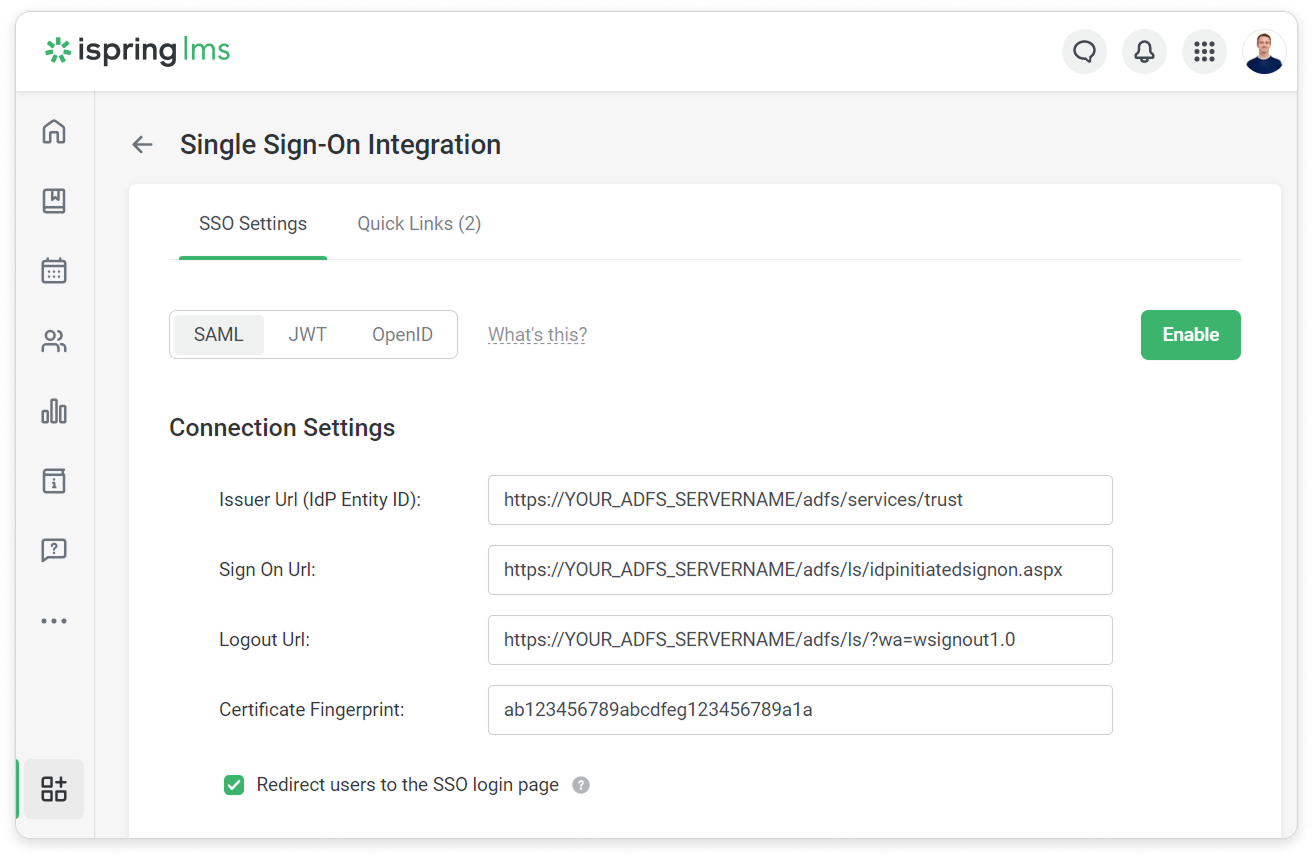
In iSpring LMS, on the SSO Integration Settings page, fill in these fields:
Field Name Example Issuer URL (idP Entity ID) http://YOUR_ADFS_SERVERNAME/adfs/services/trust Sign On URL https://YOUR_ADFS_SERVERNAME/adfs/ls/idpinitiatedsignon.aspx Logout URL https://YOUR_ADFS_SERVERNAME/adfs/ls/?wa=wsignout1.0 The Sign On URL and Logout URL parameters may differ, depending on the AD FS.
Issuer URL (IdP Entity ID)
The URL that uniquely identifies the identity provider service. This value is equal to the Issuer element in the SAML request sent by the identity provider.
Sign On URL
This is the path to the server script that generates SAML identifier confirmation requests to handle authorization.
Logout URL
This is the path to the server script that generates SAML identifier confirmation requests to handle logout.
Certificate Fingerprint
This is a short version of the public key certificate for verifying a digital signature. It is used to confirm signing requests issued by an identity provider. Learn more about certificate fingerprints here.
Redirect users to the SSO login page
If this option is enabled, the iSpring login page will have the following URL: https://yourcompany.ispringlearn.com/sso/login.
+
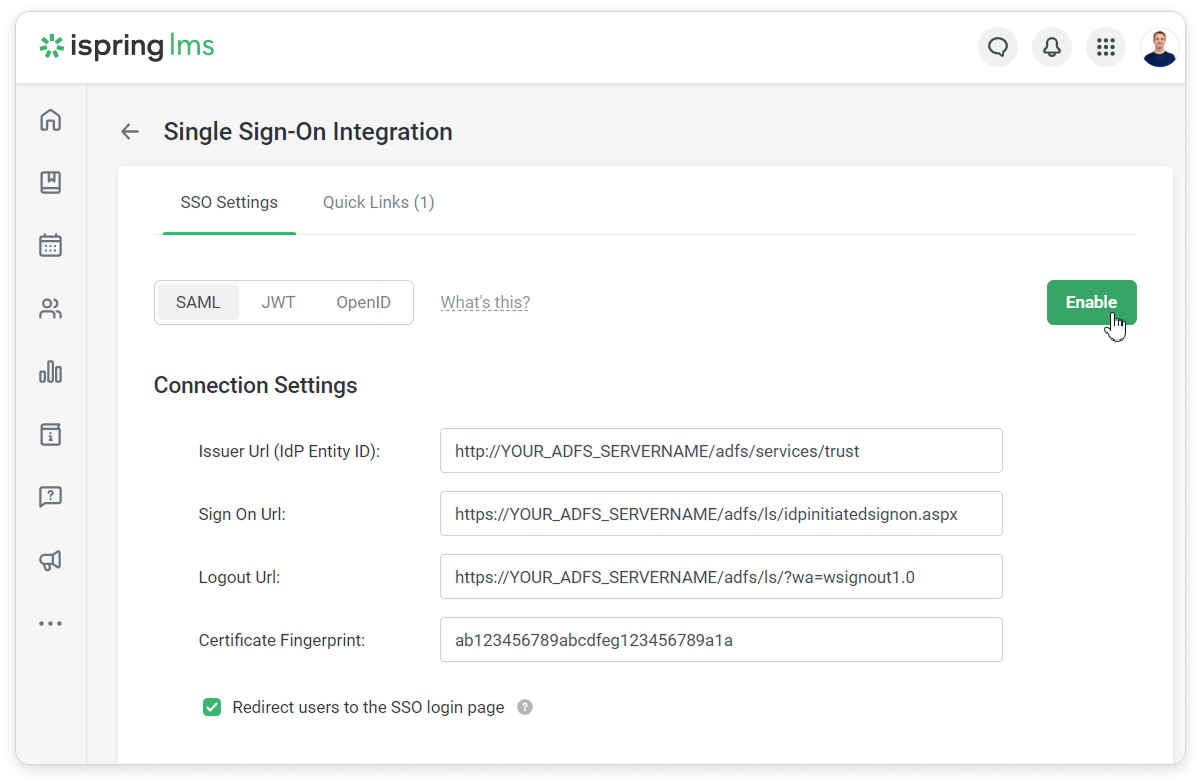
- Click Enable.
- Then add link to the corporate site in the Quick Links section.

Step 3. AD FS Relying Party Configuration
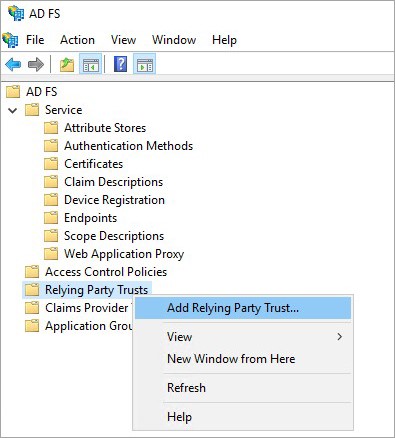
- Go to the AD FS Management console and select Relying Party Trusts, right-click on it and select Add Relying Party Trust.
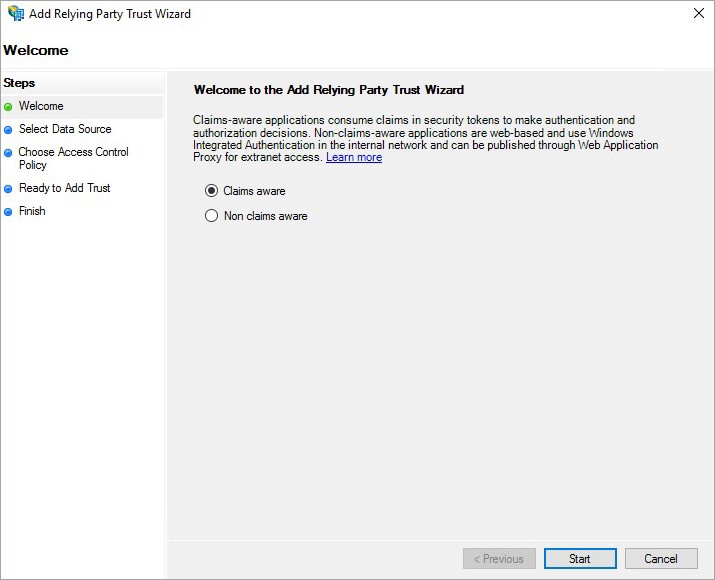
- Select Claims aware and click Start.
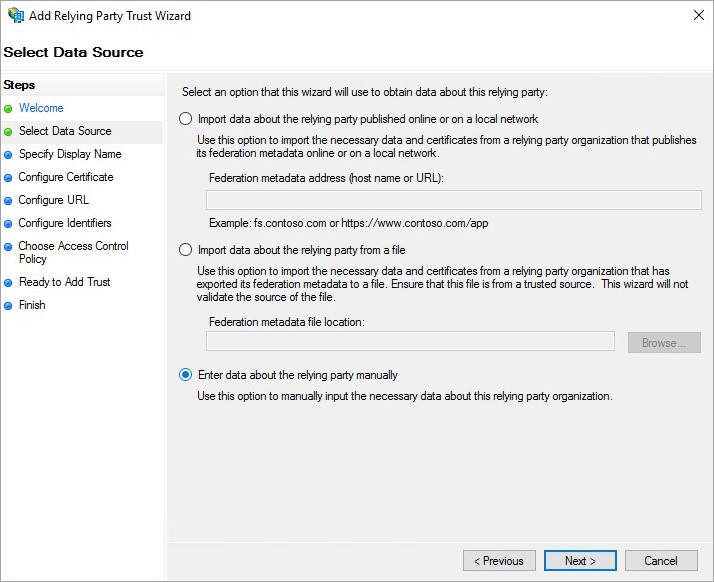
- On the Select Data Source step, select the last option: Enter data about the relying party manually.
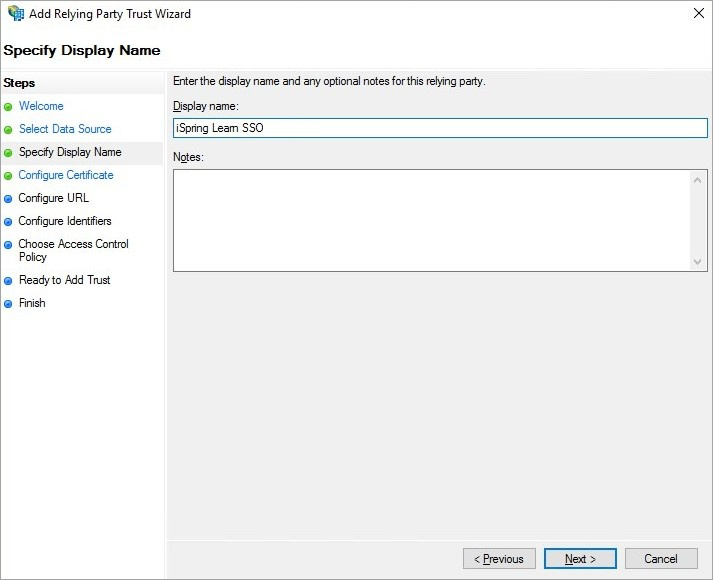
- On the next screen, enter a Display name that you will recognize in the future. Click Next.
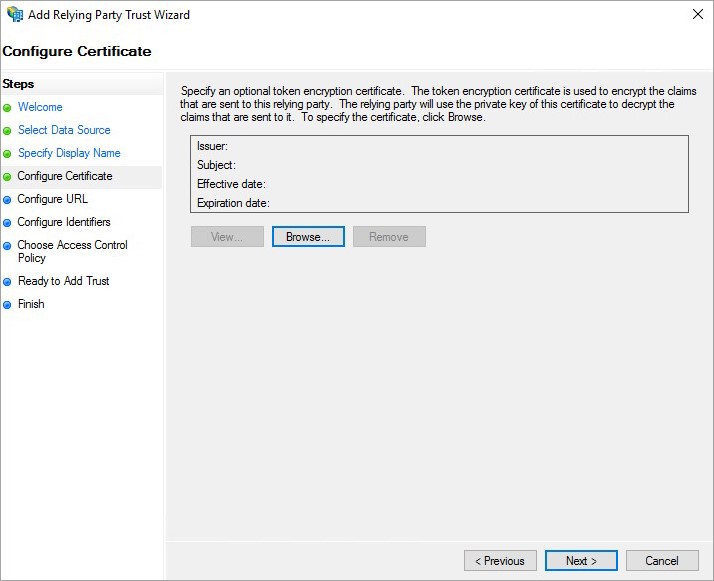
- At the Configure Certificate stage, leave the default values. Click Next.
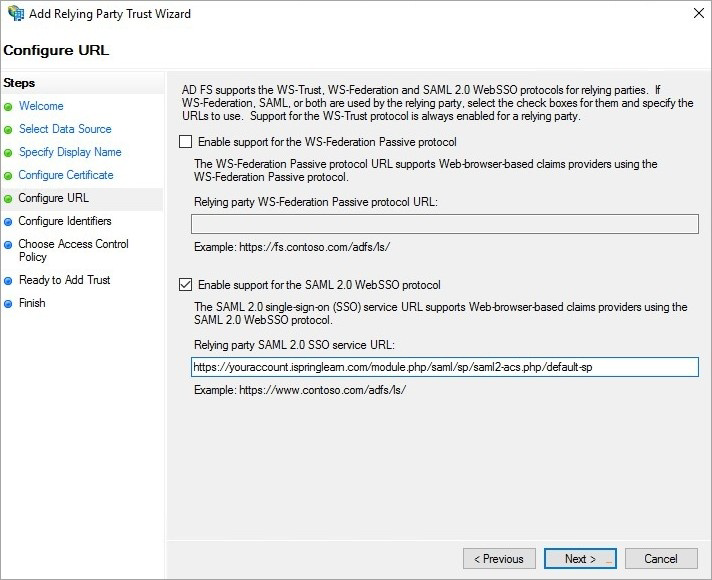
- On the next screen, check the Enable support for the SAML 2.0 WebSSO protocol box. The service URL will be: https://youraccount.ispringlearn.com/module.php/saml/sp/saml2-acs.php/default-sp.
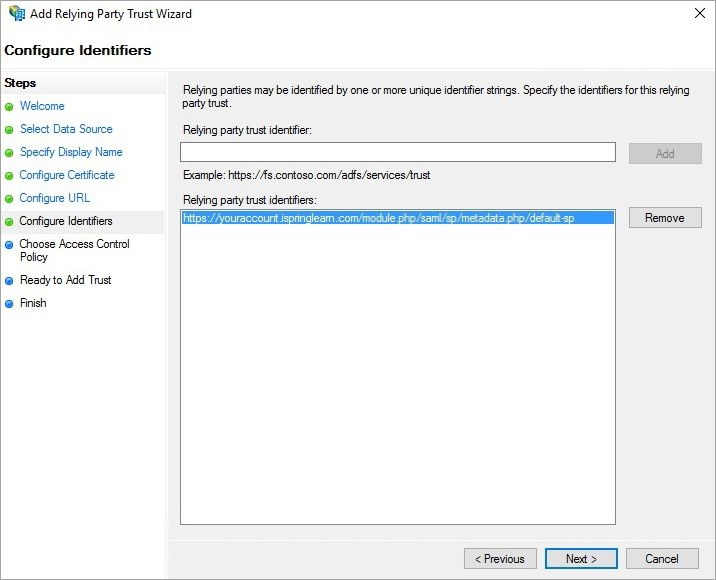
- At the Configure Identifiers step, add the Relying party trust identifier as https://youraccount.ispringlearn.com/module.php/saml/sp/metadata.php/default-sp. Click Add.
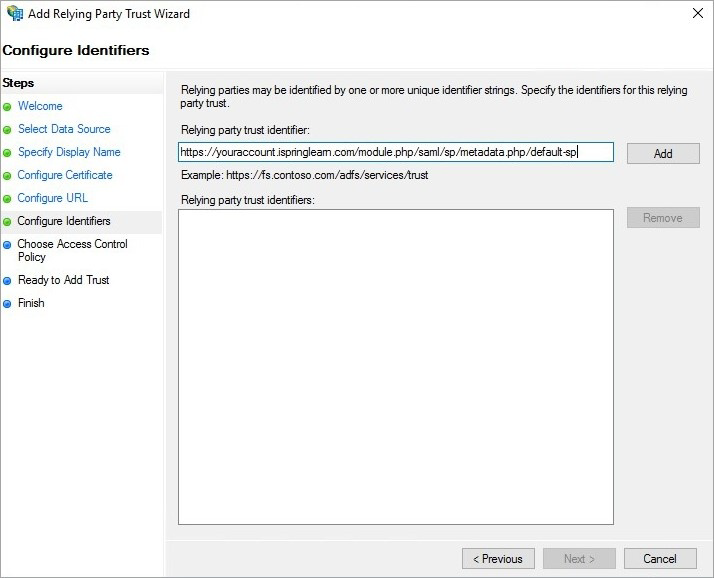
- Then, click Next.
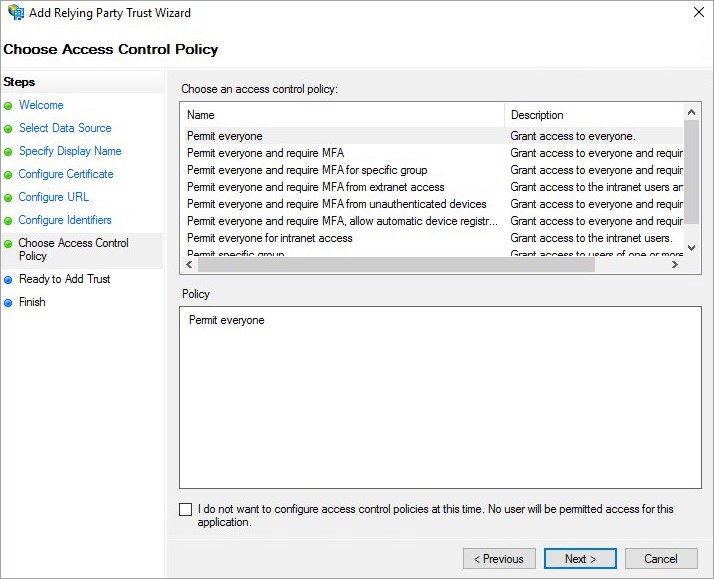
- On the next step, choose Permit everyone. Click Next.
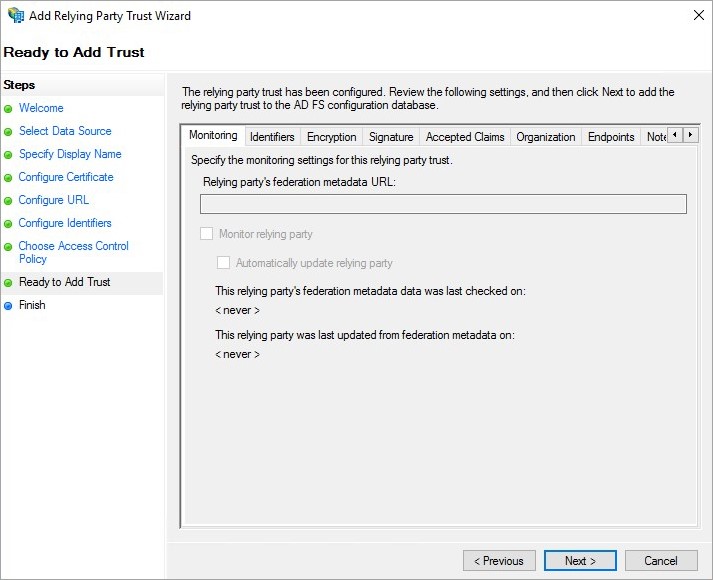
- At the Ready to Add Trust stage, leave the default values. Click Next.
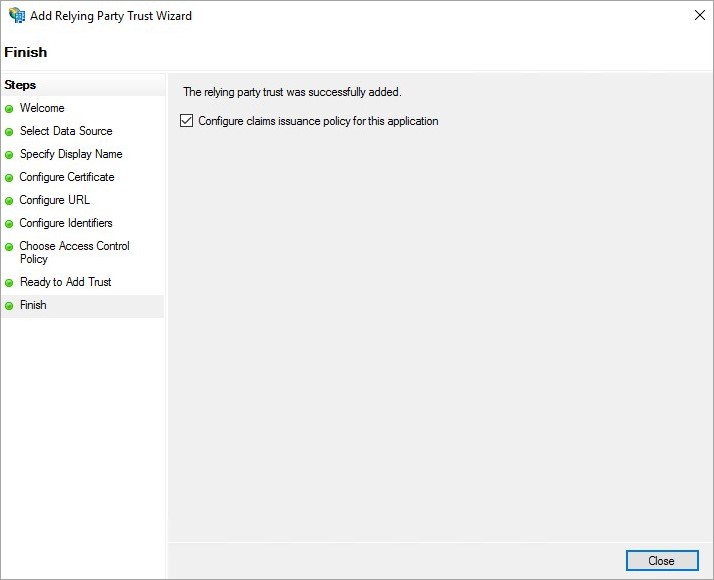
- At the last step, check the Configure claims issuance policy for this application box. Then, click Close.
Step 4. Creating Claims Rules
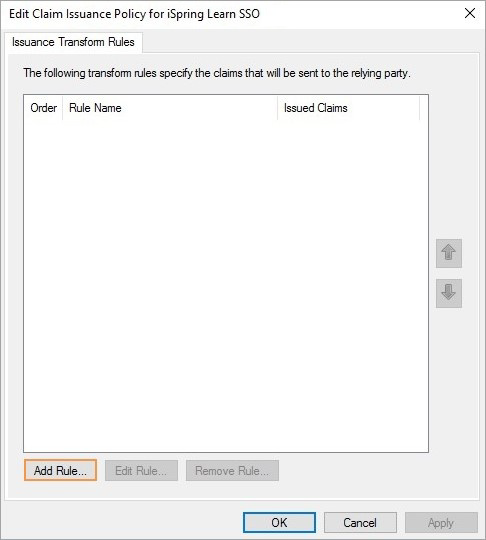
- Open the AD FS control panel. In the Relying Party Trusts section, right-click on the name and click Edit Claim Issuance Policy.

- Add the first rule. To do this, click Add Rule...
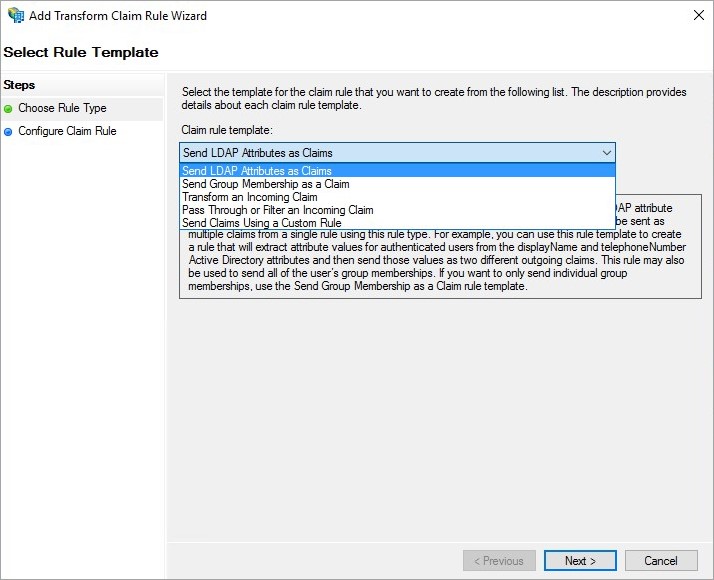
- Select Send LDAP Attributes as Claims. Click Next.
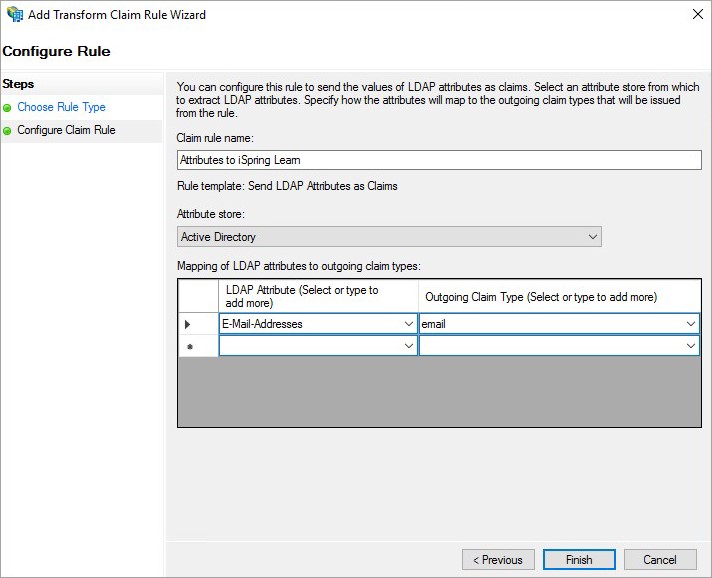
- In the Configure Claim Rule step, in the Claim rule name field, enter a name for the rule, such as, Attributes of iSpring LMS.
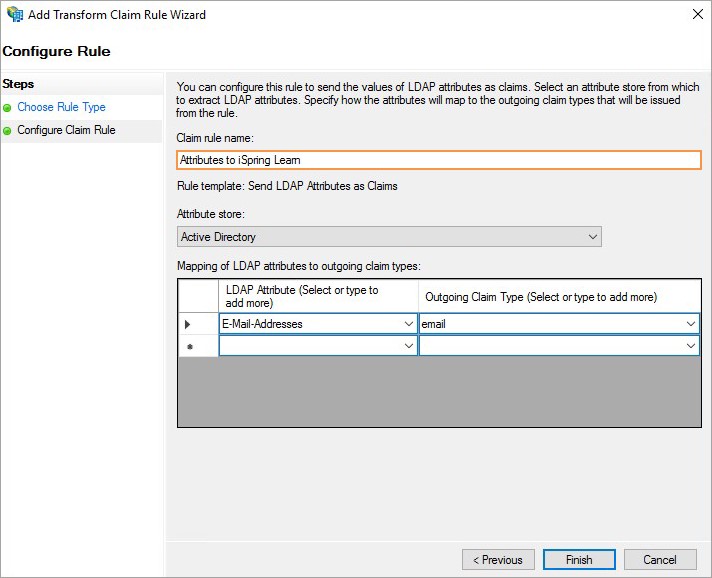
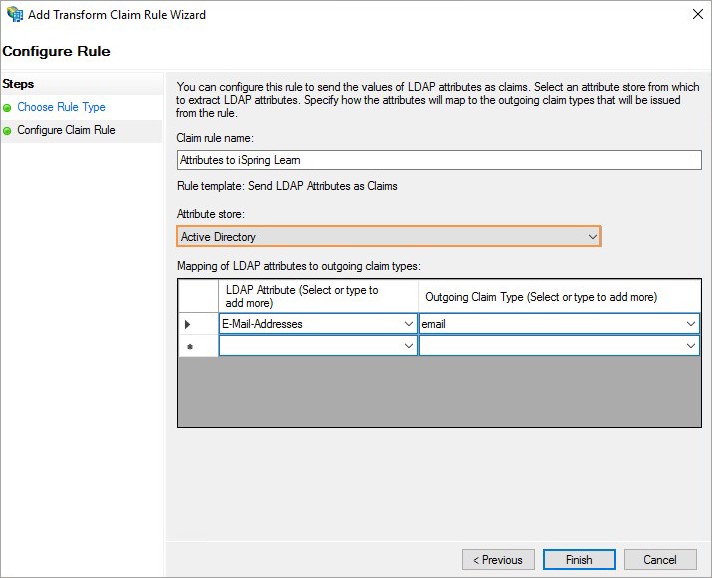
- Choose Active Directory as your attribute store.
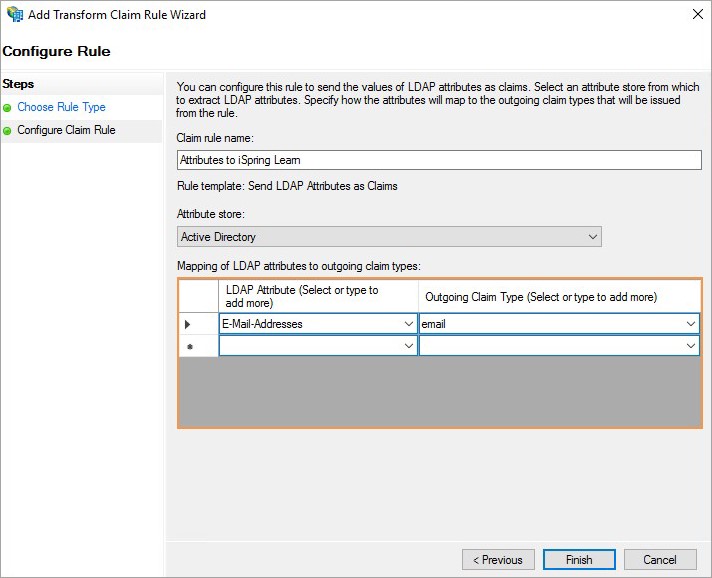
- Next, select these values:
- In the LDAP Attribute column, set E-Mail-Addresses.
- In the Outgoing Claim Type column, set the email value, as in the iSpring LMS LMS https://youraccount.ispringlearn.com/settings/sso.
- Click Finish to save the new rule.
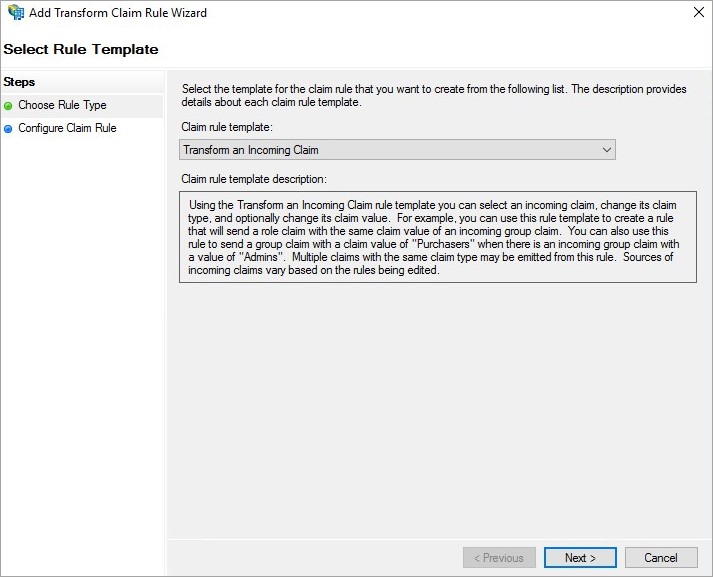
- Then, add the second rule and select Transform an Incoming Claim as the template.
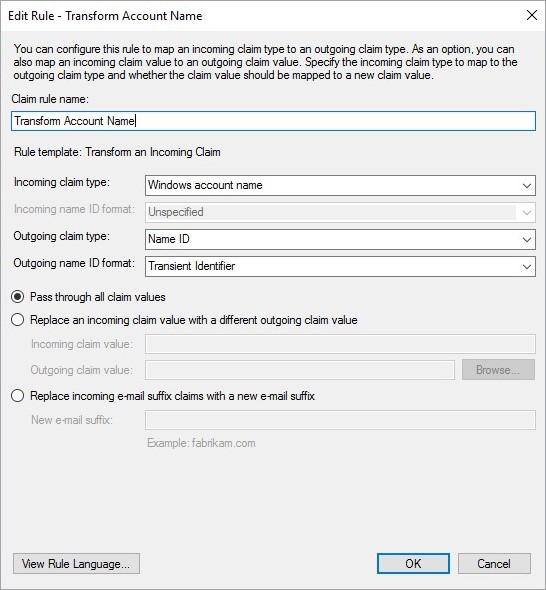
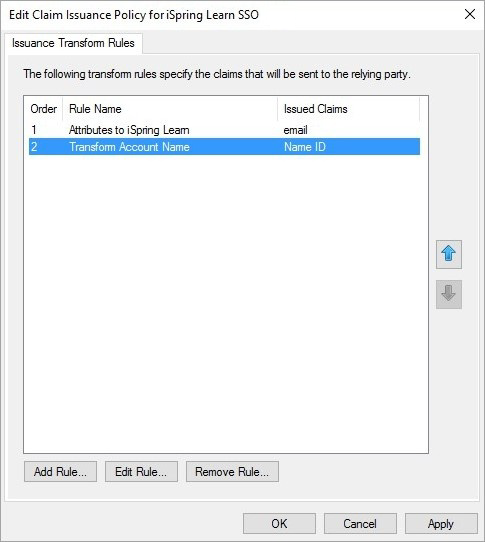
- Enter the Transform Account Name and click OK.
- Click Apply and then OK to confirm.
Step 5. Adjusting the Trust Settings
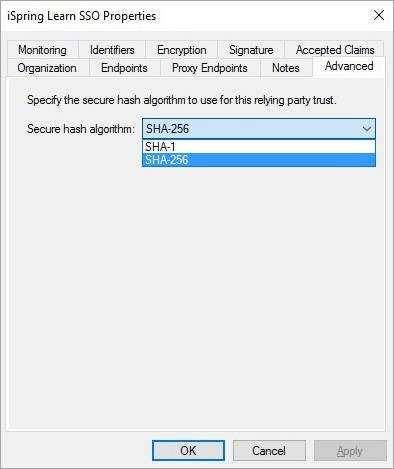
Make sure the Secure hash algorithm is set to SHA-256 in the security settings. To do this:
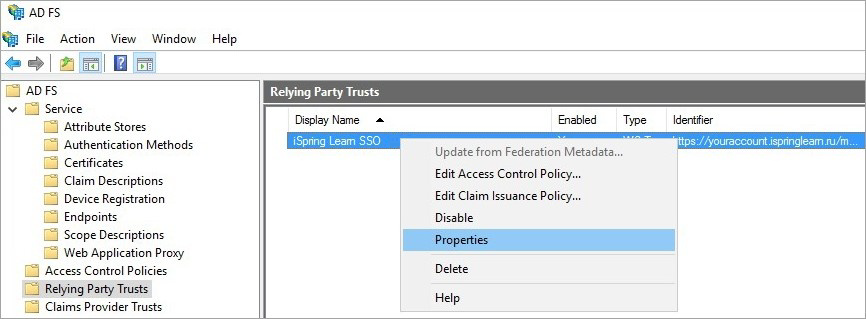
- Open the AD FS control panel. In the Relying Party Trusts section, right-click on the name and click on Properties.
- Go to the Advanced tab and select SHA-256 in the Secure hash algorithm field.
- Click ОК.
Step 6. Endpoint Settings
- Open the AD FS control panel. In the Relying Party Trusts section, right-click on the name and click on Properties.

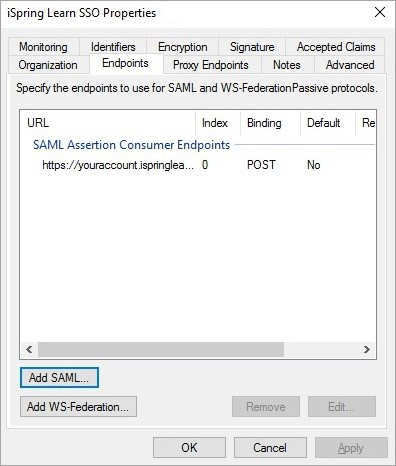
- In the Endpoints tab, check the default point:
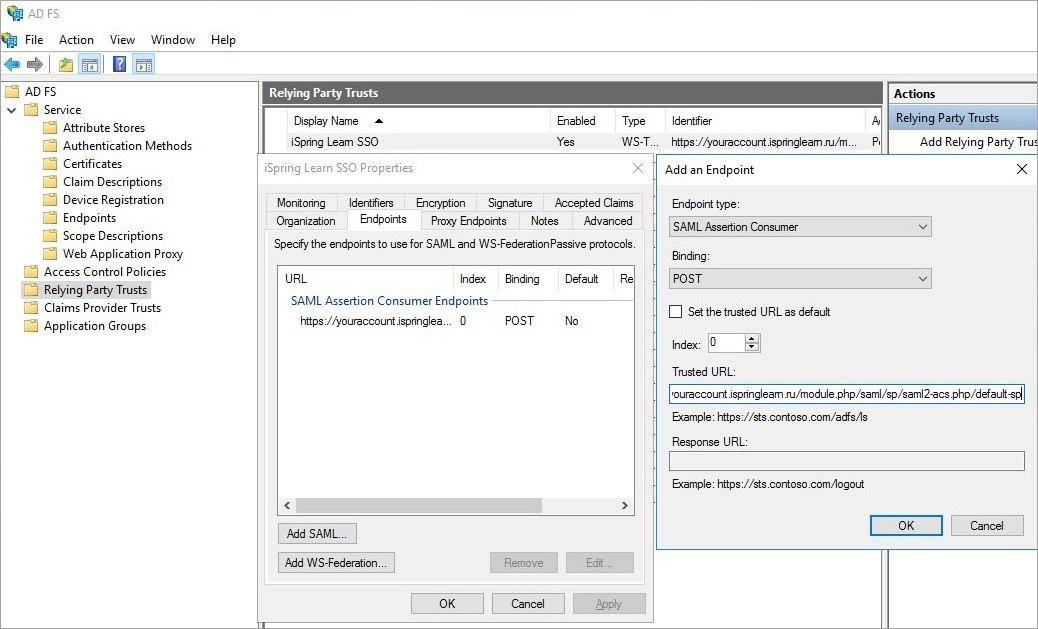
- For the Endpoint type, select SAML Assertion Consumer.
- For the Index type, select 0.
- For the Binding type, select POST.
- In the Trusted URL field, enter an address like https://youraccount.ispringlearn.com/module.php/saml/sp/saml2-acs.php/default-sp. Leave the Response URL field blank and click OK.
- Then add 2 logout points.
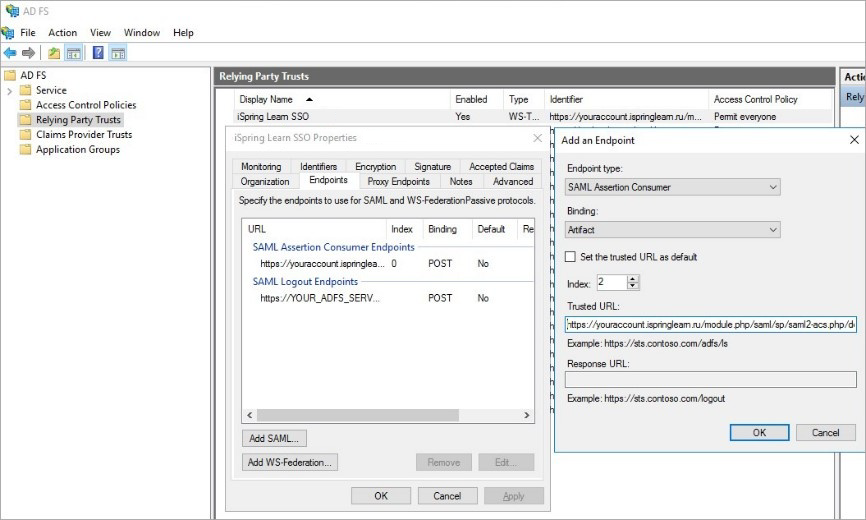
To add a point:
Click Add SAML.
For the Endpoint type parameter, select SAML Assertion Consumer.
For Binding, select Artifact.
For Index, select 2.
In the Trusted URL field, enter an address like https://youraccount.ispringlearn.com/module.php/saml/sp/saml2-acs.php/default-sp.
Leave the Response URL field blank and click OK.
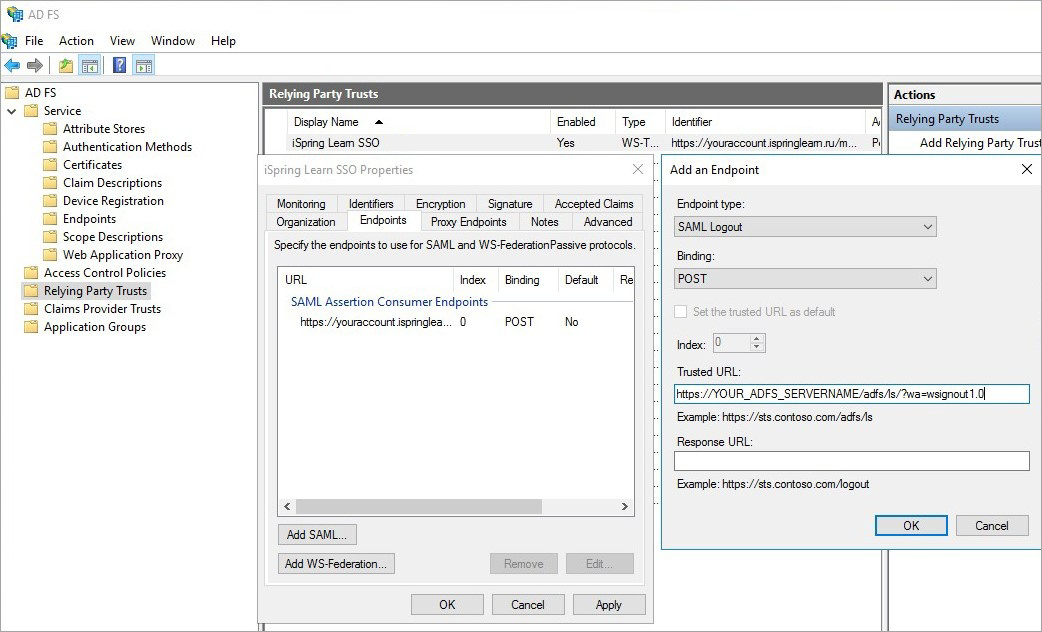
Add a new point. To do this:
Click Add SAML.
- For Endpoint type, select SAML Logout.
- For Binding, select POST.
- In the Trusted URL field, enter an address like https://YOUR_ADFS_SERVERNAME/adfs/ls/?wa=wsignout1.0.
Leave the Response URL field blank and click OK.
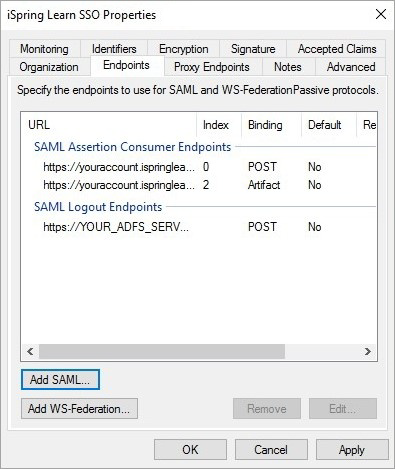
- Make sure the three endpoints have been added. Click Apply and then OK to confirm.
Step 7. Verify Single Sign-On
- Go to your iSpring LMS account https://youraccount.ispringlearn.com/.
- Click Log in with your corporate account.
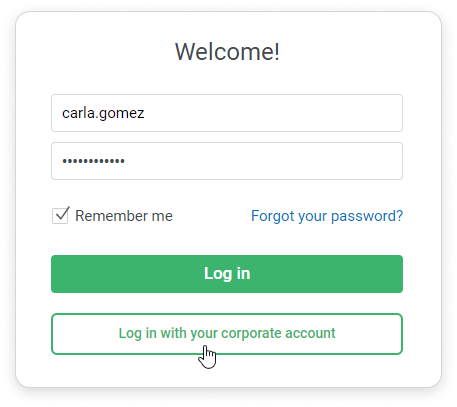
The user’s personal account will open.
If an error occurs during configuration, please send a screenshot of the error to support@ispring.com.
Matching fields of iSpring LMS and SSO
In addition to rules, you can also specify matching fields of iSpring LMS fields and SSO attributes: First Name, Last Name, Job Title, Phone, etc. Learn more about matching fields of iSpring LMS and SSO.
On the AD FS side: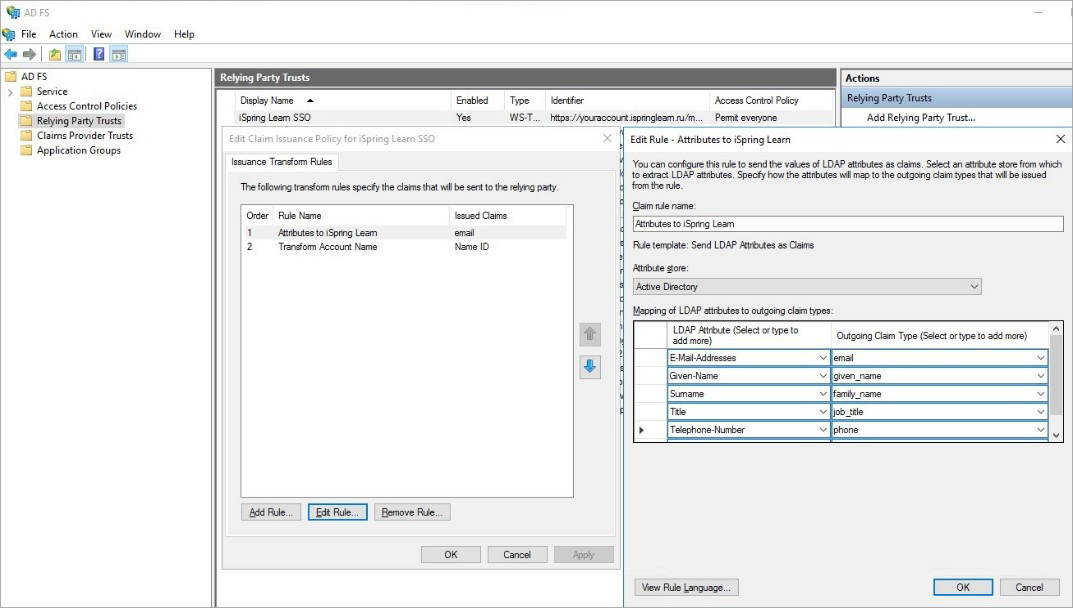
On the iSpring LMS side: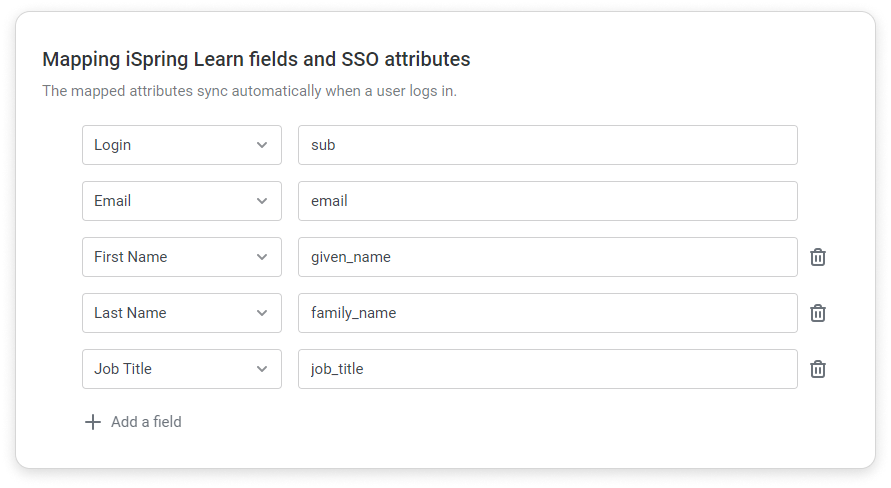
Authorization without SAML
If you have enabled OpenID in your iSpring LMS account but unable to log in using single sign-on for some reason, type the following web address: https://yourcompany.ispringlearn.com/login?no_sso.
Now you will sign in to the account as usual, using your login and password.
If you get a 400 error and a message about the request being composed incorrectly ("Cannot retrieve metadata for IdP 'https://myidp.com/oam/fed' because it isn't a valid IdP for this SP") after you enabled SAML in your iSpring LMS account, it means that the value set for the Issuer Url (IdP Entity ID) field is incorrect.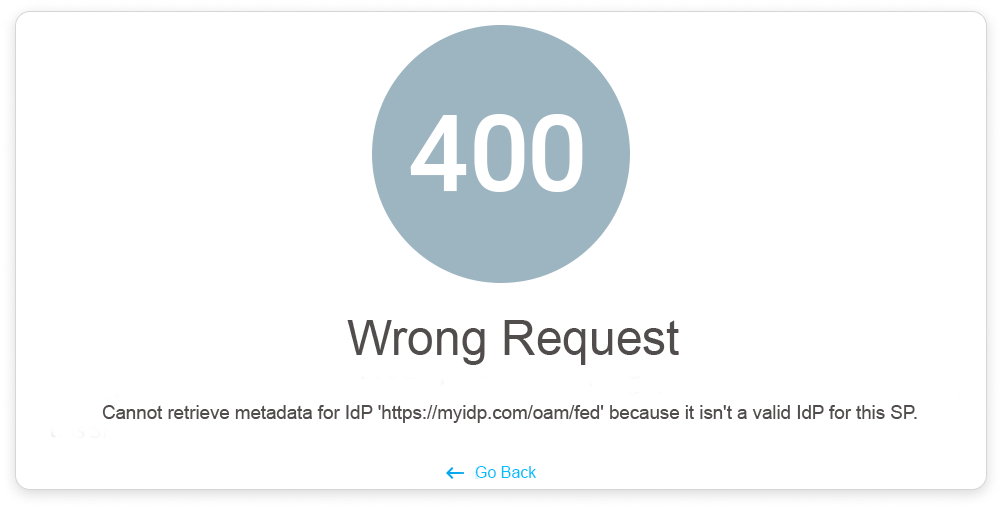
To make the SAML authorization work properly in your account, copy the URL from the error text and paste it into the Issuer URL (IdP Entity ID) field.