Once you have finished editing your interaction, upload it to iSpring Cloud, a platform for microcourse creation and content storage.

Learn how to manually upload a content item to iSpring Cloud if your computer is disconnected from the Internet or online publishing doesn't complete because of an antivirus program or a proxy server error. 

To upload your interaction to iSpring Cloud:

  1. Click Publish on the iSpring Visuals toolbar.


  2. Choose the iSpring Cloud tab. If you have already logged in to your iSpring Cloud account, your profile data will populate the Account field.

  3. Enter the title of the interaction in the Content name field. By default, the title is the same as that of the PowerPoint interaction.


  4. Click Browse... to the right of the Project field, choose the folder to upload your content, and click Select.  By default, your interaction will be uploaded to the general content list.


  5. Then, set up output options: 
  6. In the Backup field, select Upload source files if you want to save your interaction files in iSpring Cloud. Use this option for teamwork or to create a backup.


  7. Click Publish.

  8. The interaction has now been uploaded to iSpring Cloud. To view training content in the iSpring Cloud interface, click Manage Content.


    Your iSpring Cloud account will open in a browser. The uploaded course can be viewed in the project it belongs to.

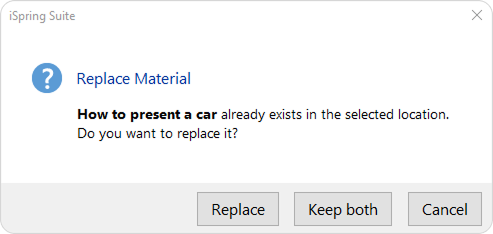
If in the All Materials section or in the project where you are uploading the content item there is already an interaction with the same name, select one of the actions:

  • Replace the old interaction with the new one
  • Keep both interactions; in this case, a digit will be added to the interaction name, like How to present a car (1)
  • Cancel publishing