OpenID Authorization
OpenID Connect is a single sign-on protocol that allows users to access multiple company services with the same credentials. In iSpring LMS, OpenID Connect works with the Okta identity provider. Okta verifies the user's identity and sends the authorization data to iSpring LMS.
OpenID Connect authorization with Okta is also available in the iSpring Learn mobile app.
Okta Authorization Server Configuration
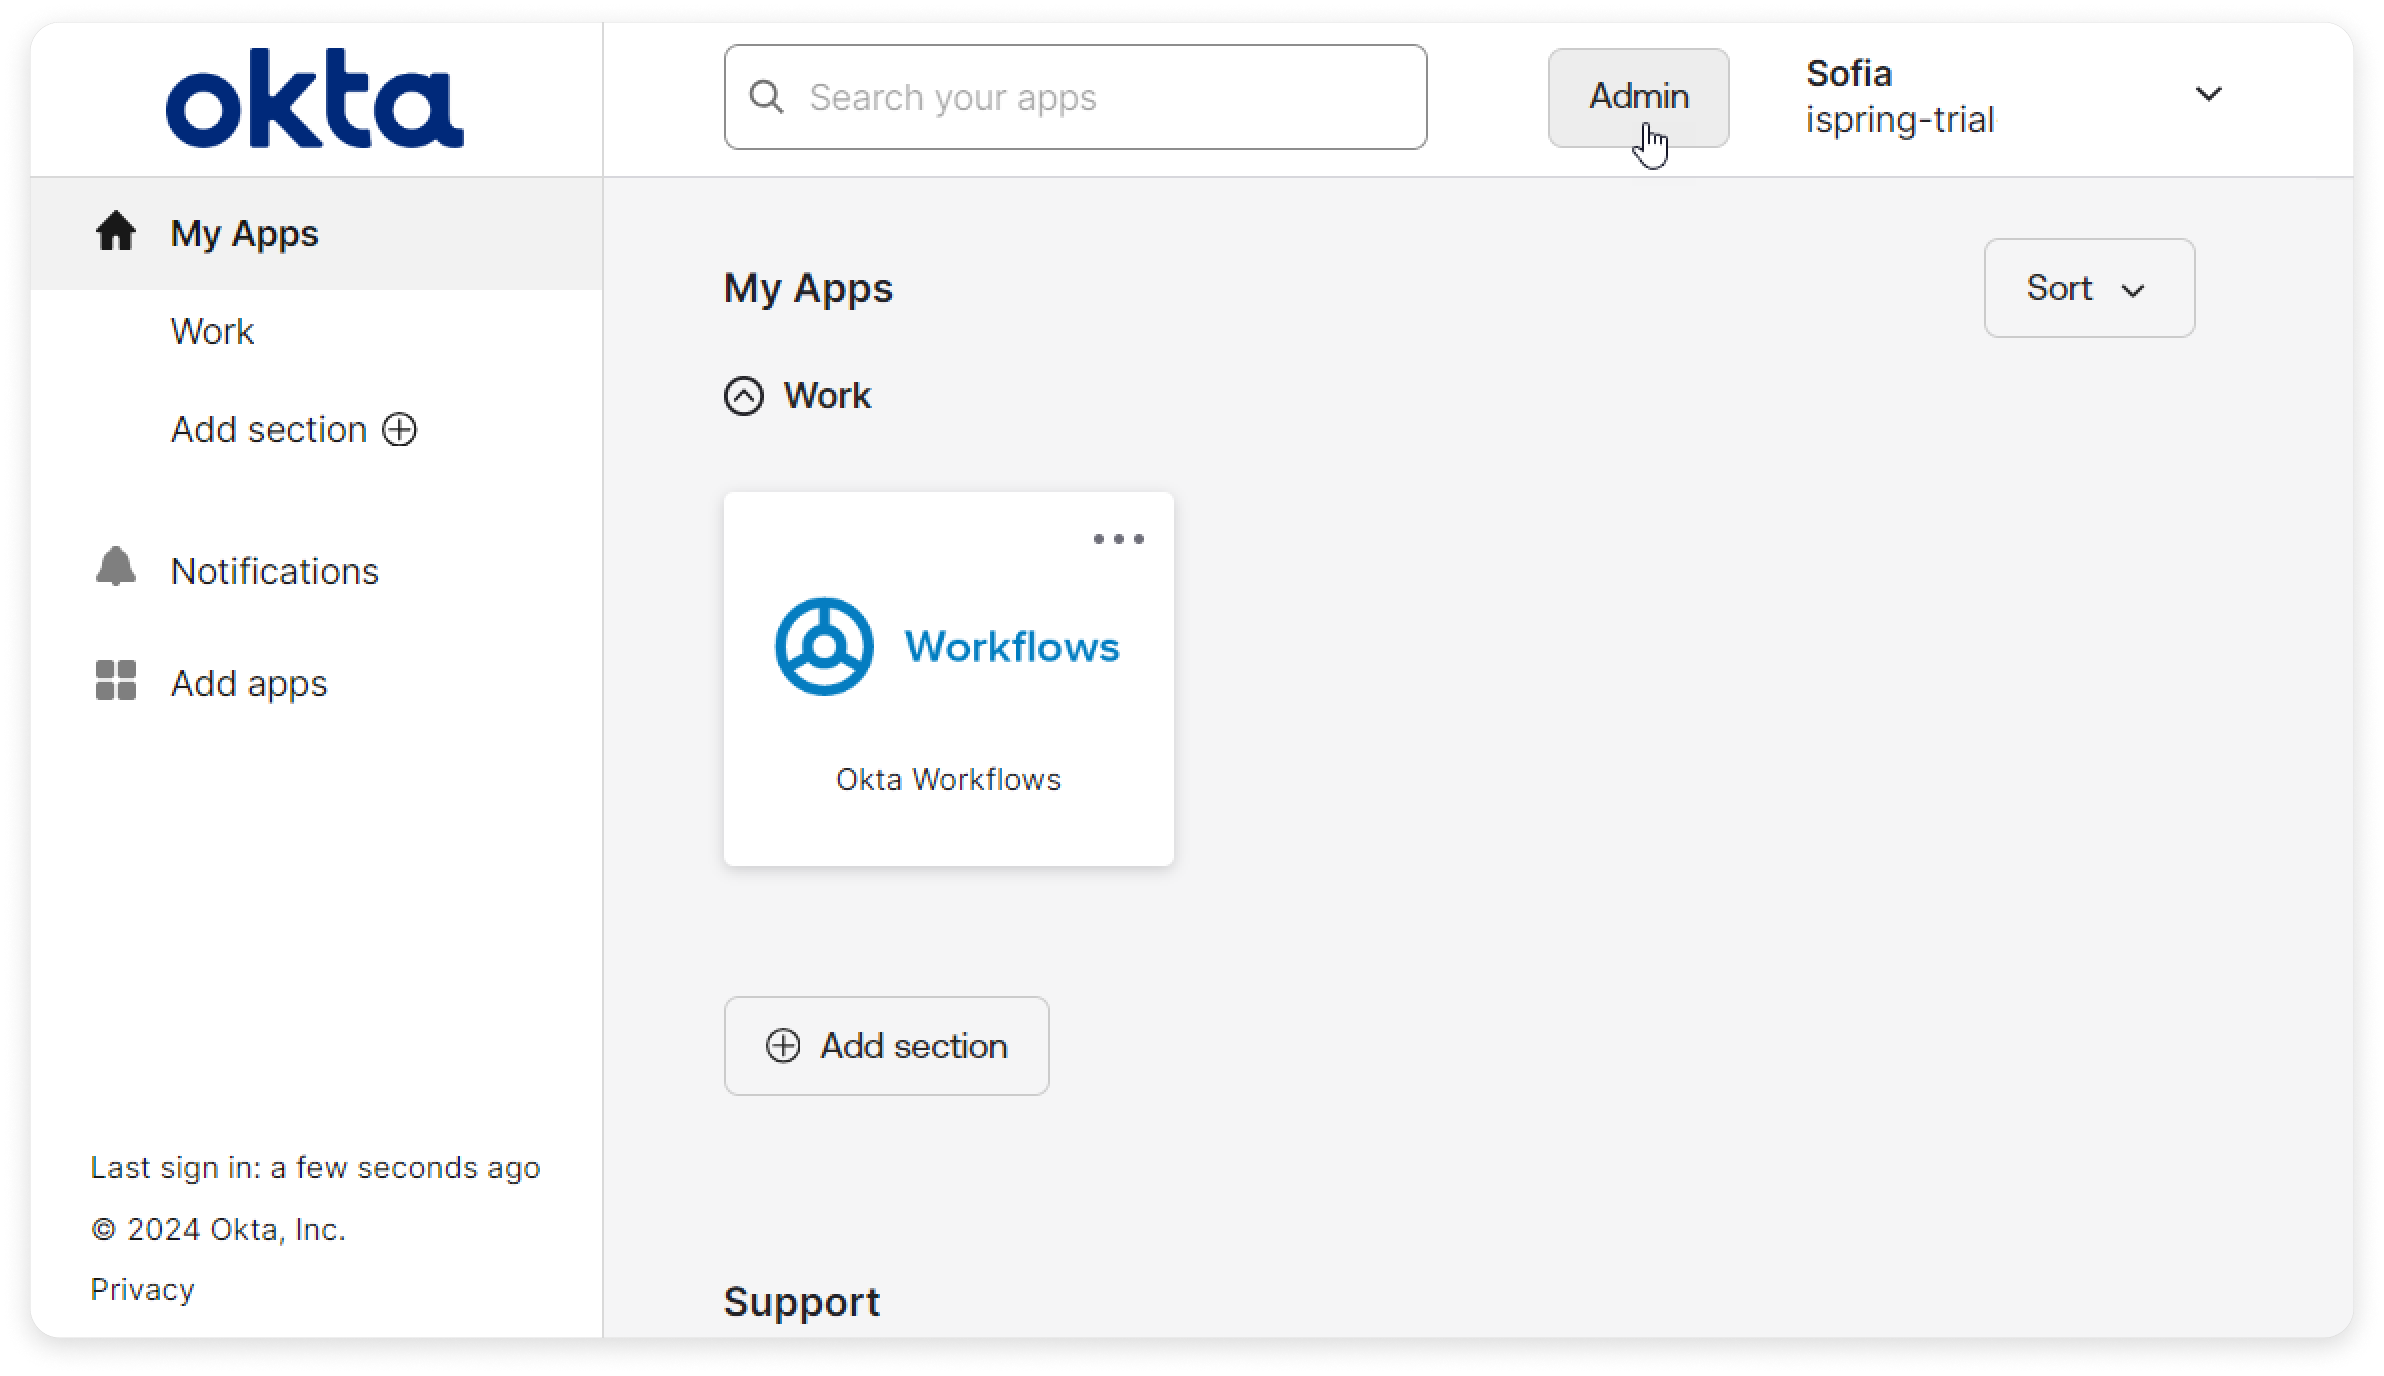
- Log in to your Okta account and click Admin.
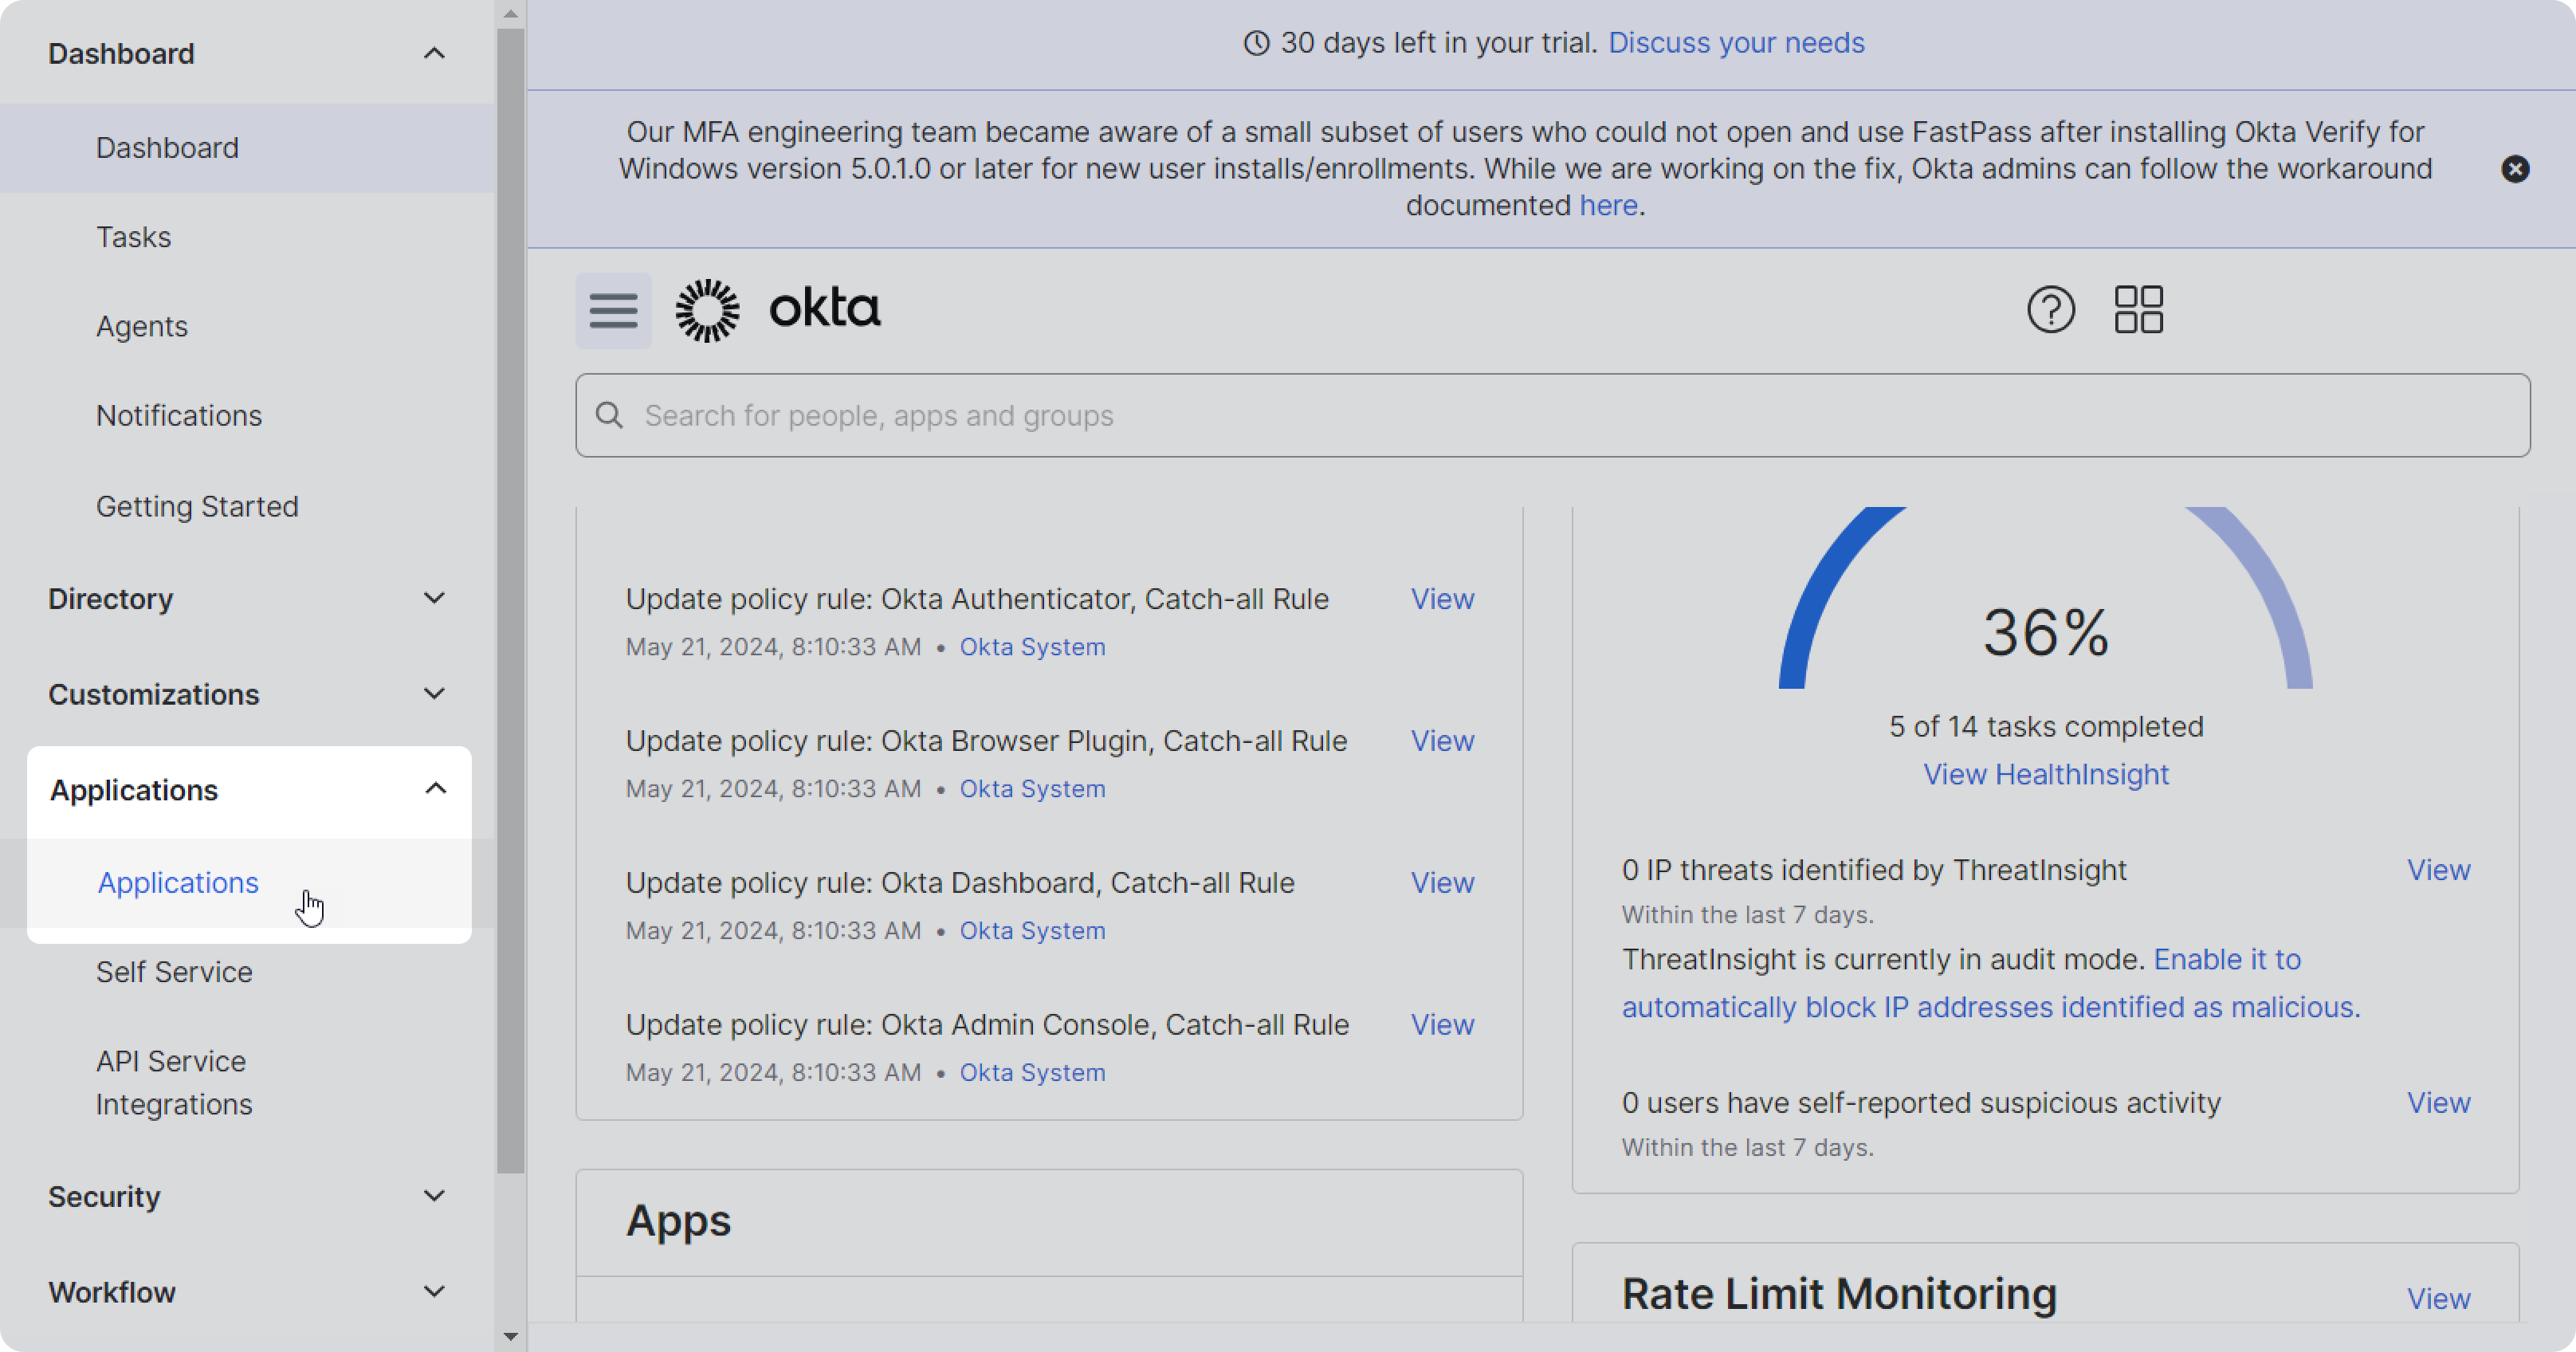
- Open Applications in the sidebar.
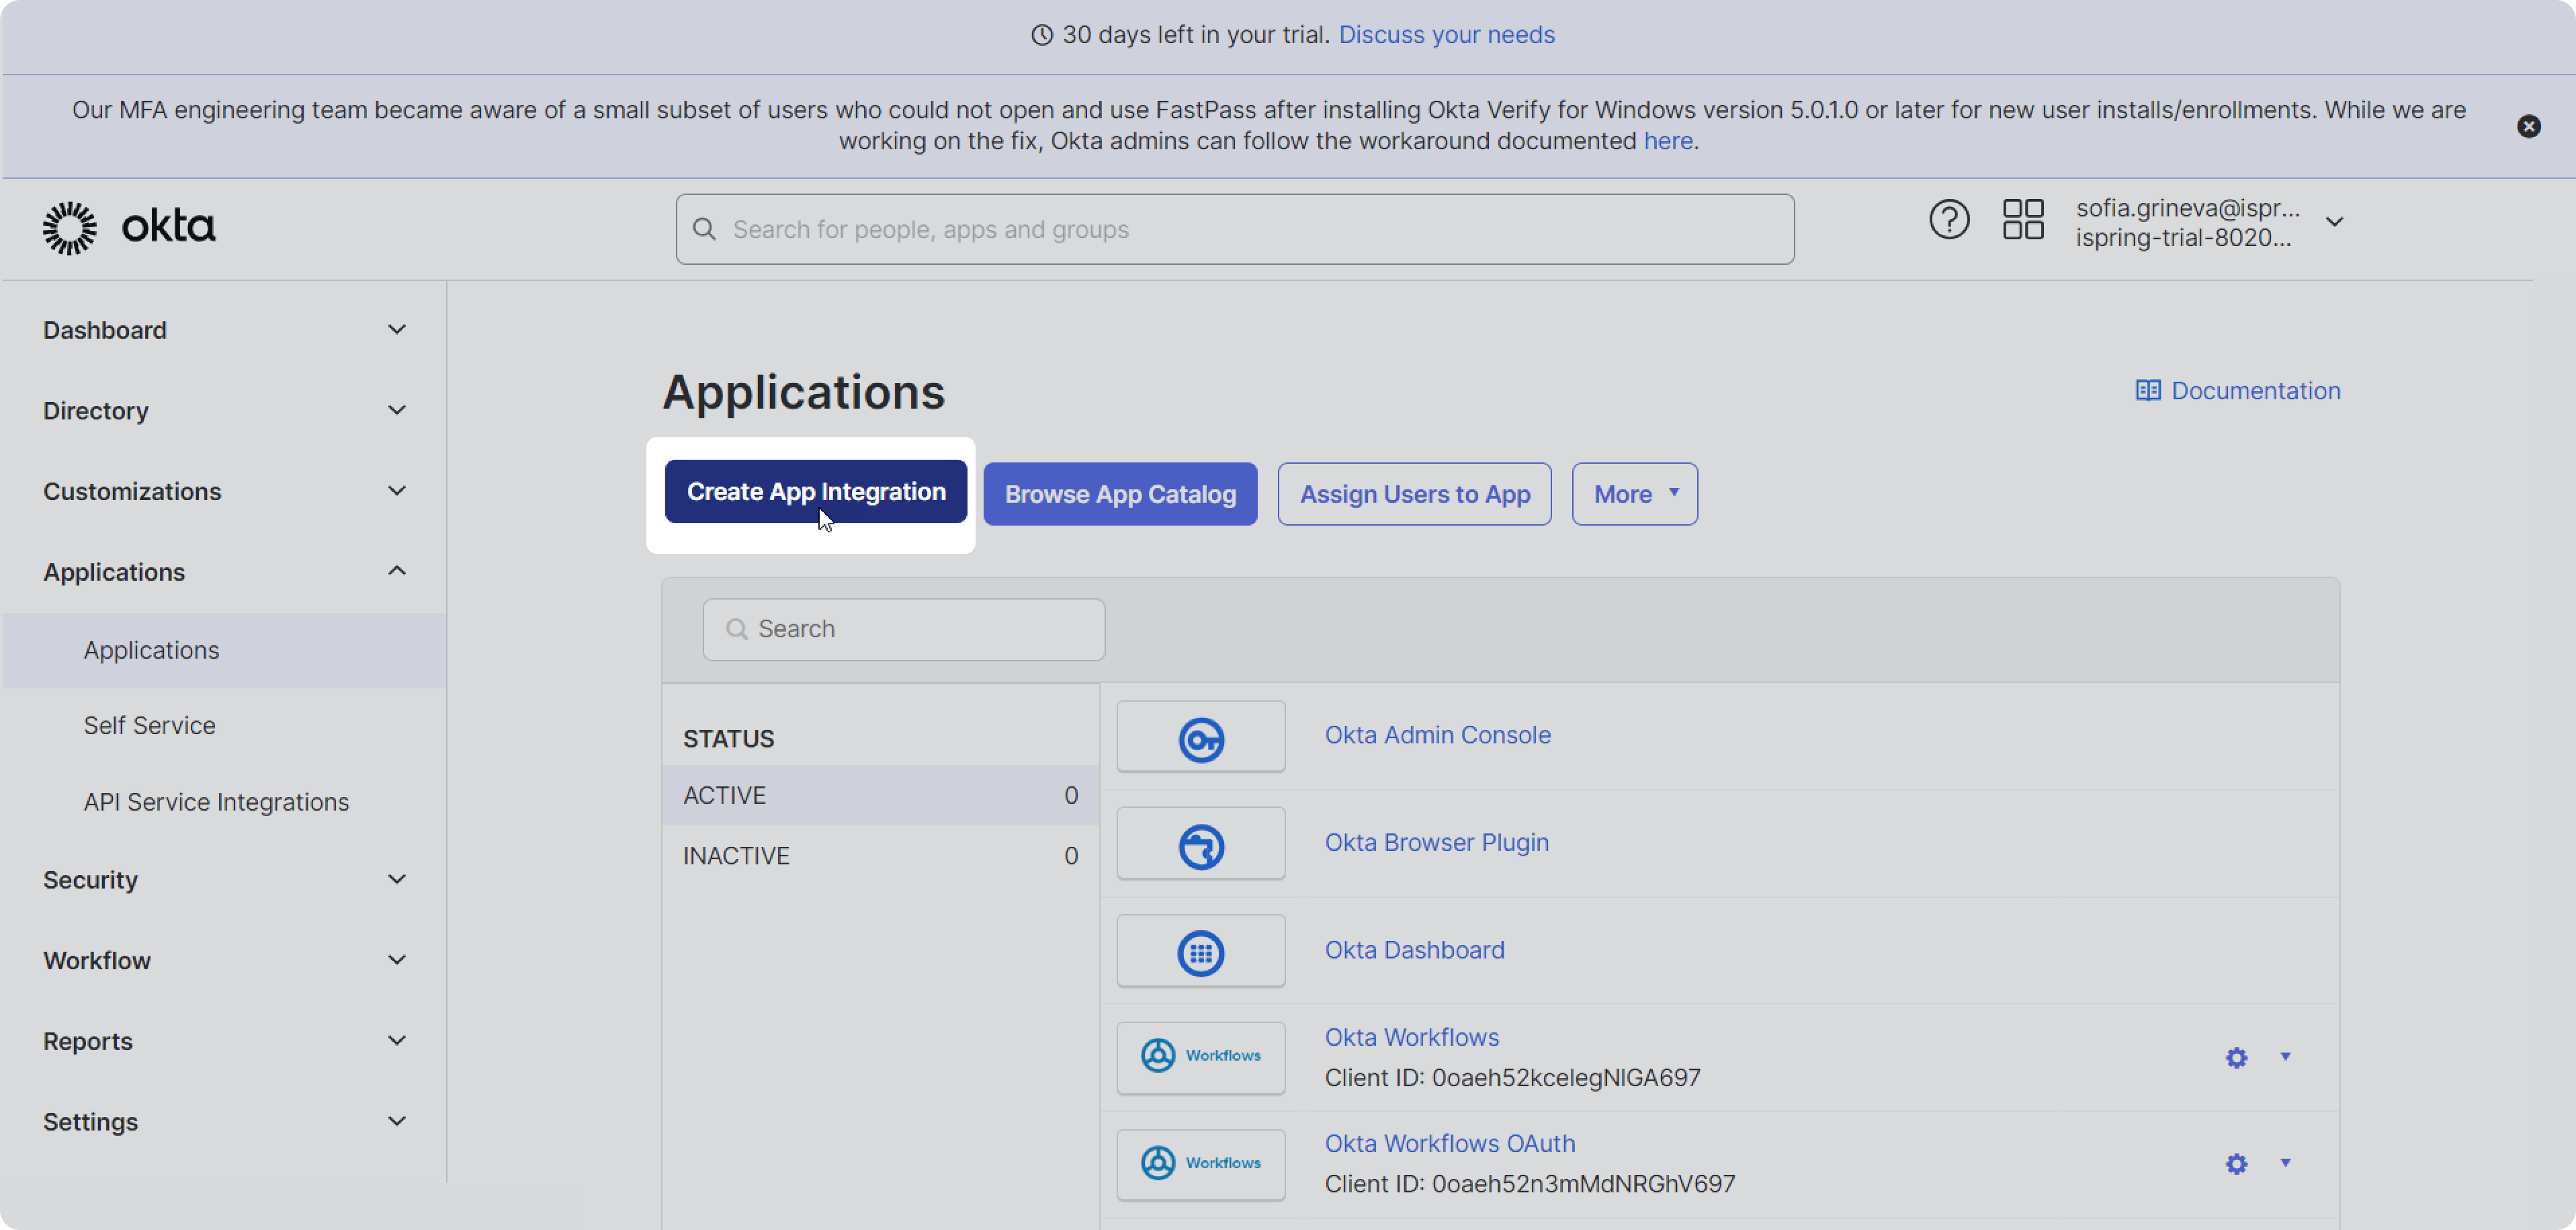
- In the Applications section, click Create App Integration.
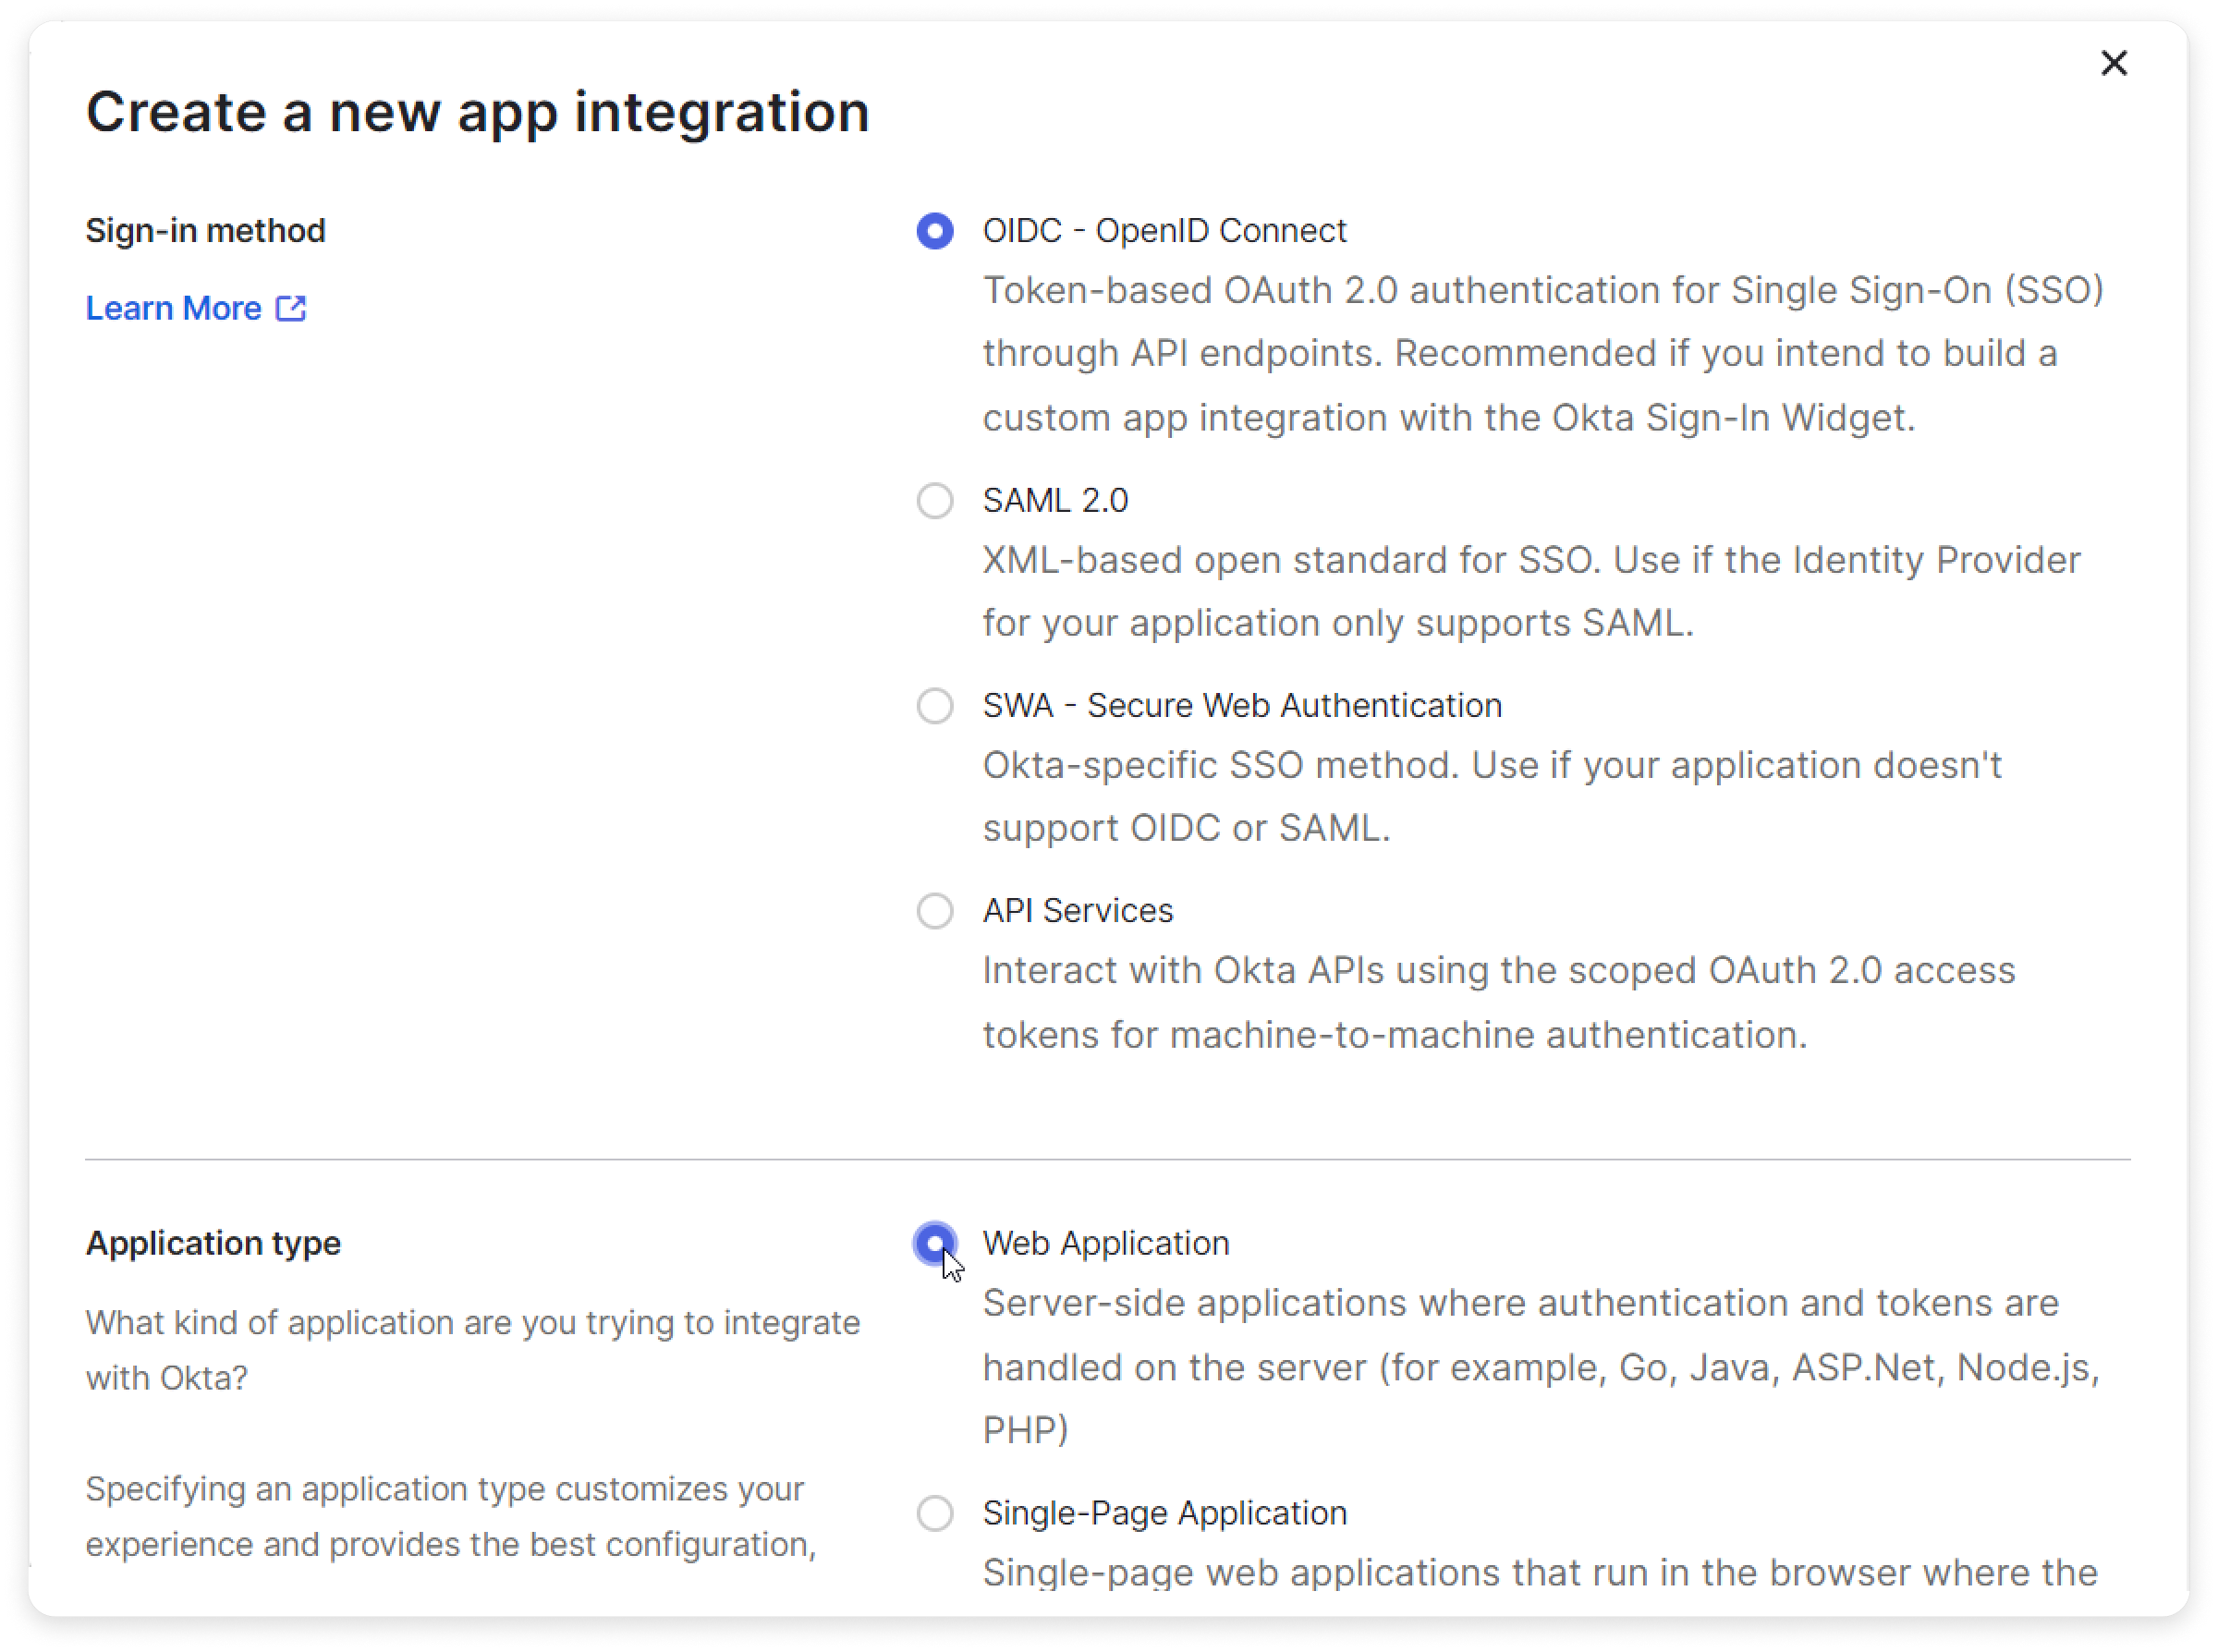
- Select OIDC - OpenID Connect and Web Application, and click Next.
After that, start configuring the application.
In the Sign-in redirect URLs section, add three more links under the default one:
https://companyname.ispringlearn.com/sso/login/oidc
http://companyname.ispringlearn.com/sso/login/oidc
islearn://companyname.ispringlearn.com/sso/login/oidcTo make the authorization in the mobile application work, add a modified Return Url to the authorization server. Swap the https scheme with islearn: for example, change https://auth.dev.mycompany.com/sso/login/oidc to islearn://auth.dev.mycompany.com/sso/login/oidc
In the Sign-out redirect URLs section, add one more link under the default one:
https://companyname.ispringlearn.com/login/?logoff=1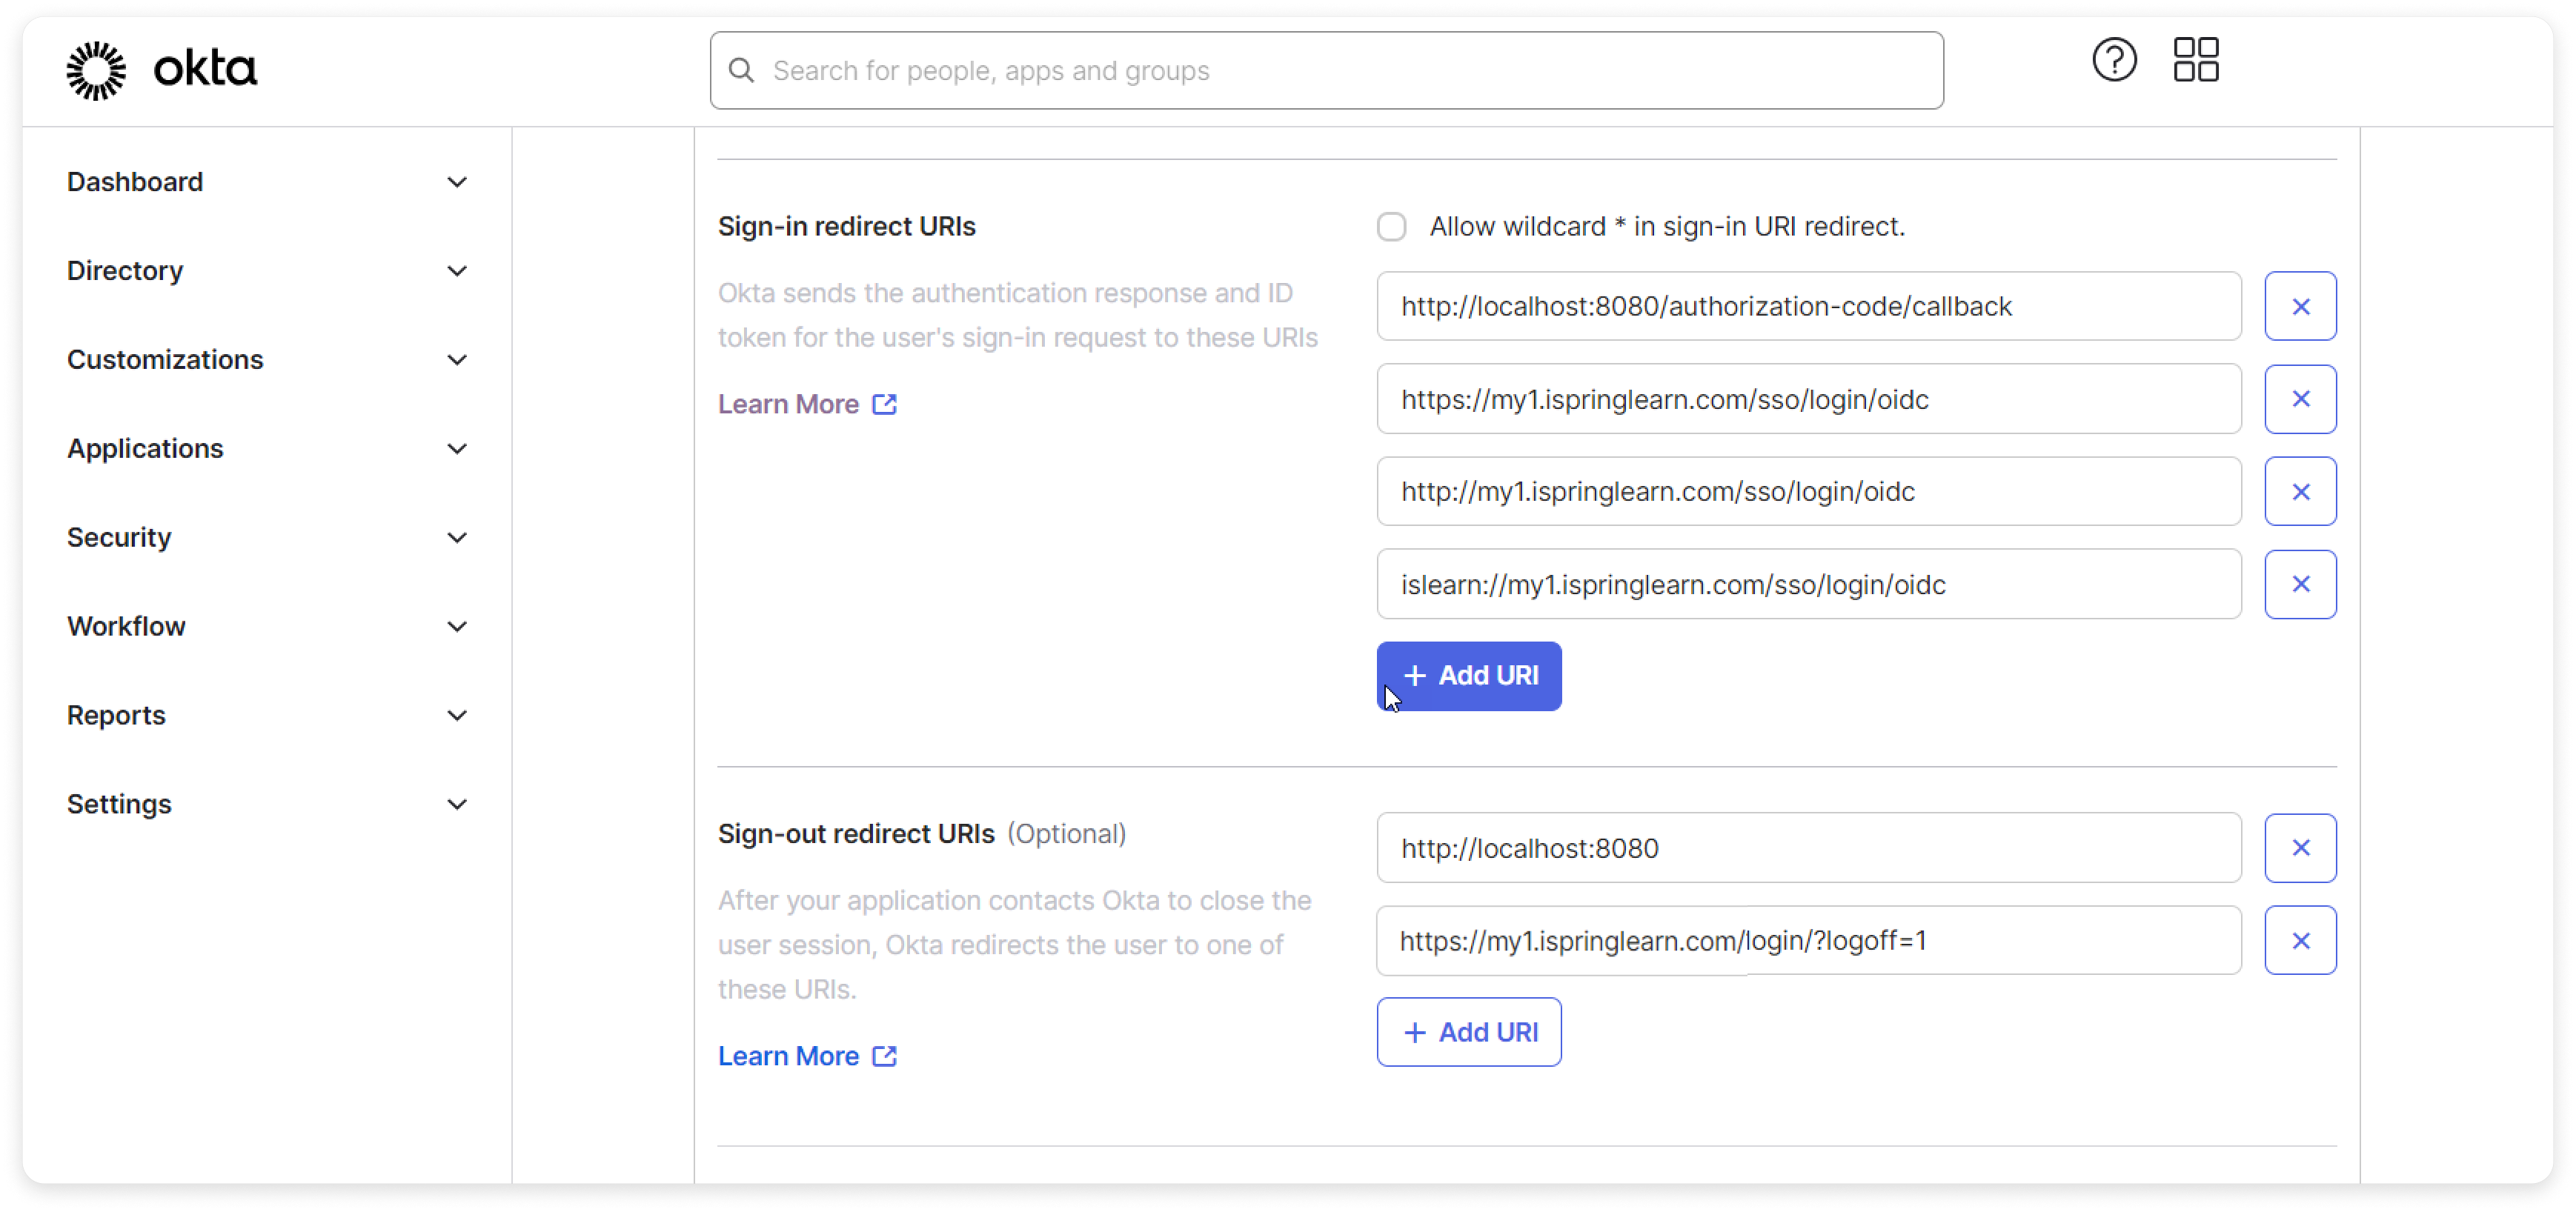
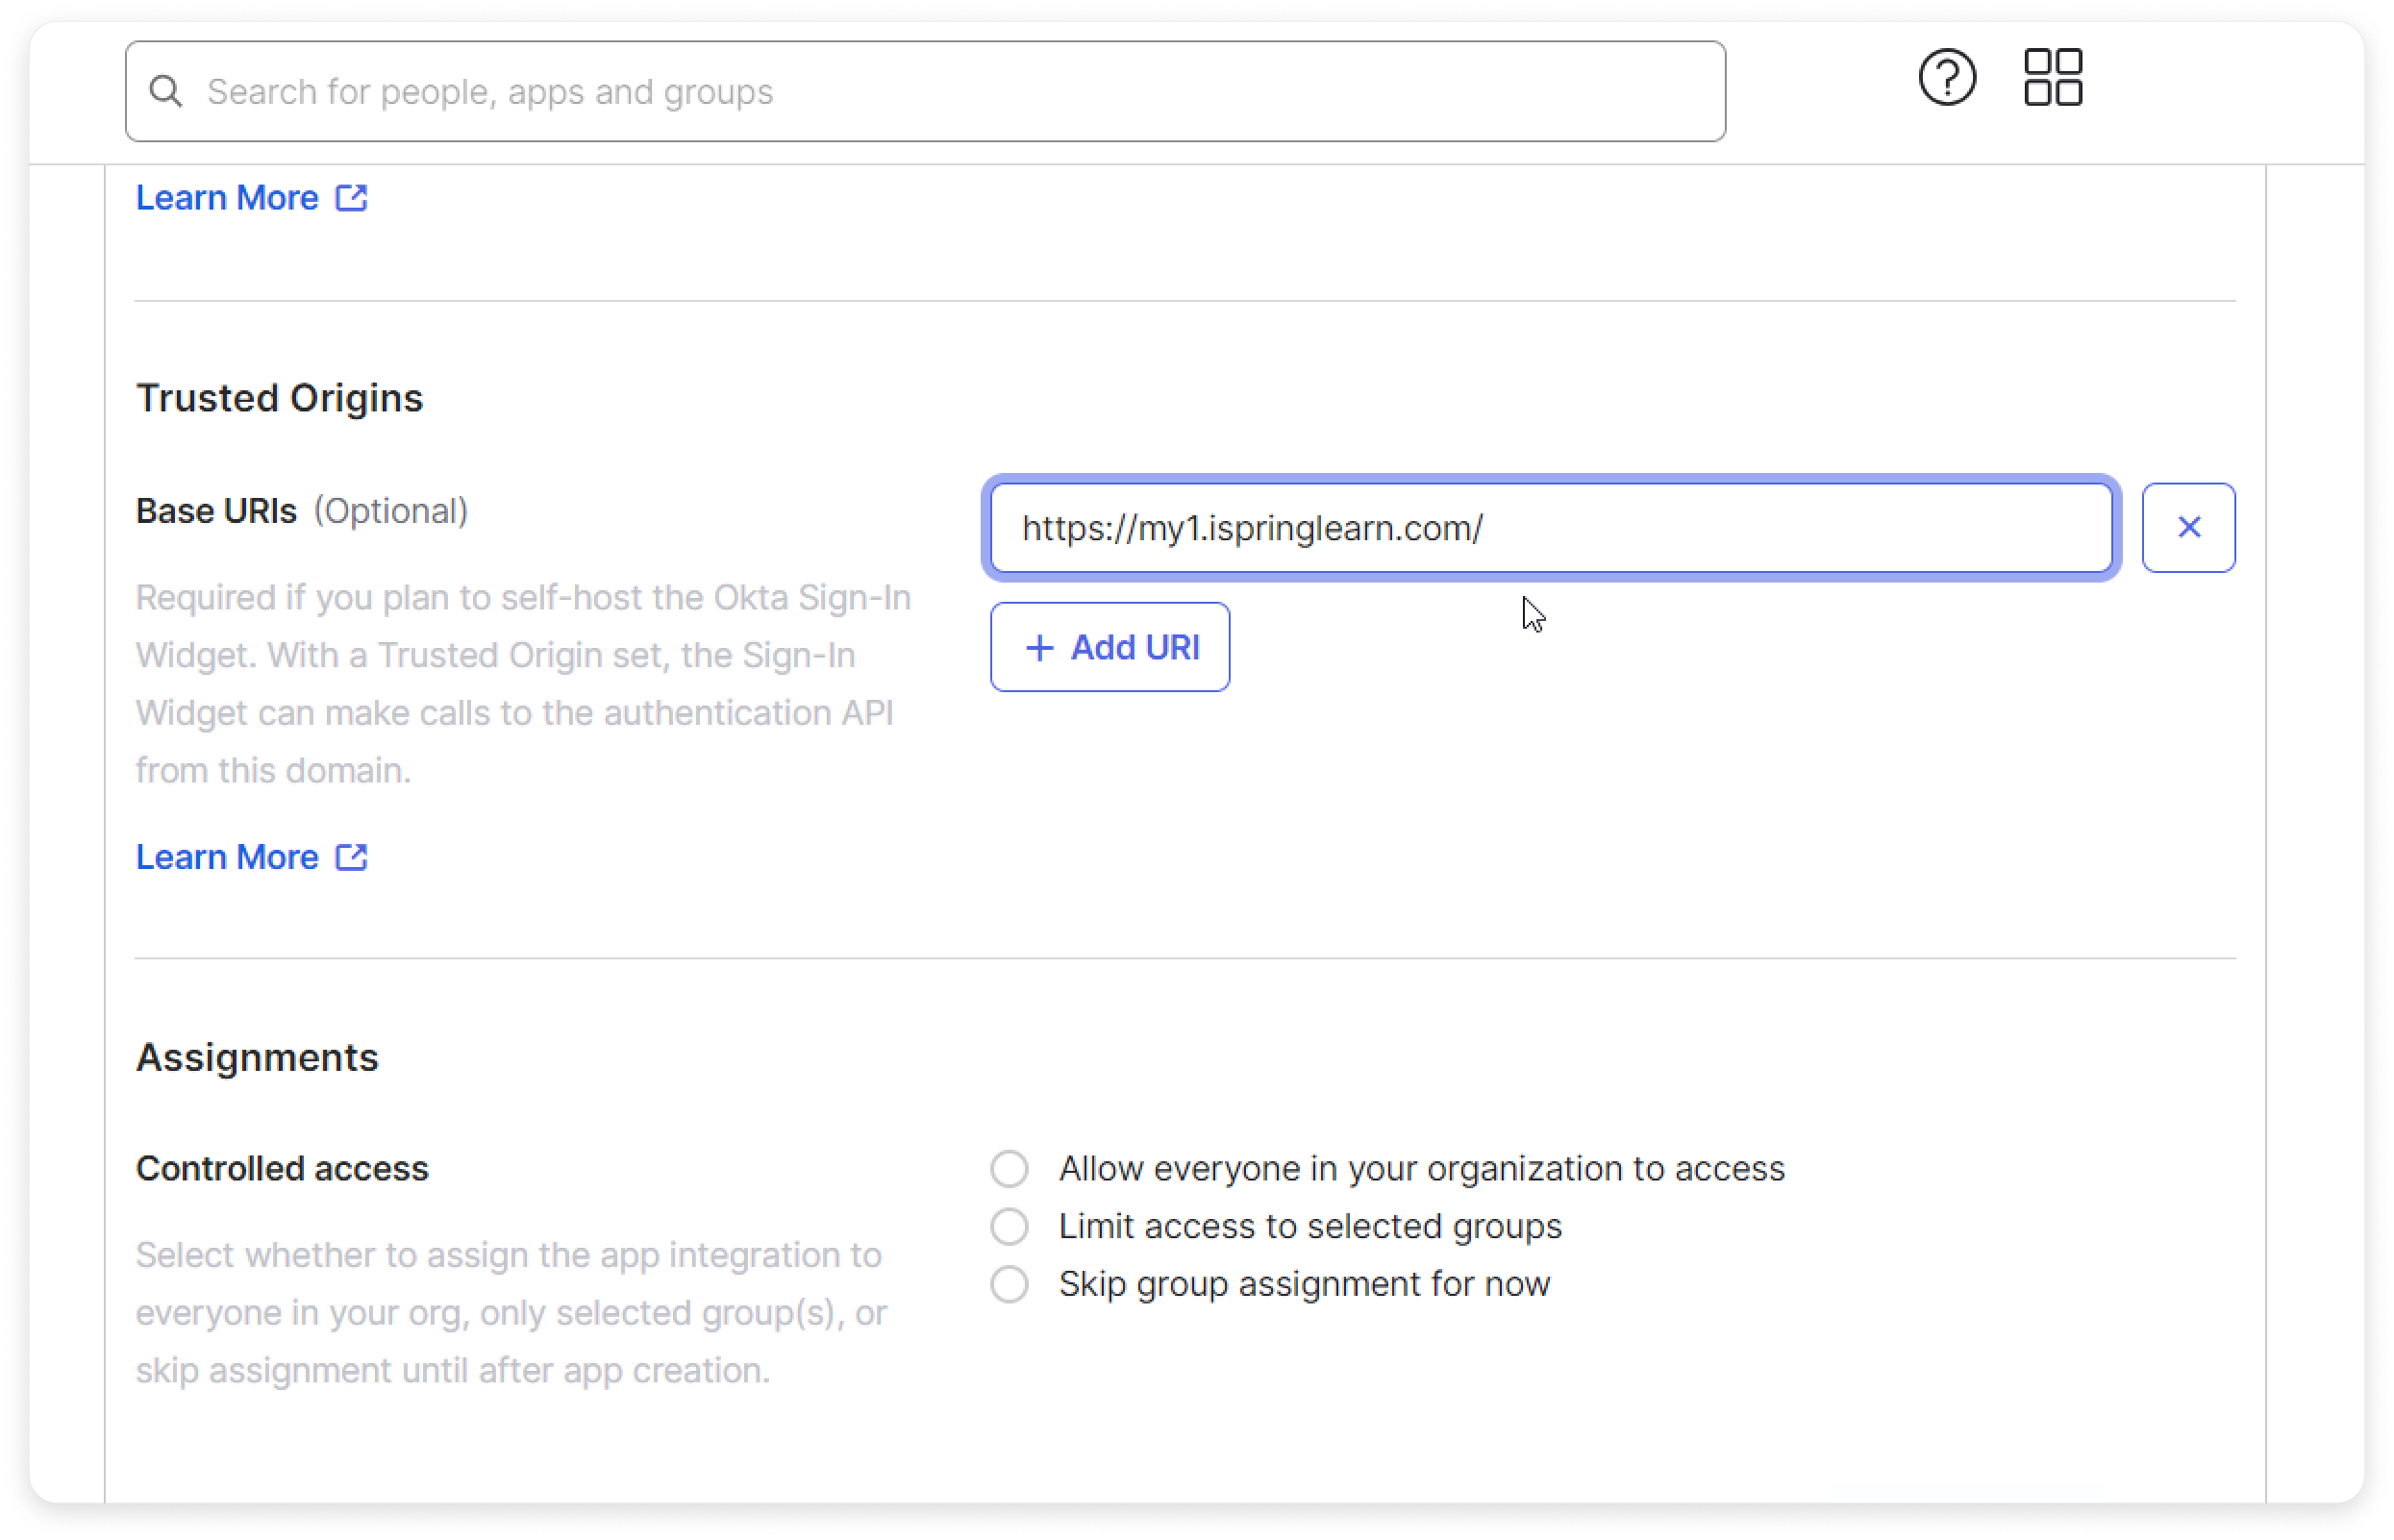
- Then, add Base URLs — it's basically the link to your iSpring LMS account.
Also, in the Grant type allowed section above, check Refresh Token and Implicit (Hybrid).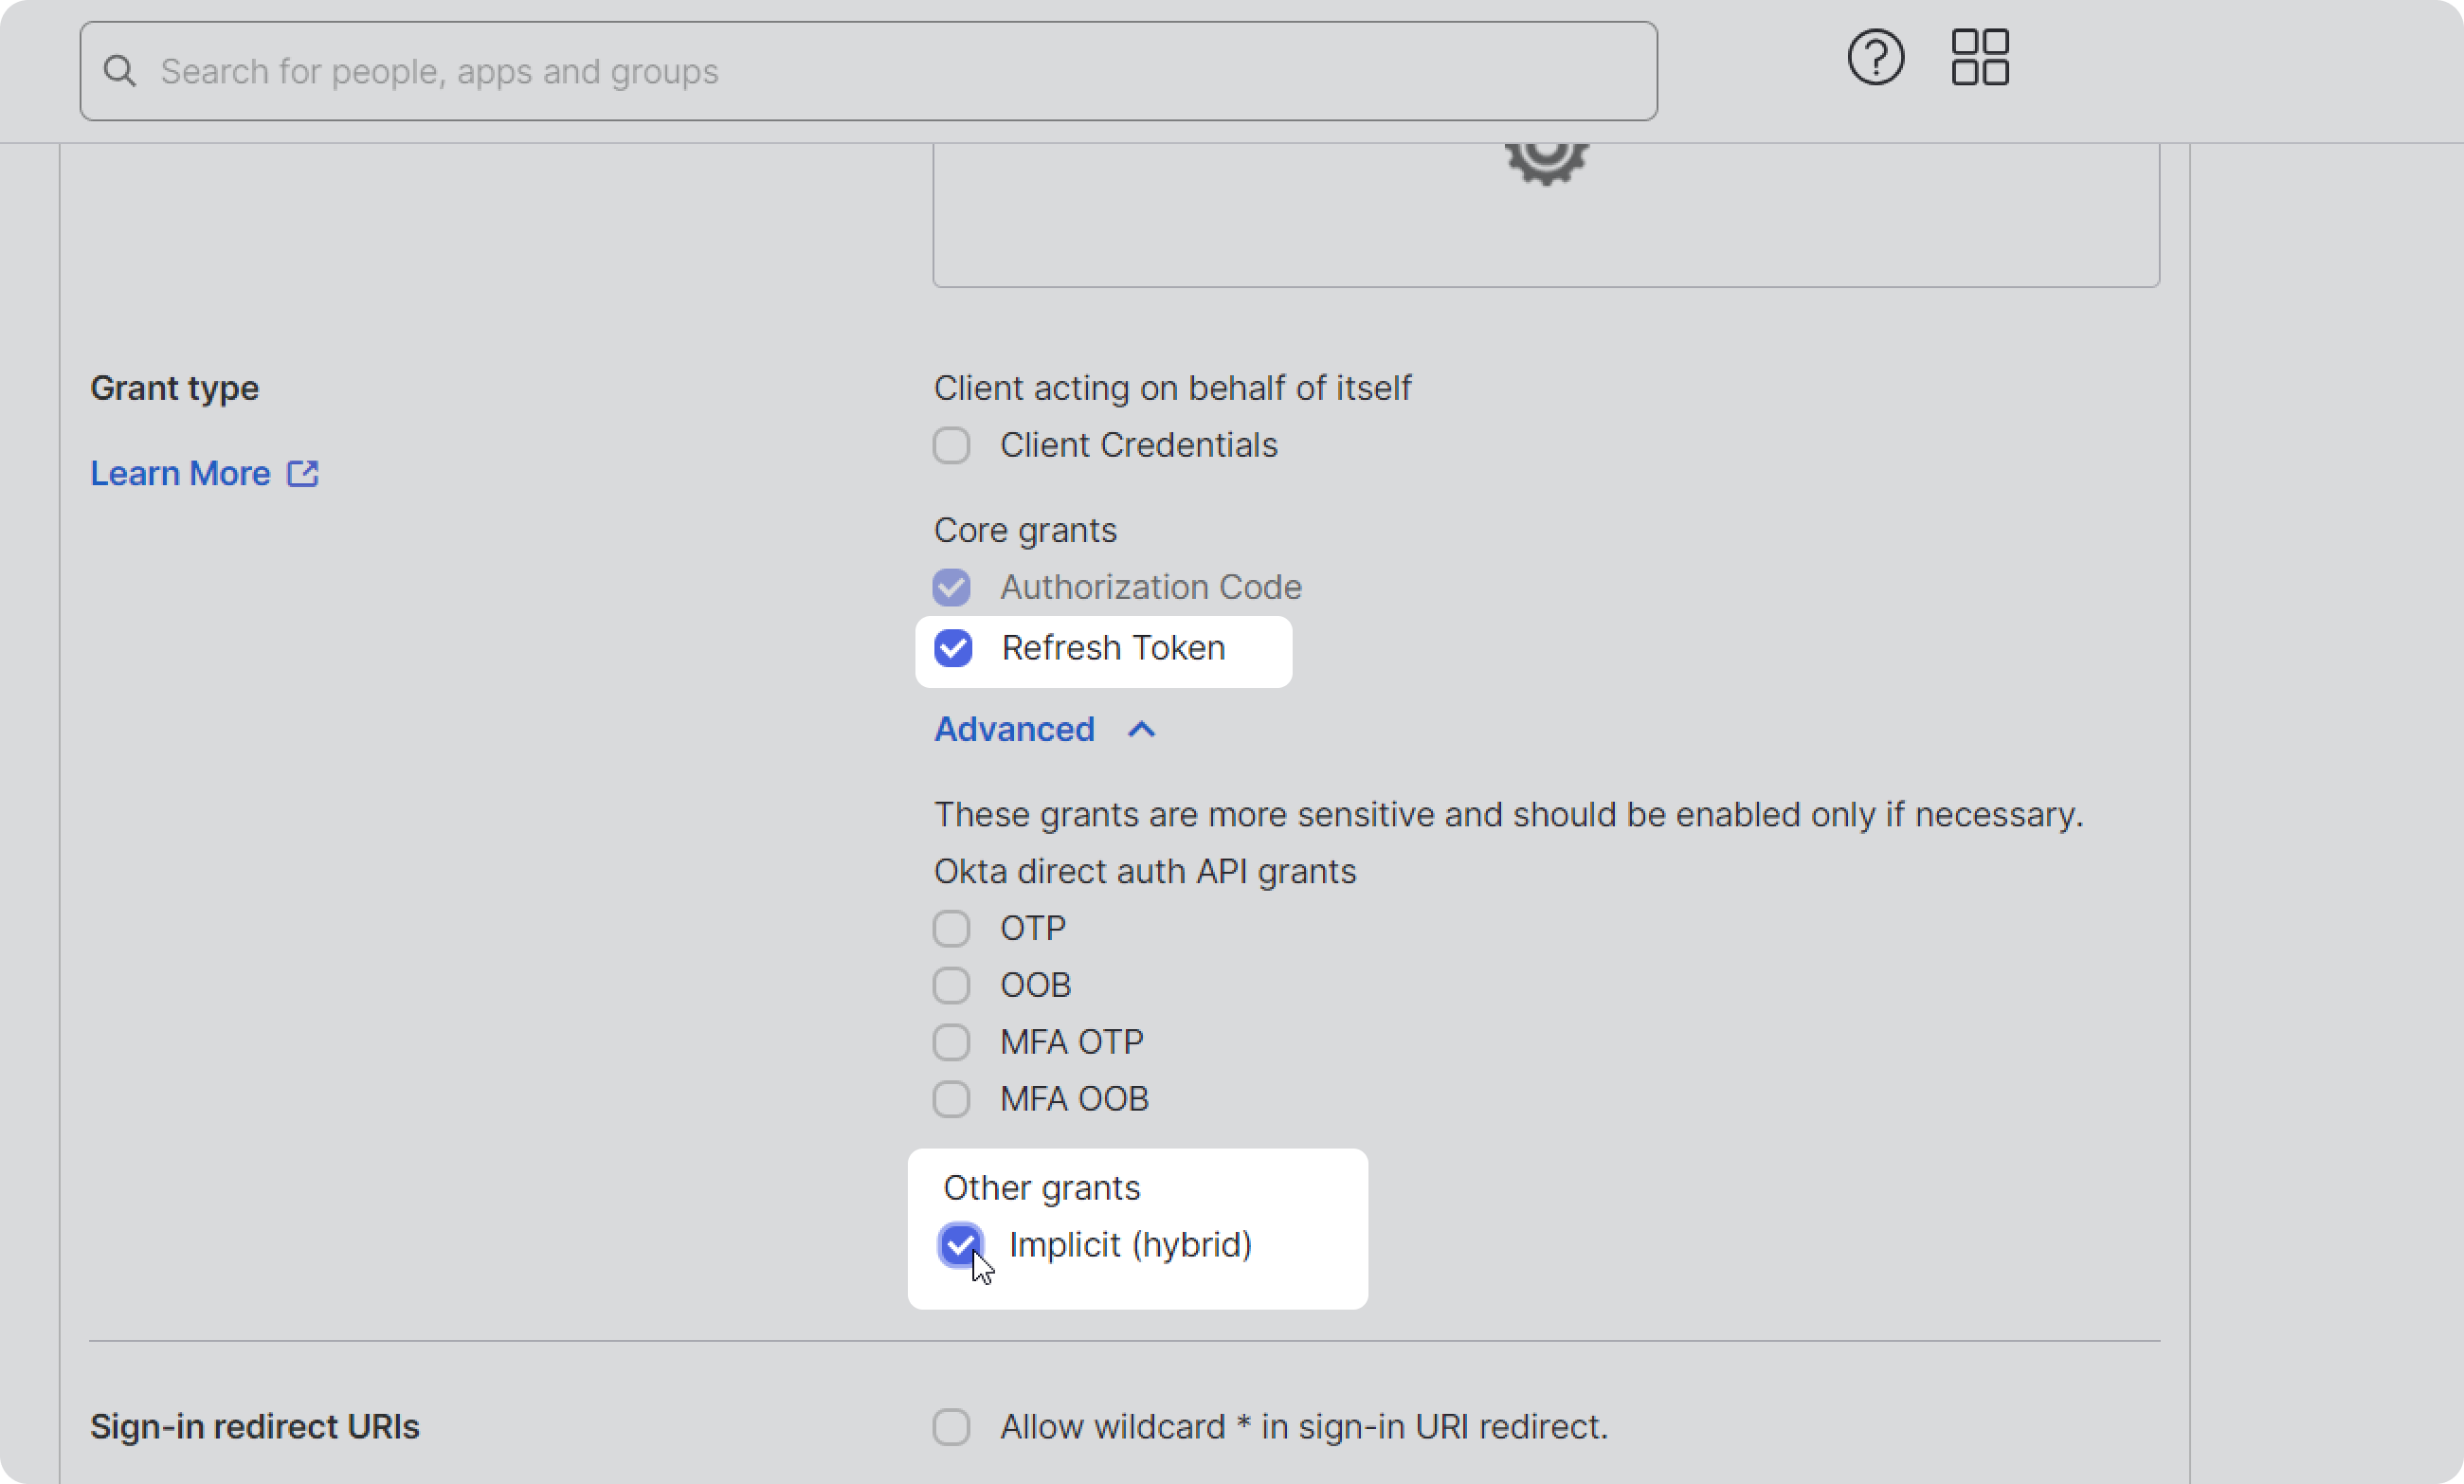
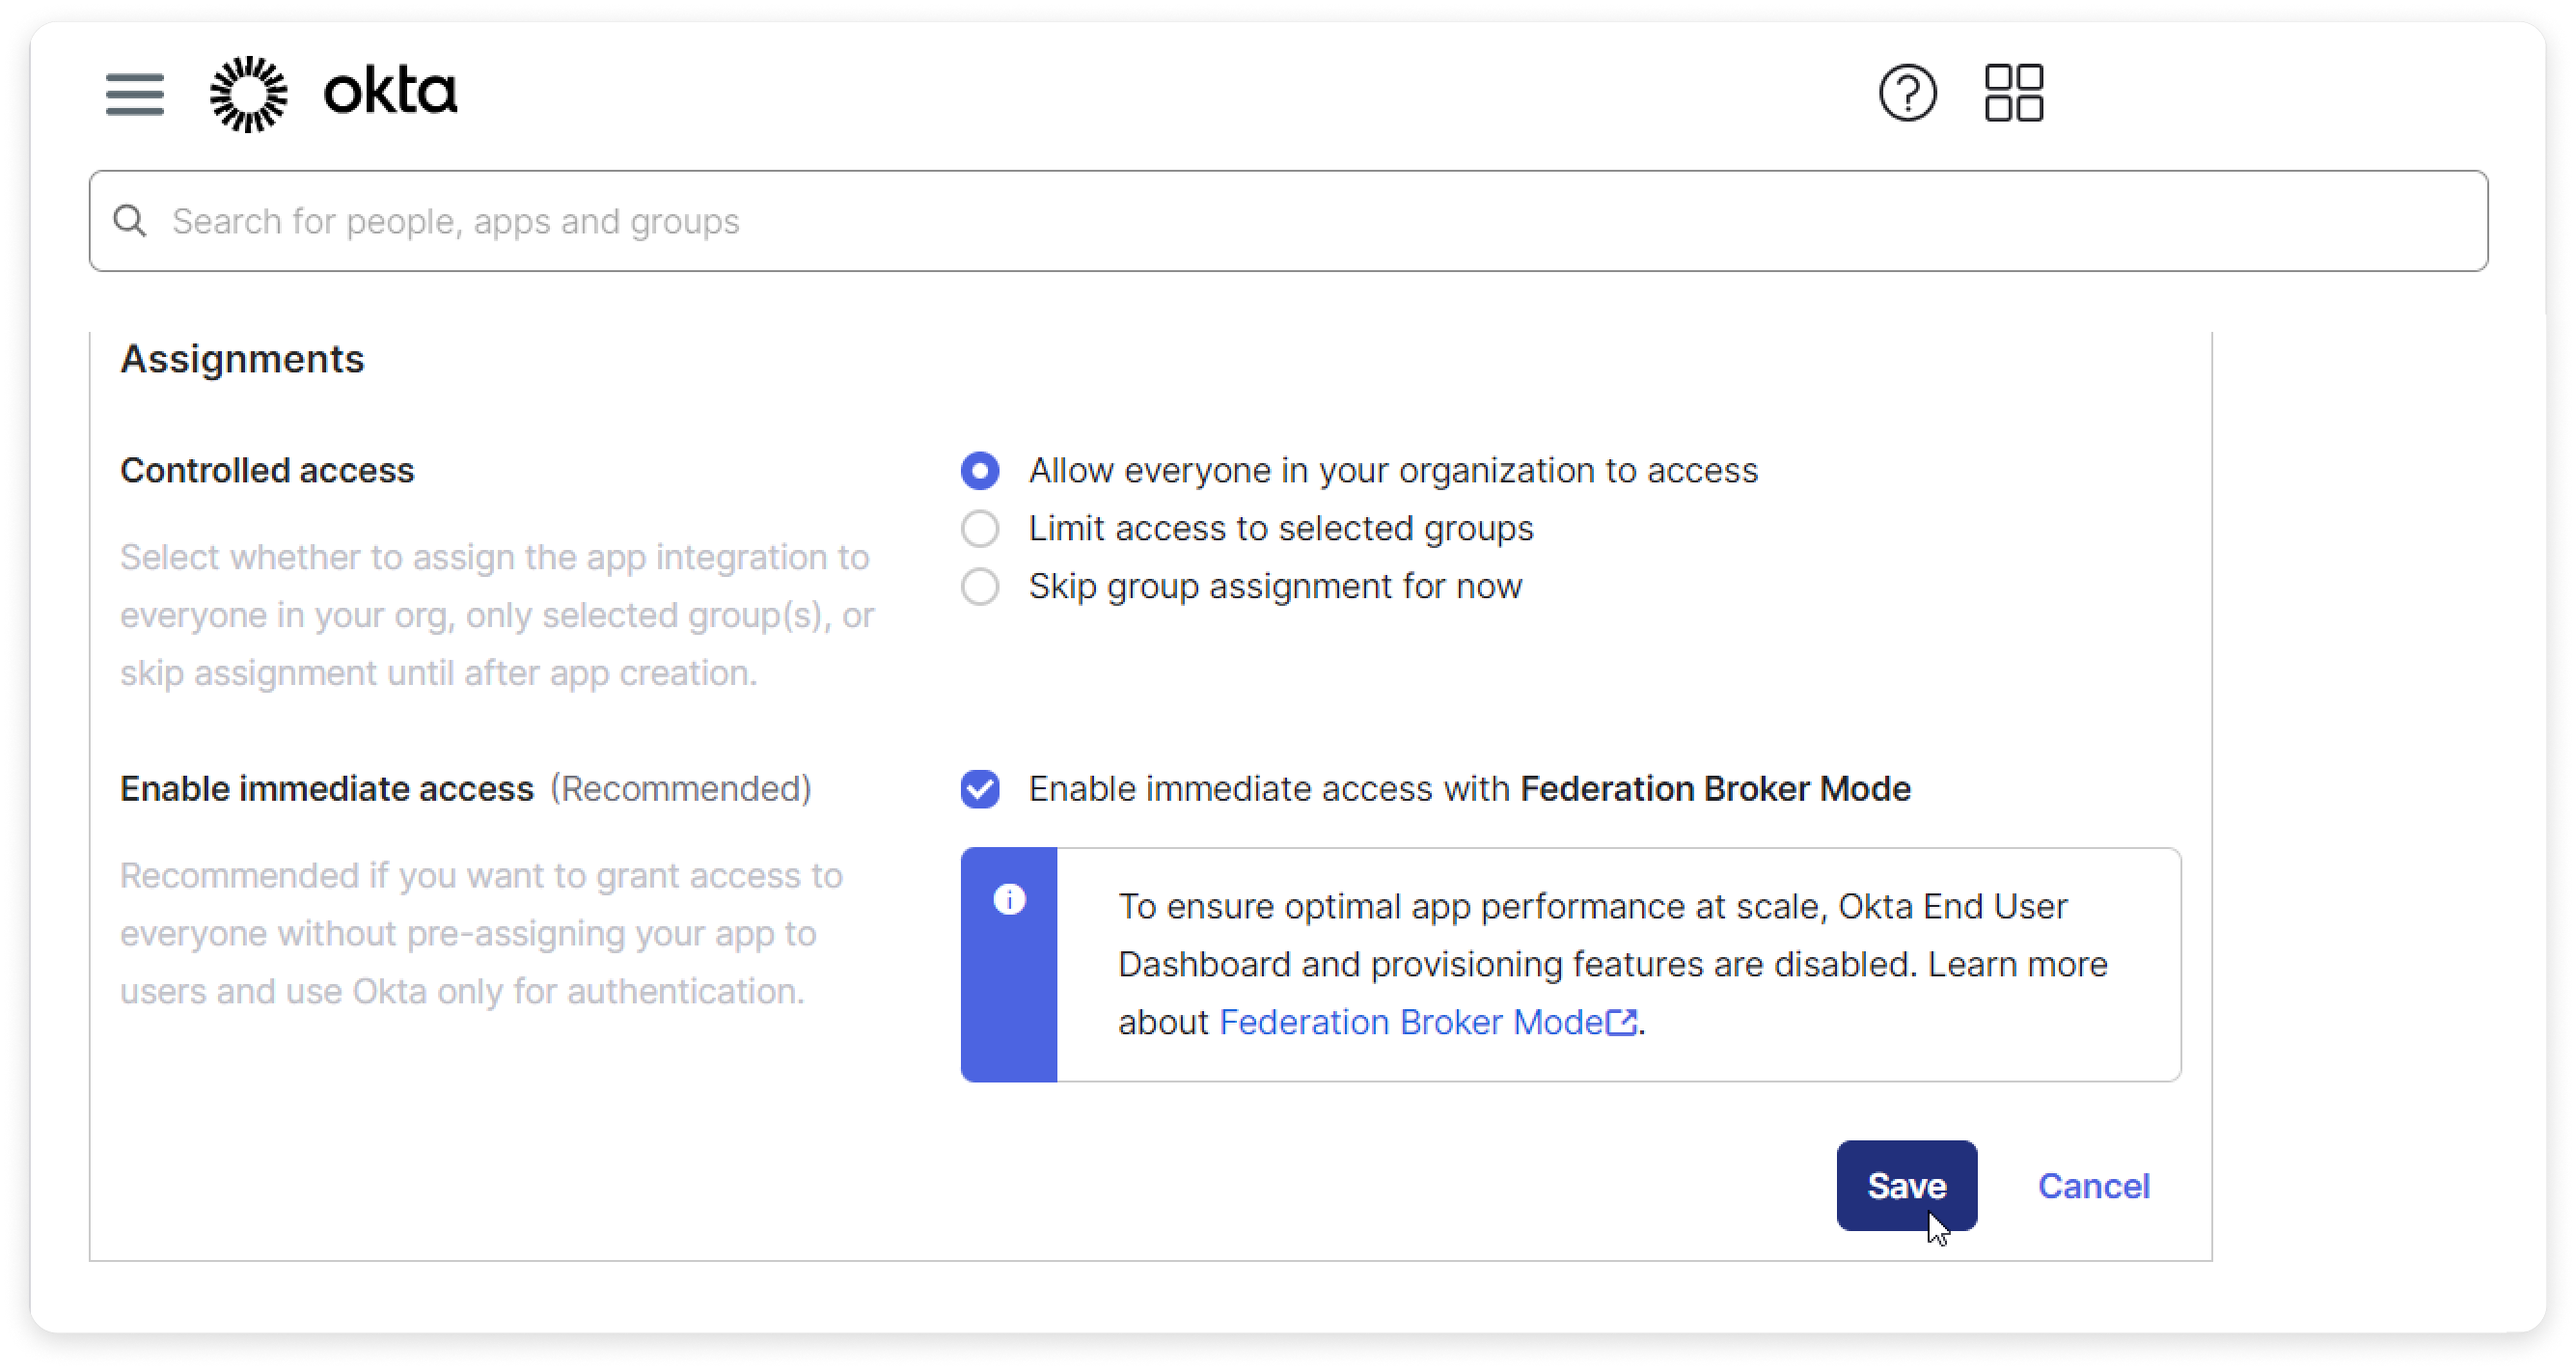
- In the Assignments section, select Allow everyone in your organization to access. Finally, click Save.
To log in without entering a verification code from the Okta Verify app, go to Sign On > User authentication and select Okta Dashboard.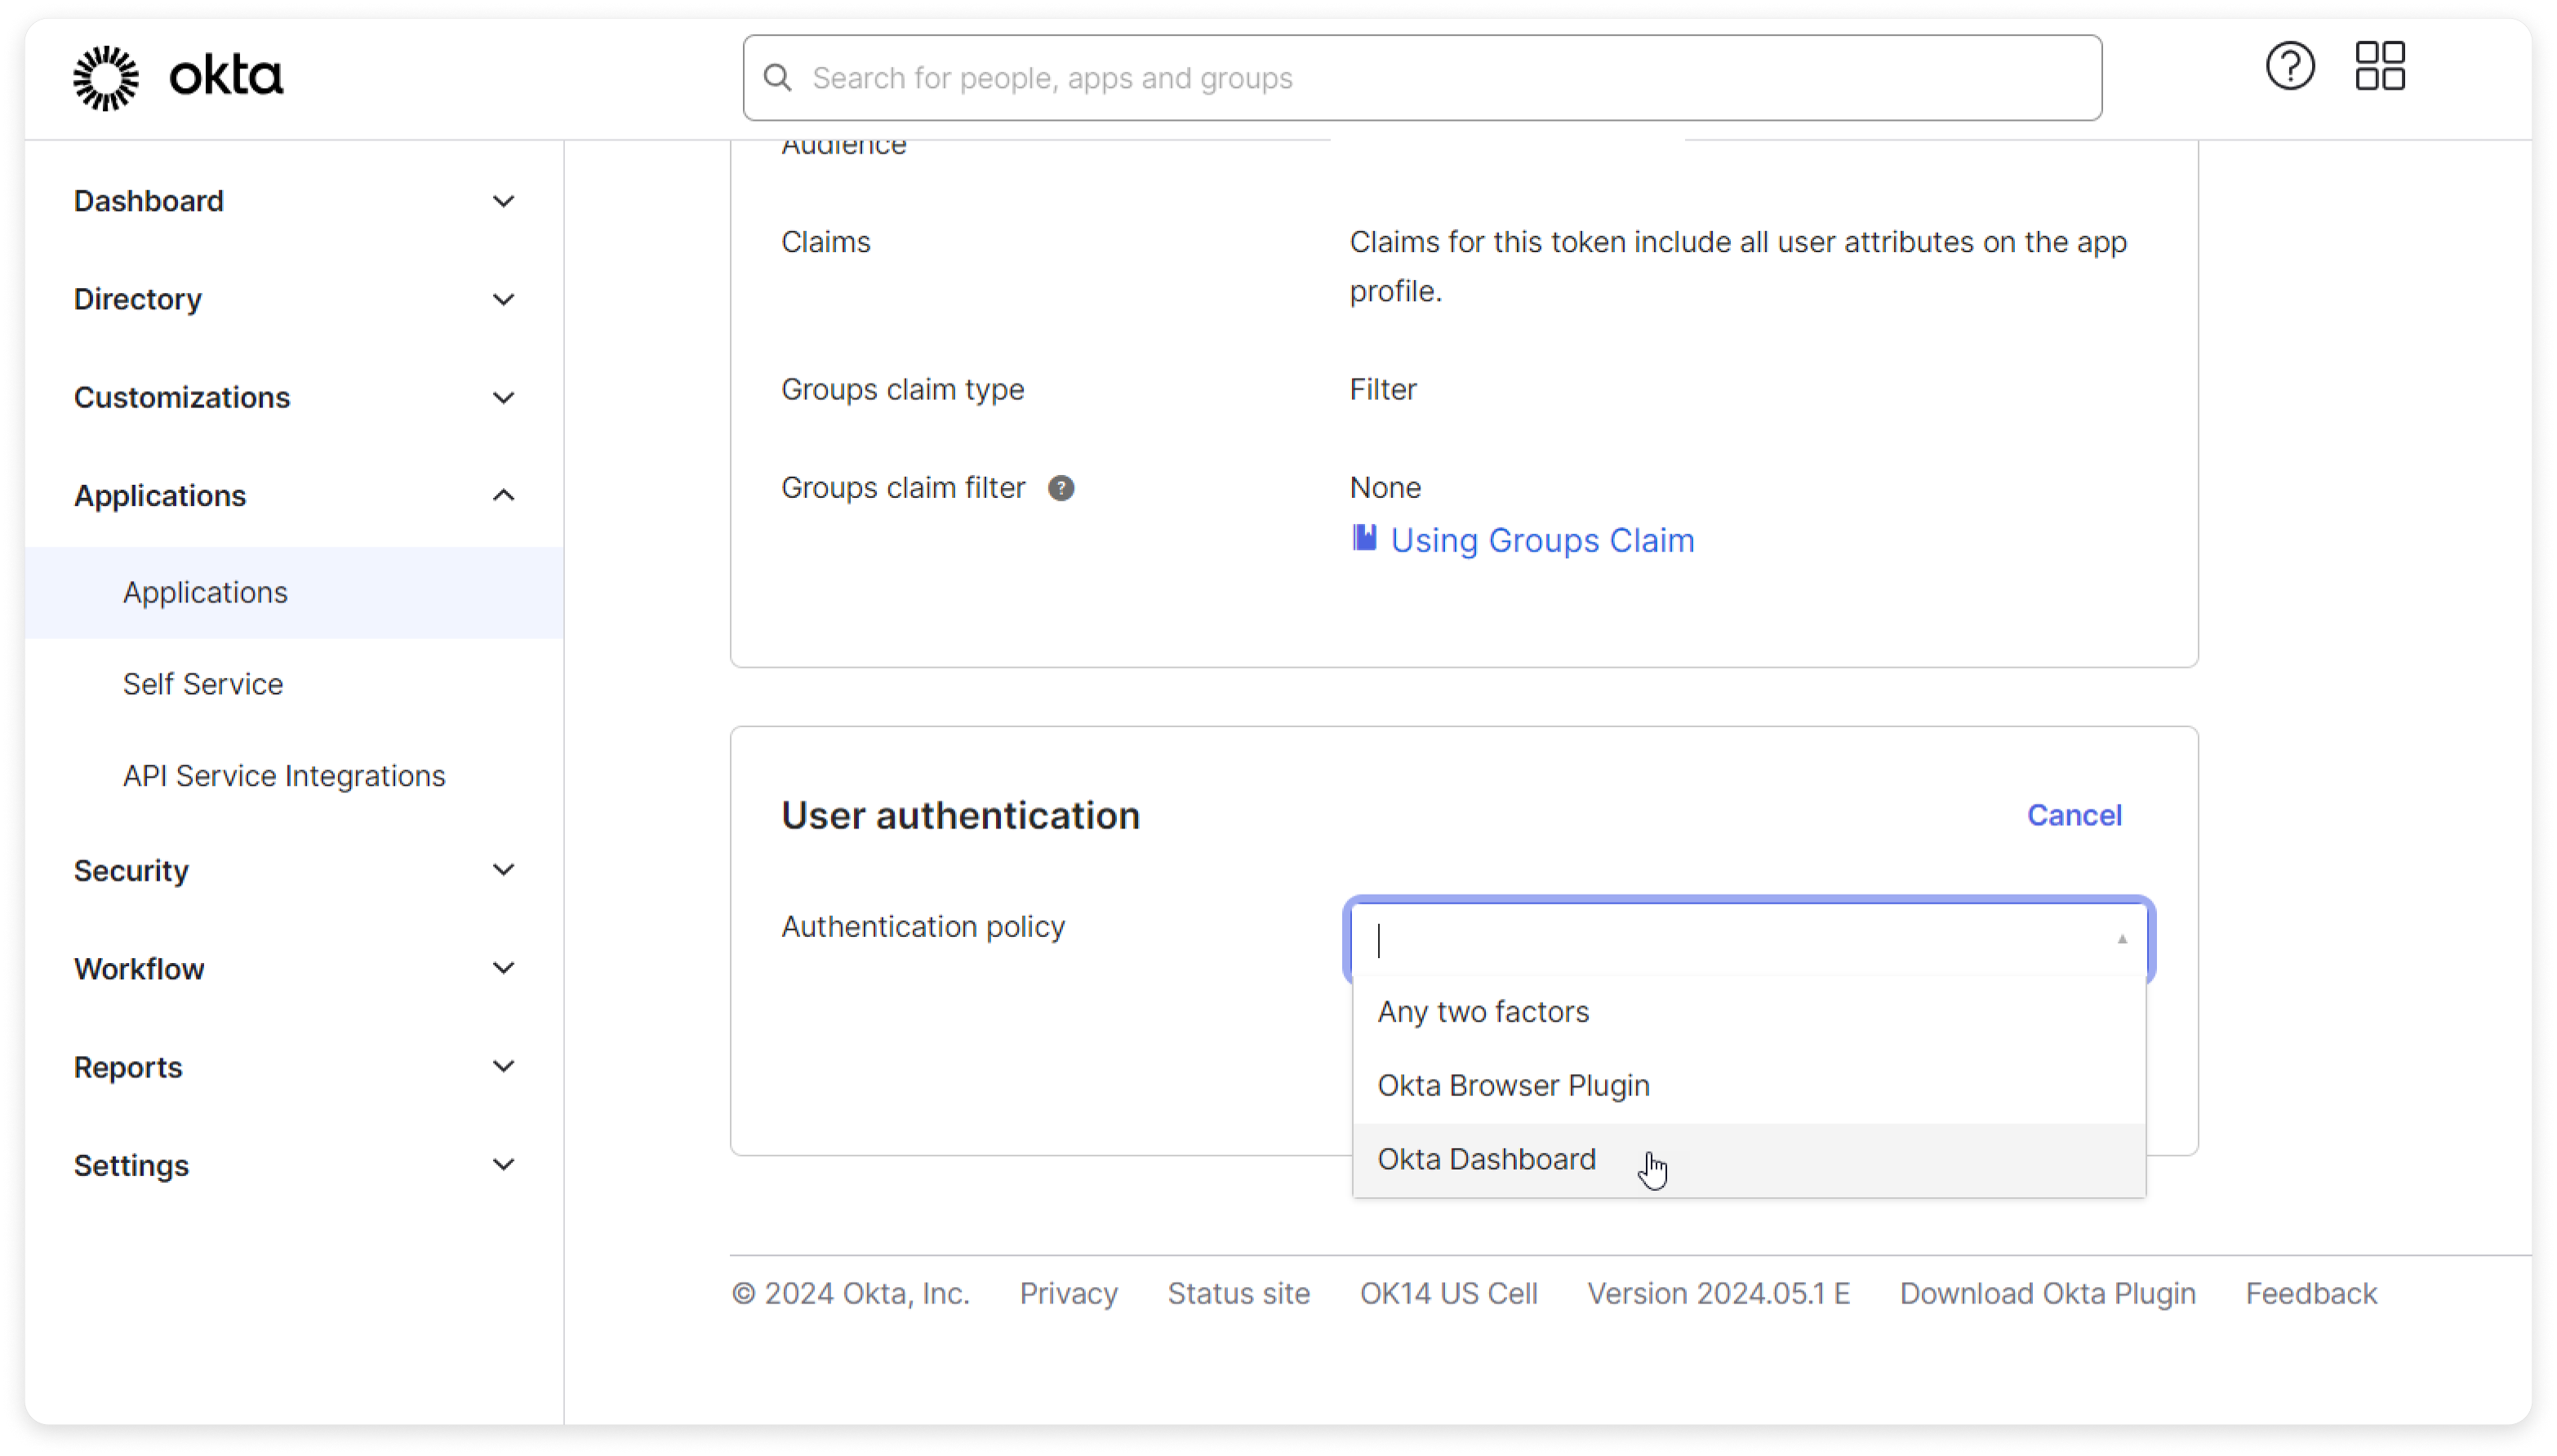
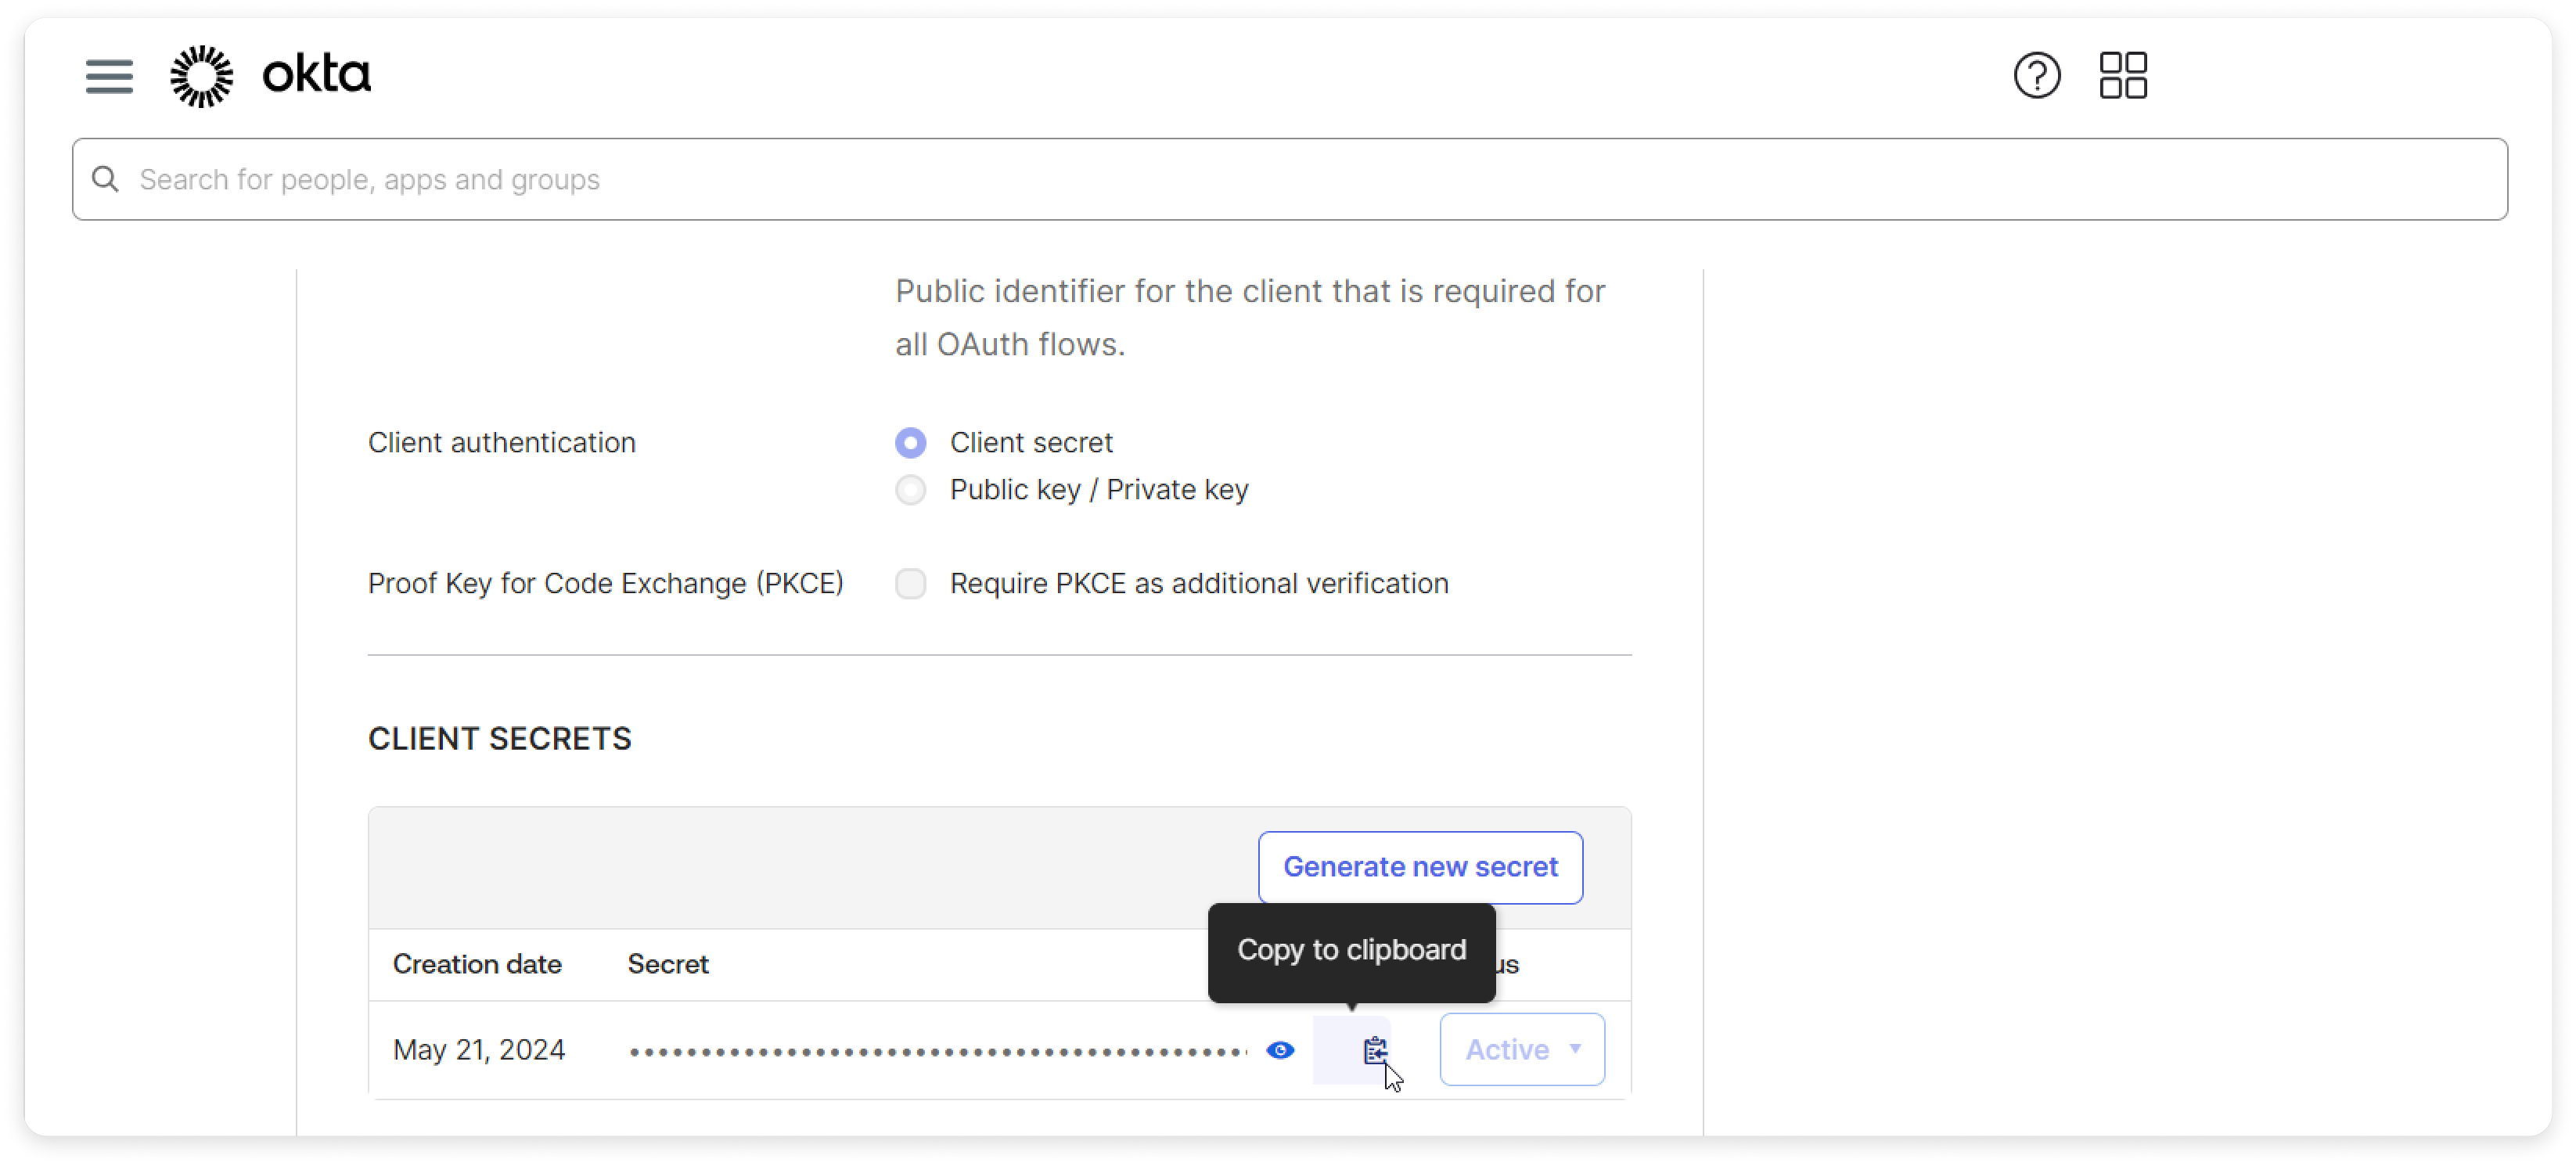
- Open the General tab and copy your Client Id and Client Secret.
Configuring iSpring LMS
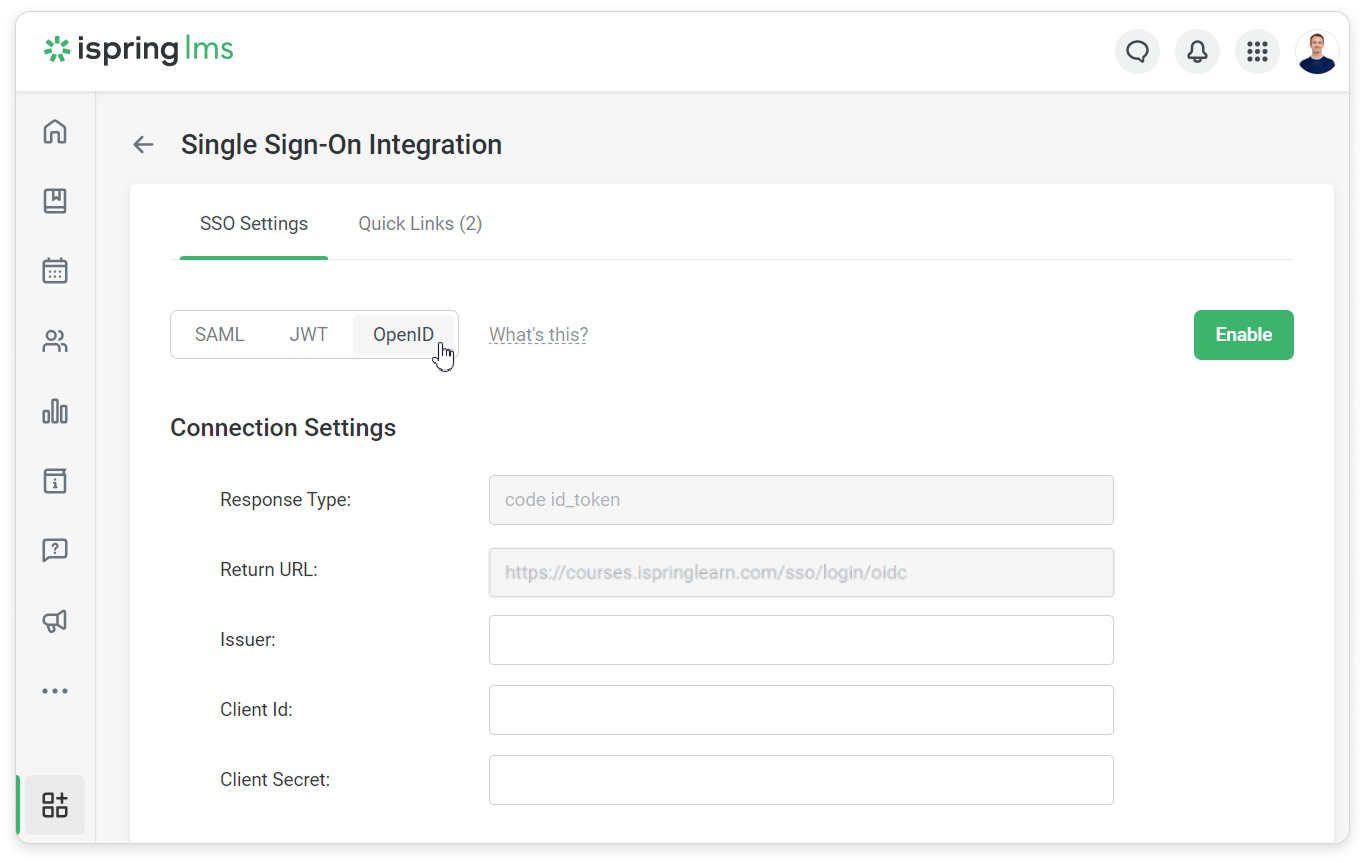
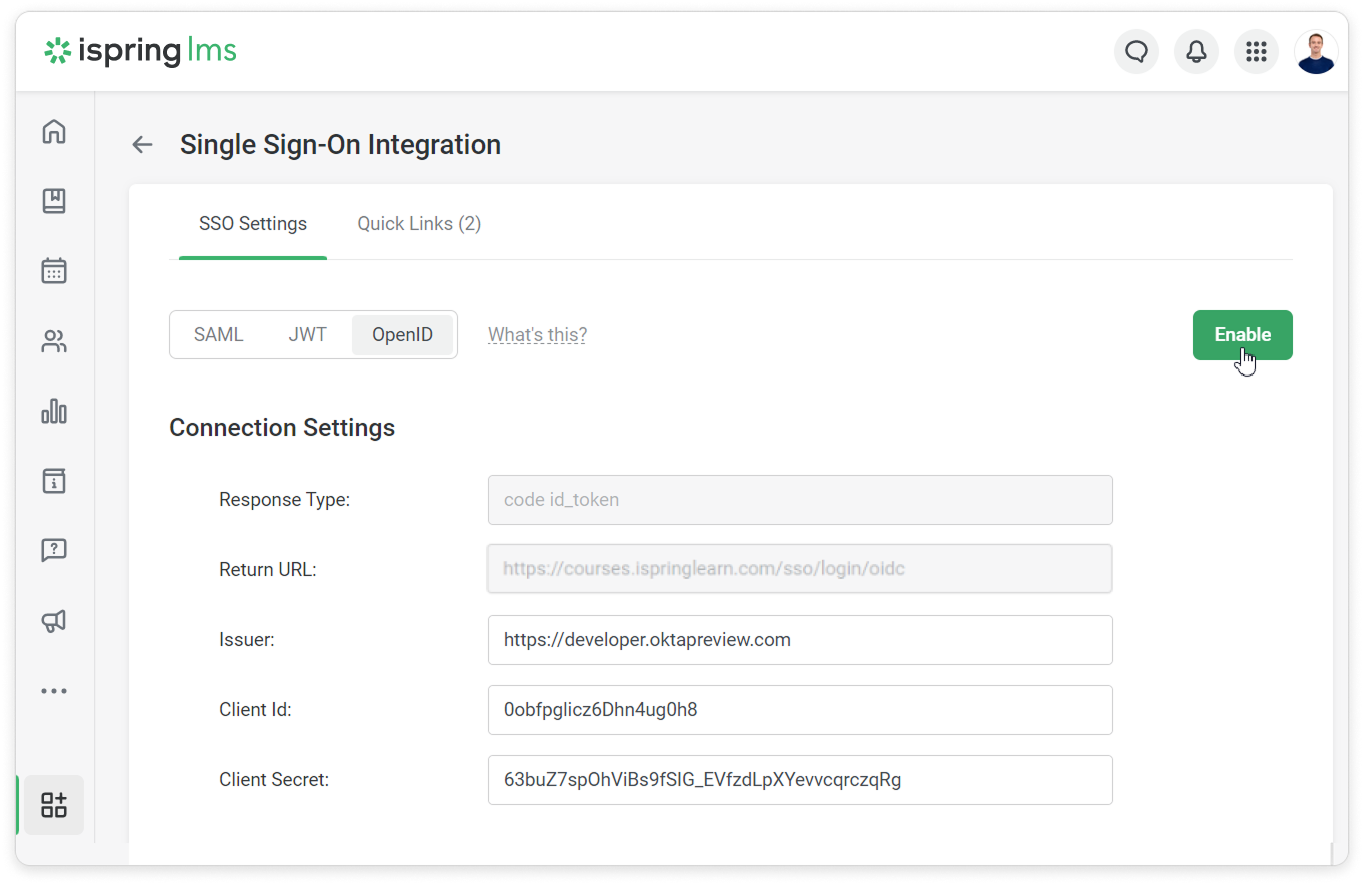
Log in to your iSpring LMS account. Then go to the SSO Settings and click OpenID.
Fill out the fields of the form and check Create a new user account for a learner the first time they sign in with OpenID.
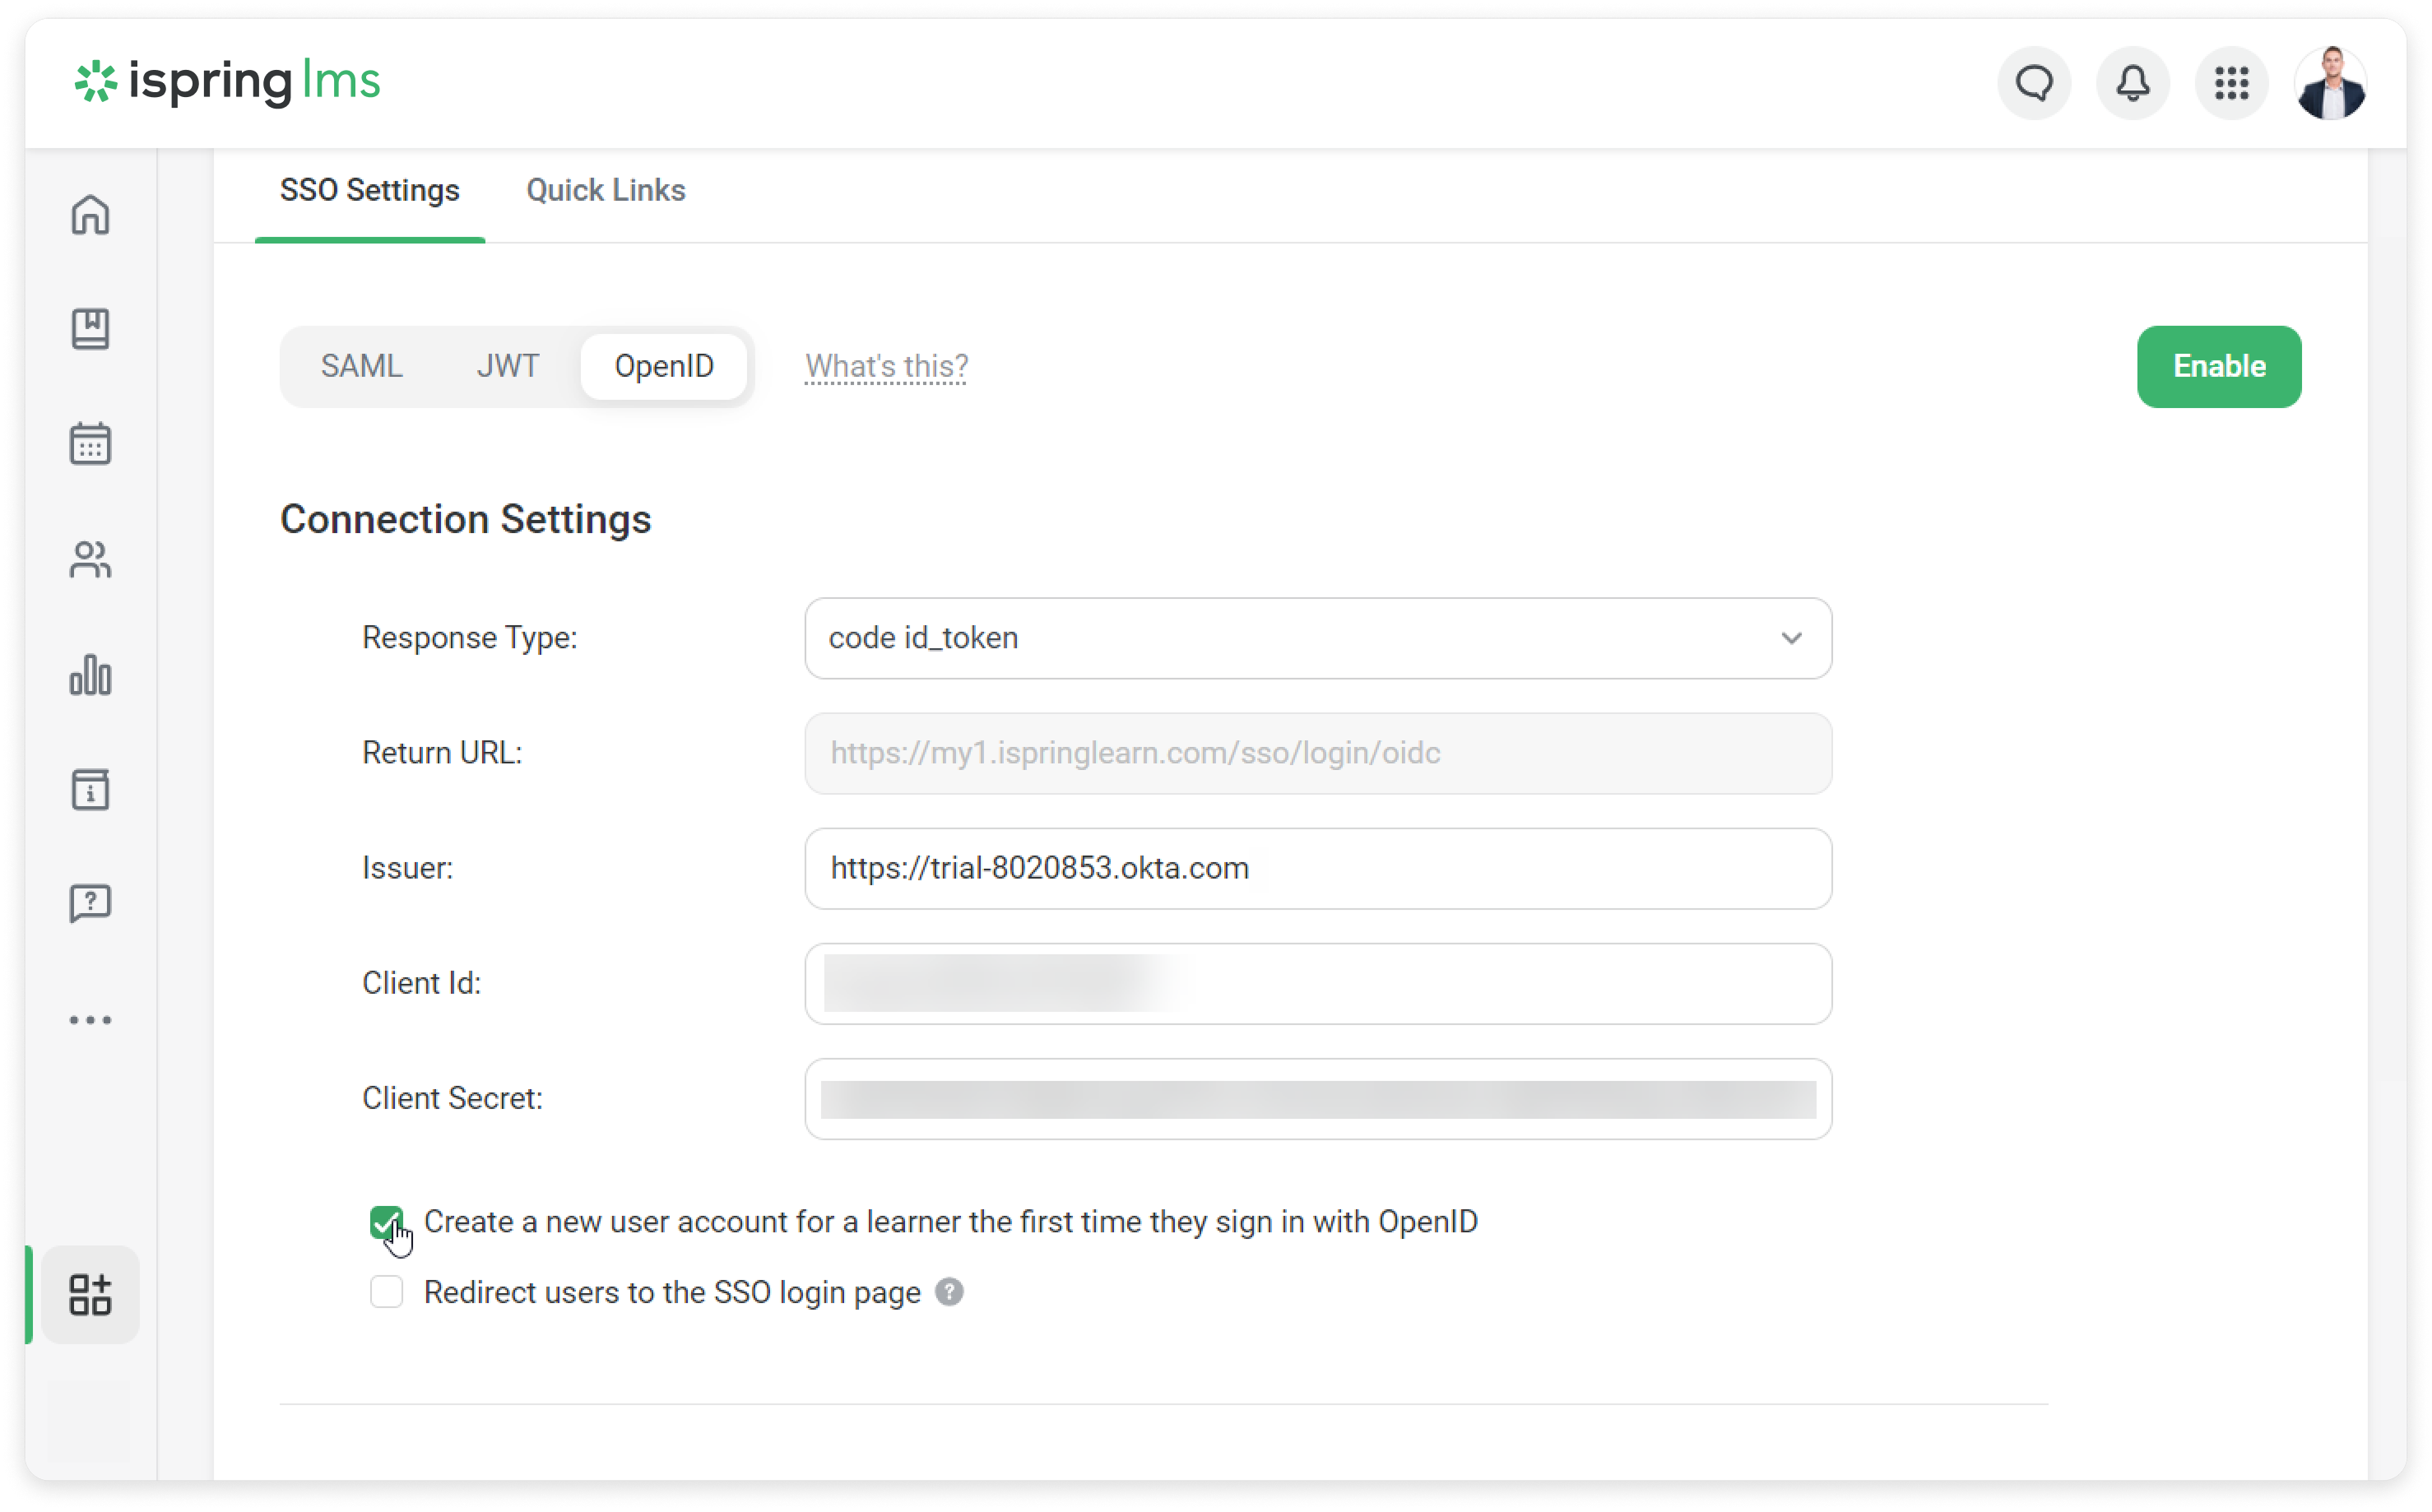
Create a new user account for a learner Select this option to automatically add unregistered users to iSpring LMS when they sign in with OpenID. Response Type The type of response returned by the authorization server. Return URL The URL that the authorization server redirects users to after authorization. Issuer The URL of the server that issues the token. For Okta, copy your Okta account URL without -admin.Client ID The client identifier provided by the authorization server. Client Secret A secret key used by the authorization server to verify the application. It is generated on the authorization server. 1
OpenID Connect Scopes
When signing in with OpenID Connect, iSpring LMS requests the following scopes:
openid— identifies the request as an OpenID Connect request.email— provides access to the user's email address.profile— provides access to basic profile information, such as the user's name and username.
These scopes determine what user information iSpring LMS can receive from the authorization server.
Make sure that the
openid,email, andprofilescopes are available on the authorization server.Don't use a user attribute name, such as
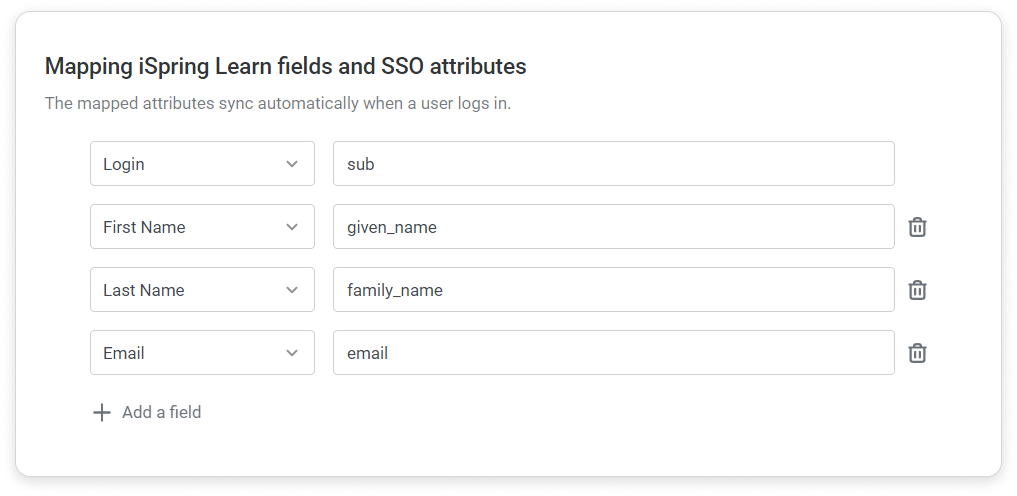
profession, as a scope. User attributes are configured separately when you match iSpring LMS fields with SSO attributes.If needed, match iSpring LMS fields with SSO attributes. Make sure that all required fields in User Profile Settings are mapped. Otherwise, users may not be created in iSpring LMS.
Click Enable.
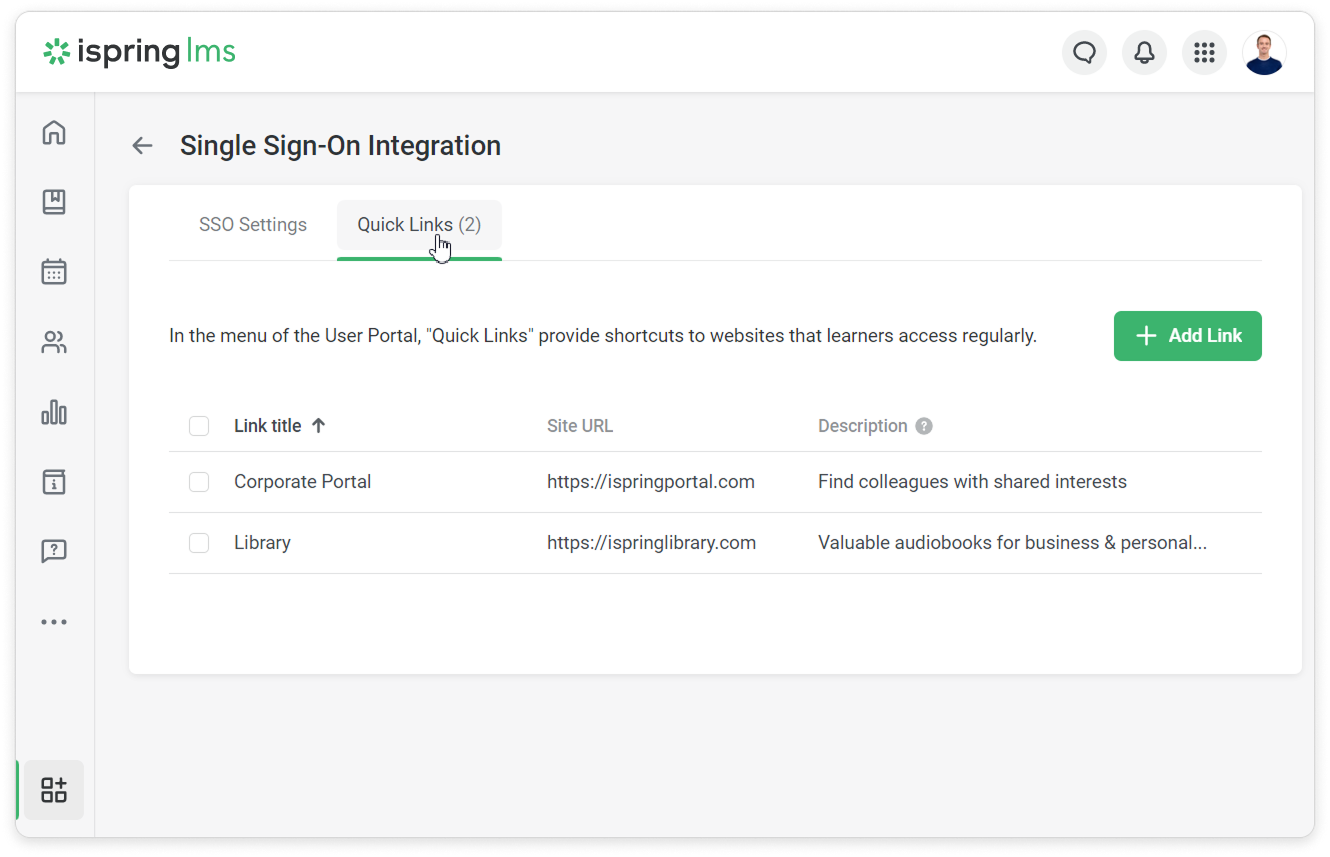
- Then, add link to the corporate site in the Quick Links section.
Adding Users to iSpring LMS
If a user doesn't exist in iSpring LMS, their account is automatically created when they first sign in with OpenID. A new user can't be added if the user limit for your subscription plan has been reached.
When creating users who sign in with OpenID, iSpring LMS uses the following attributes received from the authorization server:
Claim | Profile Field in iSpring LMS |
|---|---|
preferred_username | Login |
family_name | Last Name |
given_name | First Name |
Signing In Without OpenID
If OpenID is enabled in your iSpring LMS account but you can't sign in using single sign-on, go to:
https://yourcompany.ispringlearn.com/login?no_sso
You can then sign in to iSpring LMS using your login and password.