Protection Settings
You can protect the course against unauthorized use with a watermark that will appear on the slides, as well as using a password and time or domain restrictions.
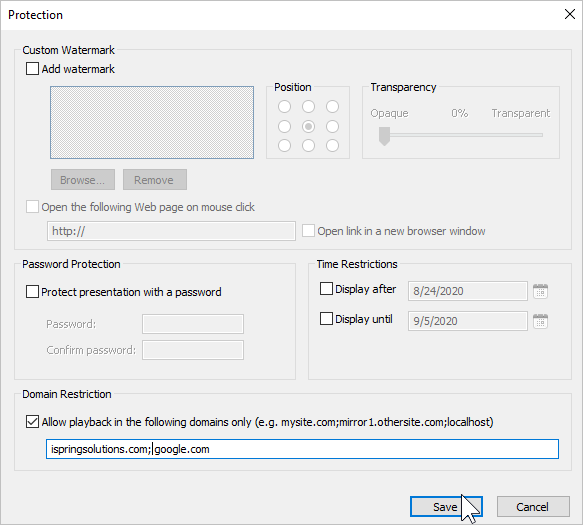
To configure your protection settings, select HTML5 format and click the link in the Protection field.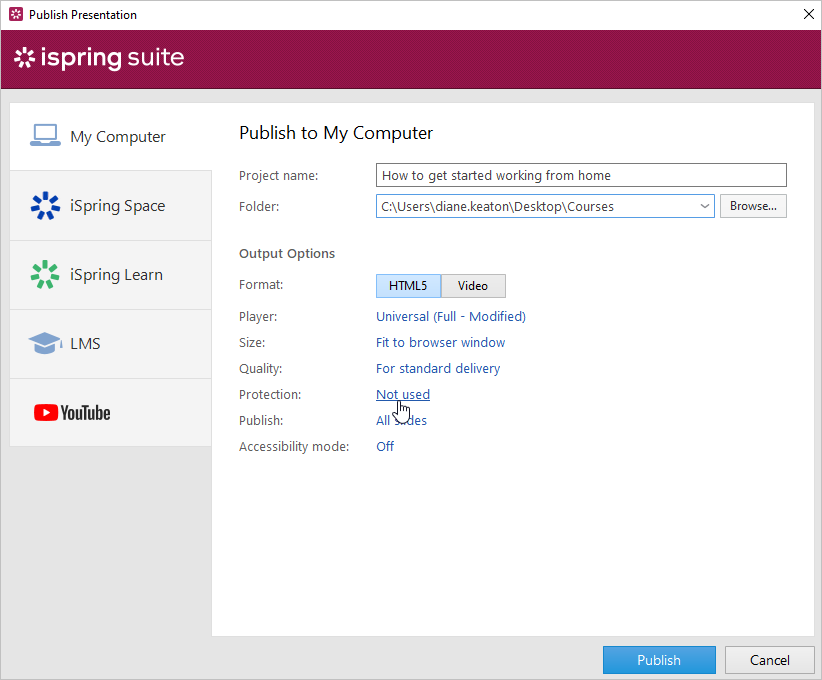
Watermark Protection
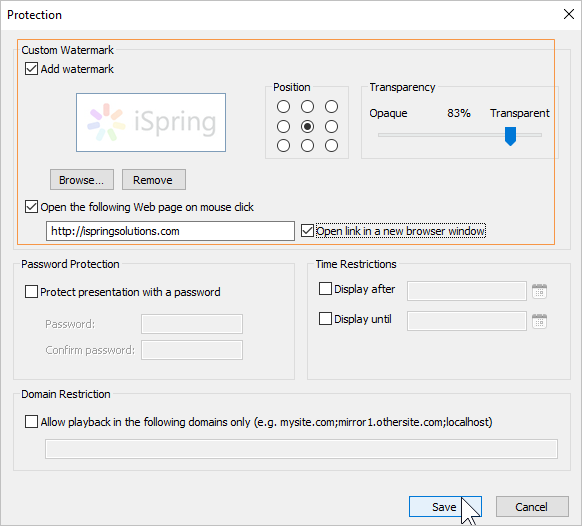
You can use an image from your computer as a watermark and adjust its transparency and position on the slide. You can also specify a link to a web page that will be opened by clicking on the watermark.
- Select Add watermark and locate an image on your computer.
- Choose the watermark's position on the slide.
- Set the transparency of the watermark from 0% (opaque) to 100% (transparent).
- Select Open the following Web page on mouse click and enter the address of the page that will be launched when the watermark is clicked.
- To open the web page in a new browser window, select Open link in a new browser window.
- Finally, click Save.
Password Protection
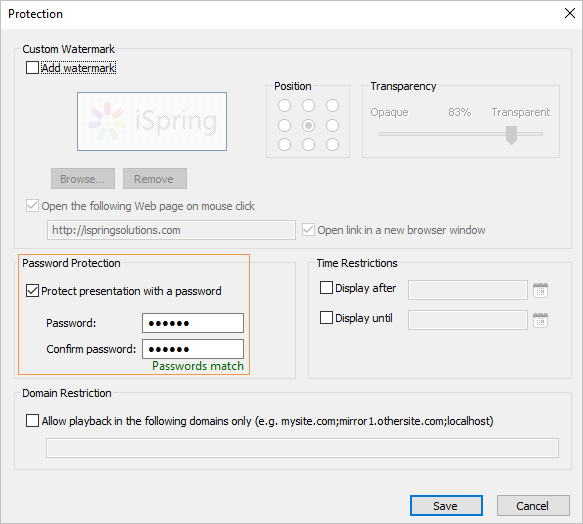
A password protects your course from unauthorized viewing. To view the course, the user will need to enter the password.
- Select the Protect presentation with a password option.
- Enter the password in the Password and Confirm password fields.
- Finally, click Save.
Note:
- The password is stored in the course in encrypted form. It cannot be restored if you forget your password.
Time Limits
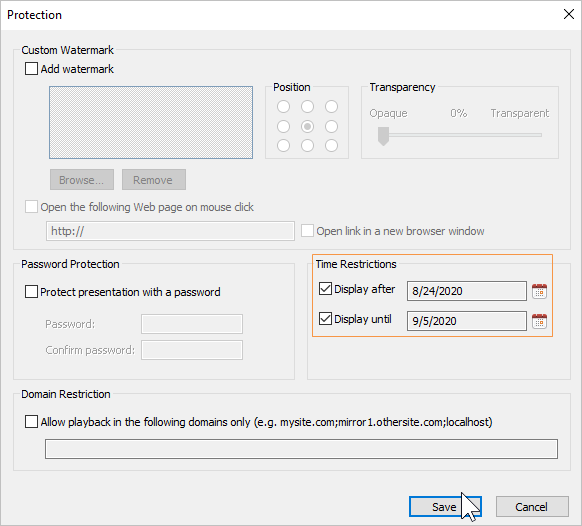
Users' ability to view the course can be limited by date. In this case, slides are only available in the specified time interval (before the date, after the date, or between the dates).
To add a time limit:
- Select Display after and/or Display until.
- Select the date in the calendar that appears.
You can specify values in both fields at once to limit the time period in which the presentation will be available for viewing. - Finally, click Save.
Domain Restriction
Allow users to view the course only from certain domains and their subdomains. This option will work to protect content from unauthorized distribution.
- Enable the Allow playback in the following domains only option.
- Add the domains from which the course can be viewed. Use a semicolon as the delimiter.
- Finally, click Save.
Note:
- This option does not limit playback if you insert a course on a web page using the HTML <object> tag.