Once you have finished editing your video project, you can upload it to iSpring LMS, a platform for delivering distance learning to employees and students with online testing and webinars.
To publish your video to iSpring LMS, follow the instructions below:
- Click Publish on the iSpring Cam Pro toolbar.

- Choose the iSpring LMS tab.

- Create a new free iSpring LMS account right in the publishing window. Enter your email, name and phone number and click Create Account. Your login details to access iSpring LMS will arrive in your e-mail inbox.

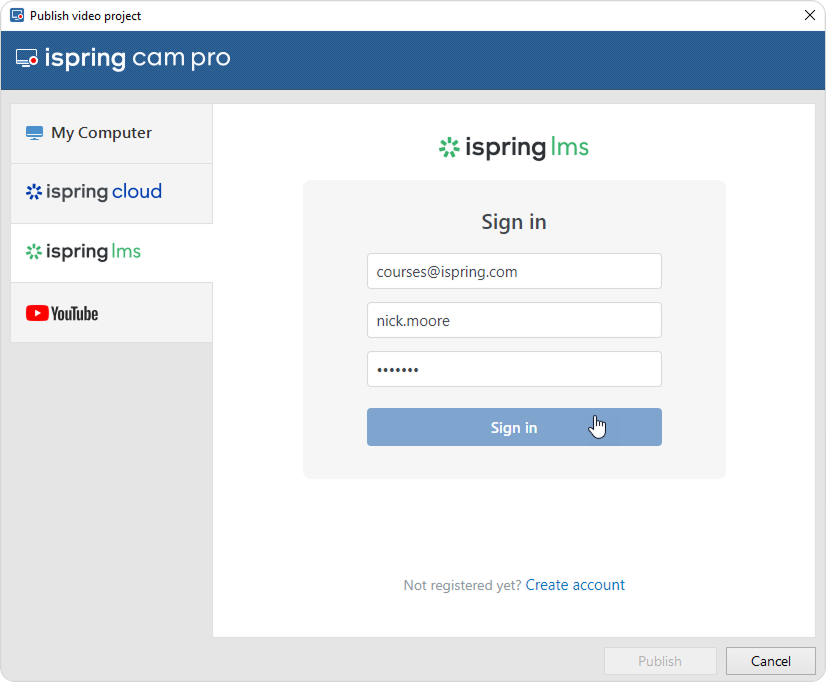
- If you are already registered, click the Sign in link at the bottom of the window and enter your email and password for your iSpring LMS account. Then click Sign In. The specified data will be saved in iSpring Cam Pro, and you do not have to enter it every time.
- Enter the title of the video in the Project name field.
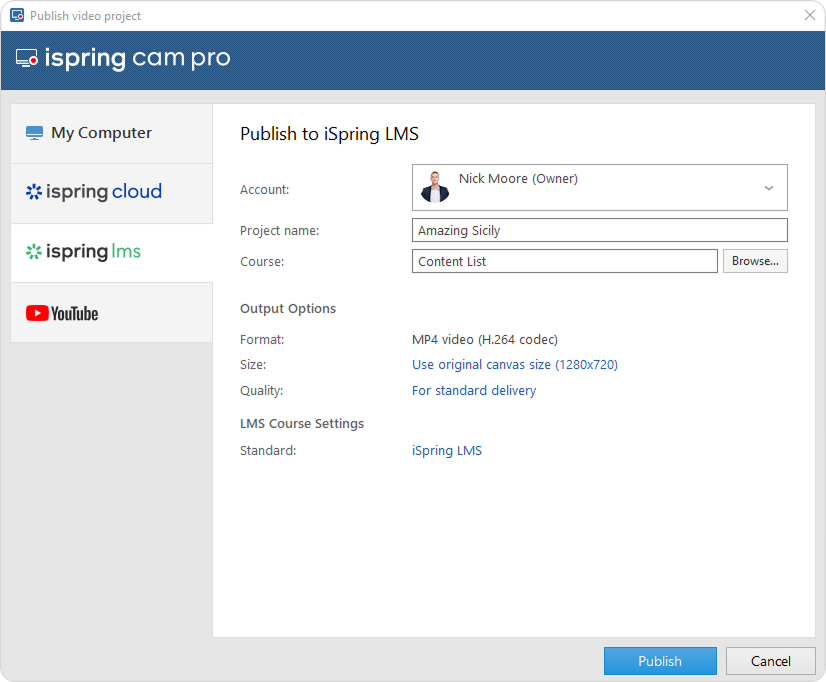
- Click Browse... to the right of the Folder field, choose the folder to upload your content, and click Select. By default, your video will be uploaded to the Content List folder.
- Then, set up output options:
Click the iSpring LMS link next to Standard. This opens the Properties window.
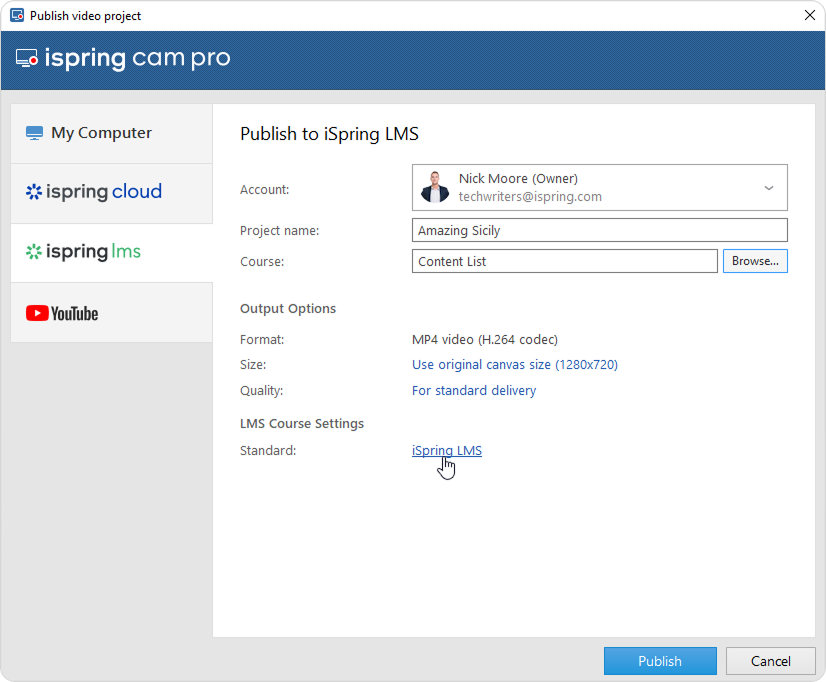
Here you can enter the course name and description, tags, and the author's name.

Click the Publish button
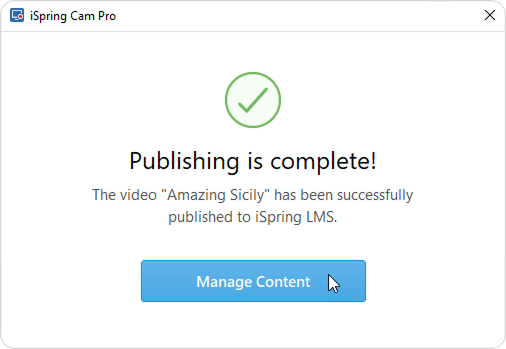
When the publishing process is successfully completed, a new window will be opened. To open the published video in the iSpring LMS interface, click Manage Content.
You will see the video uploaded to your iSpring LMS account. From there, you can fully manage the video settings and assign it to users.