Publishing to My Computer allows you to save a course on a local drive.
Once published, you can post the converted course on your website, blog, or on the internal network of your organization.
- When you have finished editing the course, make sure you are in the iSpring Presenter tab. Then, click Publish on the toolbar.

- Next, select My Computer. Here you can name your project. By default, the project name is the same as the course name, but you can change it if you want.
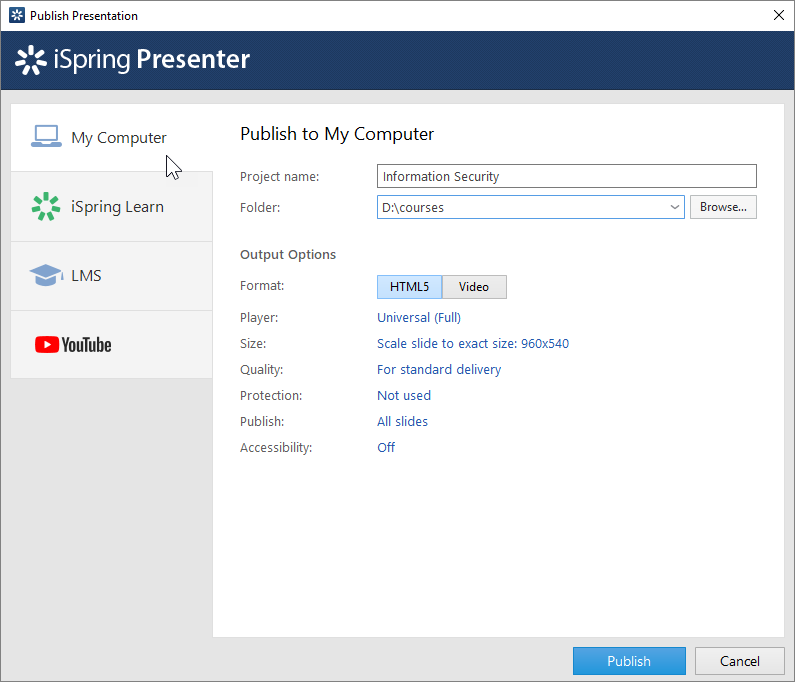
- In the Folder field, specify the local or network folder in which the course will be saved. To do this, click the Browse... button, select the desired folder, and click Select Folder.
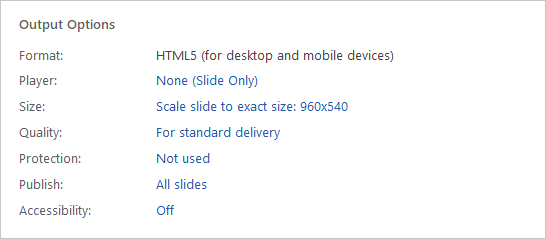
- Then, set up the output options:
- After you've configured all the settings, click Publish.
- In the window that will open after the publishing process is completed, the following options are available:
- View the course in a browser
- Open the course in a folder on your computer
- Upload the material to an FTP server
- Send the item as an email attachment
- Compress the course into a ZIP folder
