Let's outline how to set up authorization with JWT in your iSpring Market account.
Setting Up iSpring Market
- Log in to your iSpring Market account, open the Settings section, and select the Additional Options tab.

- Scroll down to the Integrations section and, next to SSO JSON Web Token (JWT), click Enable.

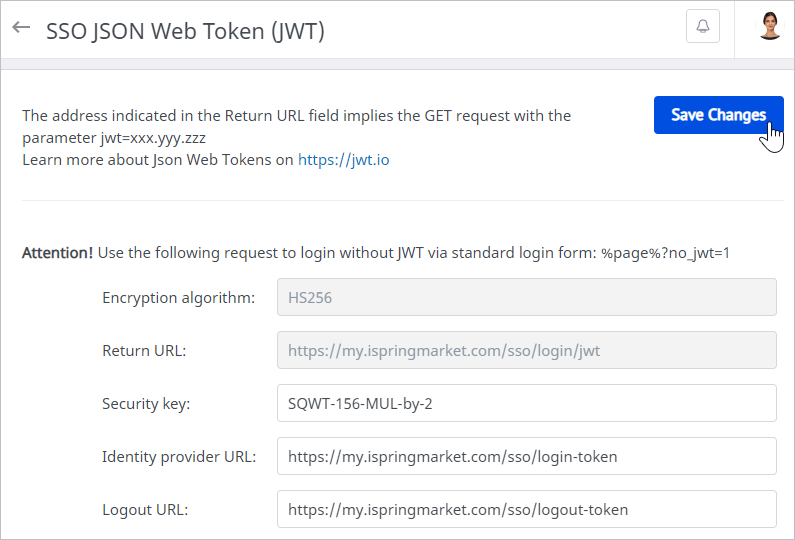
Fill out the form fields. For the URLs, we recommend using HTTPS instead of HTTP for greater security. Finally, click Save Changes.
Encryption algorithm | The algorithm used for signing/encrypting. |
Return URL | The web address of a page where users who haven't gone through the identity authentication are directed. |
Security key | The cryptographic key and the secret part of the JWT token. |
Identity provider URL | The web address of a page where the script generating JWT tokens is kept. |
Logout URL | The web address of a page where the script generating JWT tokens for users' logout is kept |
Adding and Authorizing Users in iSpring Market
If users aren't included in the iSpring Market database yet, when authorizing with JWT, they are automatically added and authorized in the system. The only obstacle for an automatic adding a new user can be your subscription limit.
One more example of automatic authorization is the case when users sign in with iSpring Market without prior authorization on your corporate website. If the JWT technology is enabled in your iSpring Market account, users will be automatically redirected to a corresponding page of the identity provider website https://www.yourwebsite.com/login-token/. After the login and password are entered on the identity provider side, users get authorized in iSpring Market.
Authorization without JWT
If you have enabled JWT in your iSpring Market account and for some reason can't log in using single sign-on, type the following web address: https://yourcompany.ispringmarket.com/login?no_sso.
Now you will sign in with the account, as usual, using your login and password.