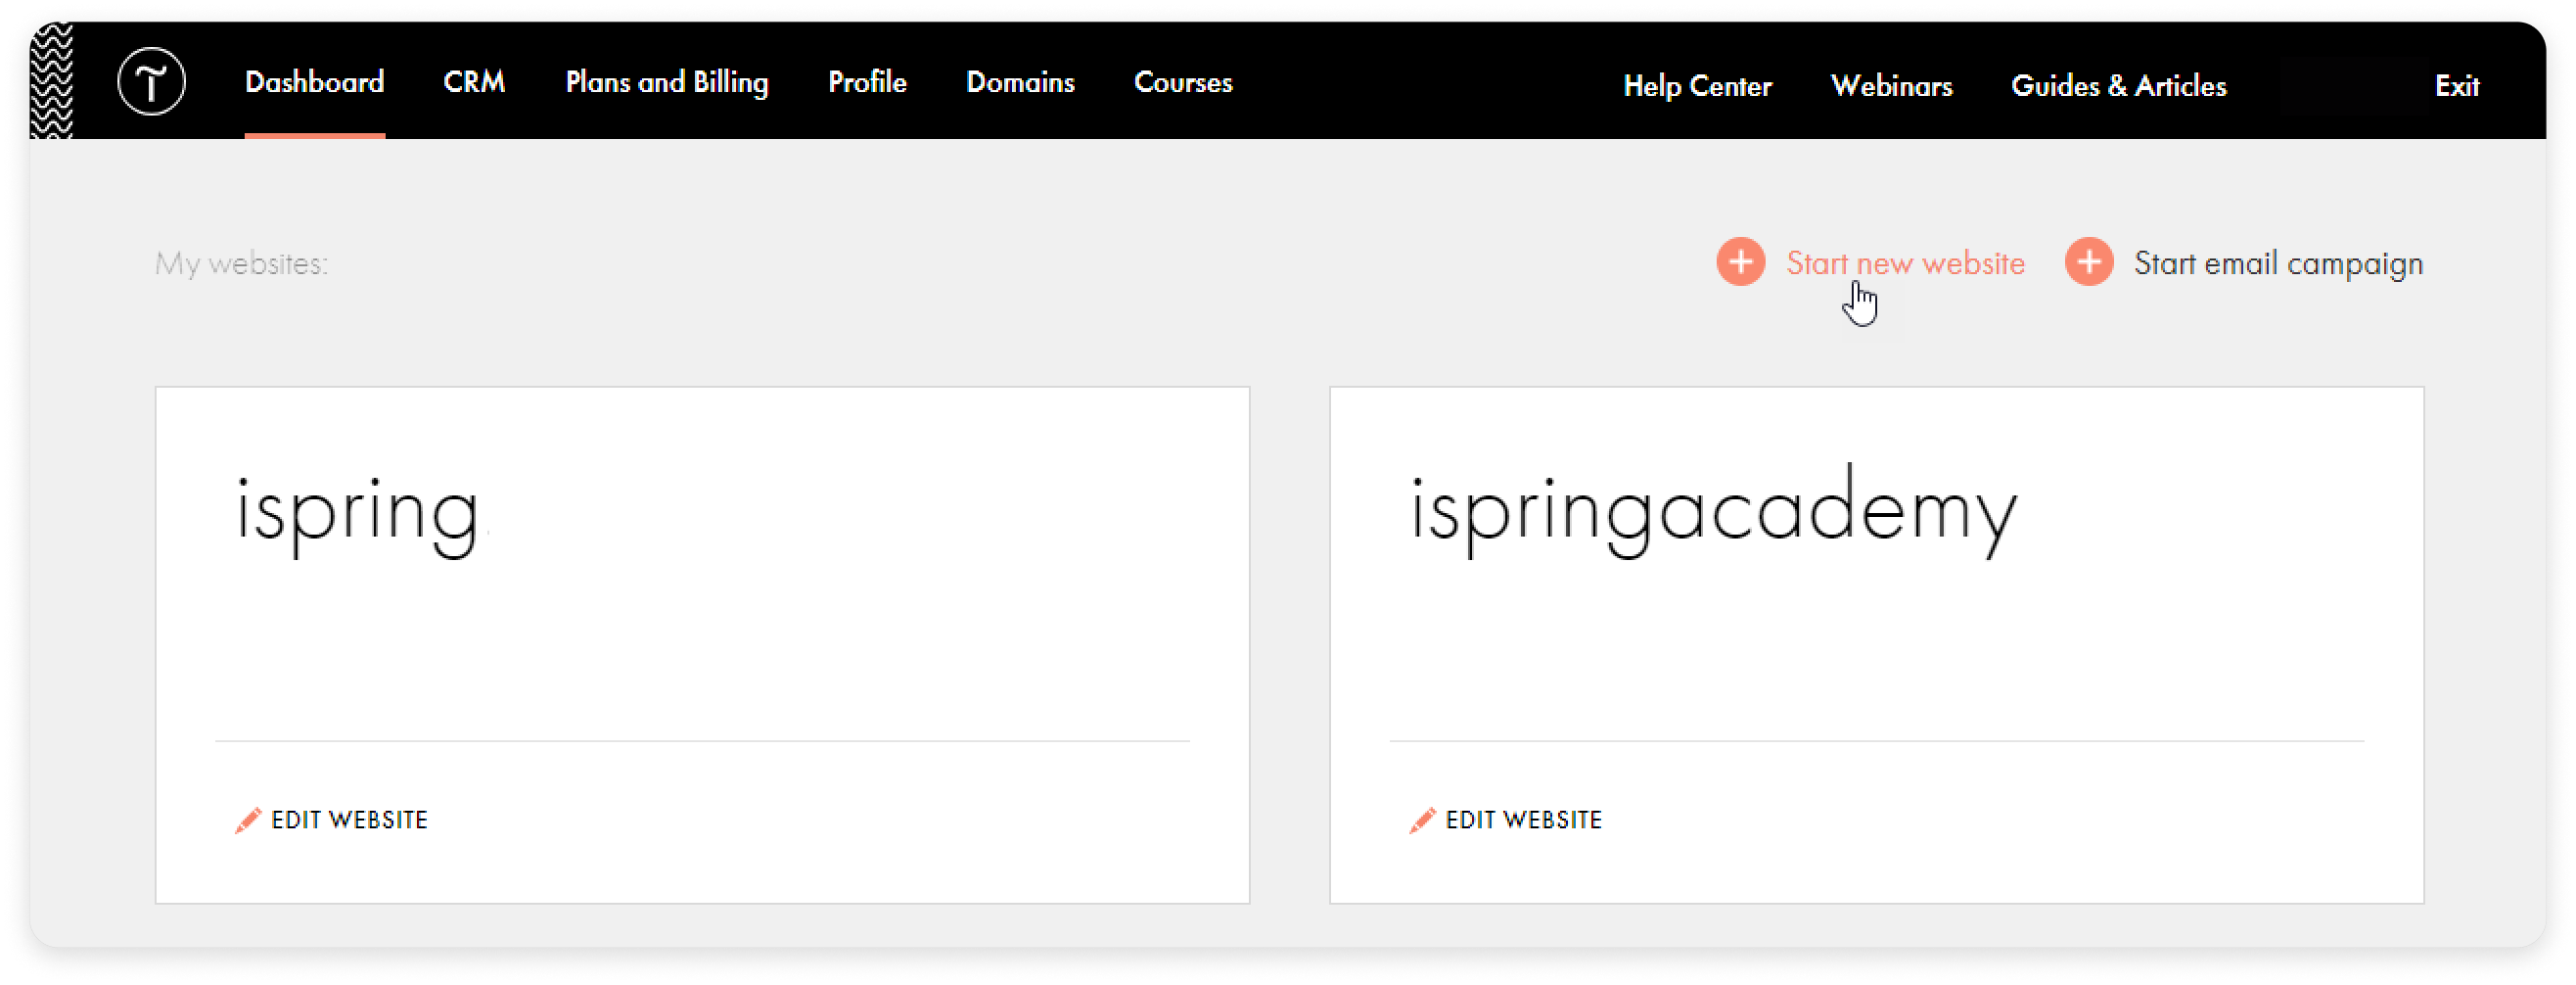
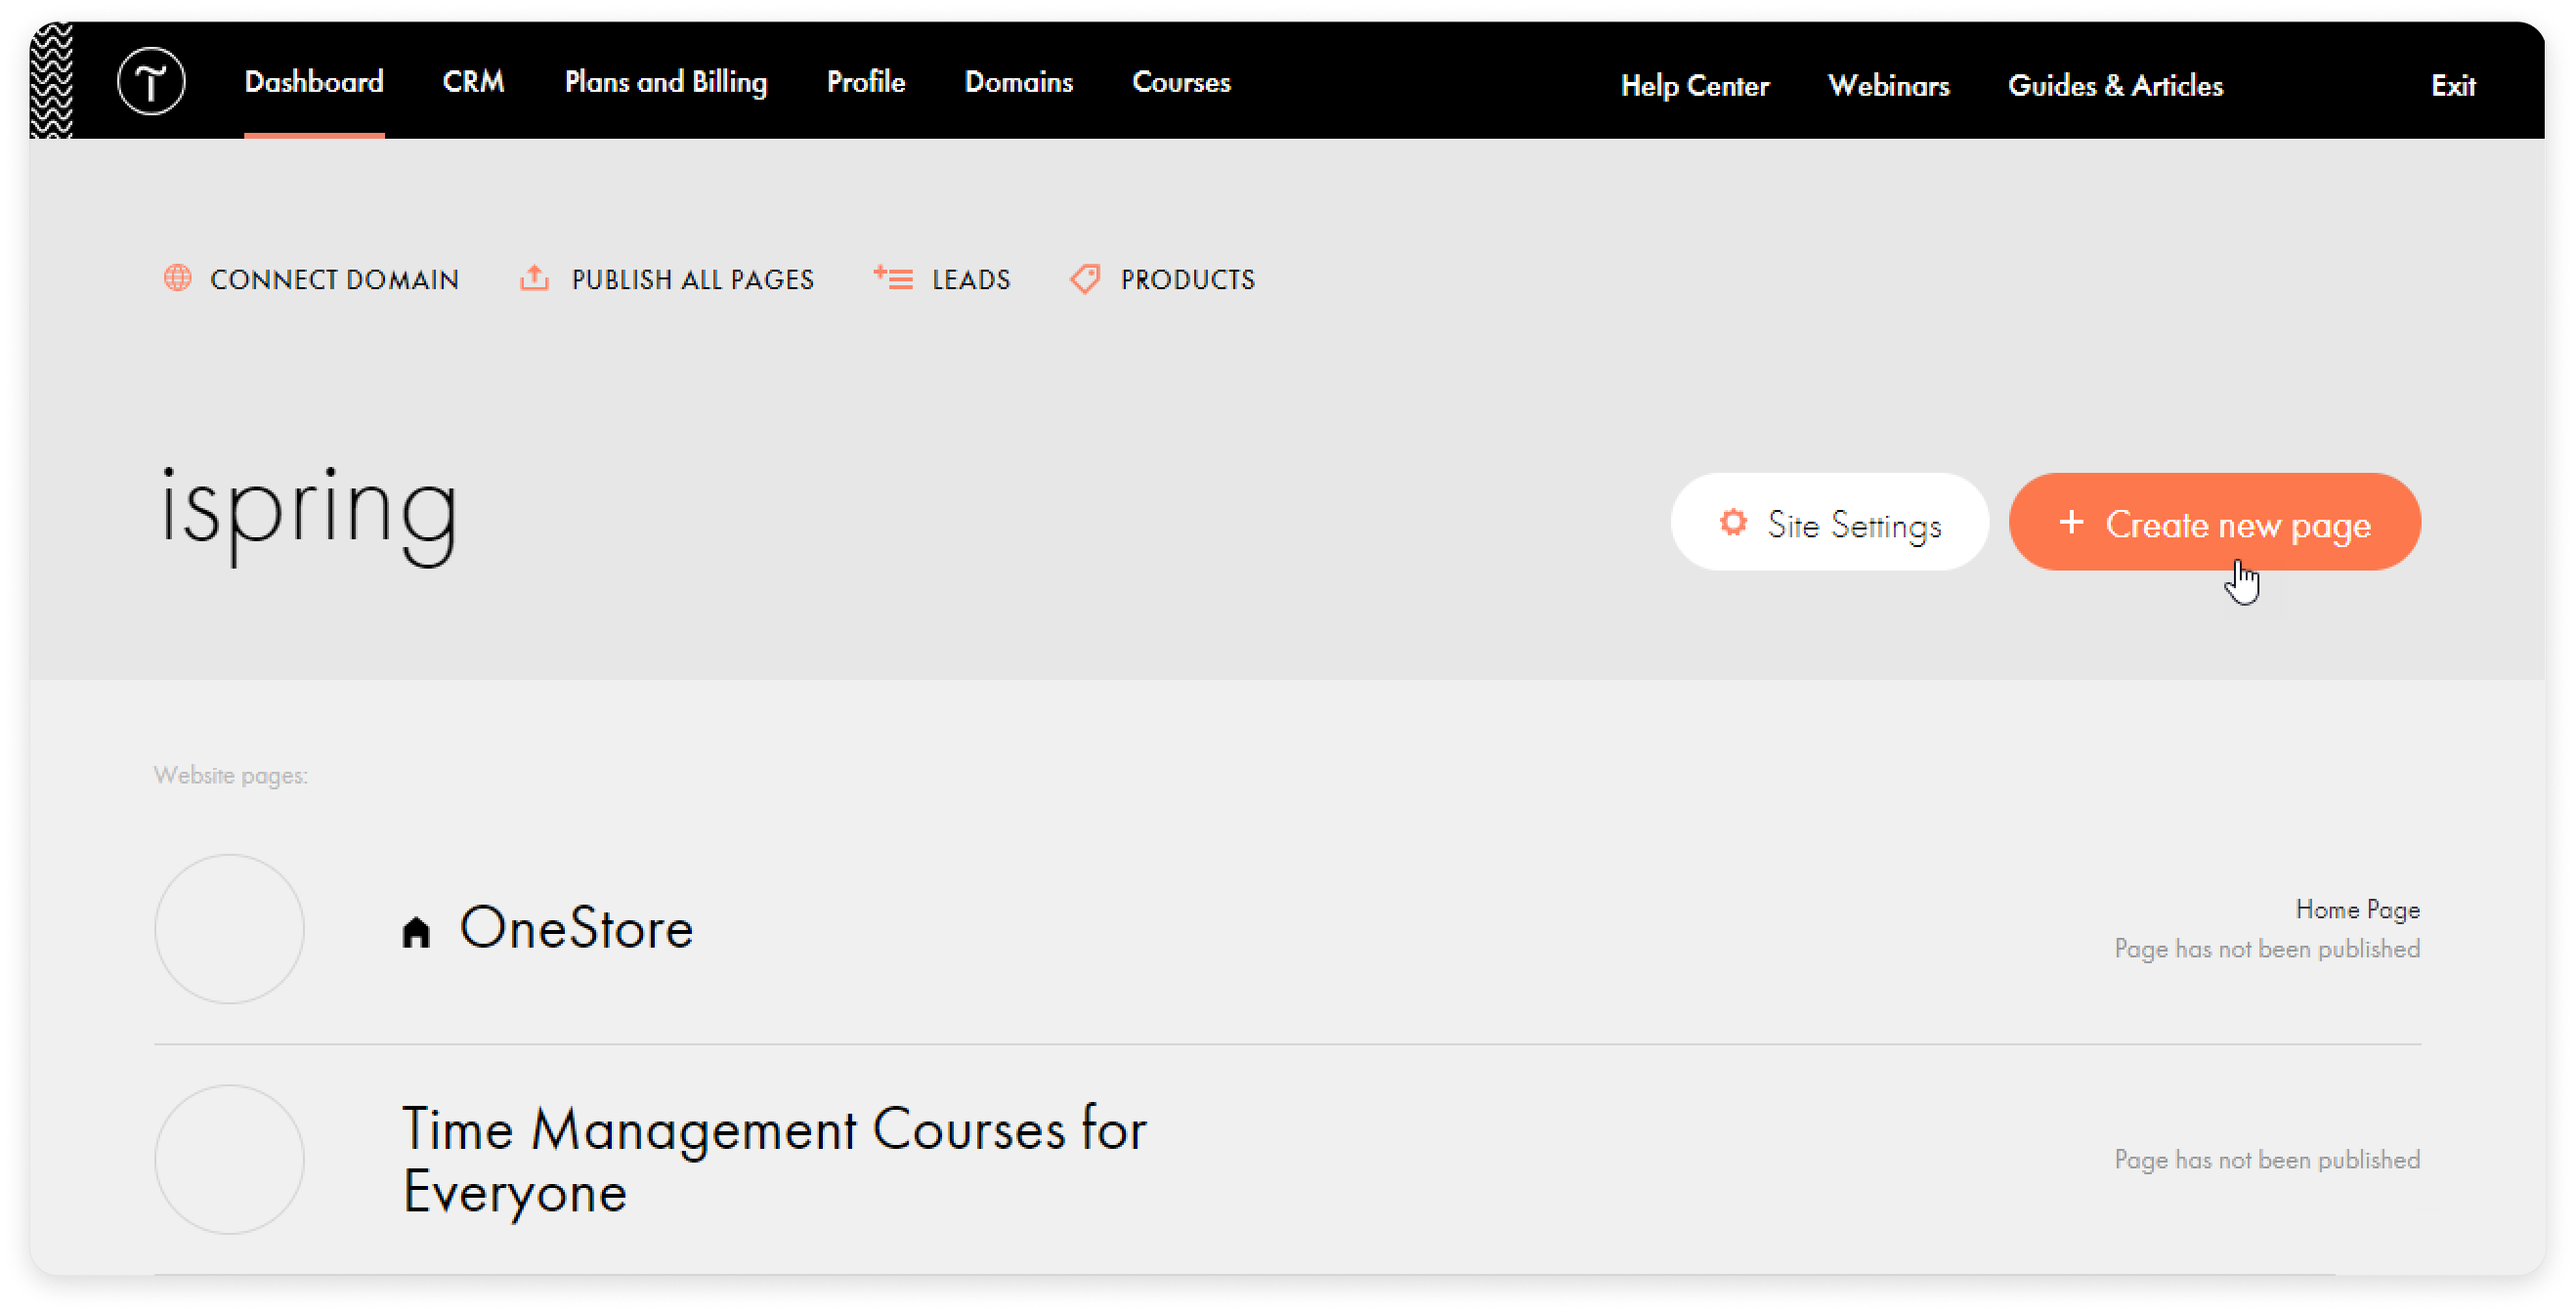
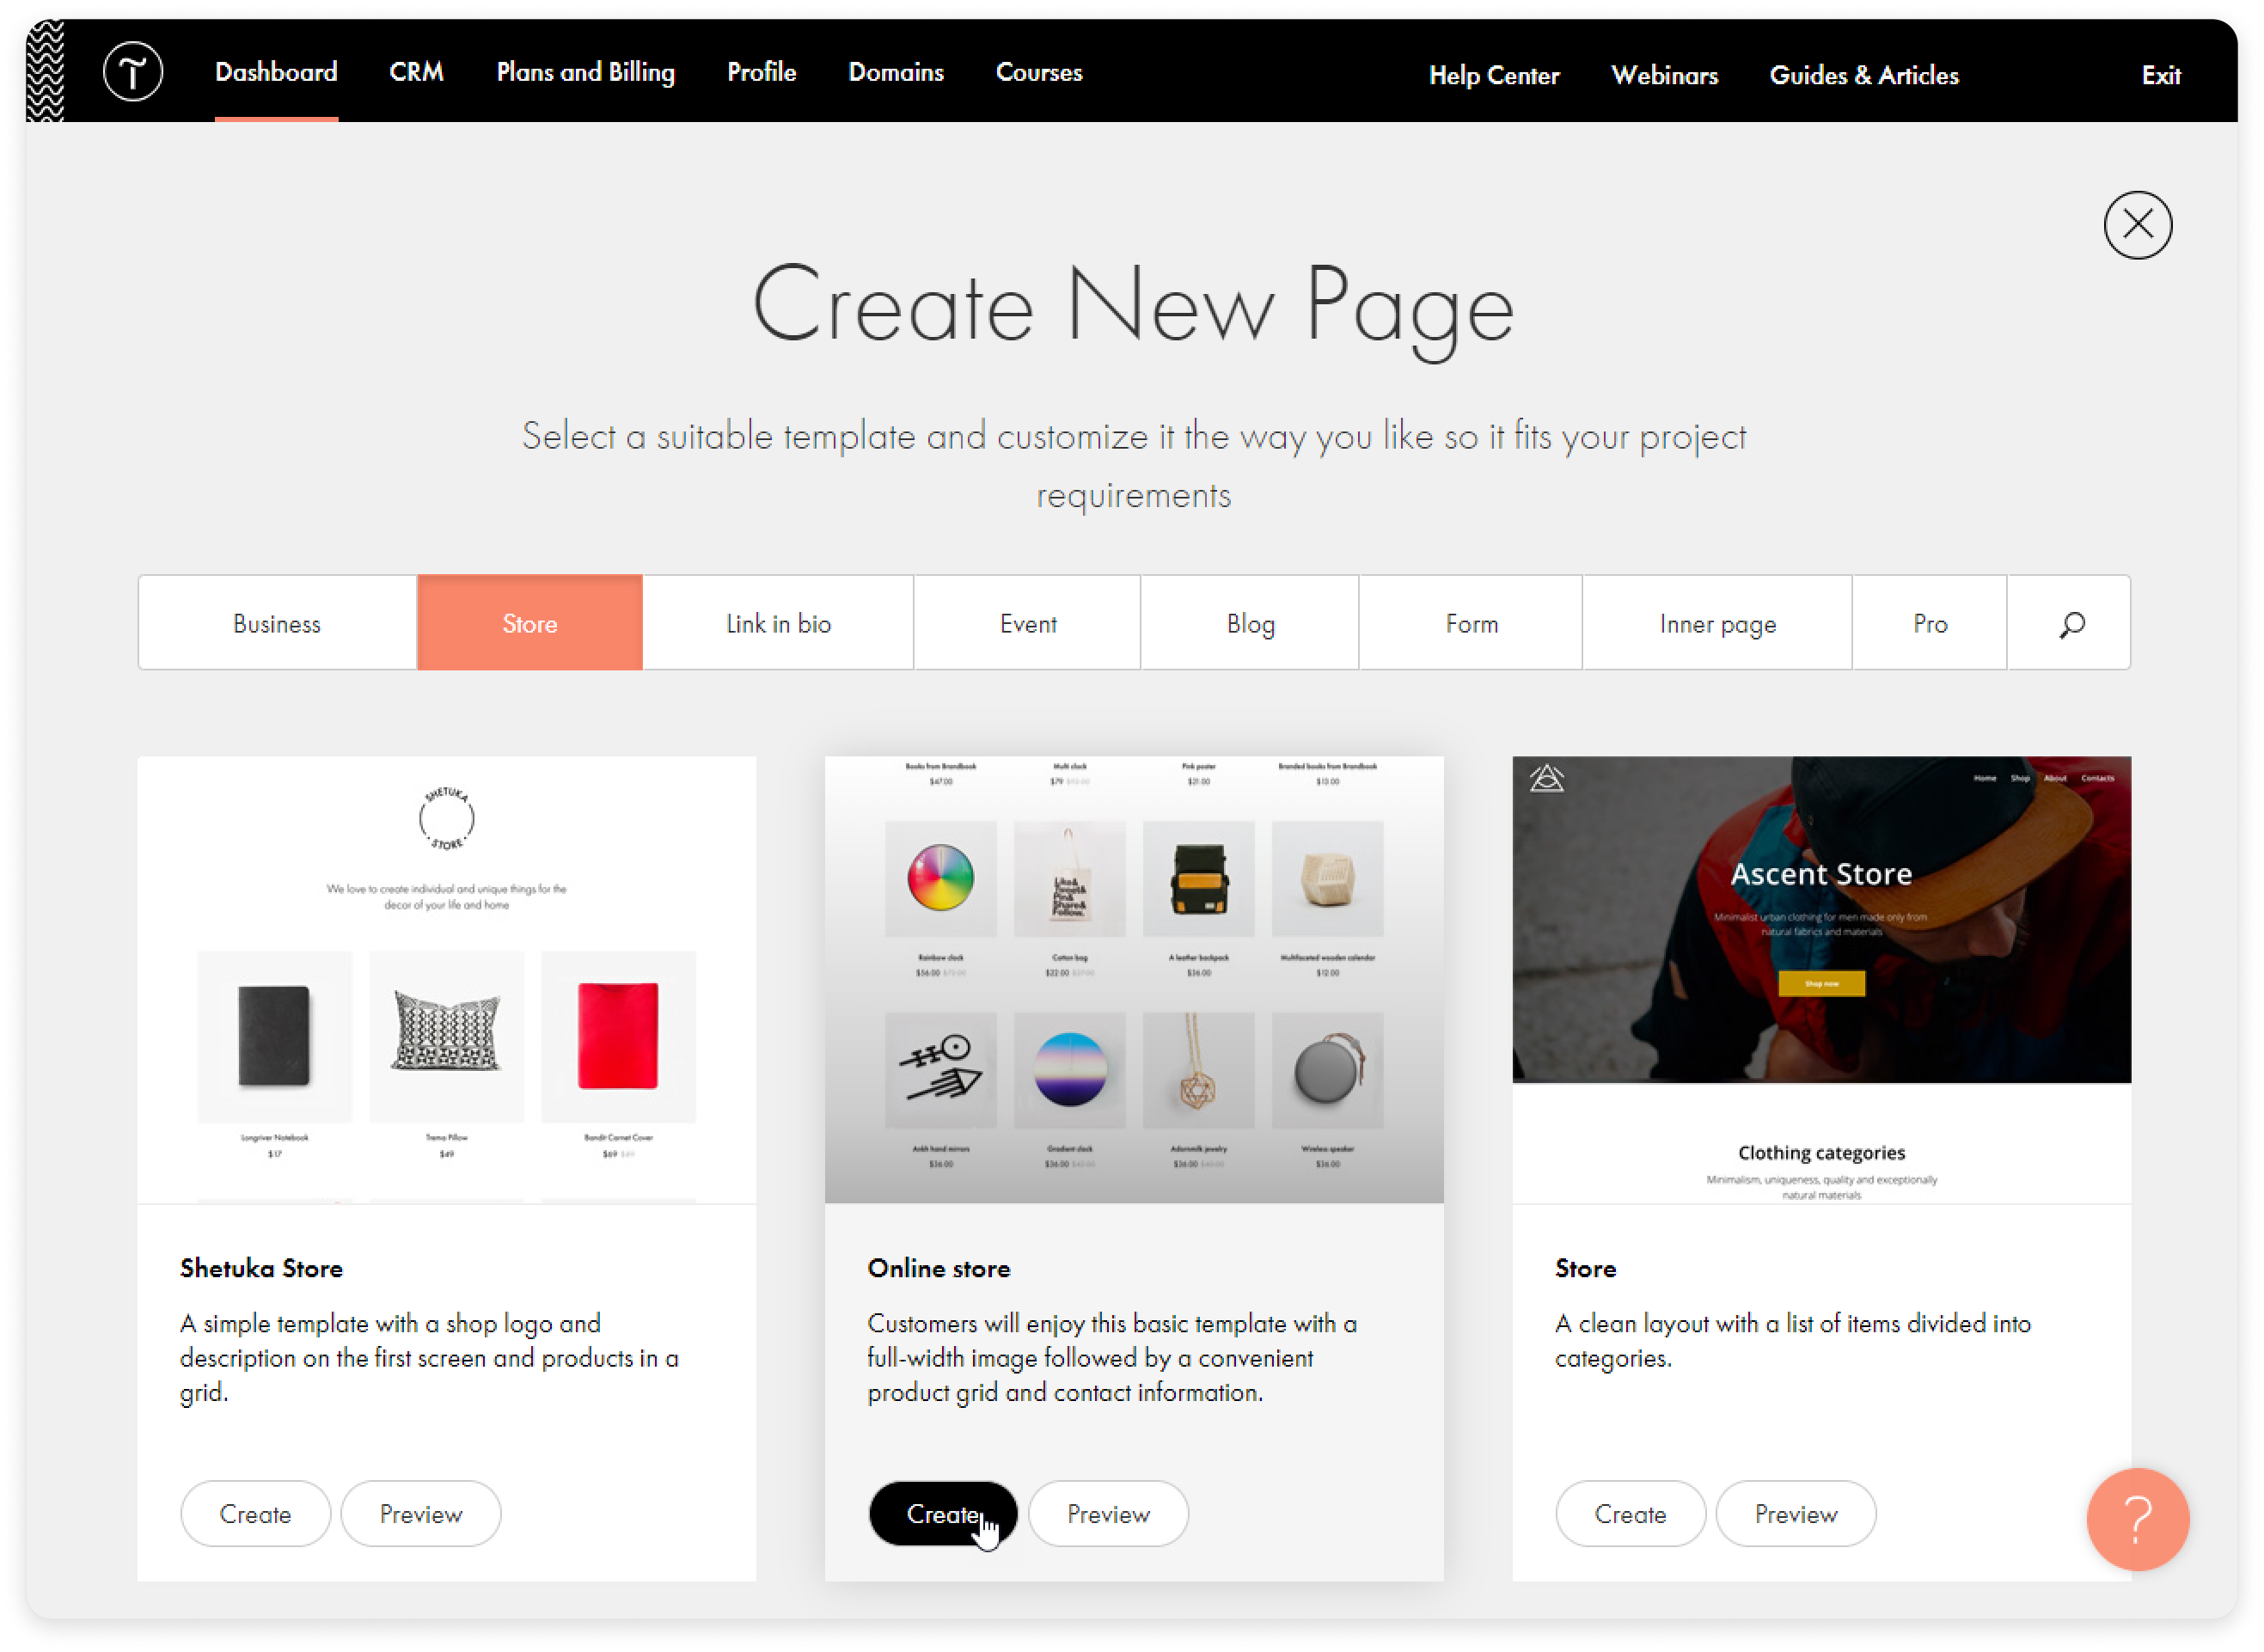
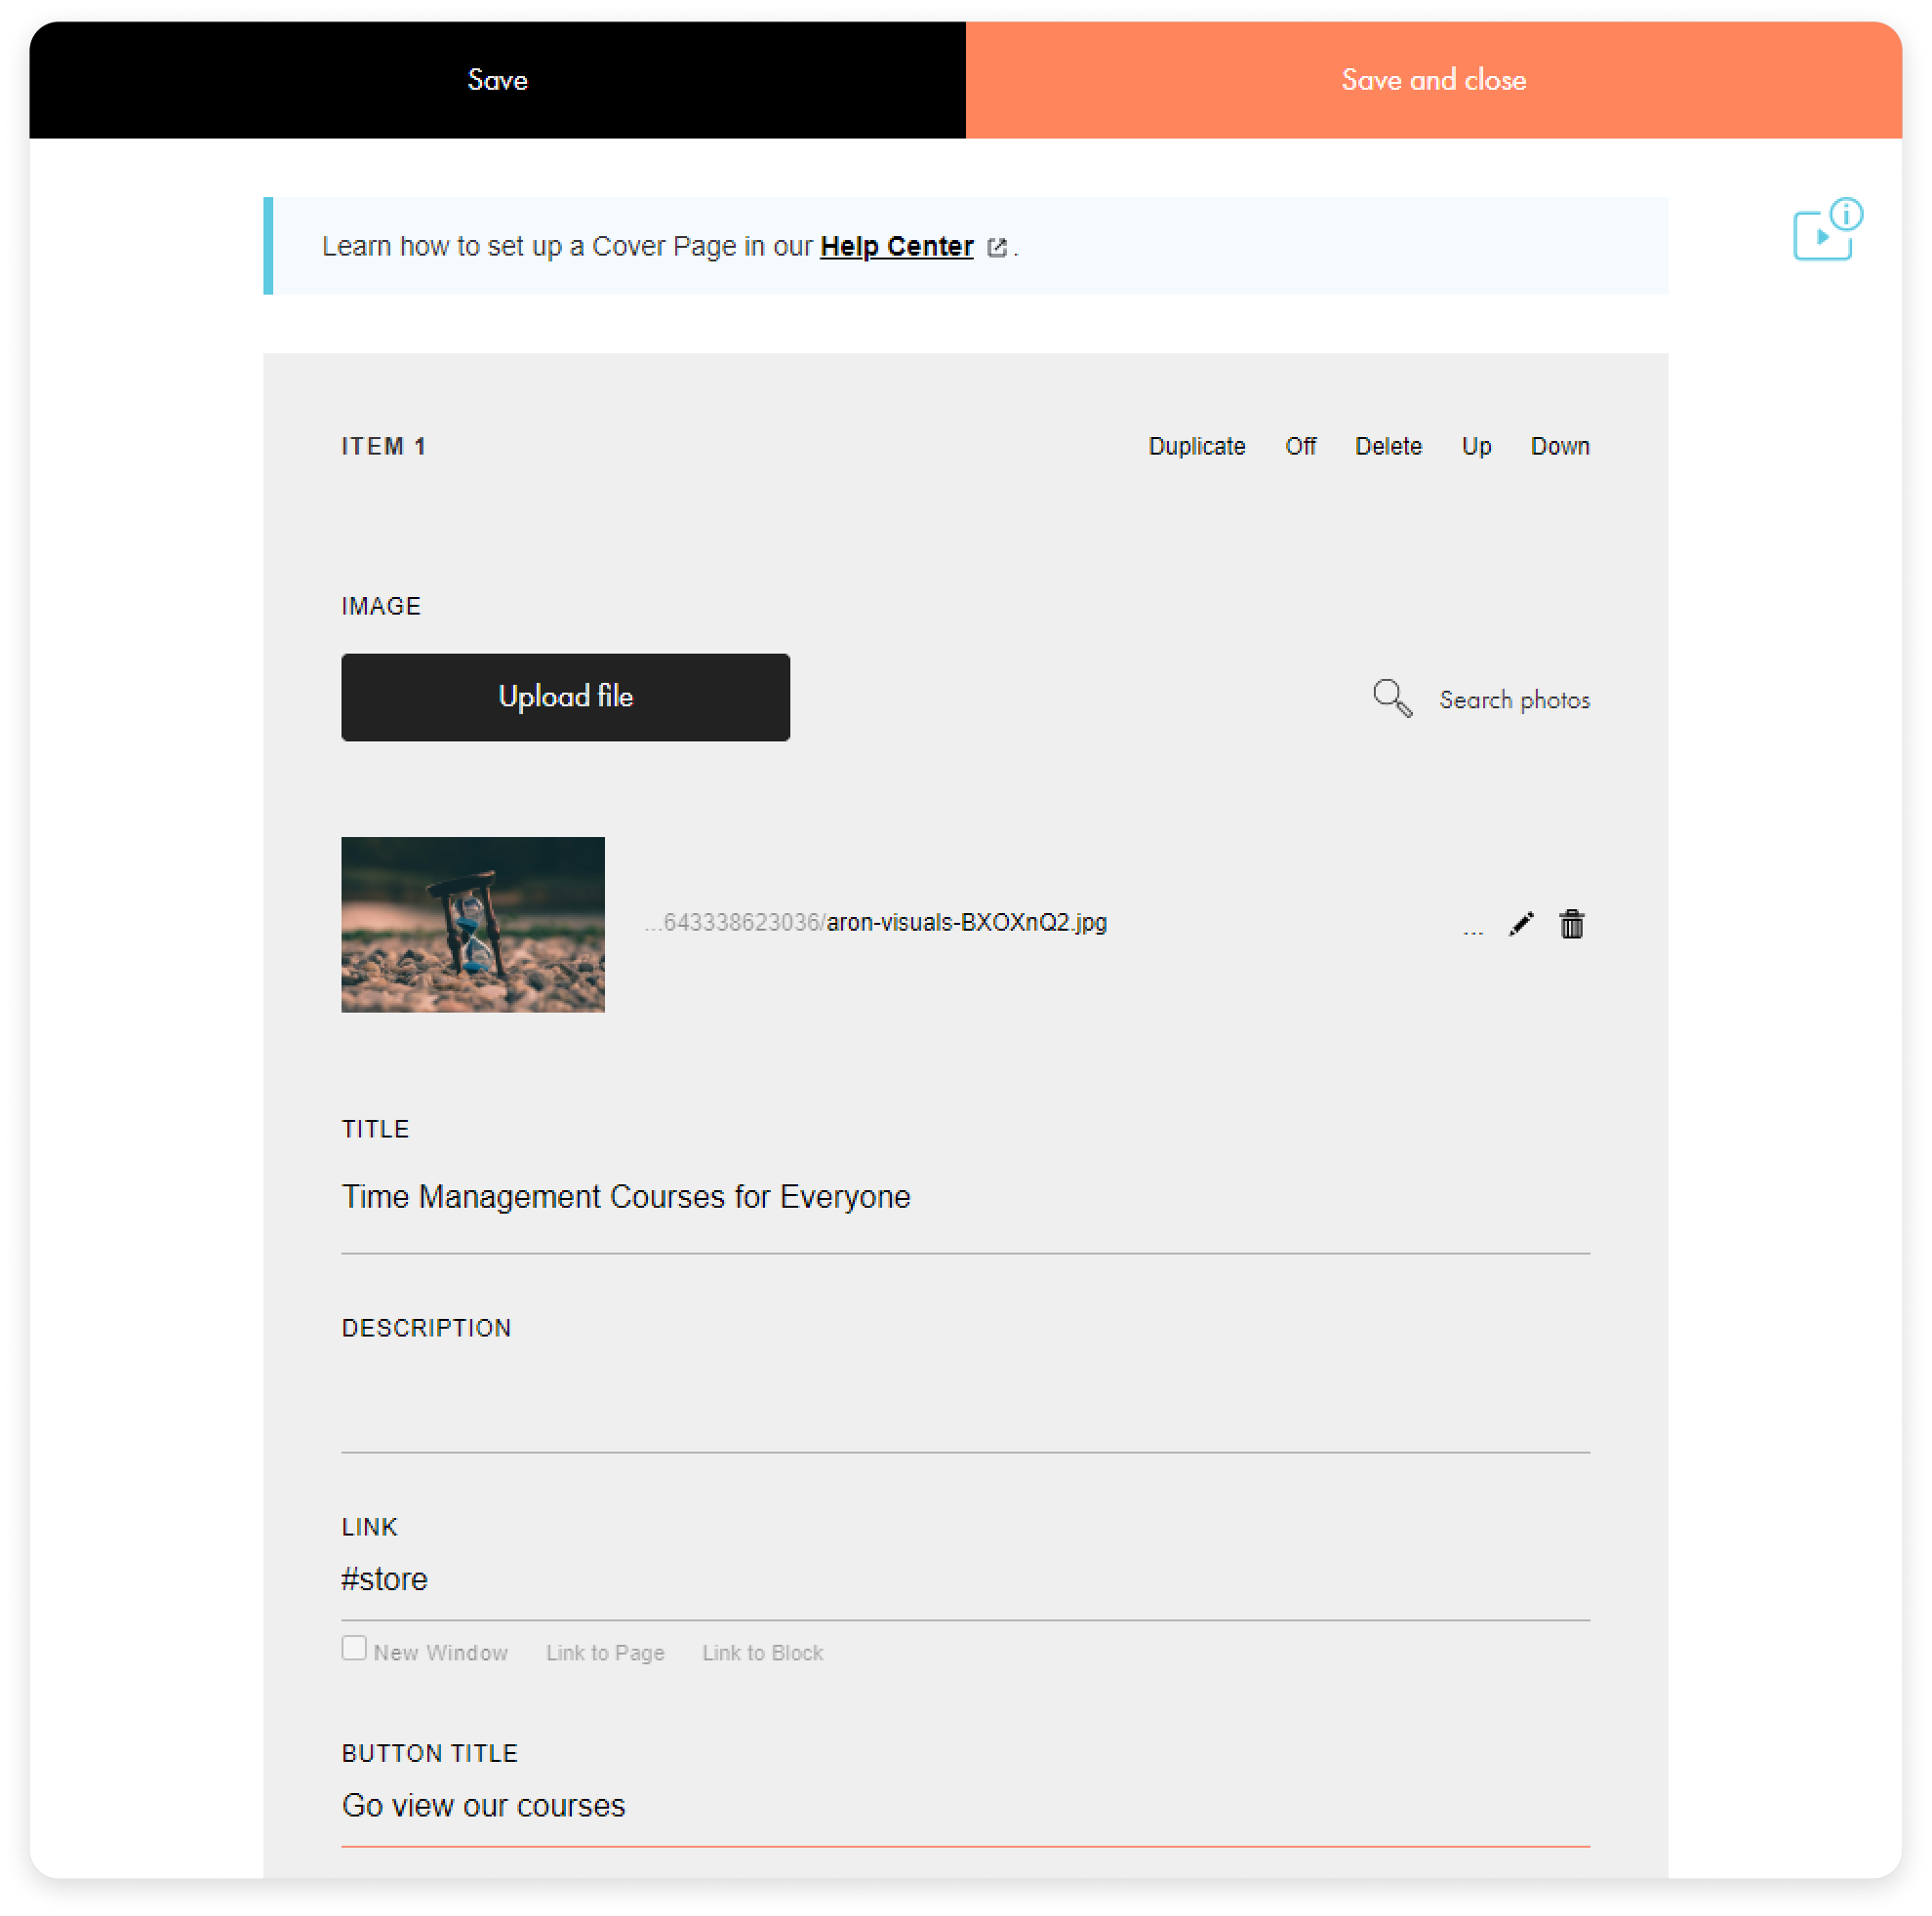
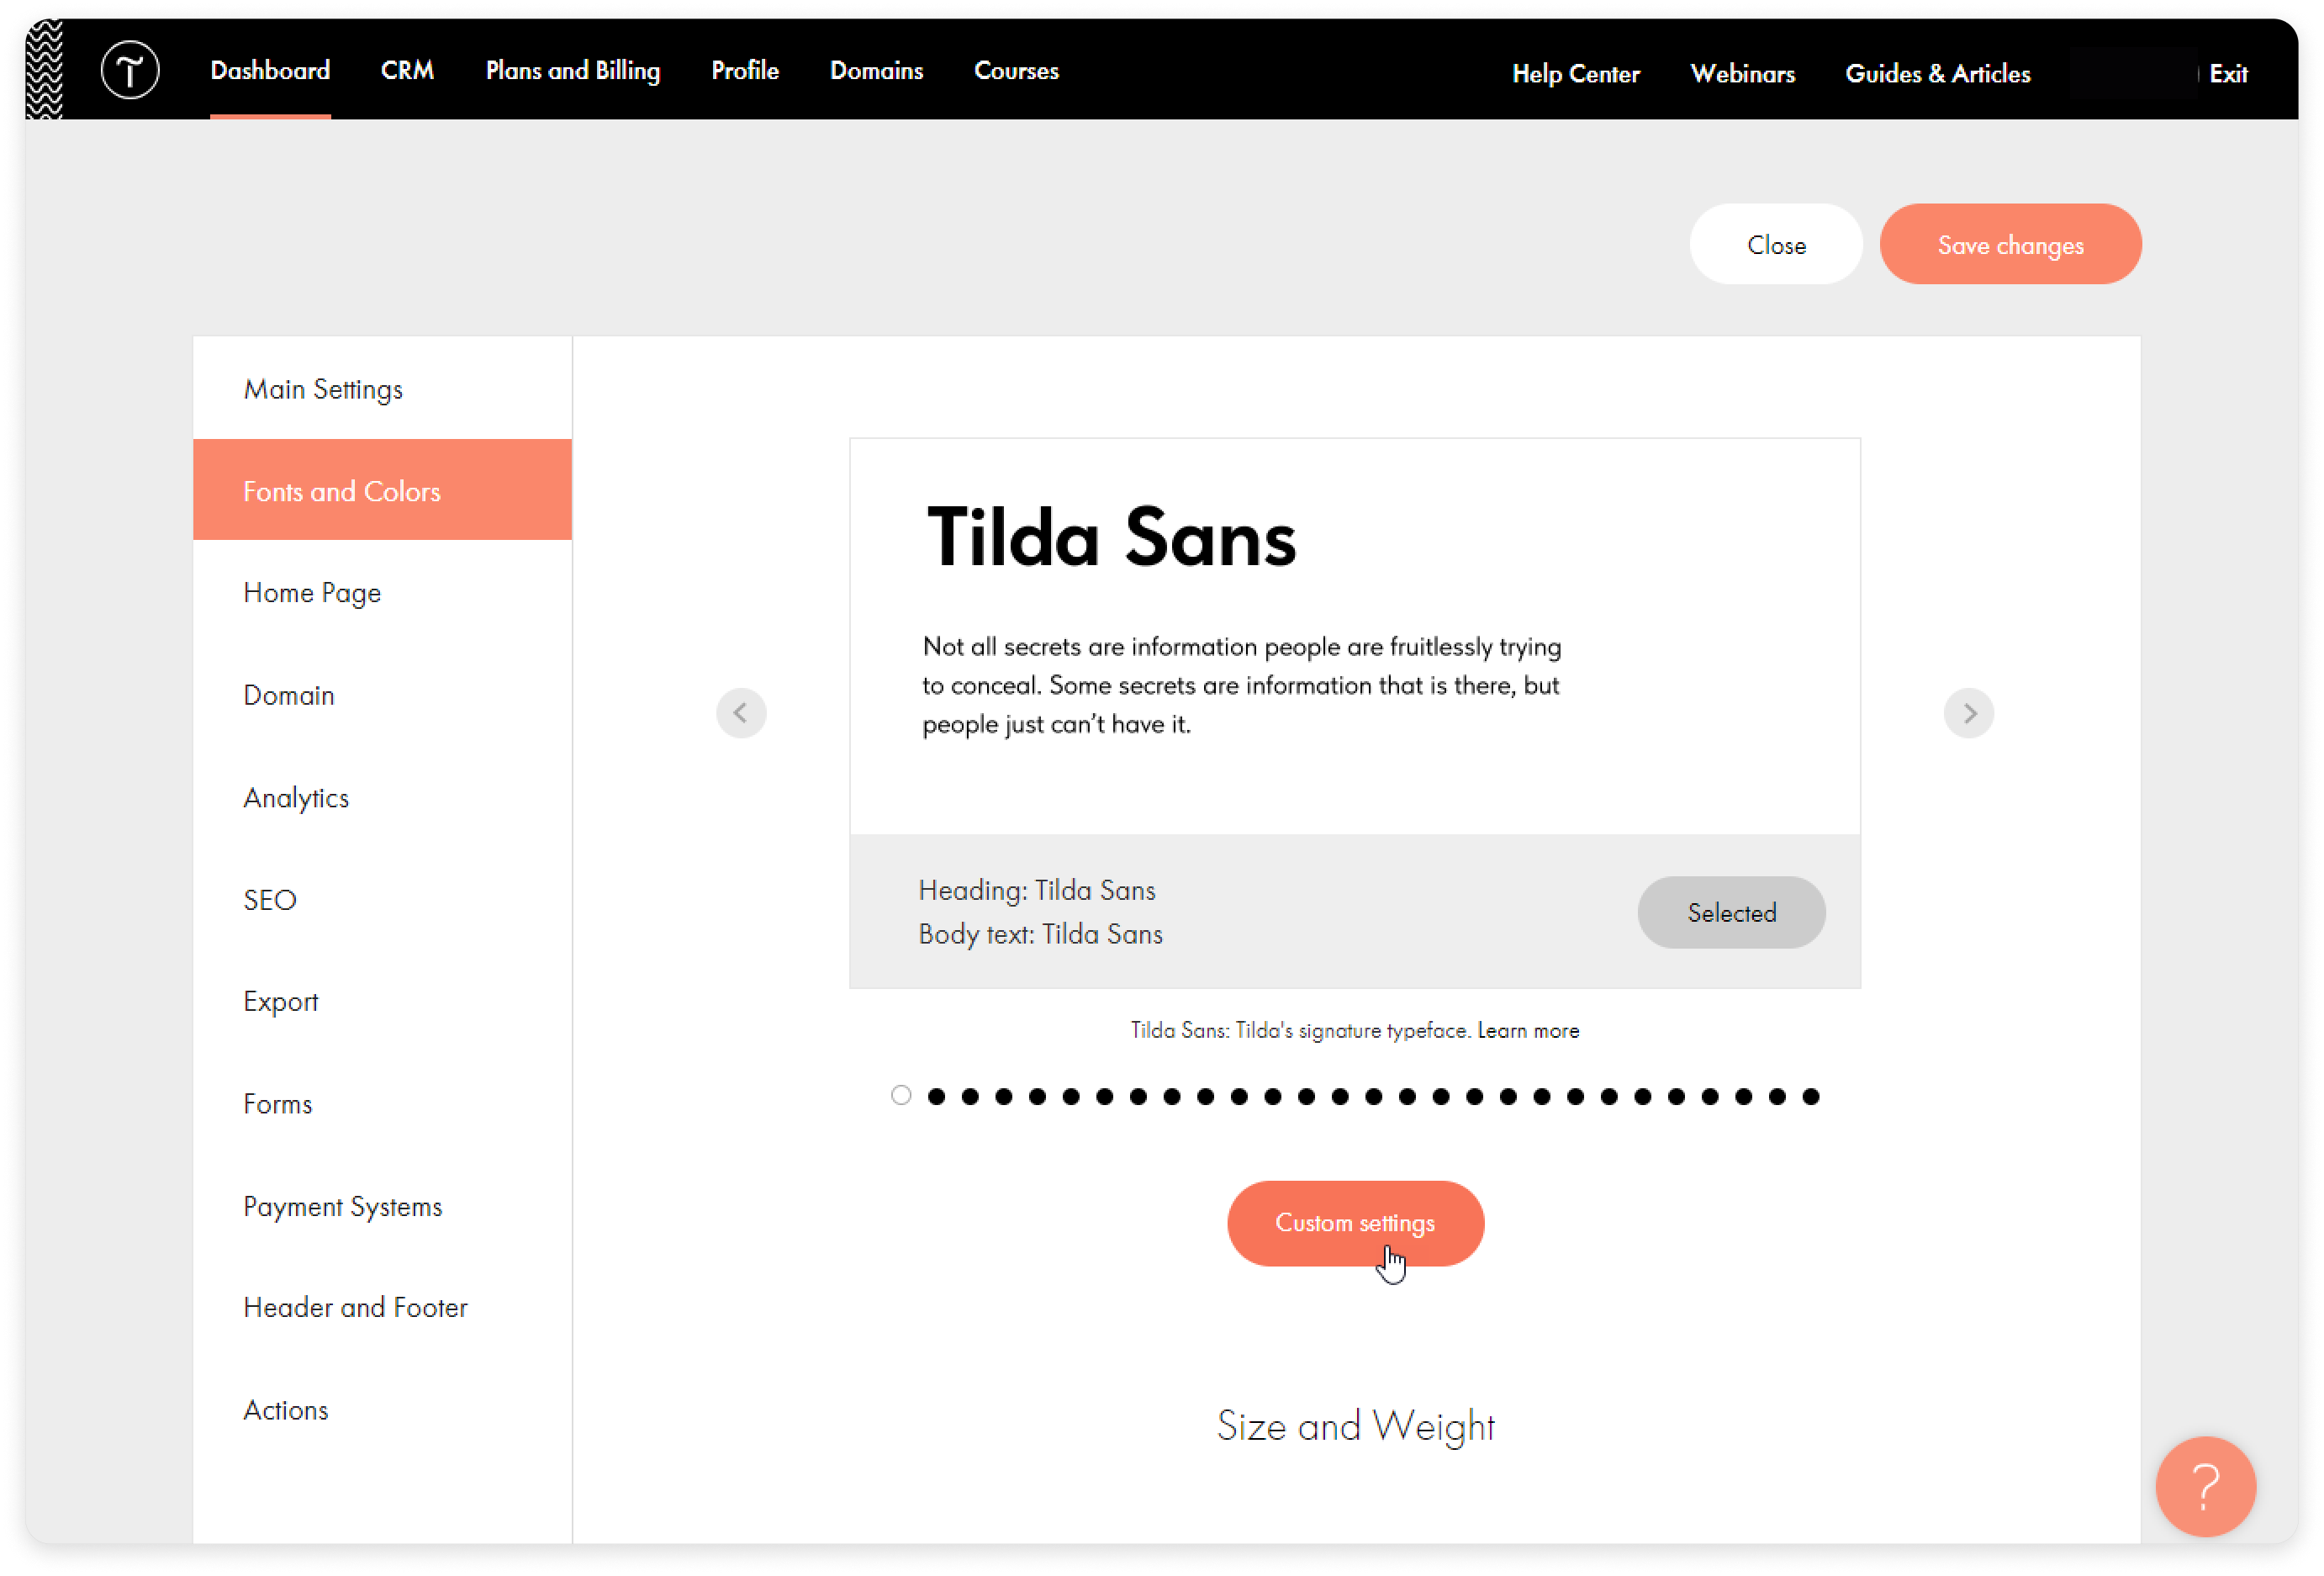
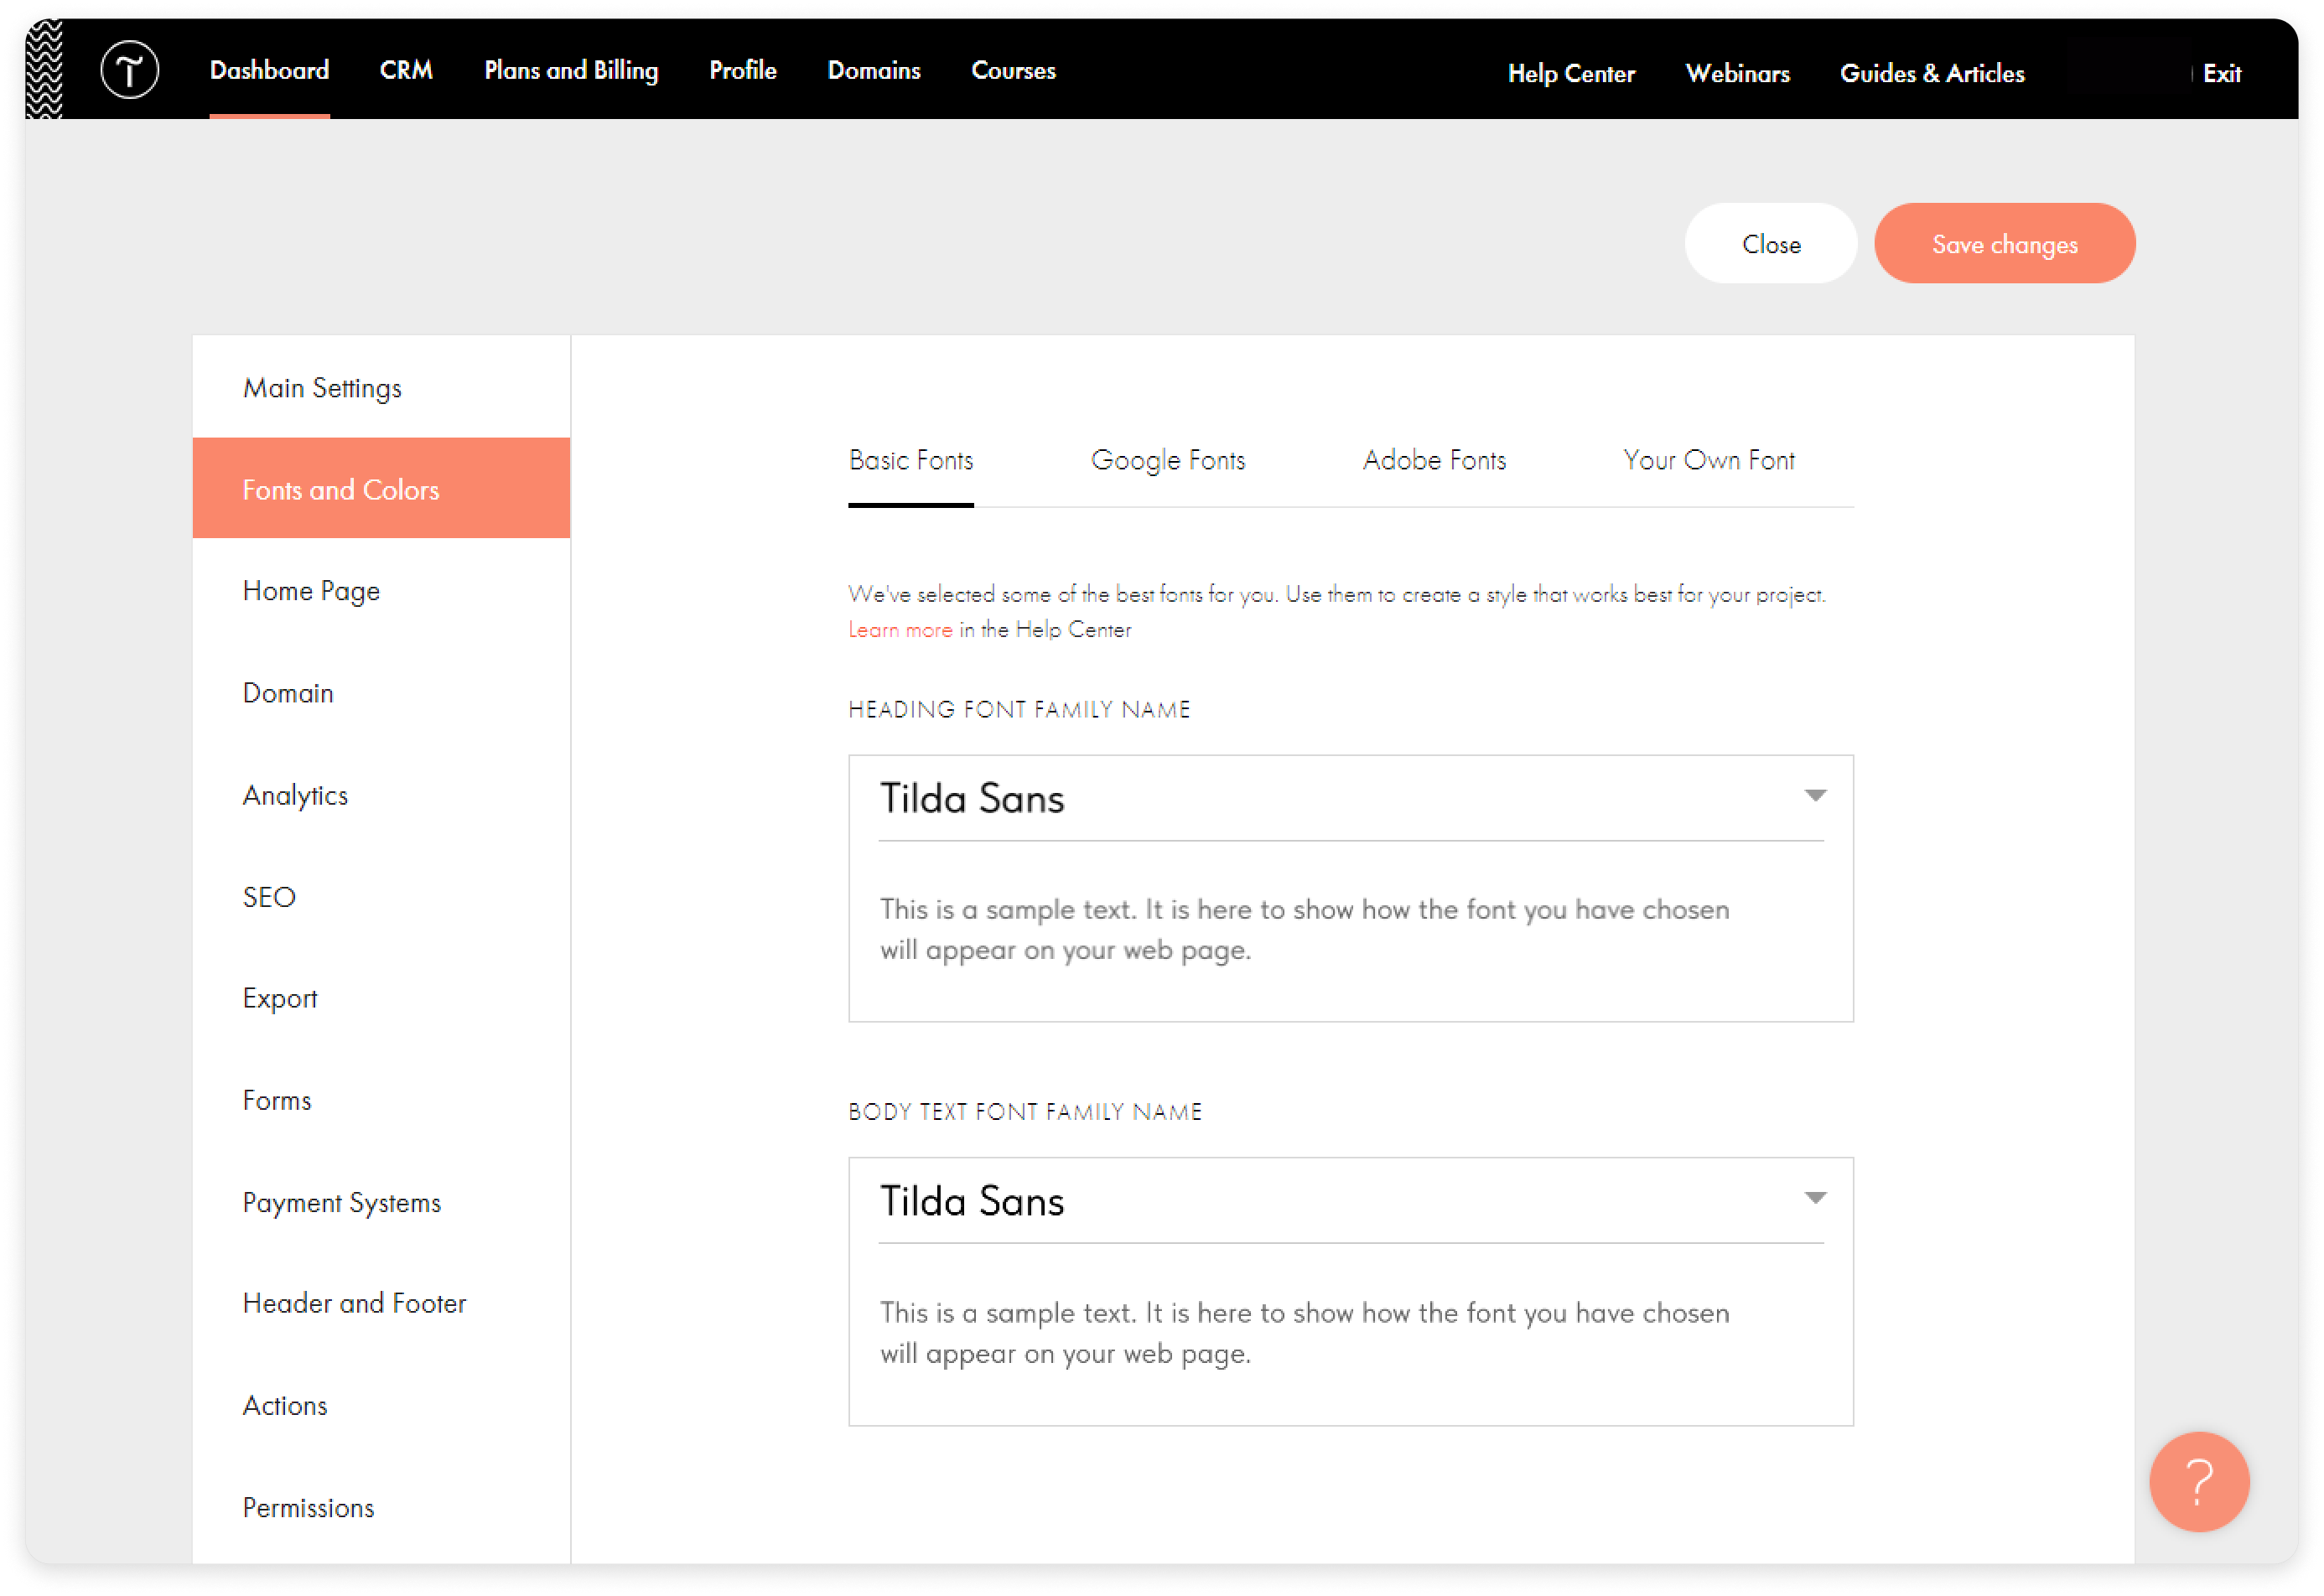
iSpring Learn Services Integrations Tilda How to Launch a Course Store Current: How to Create a Website and a Page How to Create a Website and a Page Go to Dashboard and select Start new website in the upper right corner. Specify the site name. Next, we will populate the site. For this, you need to create the first page.Select Create new page in the upper right corner.Click on Store and explore the ready-made online store templates. Click on Preview to see the design options in detail.Click on Create to start working with the template you like.All pages consist of blocks. You can edit blocks, replace texts and images in them, change the size and color of elements, and much more.For example, to change the text and image in a block, go to the Content tab.In the Settings tab, change the style, color, and size of the font. Here, you can also change the size and width of the button in the block. An important element of design is the font. By default, the choice of fonts is limited.To use a larger set of fonts or upload your own, go back to Dashboard and click on Site Settings.Next, go to the Fonts and Colors tab and select Custom settings.In the Basic Fonts tab, select the available fonts with a free license on Tilda. You can also upload fonts from Google Fonts or your own set of fonts. Now click on Save and close, and return to the page. ×