You can add an audio clip to every element in iSpring Visuals interactions that you either record using a microphone or import into the Visuals program.
Importing Audio
- Click the Import Audio button on the editor toolbar.

- Choose an audio file in the standard Open dialog.
Recording an Audio Narration
- Click the Record button in the Audio area.
- Read your narration into the microphone.
- Stop recording by clicking the Stop button.
Moreover, the Narration script window has been added for your convenience. You can add your narrative description into the window and read from it while you record. If you close the window, the application will automatically save the text you've put there.
You can play the imported file right in the editor by clicking the Play button.
Audio Properties
Once you added a supplementary audio file to an item, you can specify additional options for it.
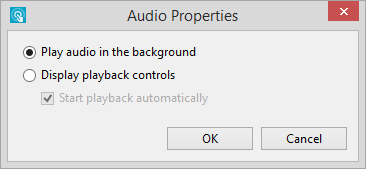
- Play audio in the background - Select this option to play the added audio sound in the background of an element. The audio player will be hidden.
Note: Since there are no visible buttons to start or pause the playback of an audio file, the playback will start automatically. - Display playback controls - Select this option to make audio player buttons available to the viewer.
- Start playback automatically - Use this option to start playing an audio file automatically when a user goes to a particular element.

Deleting Audio
To delete an audio file or audio narration, click the Delete button on the editor toolbar.