Managing projects in iSpring
Learn how to manage your projects when creating courses with iSpring Suite. It’s important to know about the project functionality in iSpring Suite before you start working on complex courses, recording audio or video, creating quizzes or adding other resources to your project.
What is a project
A project in iSpring Suite is a combination of your original PowerPoint presentation file and the respective project folder that stores your project files: narrations, quizzes, etc. iSpring Suite creates this folder when you add something by means of iSpring, and gives it the same name as your PPTX file.
This is how your iSpring Suite project looks:
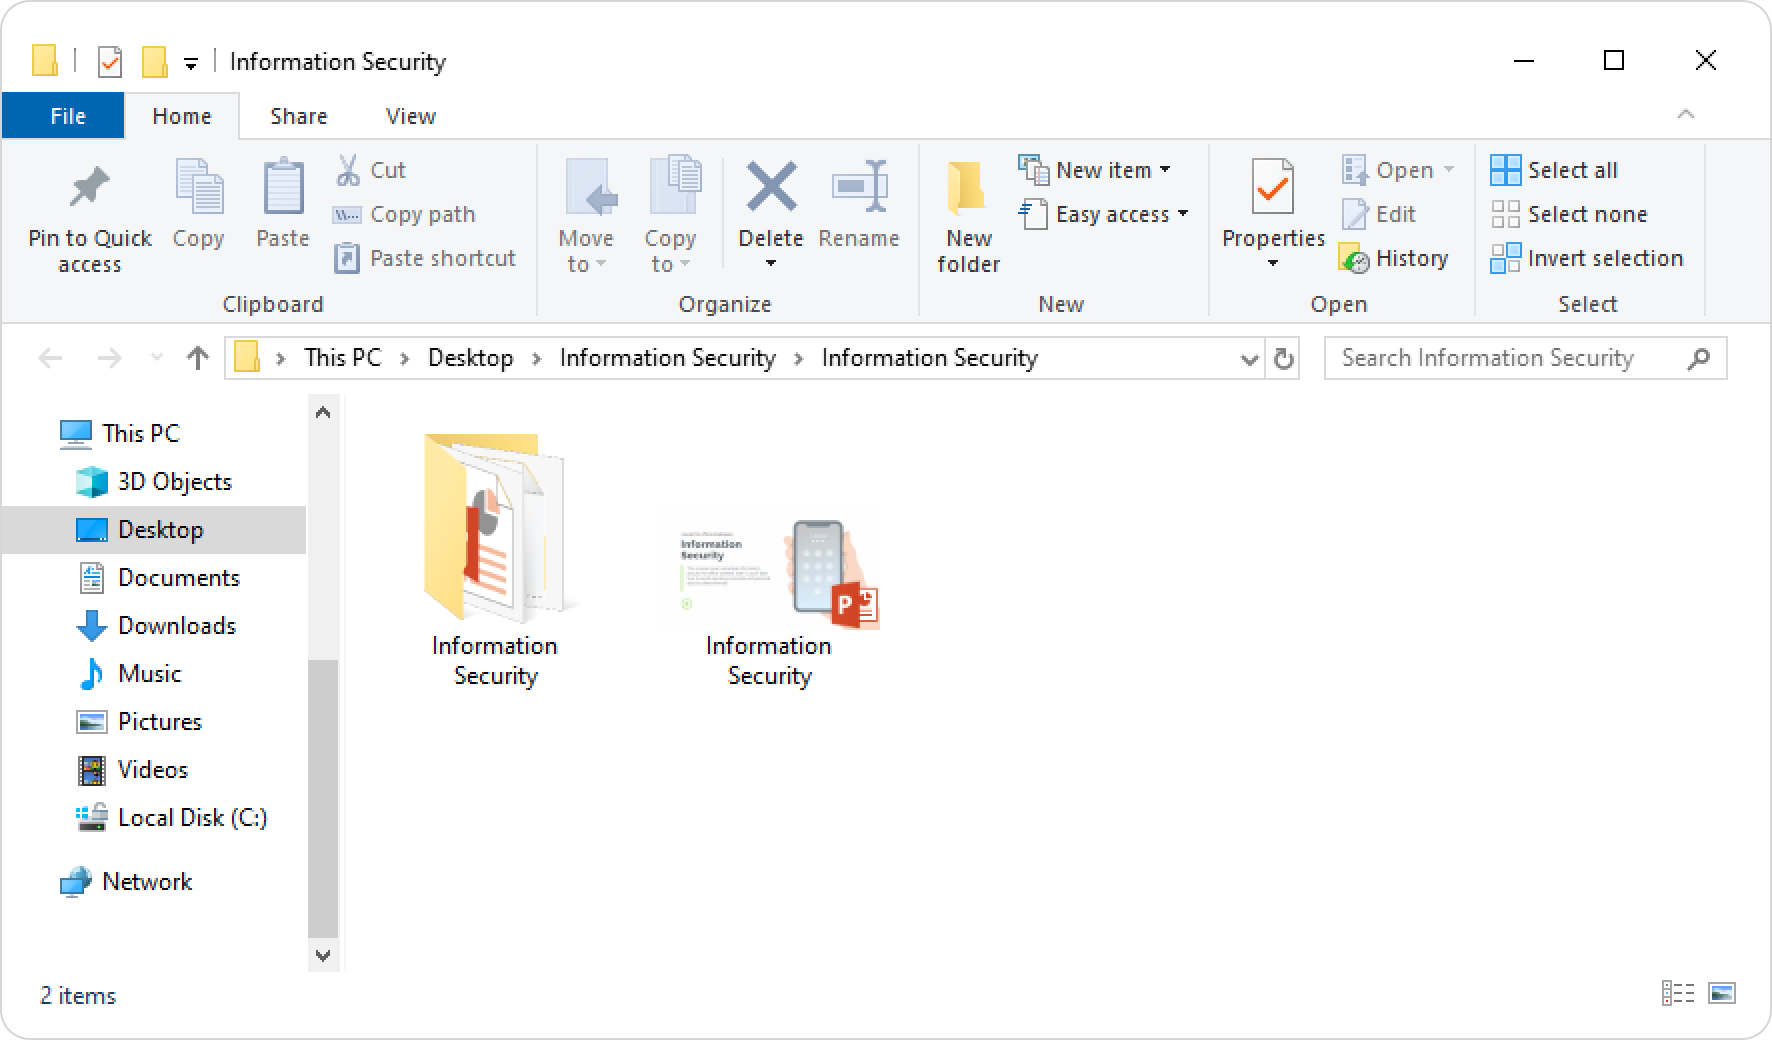
You can work on your project, zip it, and send it to your colleague as a part of collaborative work, or make a backup copy to ensure the safety of your data.
Choose the right place for your project
Select the right place to work on your projects. It must be the main storage of your computer (HDD or SSD), C:\ or D:\ logical drive.
The default location is C:\Users\%username%\Documents\Presentations, but you can create any other folder for your iSpring Suite projects in your Documents or another user folder. You must have full access to the folder where you store your projects. There should be plenty of free space on your drive for recording audio and video.
iSpring Suite project folder tree
Take a look at the tree structure below to see how you can organize two or more iSpring Suite projects:
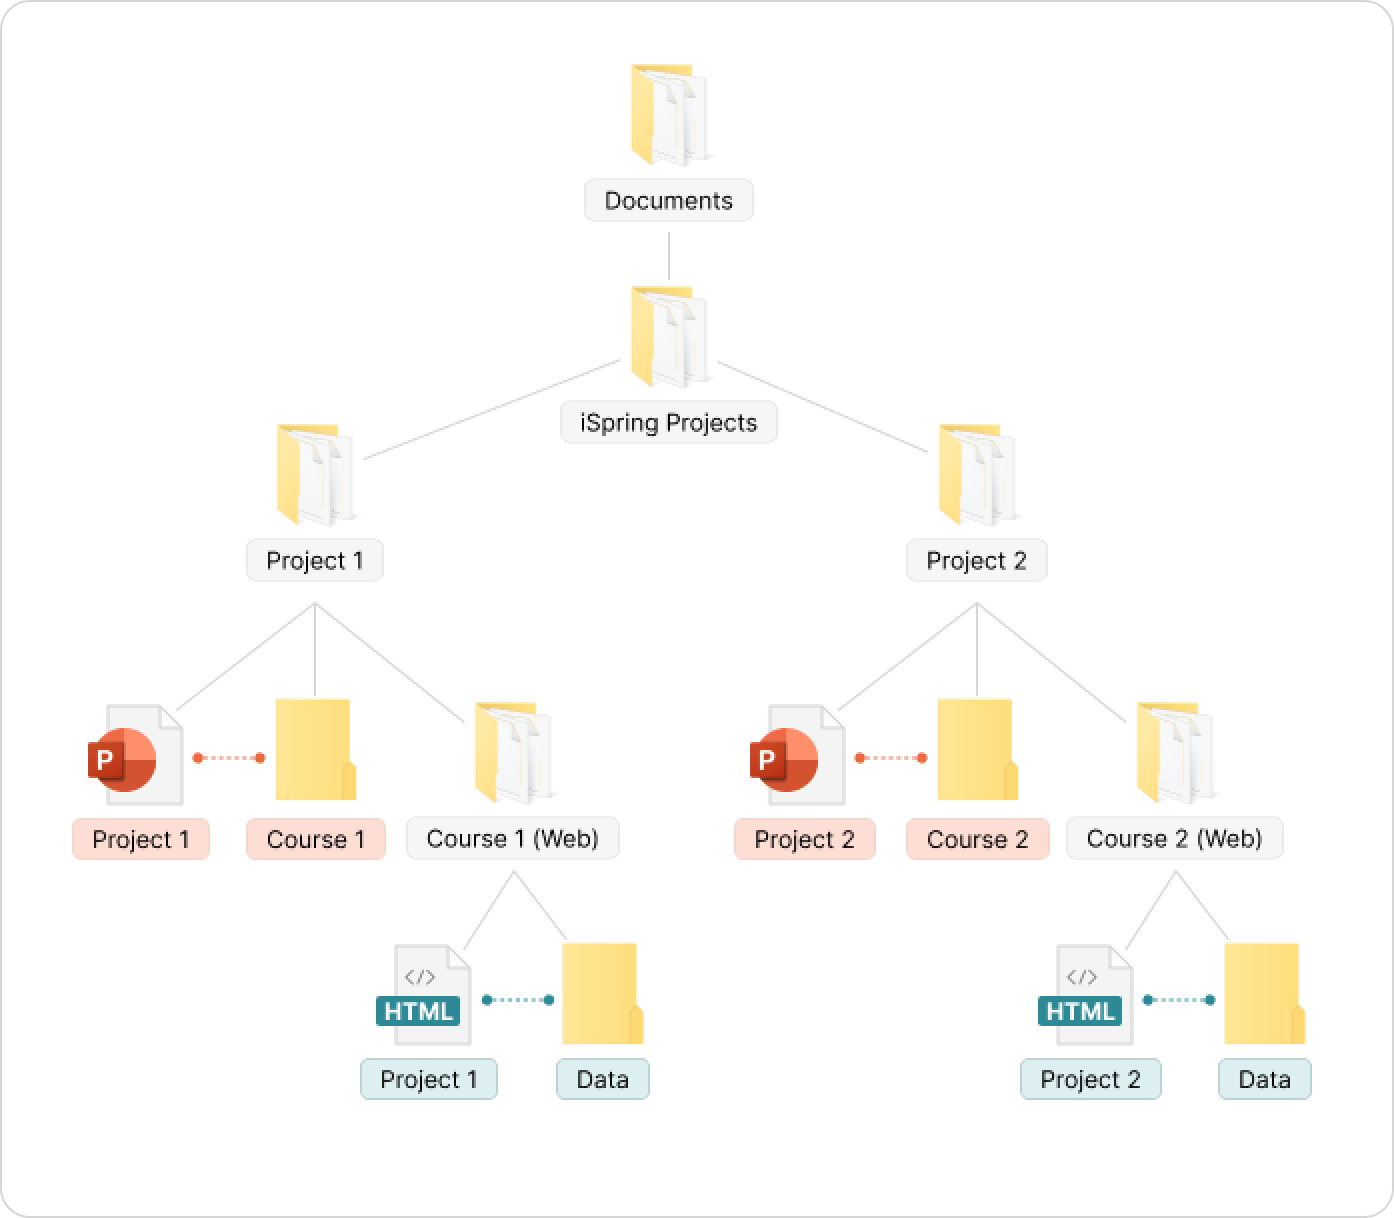
It would be best to locate every project in a separate folder such as Project 1, Project 2.
Closed folders on this scheme are not supposed to be manually managed. Any manual changes done to them like renaming, moving, or deleting files inside the folder or the folder itself can cause the connection between the elements to be lost. Use the PowerPoint to make changes to the project.
Other places to store projects
Fast USB drives can be carefully used, but it may cause some problems with lost project folders. Use external drives for storing large media files, backups and documents.
Network locations are not recommended because they have slower access time, and can cause conversion issues or errors while saving the project.
The structure of the project folder
The project folder is automatically created when you click on any of these buttons on the iSpring Suite toolbar: "Record Audio/Video" or "Manage Narration", insert a "Quiz", "Interaction", "Role-Play", Screen Recording" or a third-party "Web Object", and "Presentation Resources". This additional information cannot be saved in a PowerPoint file, and therefore goes to this folder. It is given the same name as your PowerPoint presentation.

This is how the content of your iSpring Suite project is organized inside this folder:
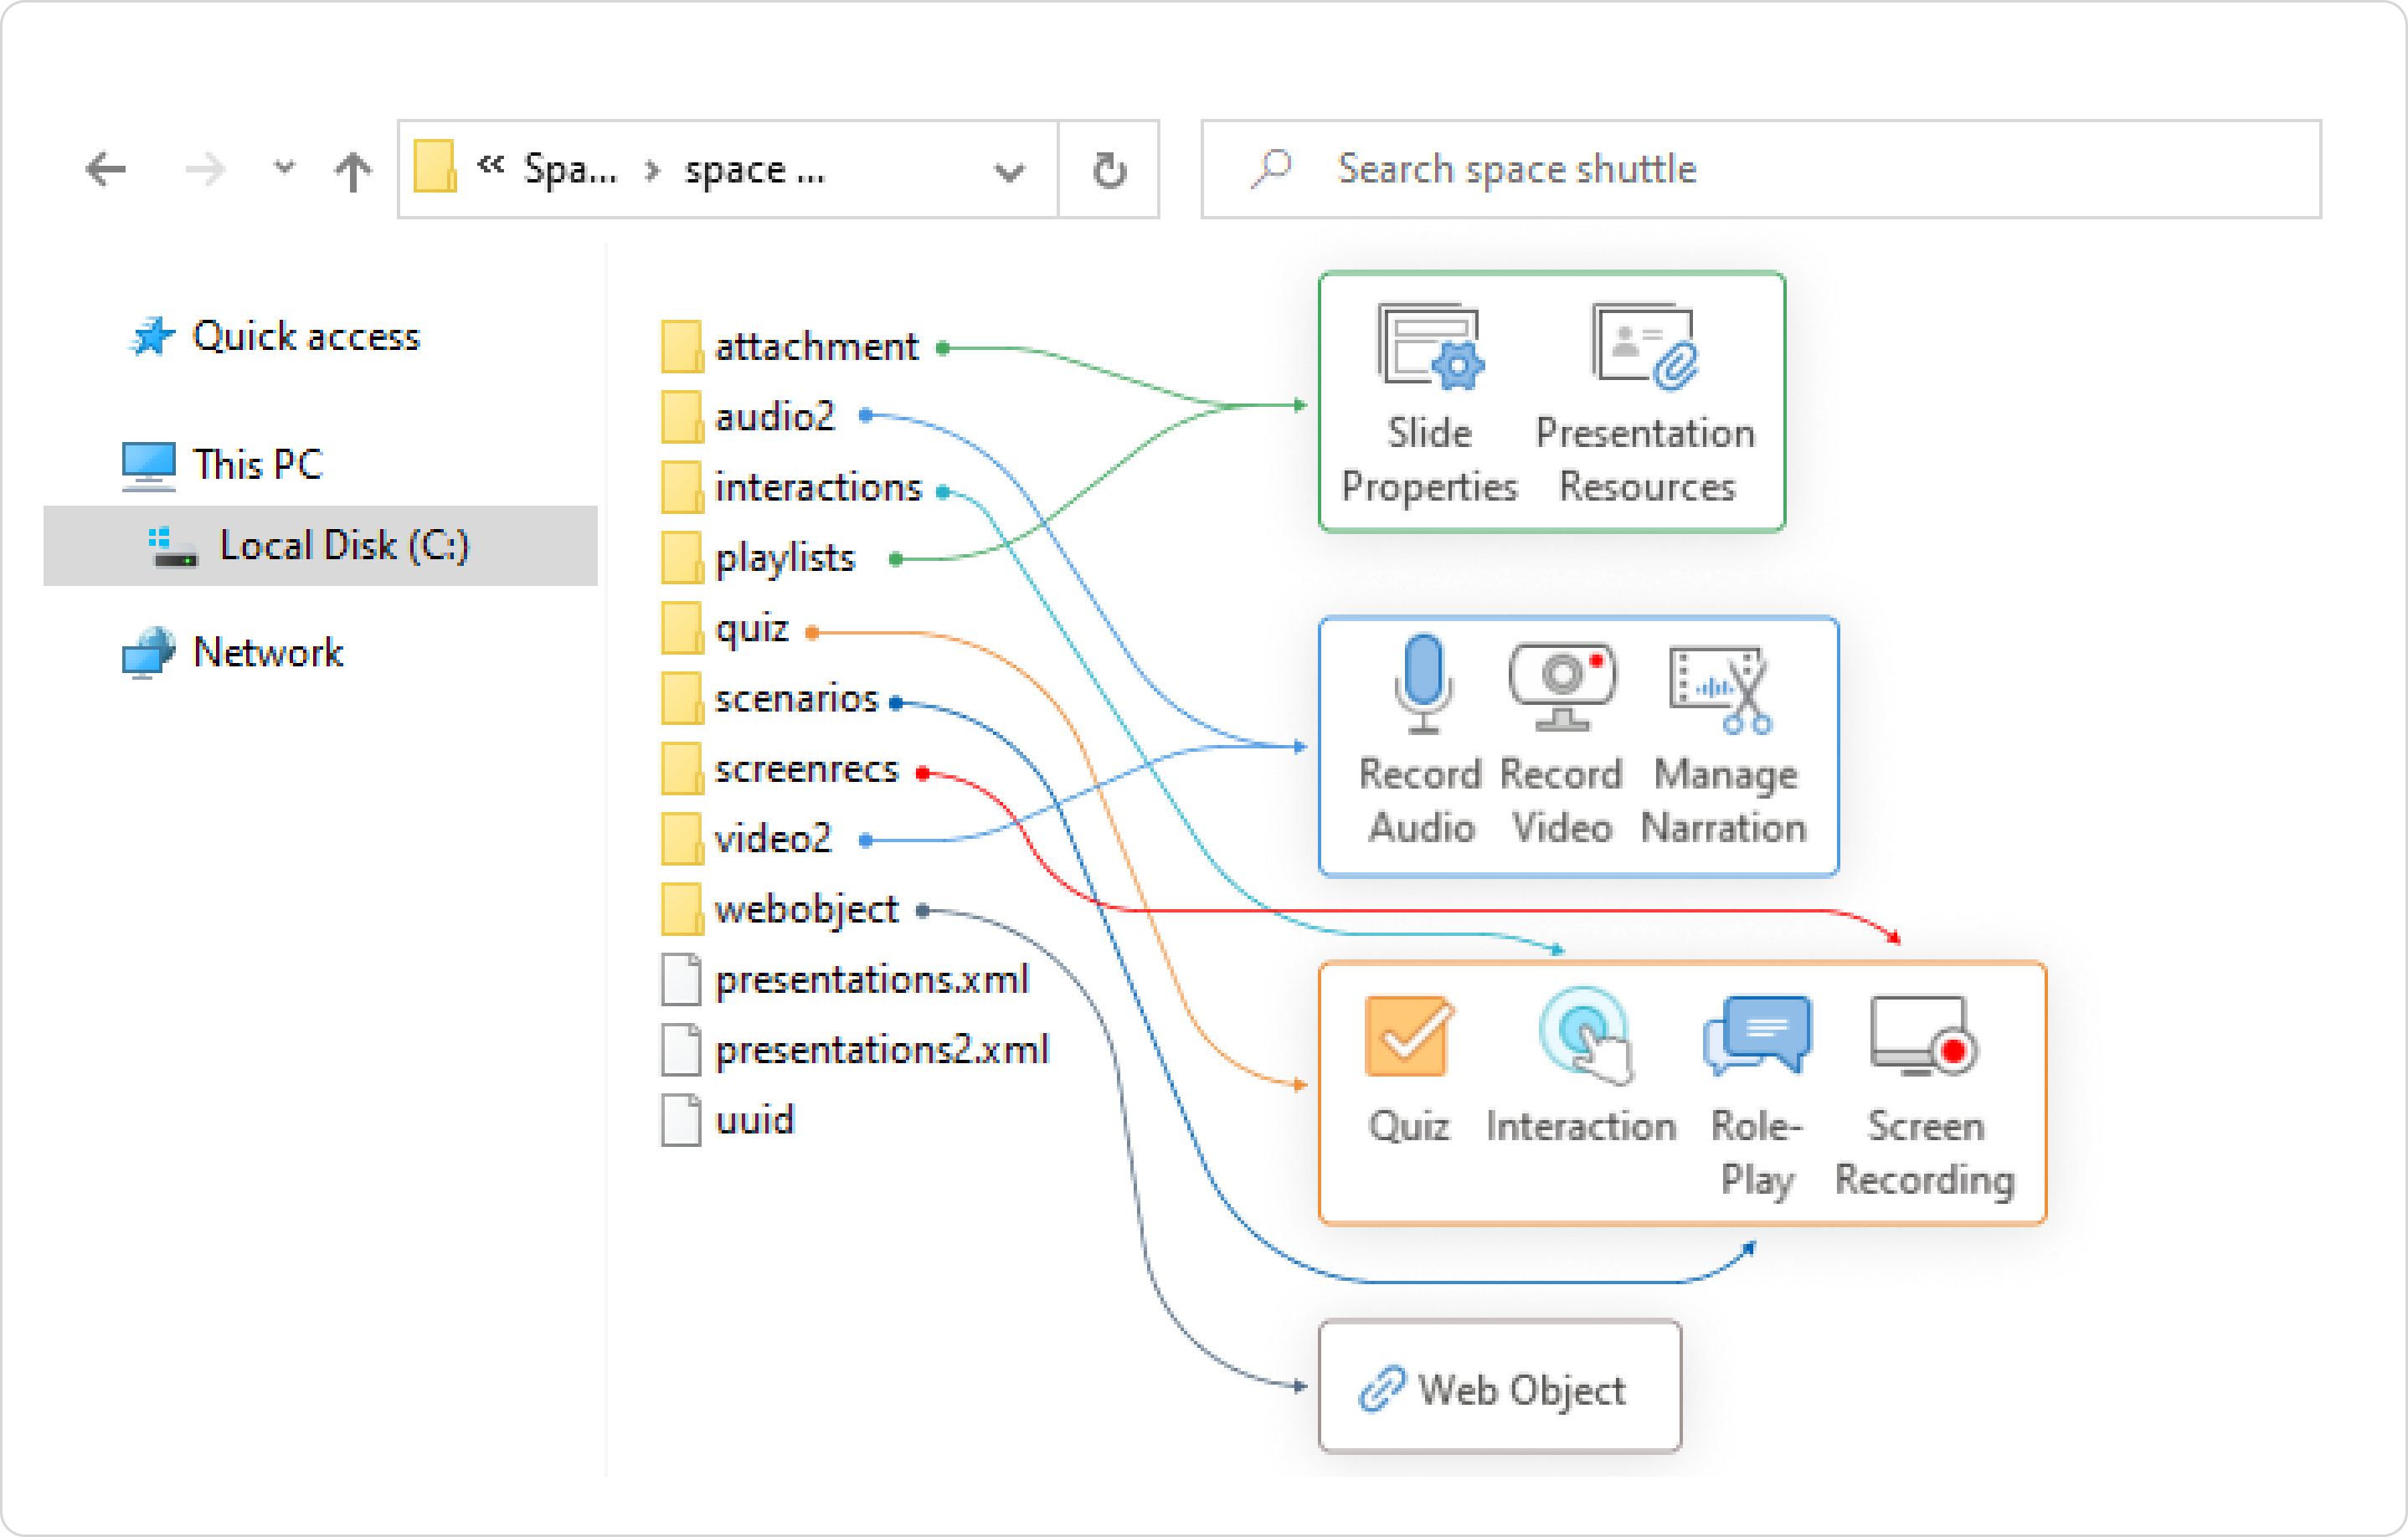
If the content item file or the project folder is missing, iSpring Suite will show an error message and ask you to manually locate the project folder. 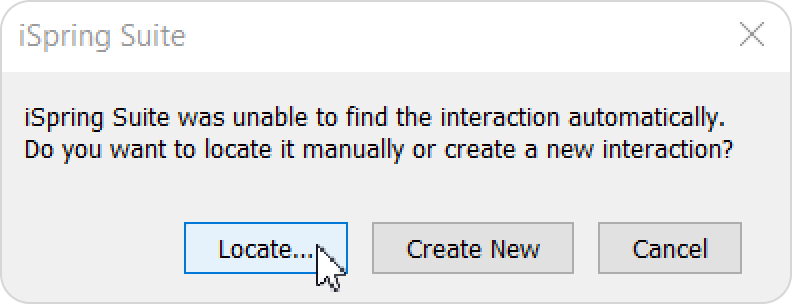
Once it’s found, the folder or the content item will be re-linked to the presentation, and you can then continue editing the quiz or role-play.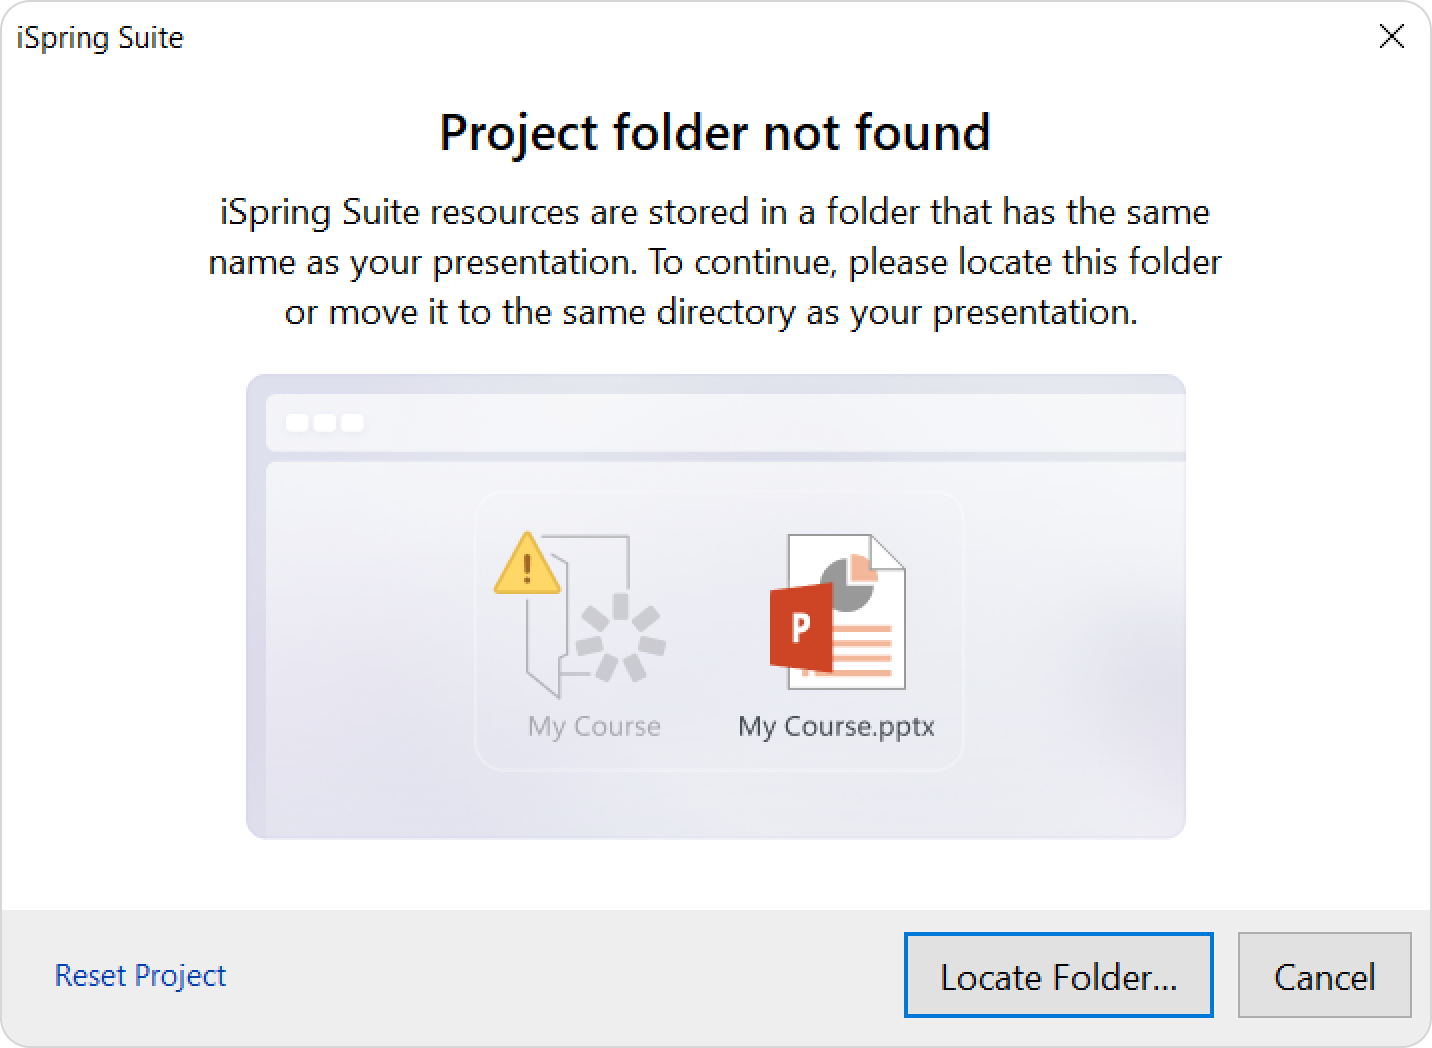
If the folder cannot be found, you can reset the project by deleting all links to missing resourses. You can then recreate the content in iSpring Suite.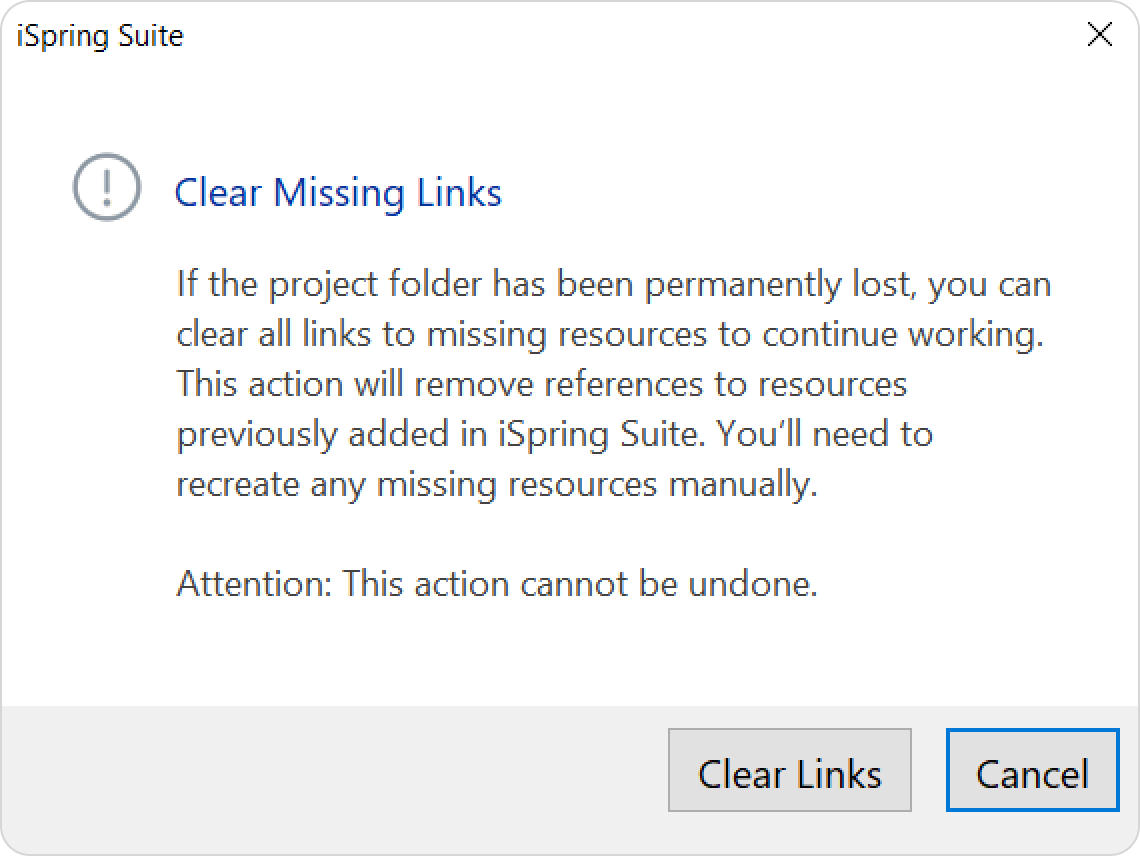
Audio
You can record an audio narration with iSpring Suite.

The source audio is stored as uncompressed WAV audio files inside the "project_folder_name\audio2\files" folder. If you import a sound file in any compatible format (e.g., MP3 or WMA), it is also saved in to this folder without any additional compression.
The file names are generated randomly using letters and numbers [a-f, 0-9]. This is an internal automatic hex naming format, and there is no way to apply a custom naming scheme (e.g., audio01.wav, audio02.wav, etc.). If you need to find a specific source file, apply file sorting by the Date created column. It will list the audio files in their chronological recording order.
On the upper level, there are folders with description XML files that store the audio file timings and modification instructions you apply when you edit the audio in the iSpring Audio Editor. For example, if you crop the audio in the editor, the source file stays unchanged, but the XML file gets a modification instruction for this audio file.
What to do if an audio or video file is missing
iSpring Suite will inform you which files are missing or have been modified.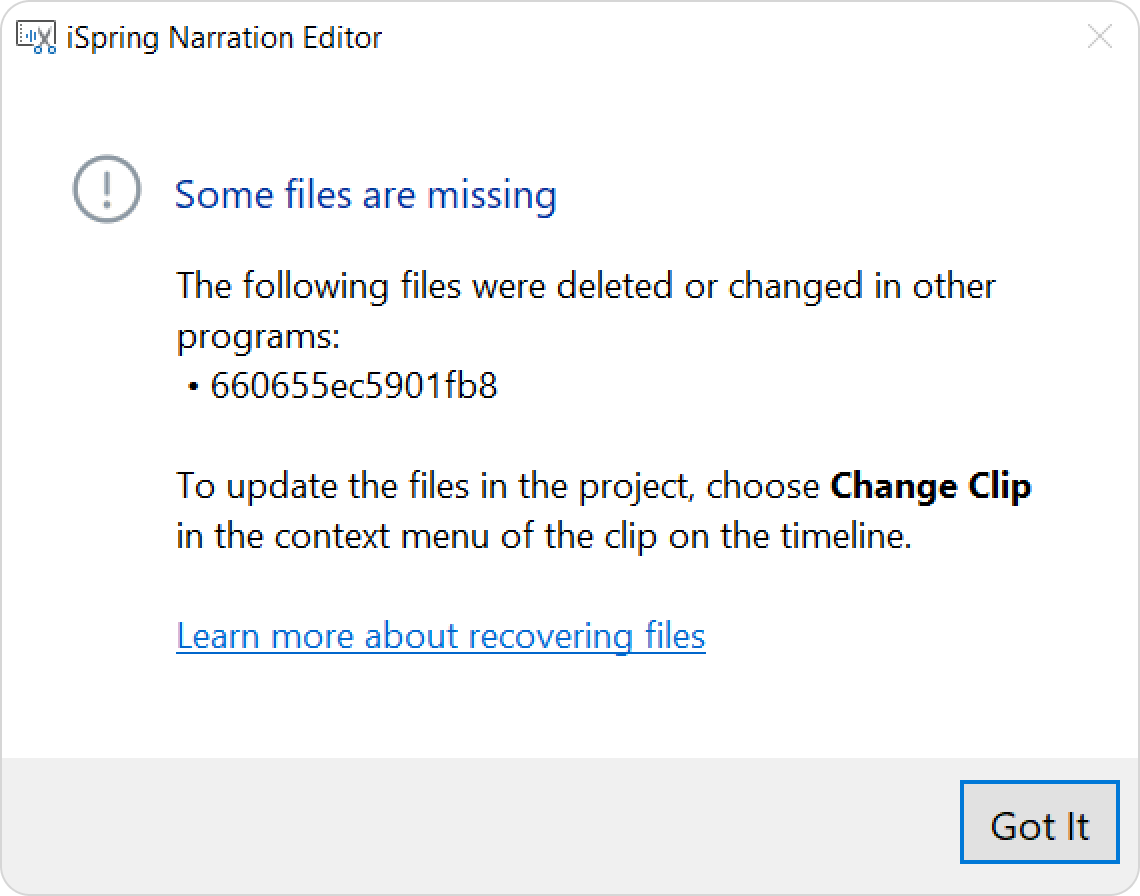
You can try to locate the file on your computer or restore it from the Recycle Bin. Next, re-link the file by clicking Change Clip.
Video
Video projects can be arranged the same way as audio.
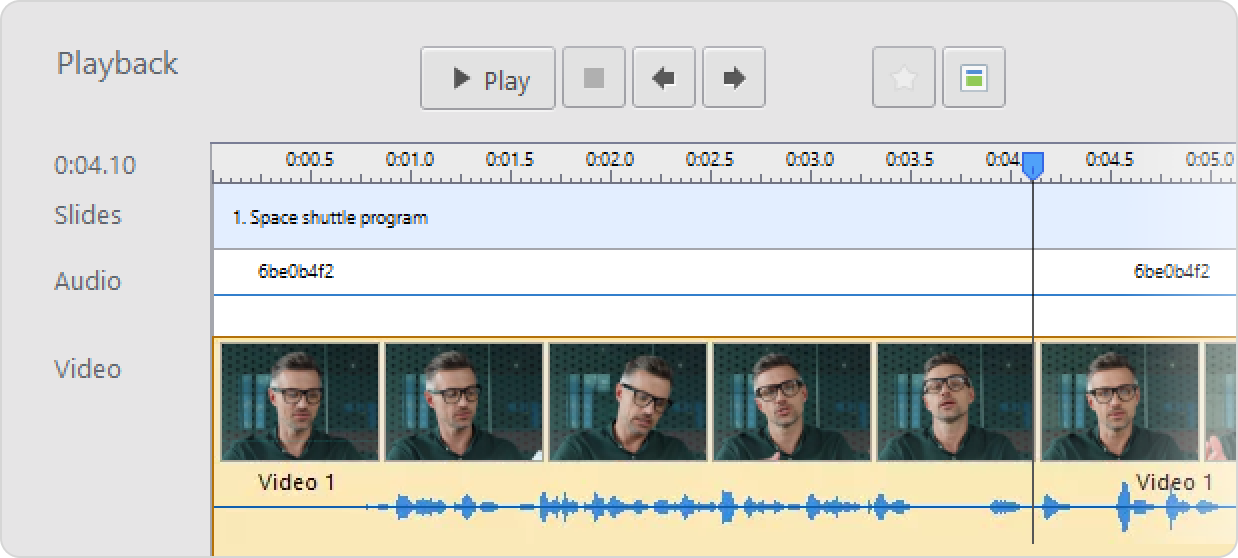
Videos are stored in the respective "project_folder_name\video2\" files folder:
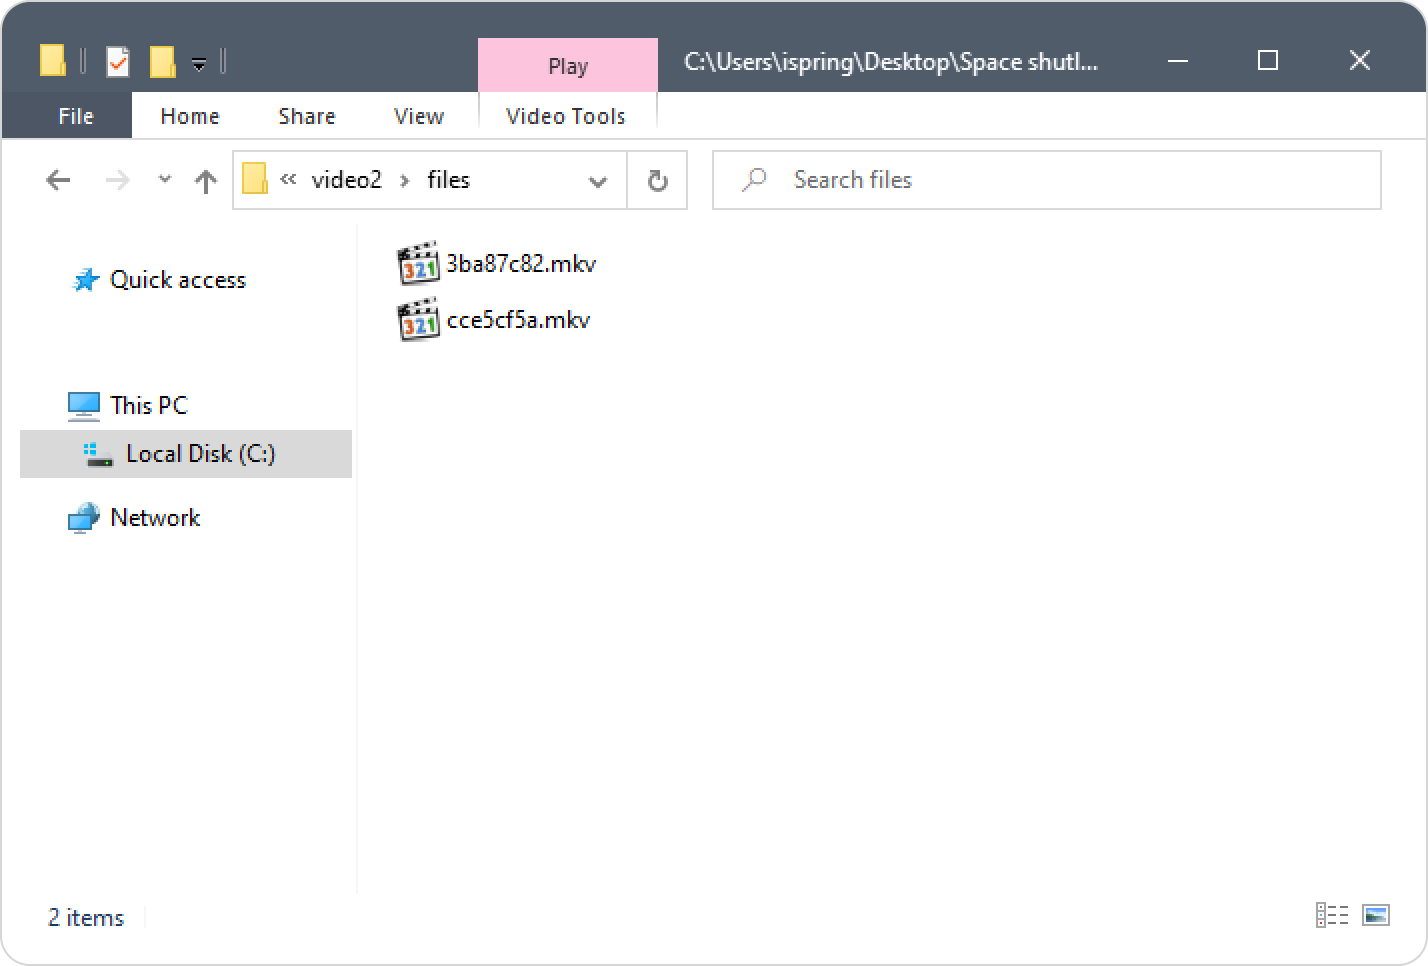
If you import a video file in any applicable format (e.g., MP4 or AVI) it is also saved as is inside this folder without any additional compression.
The upper level "project_folder_name\video2\" stores folders with description XML files containing file timings and modification instructions from the iSpring Suite Video Editor.
Quizzes
Below is a quiz added on one of the slides of the PowerPoint presentation by clicking on Quiz.
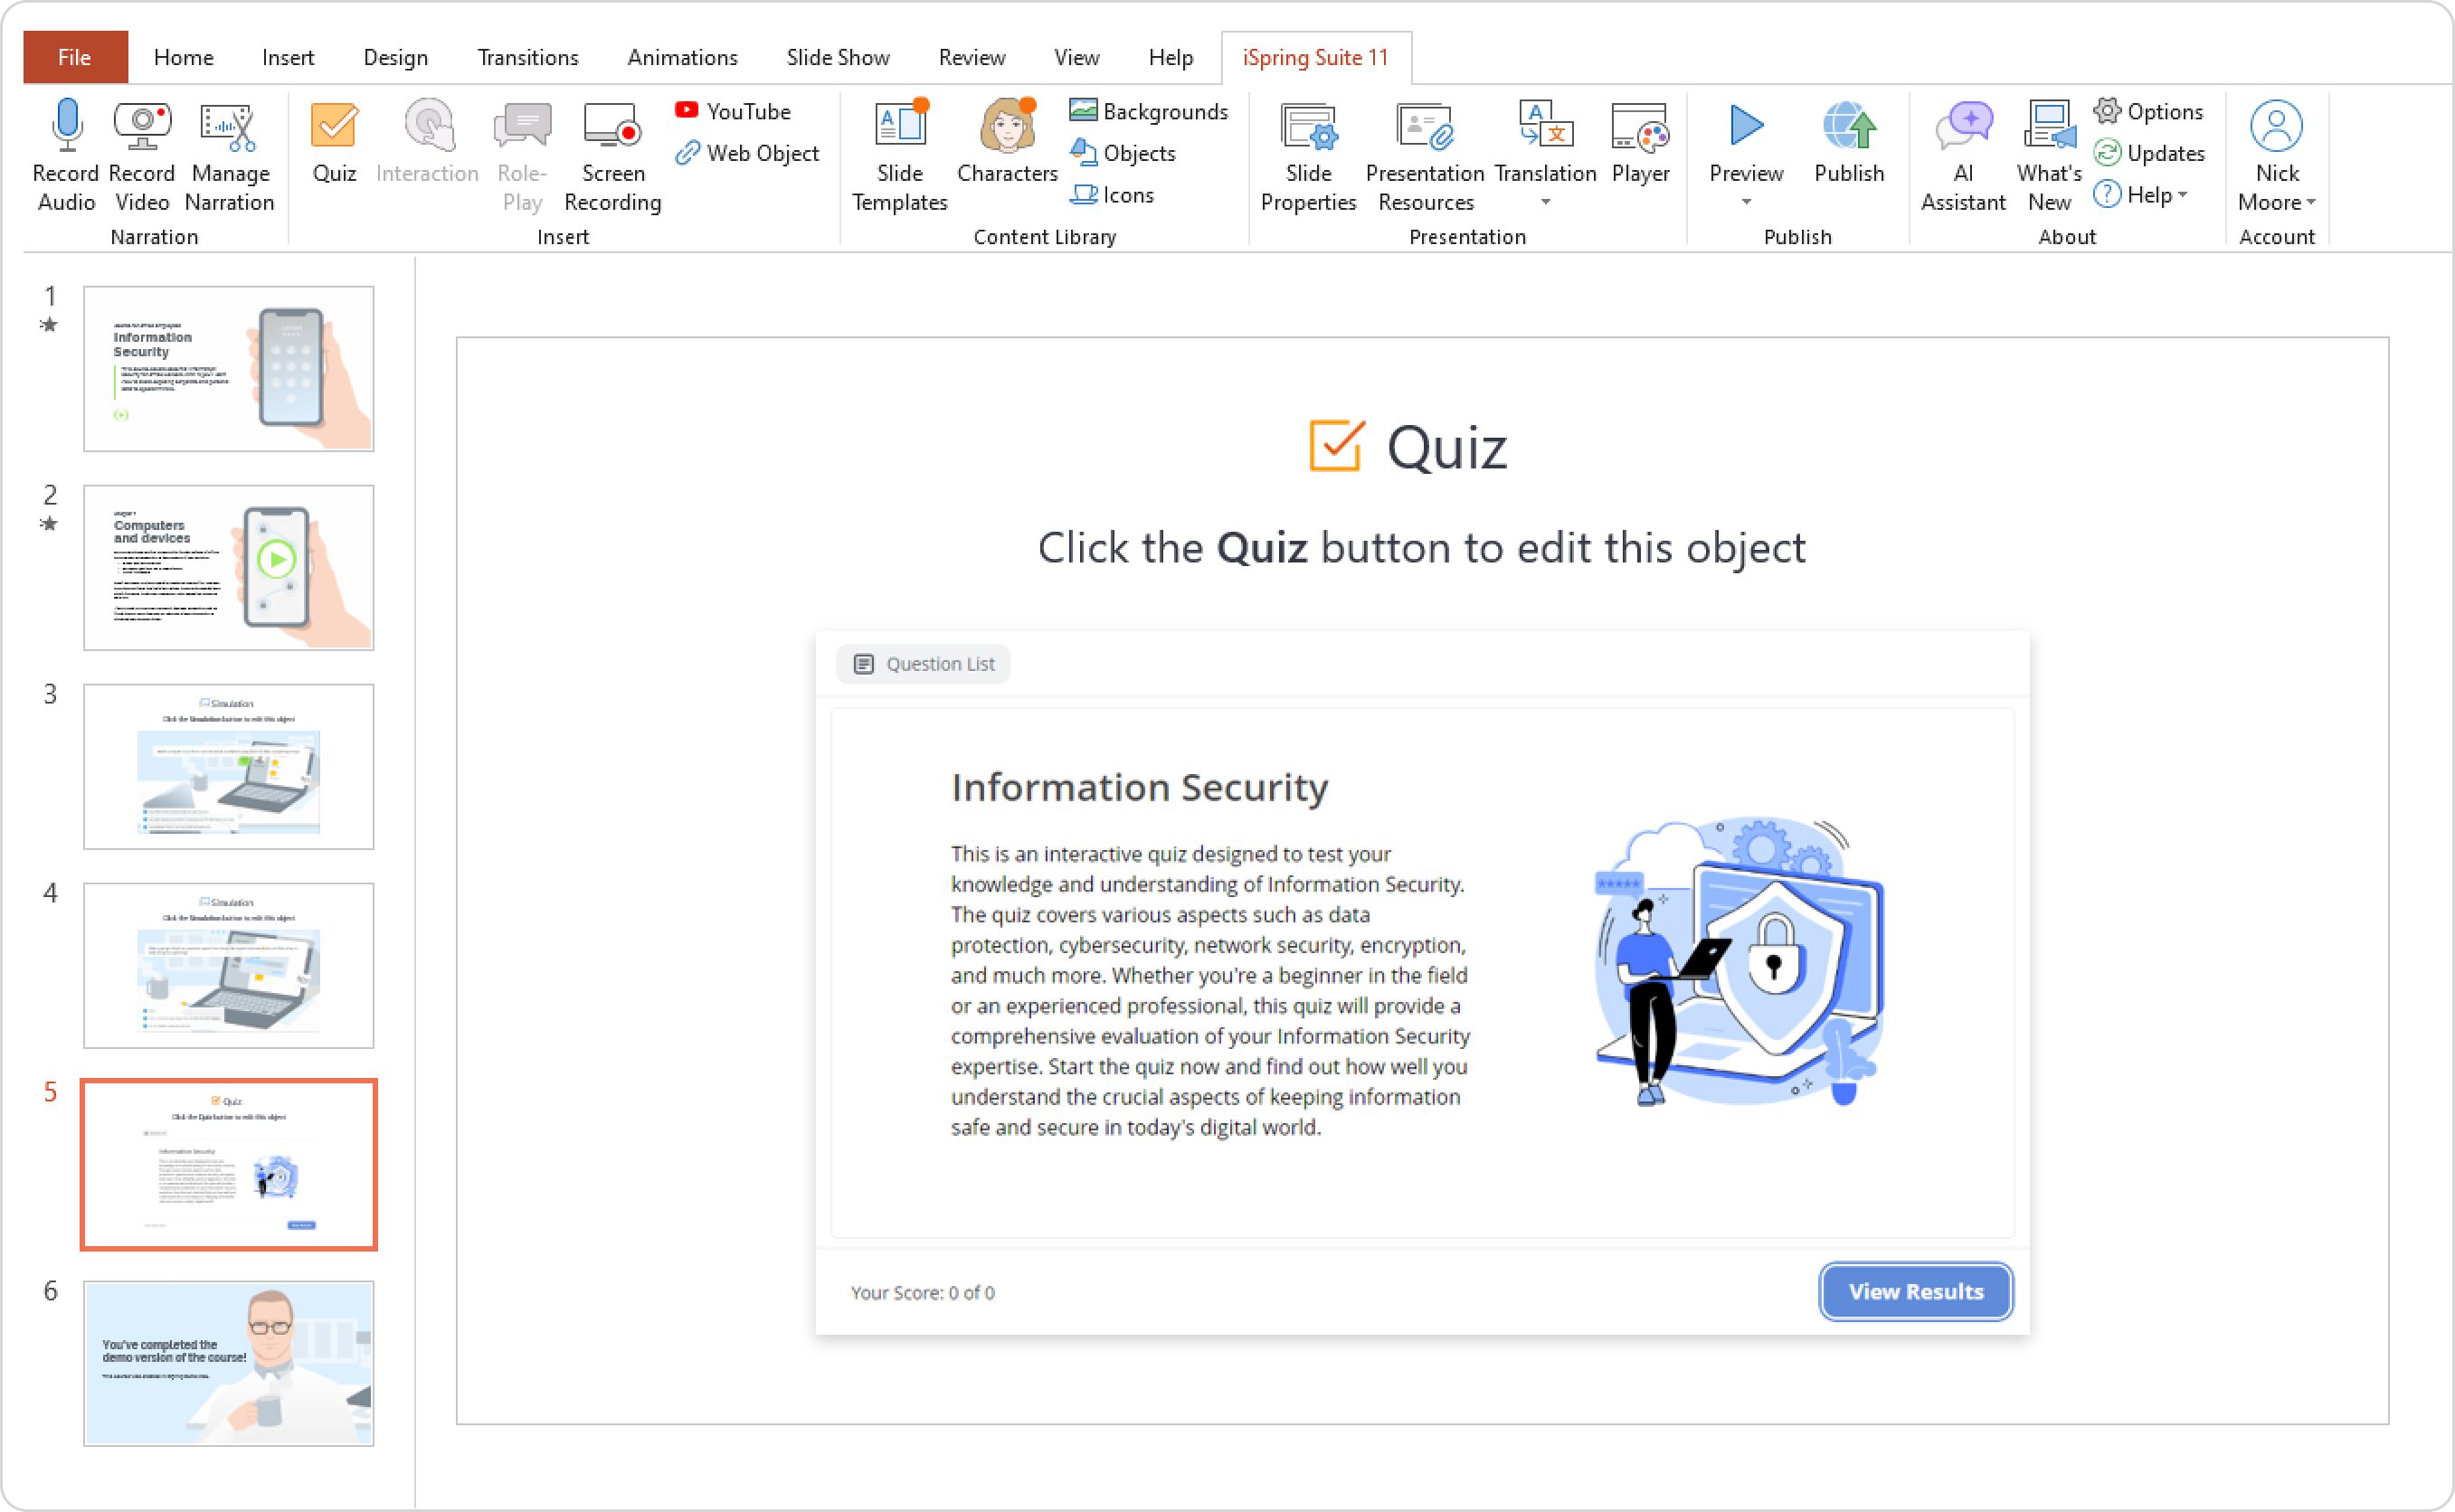
The source file for this quiz is stored inside the project_folder_name\quiz folder. Once created, every quiz is given a sequential name (e.g., quiz1.quiz, quiz2.quiz, etc.).
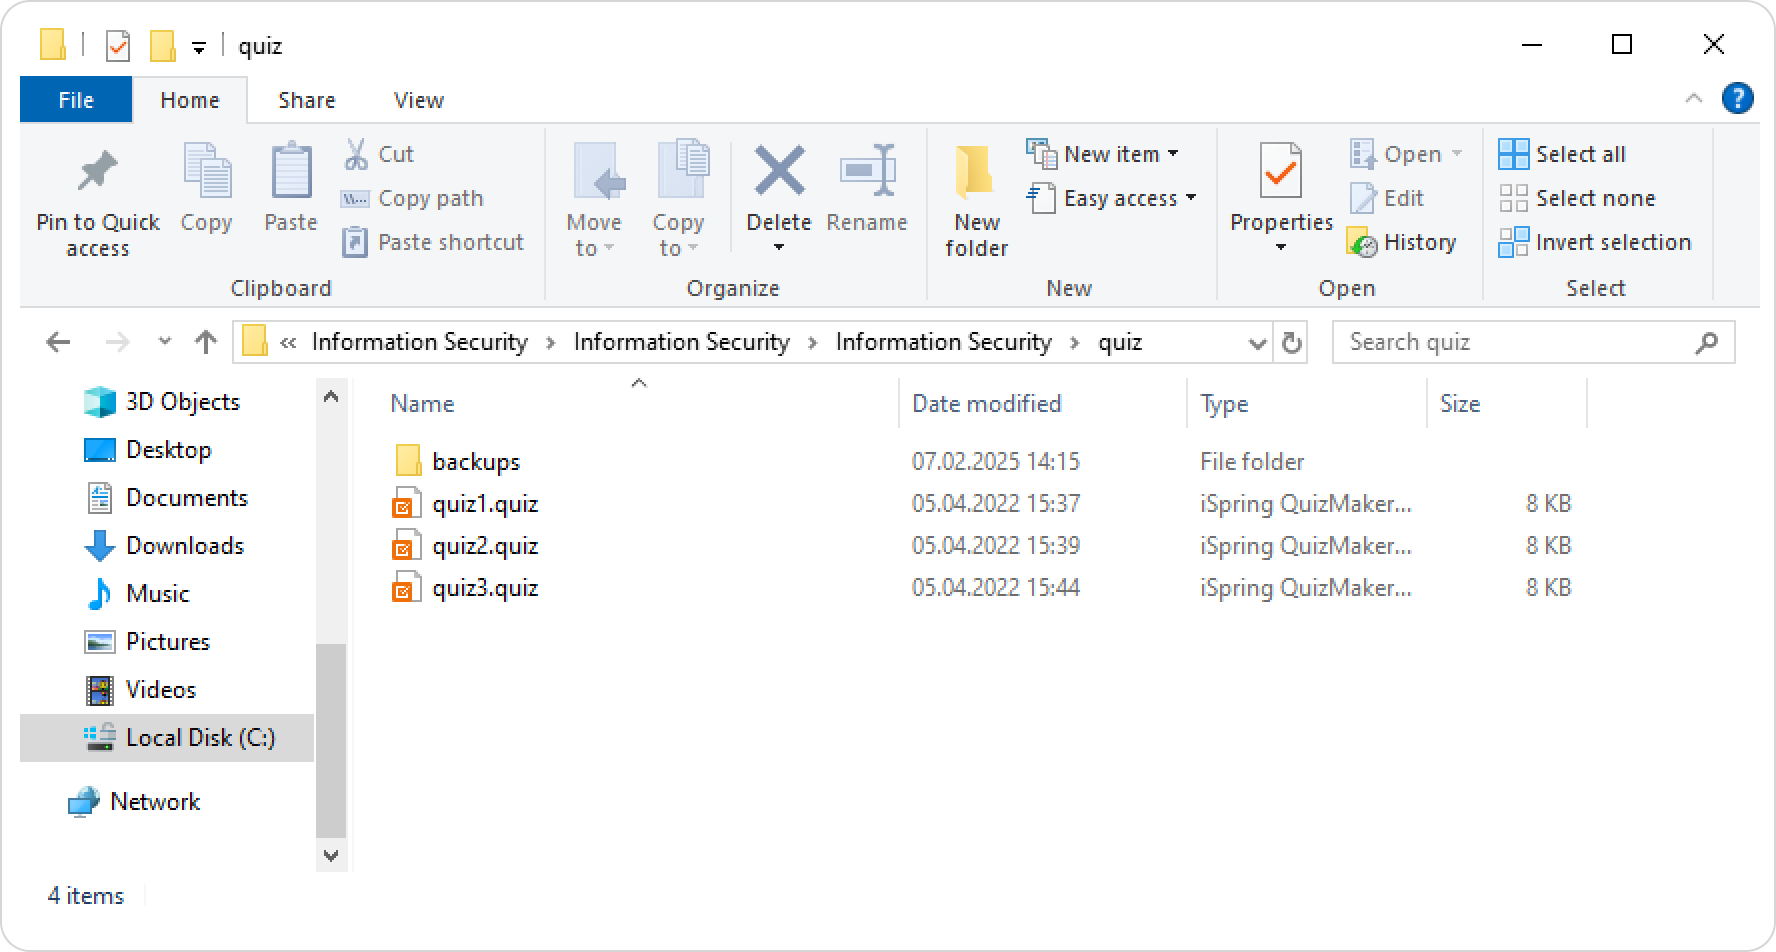
If you import a quiz to this presentation, it will also be copied to the project folder and given the automatic name.
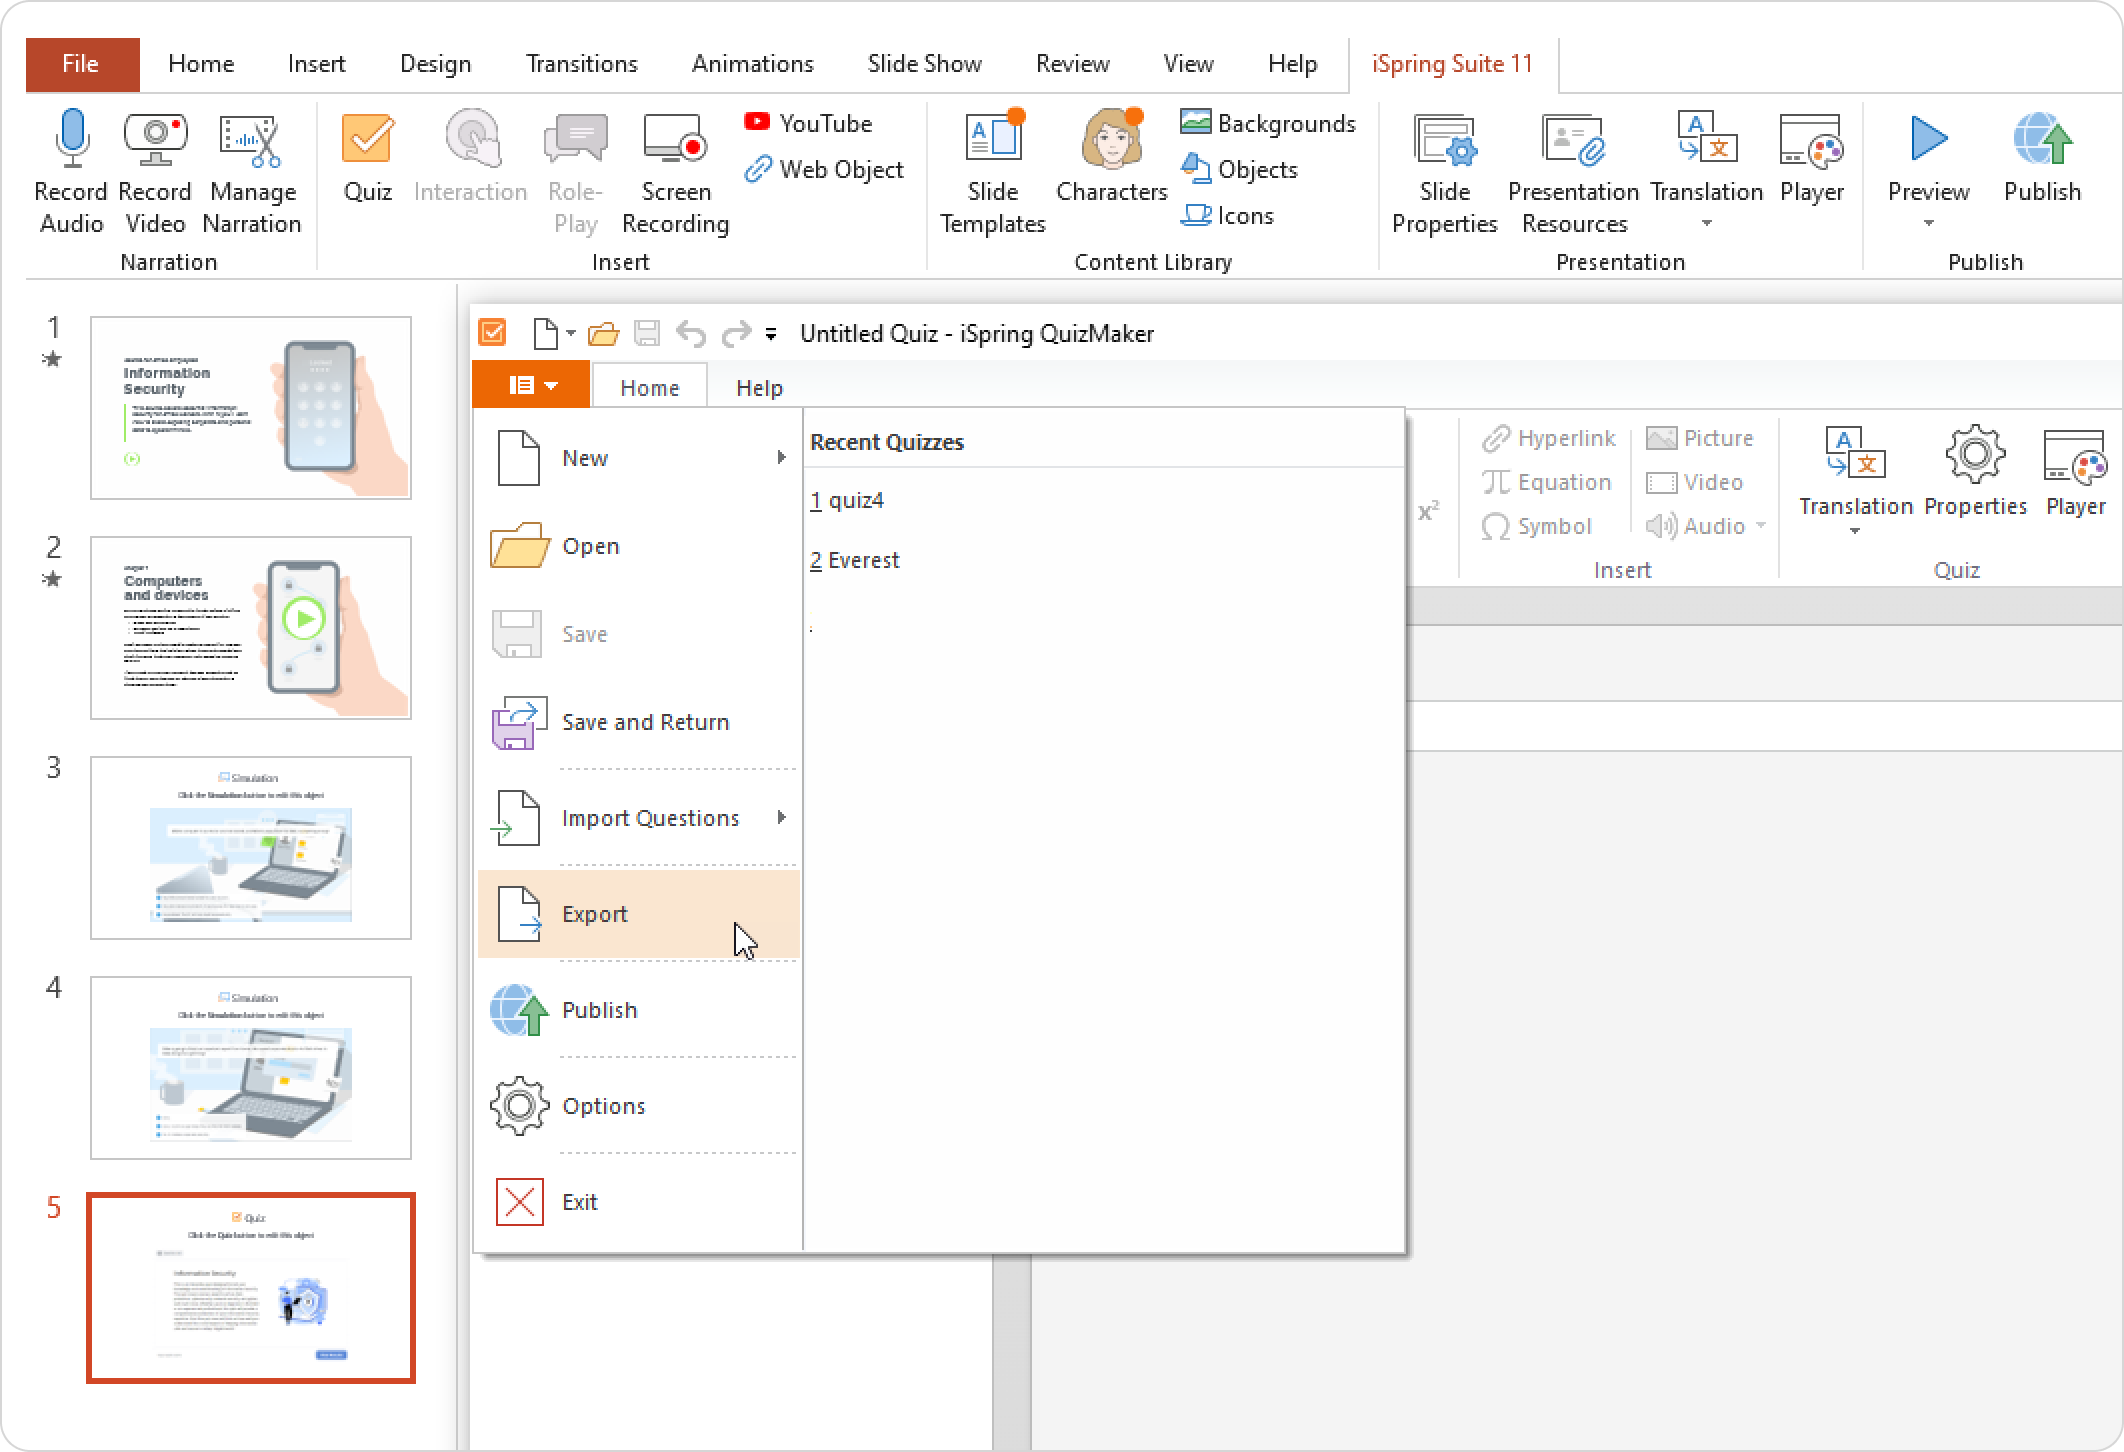
You can also export your embedded Quizzes using the Export function when editing:
What’s stored in the PowerPoint file
There are some actions with the iSpring Suite toolbar that don’t create a project folder. If you insert a Character, a Slide Template or a YouTube video, they become a part of the PPTX file. Also, some settings that you adjust in the Publish and Presenters dialog windows will be saved to the system folder and the PowerPoint file.
Also, the PPTX file stores the publishing settings for your project and the path to the project folder.
A PowerPoint presentation may contain Audio or Video that you add using PowerPoint’s Insert tab on slides.

Output folder
After you publish your project, you will get an output folder with the web-ready presentation. This folder also has the same name as the project folder, but it always has the suffix (Published) if it was published to HTML5.
The output folder has an index.html file for launching the presentation and a data folder that stores everything else. In other words, it is a webpage, created by iSpring Suite out of your PowerPoint presentation. The data folder doesn’t store the original project files (e.g., quizzes) and it has a totally different structure than the project folder.
Take a look at the diagram below that shows the dependency of the output folders on the publishing option you choose.
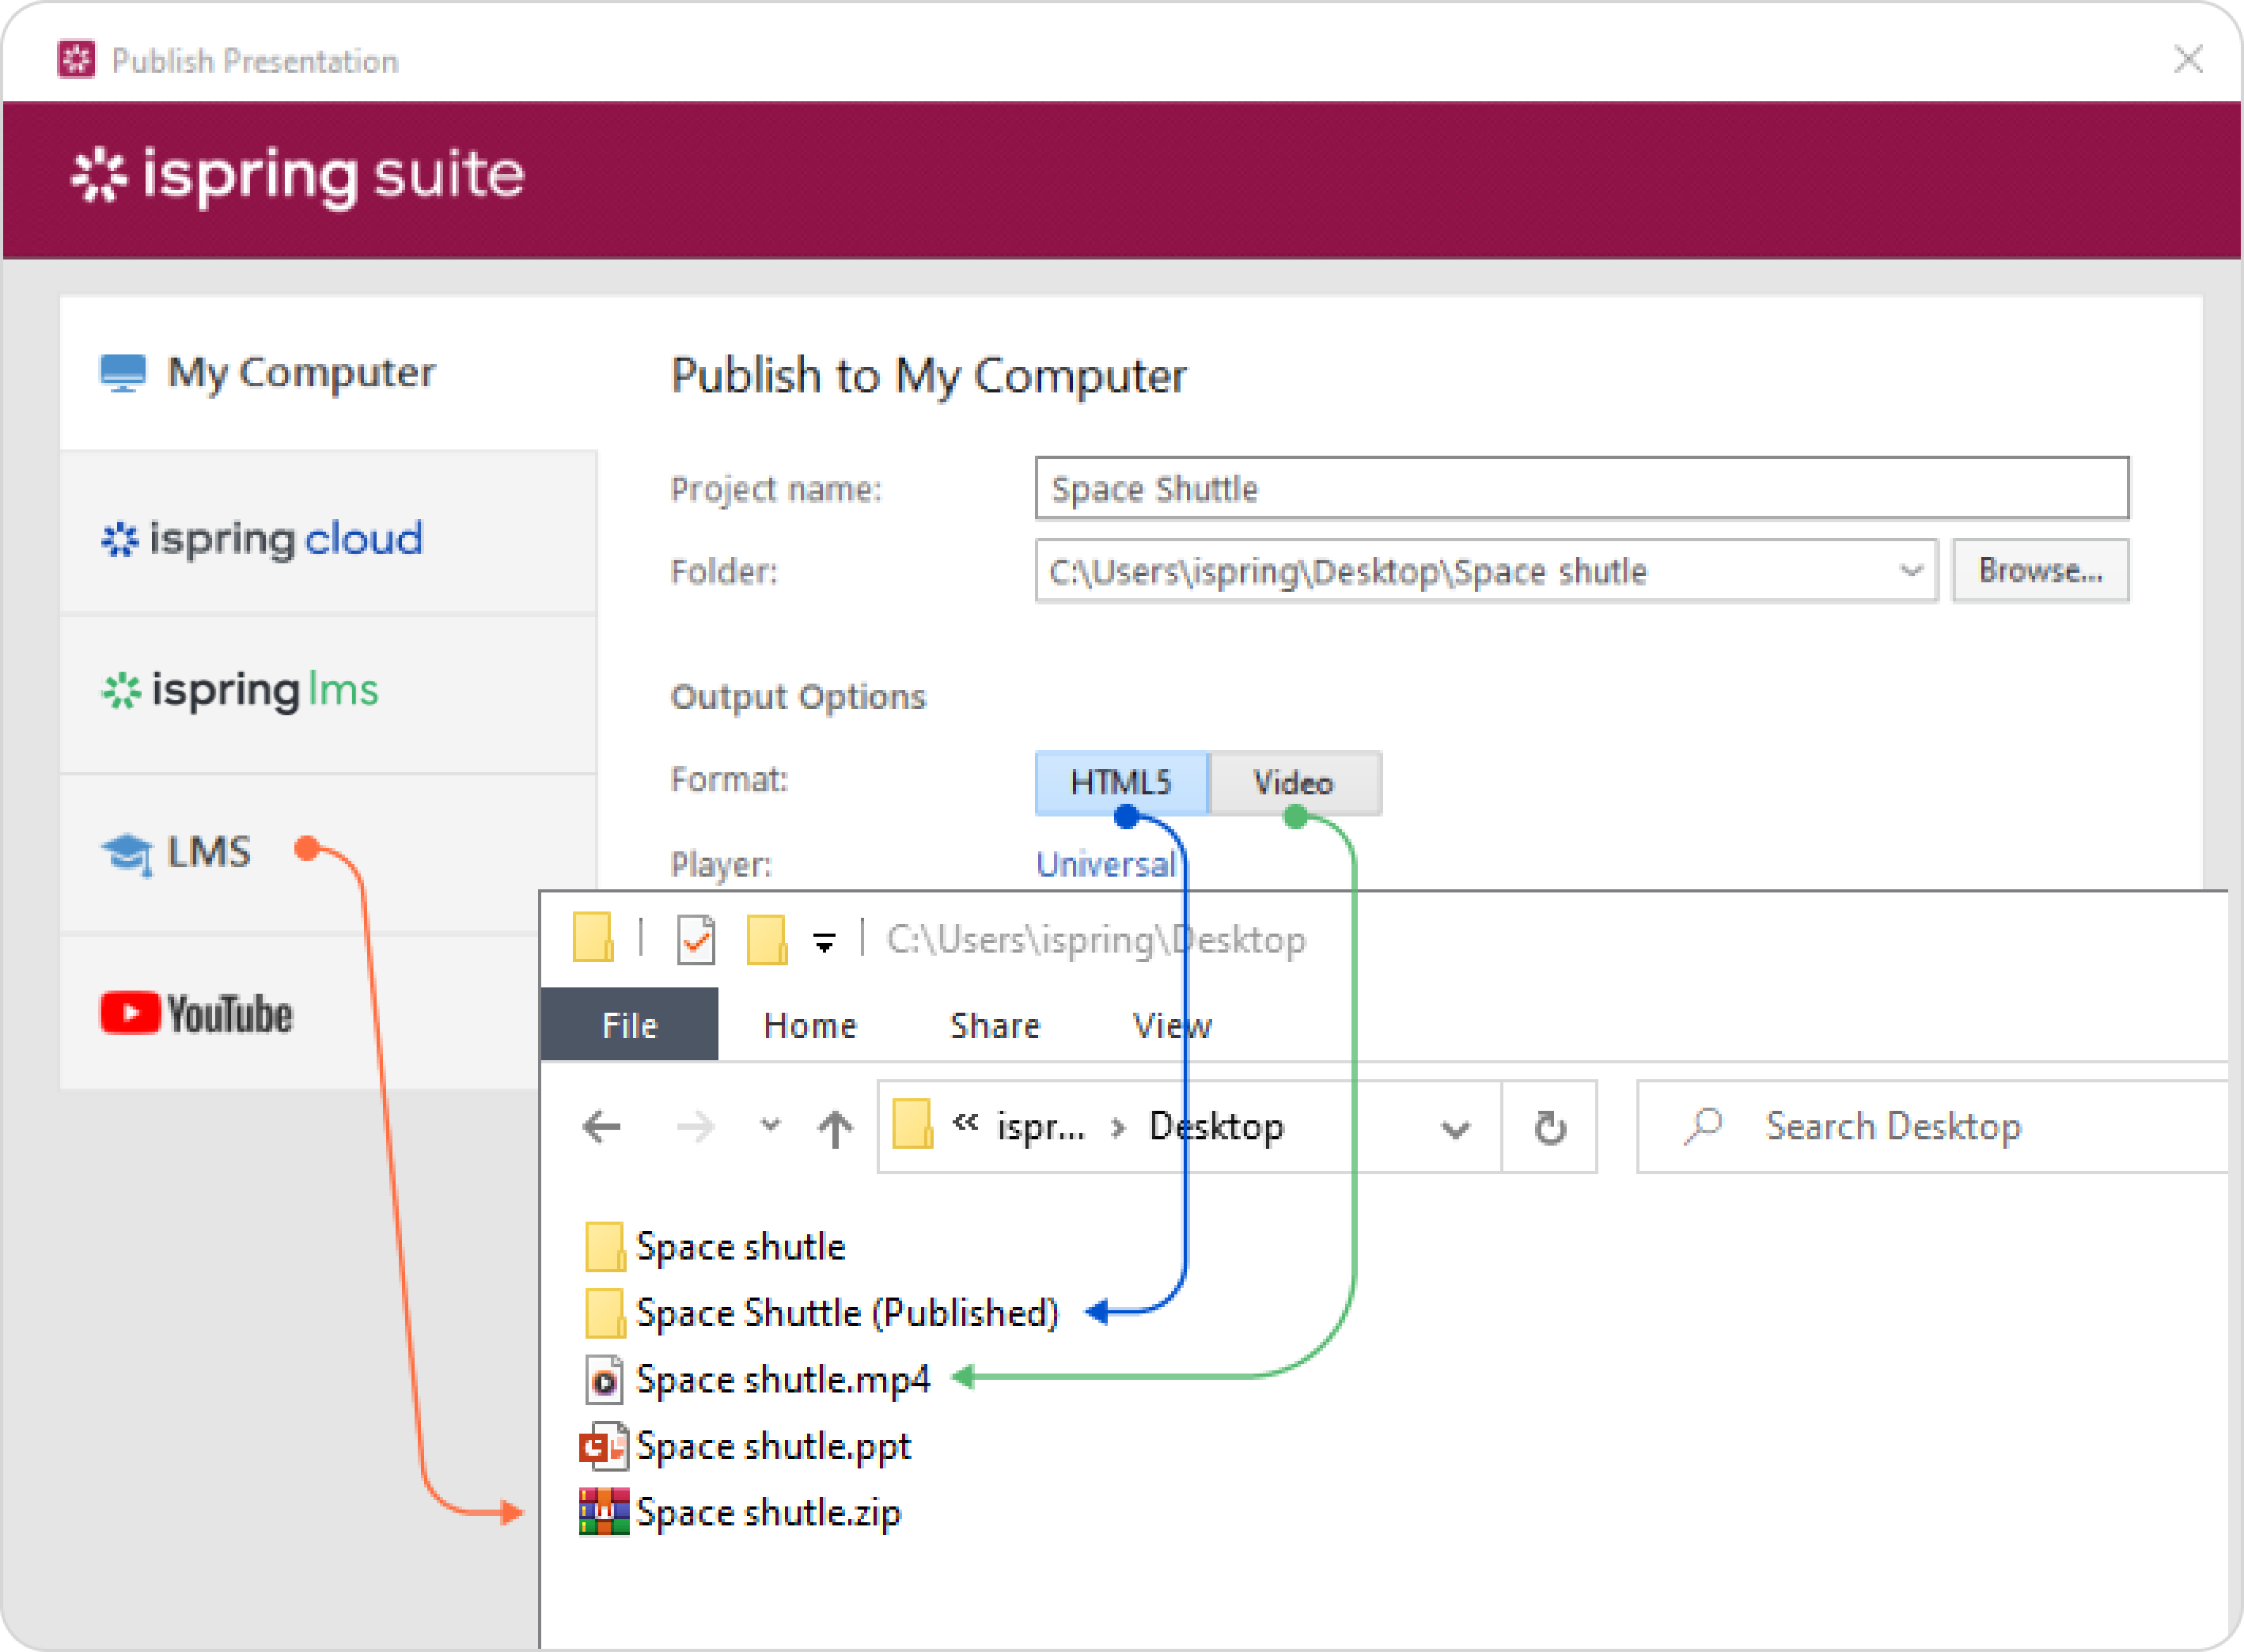
You cannot edit the course once it’s published. Using technical terminology, the iSpring conversion is similar to rendering a video project or compiling some code in to a program. Once it’s done, you can’t turn it back to make changes if you don’t have access to the original project.
You can upload the (Published) folder to your website via FTP or give it to your webmaster to do so. Recommended freeware tool: FileZilla.
Backups and collaborative work
Nothing is as important as making backups of your projects (not just iSpring projects). It will ensure that you don’t lose a bit of your precious work. Also, you can track the version history and share it with your colleagues for collaborative work.
Manual backup
To export your project, click File > Share > Share iSpring Suite Project > Export Project > Export. To get detailed instructions, read the Exporting a Project article.
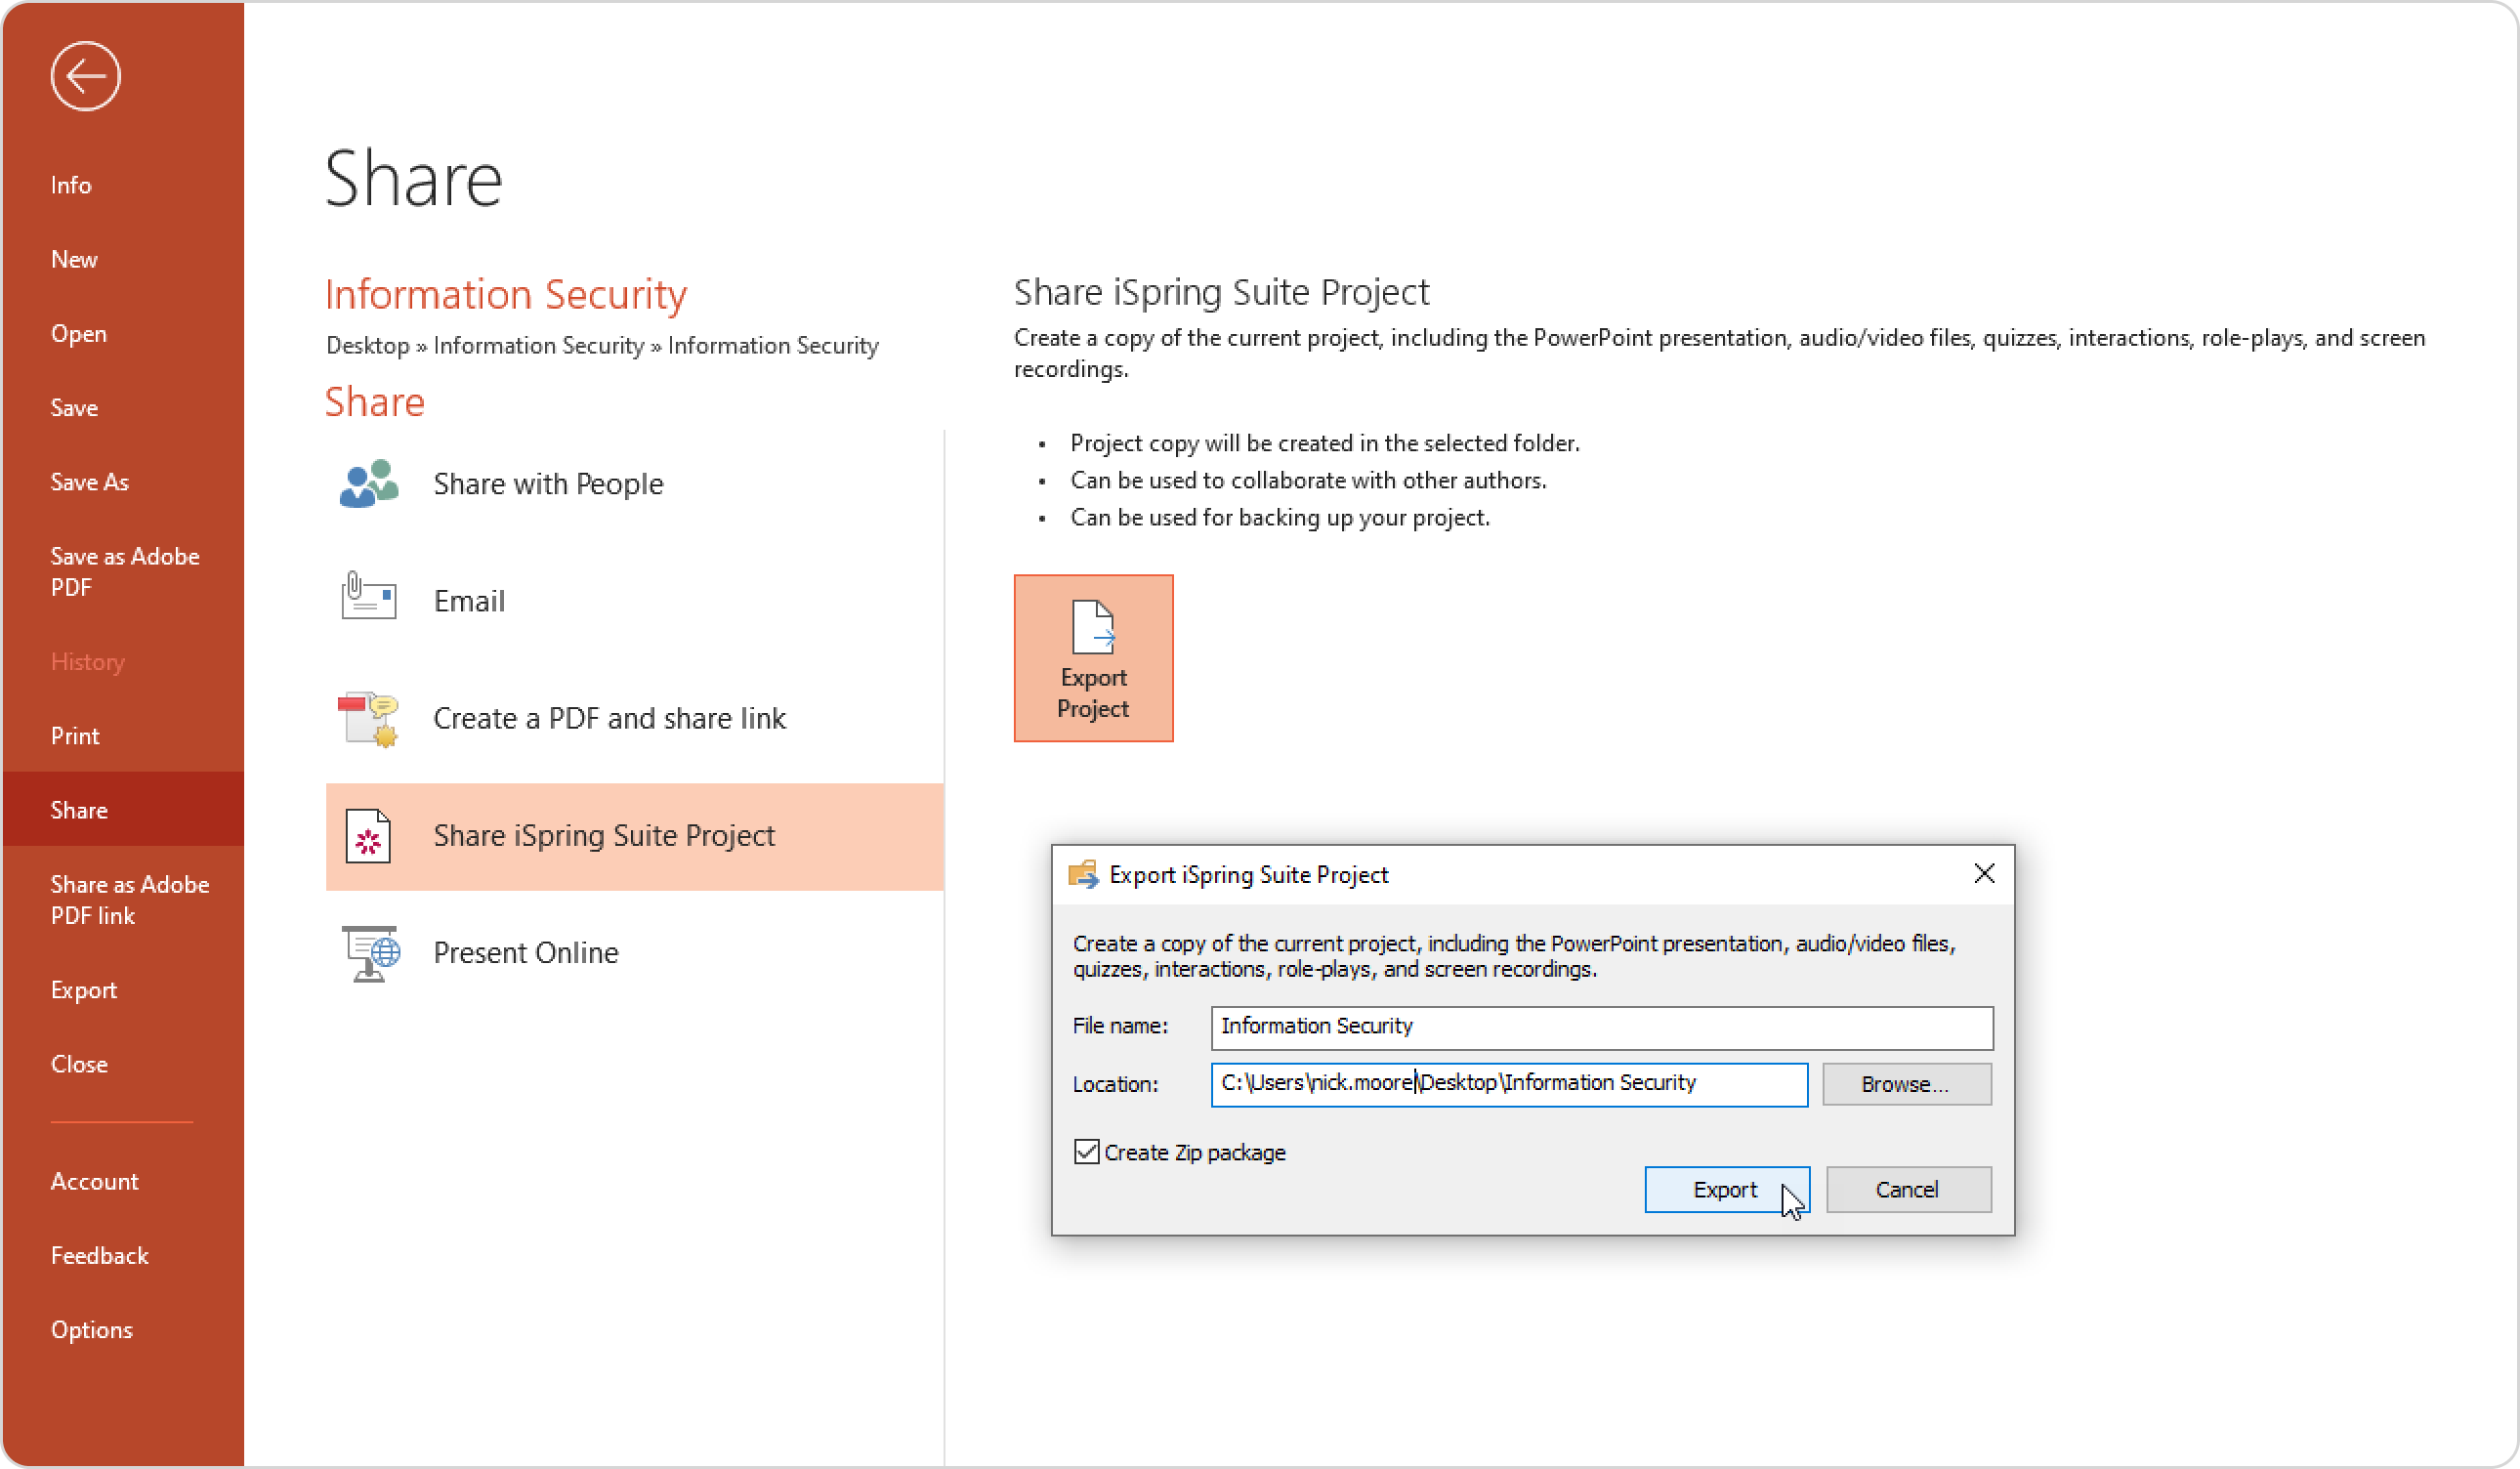
Export is the same operation as if you copied the PPTX file along with the project folder and then added them to a ZIP archive in Windows Explorer.
After you get a backup copy of your project, you can:
Put it in a project backup storage folder on your computer (create it manually).
Send it to a colleague, who will continue working on it in iSpring Suite (e.g., to record or fix a voiceover).
Send it to the iSpring Support email if you were asked to share the presentation with the iSpring Help Desk to reproduce the issue.
The repository of your backups may look like this, providing you with version control options as well:
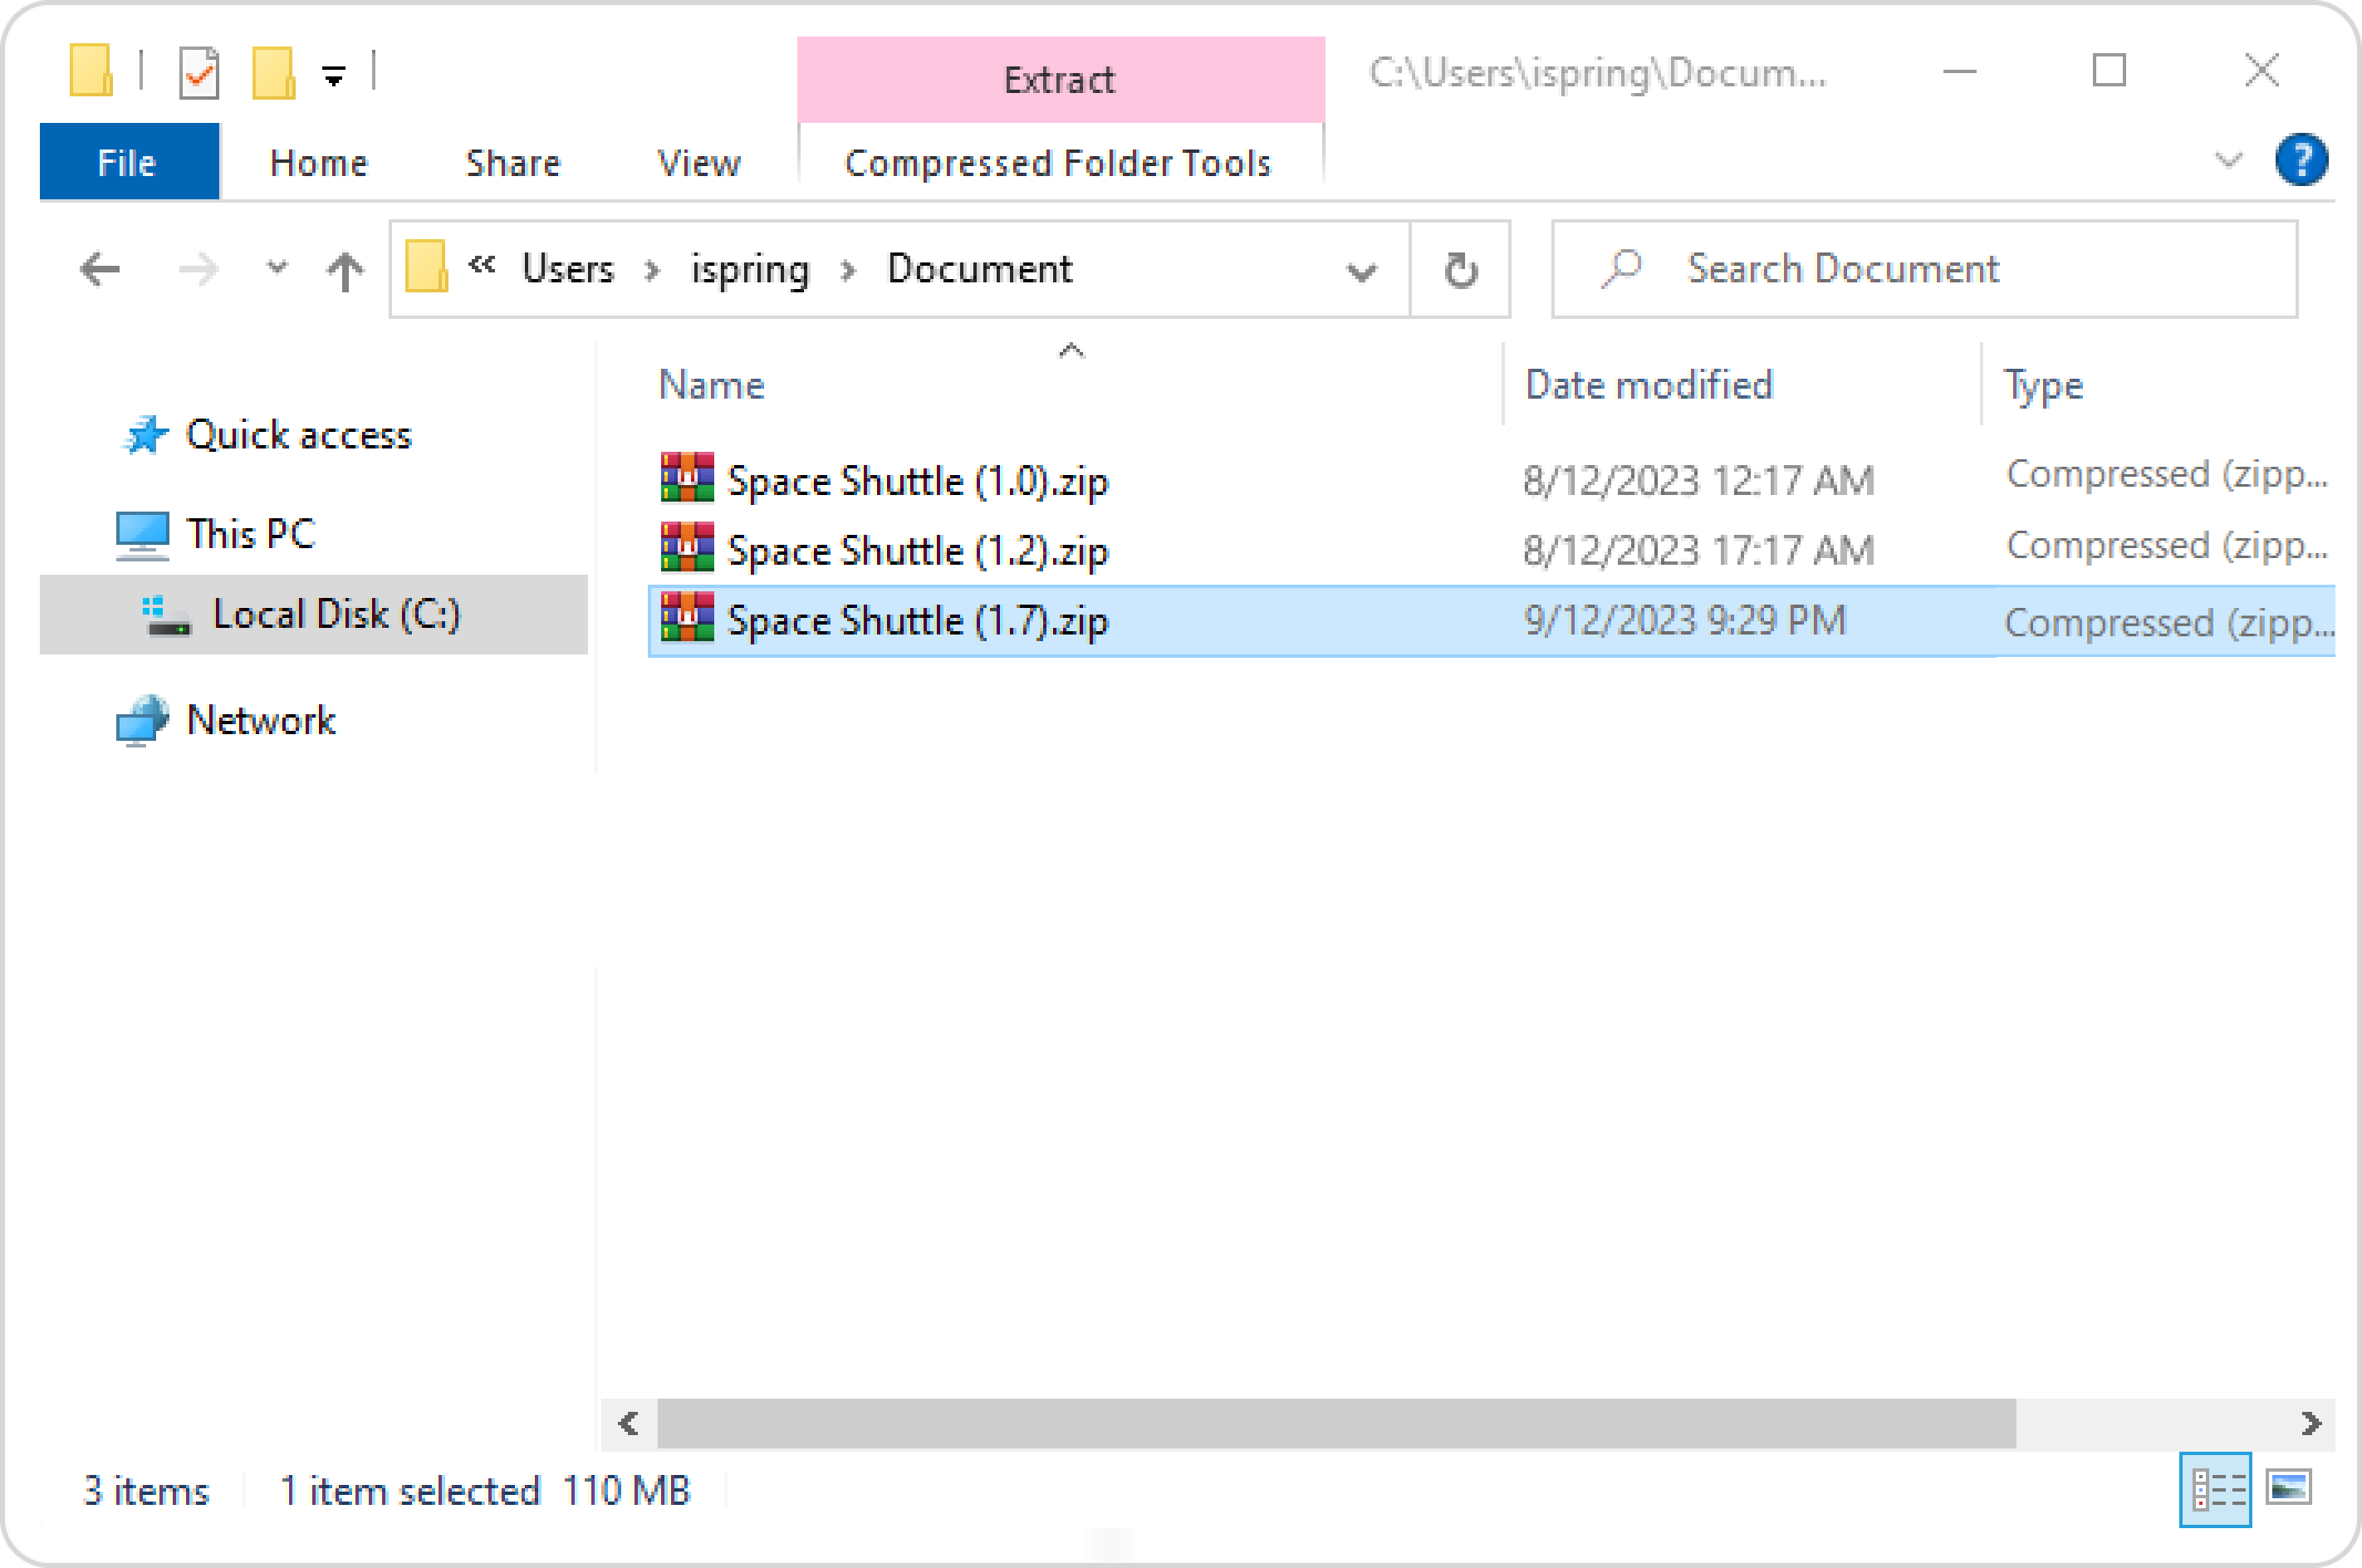
There are plenty of different solutions that will automate the backup routine for the whole system or selected folders that store the important projects you work on.
Commercial backup software:
Built-in backup options:
- Windows 10 File History (similar to Time Machine on Mac)