Inserting a Local HTML File
If you have to deal with presentations a lot, you might need to embed one PowerPoint in another.
Embedding a PowerPoint file with iSpring Suite will take you just 2 simple steps. They are:
- Publish your presentation
- Insert your presentation as a Web object
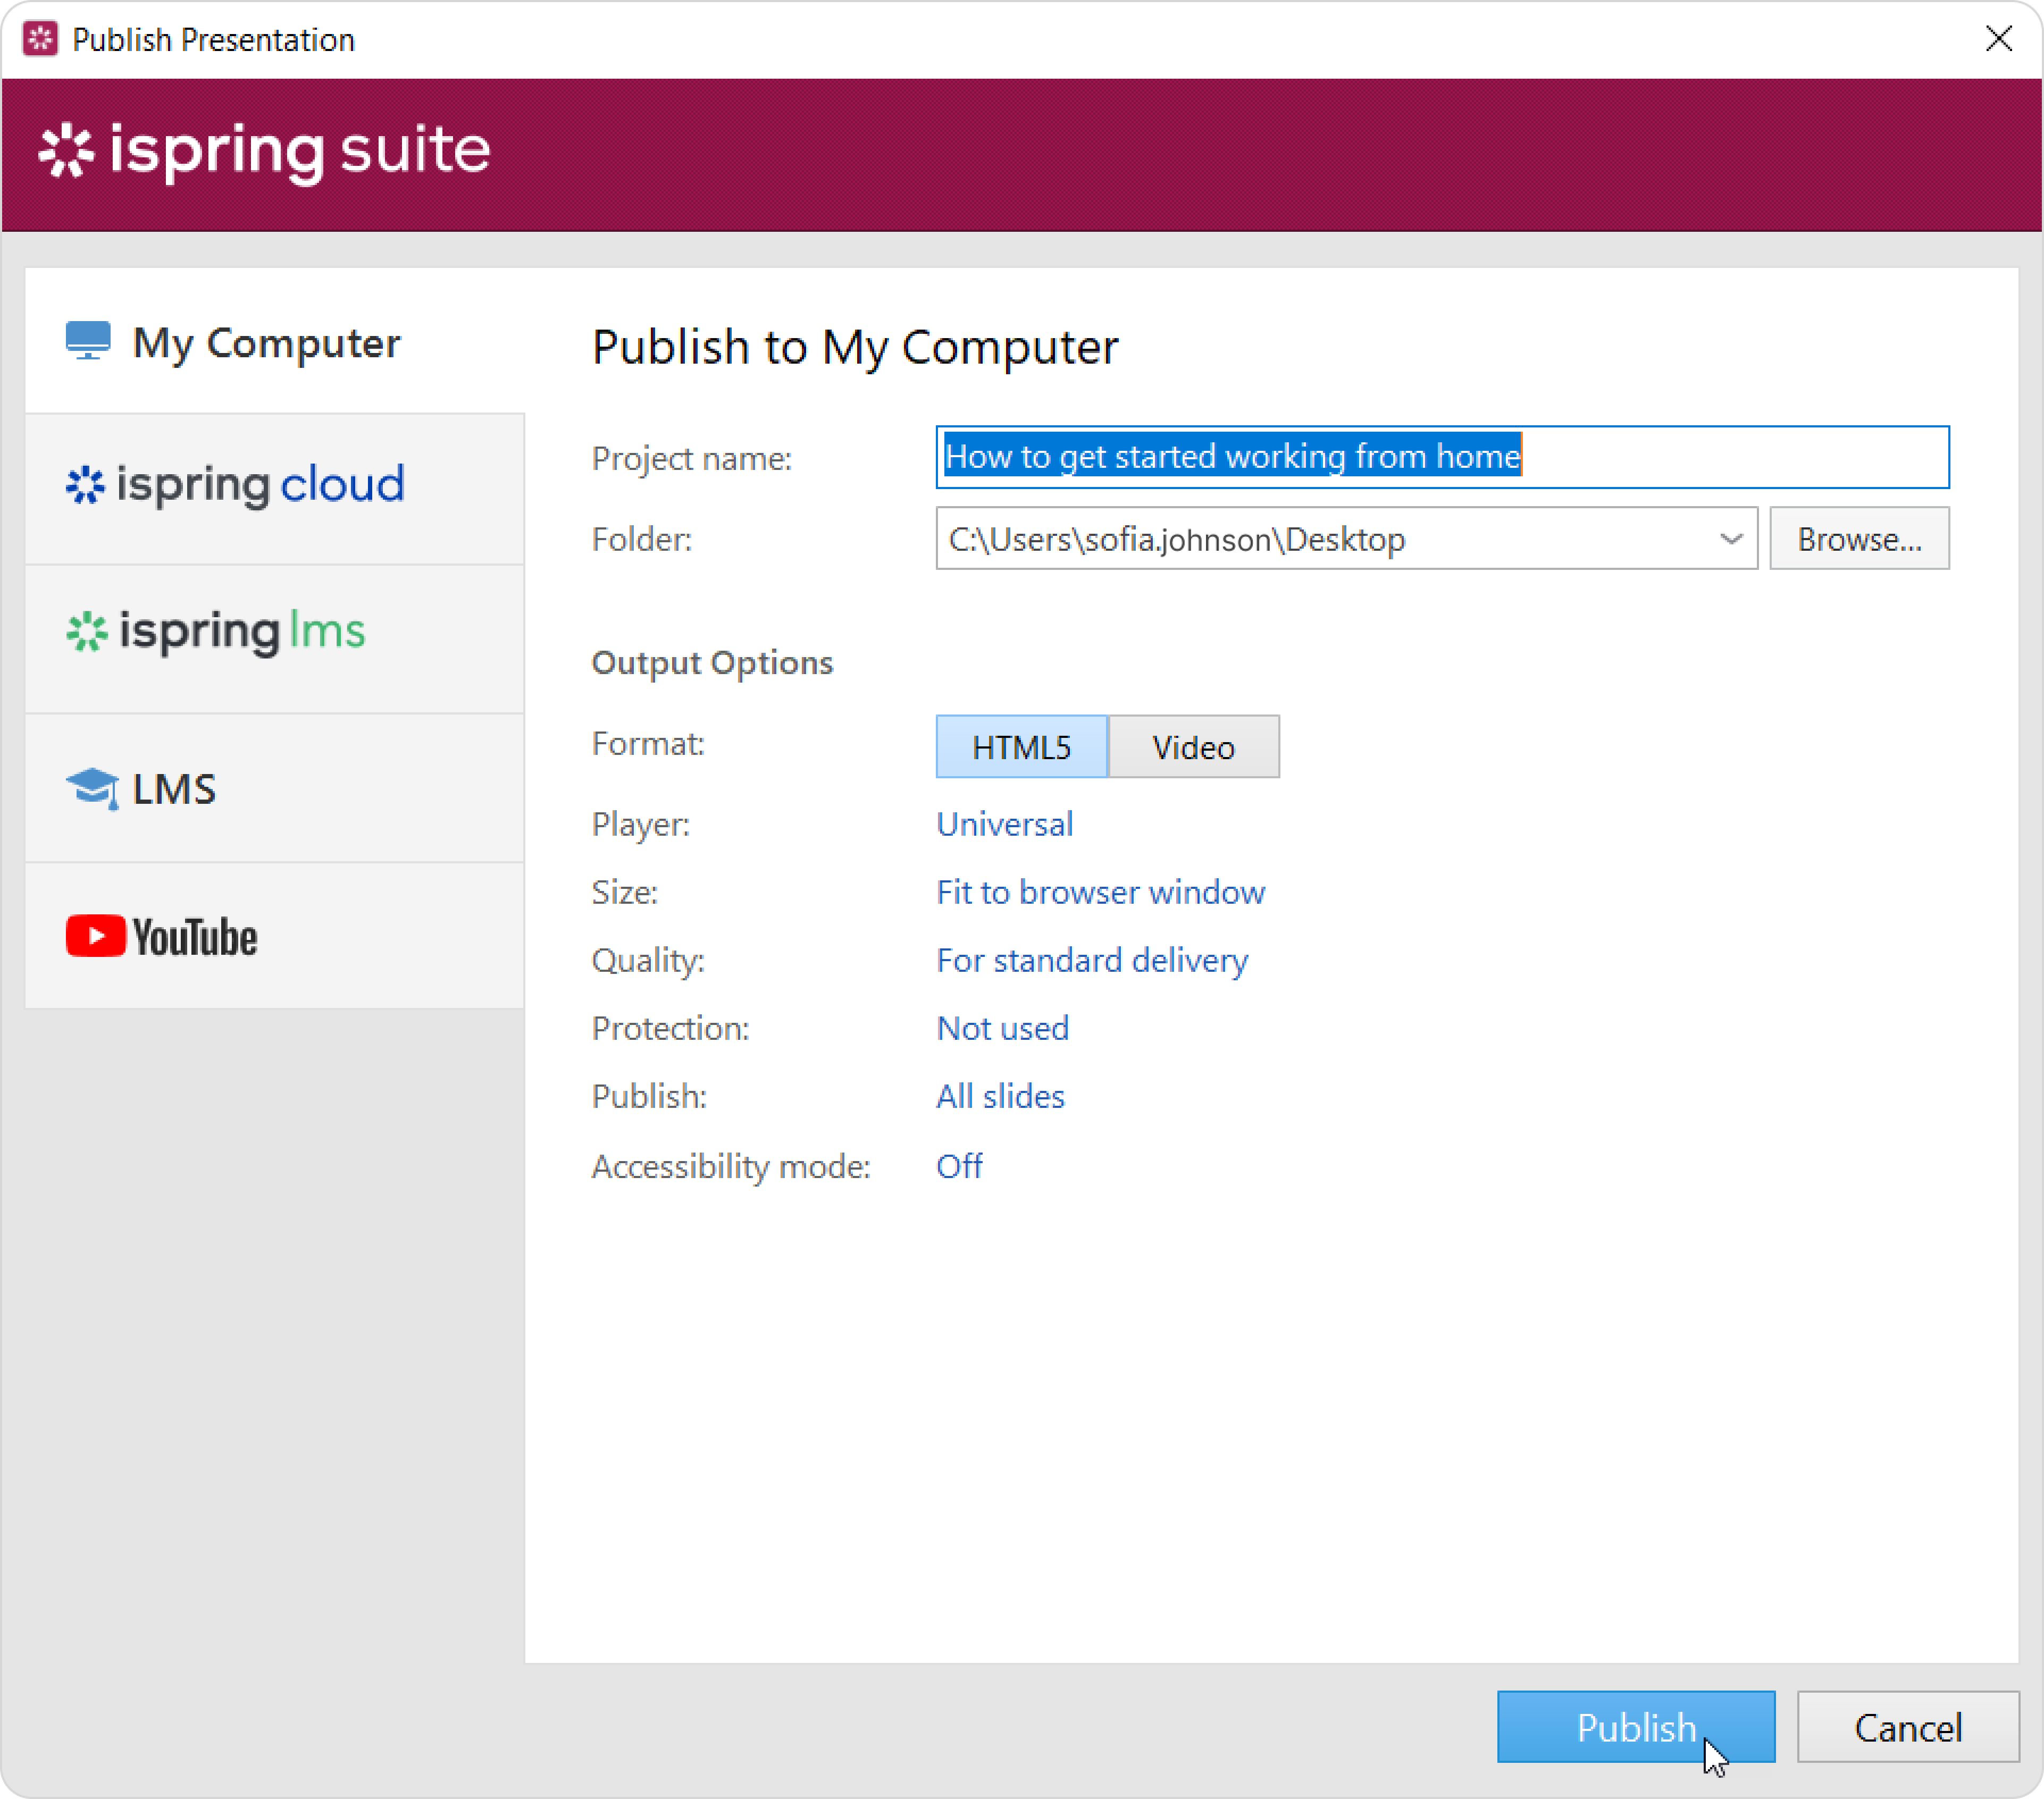
How to publish a presentation to HTML5
Convert the presentation you want to embed into another presentation to an HTML5 format with iSpring.
- Click Publish on the iSpring toolbar.

- Make sure you have HTML5 in the Output Options on the My Computer tab. Adjust other settings like Player and Quality, if needed.
- Click Publish to convert your PowerPoint presentation to HTML5.
Done! You now can insert your presentation as a web object.
How to insert a presentation as a Web object
To insert a local HTML file:
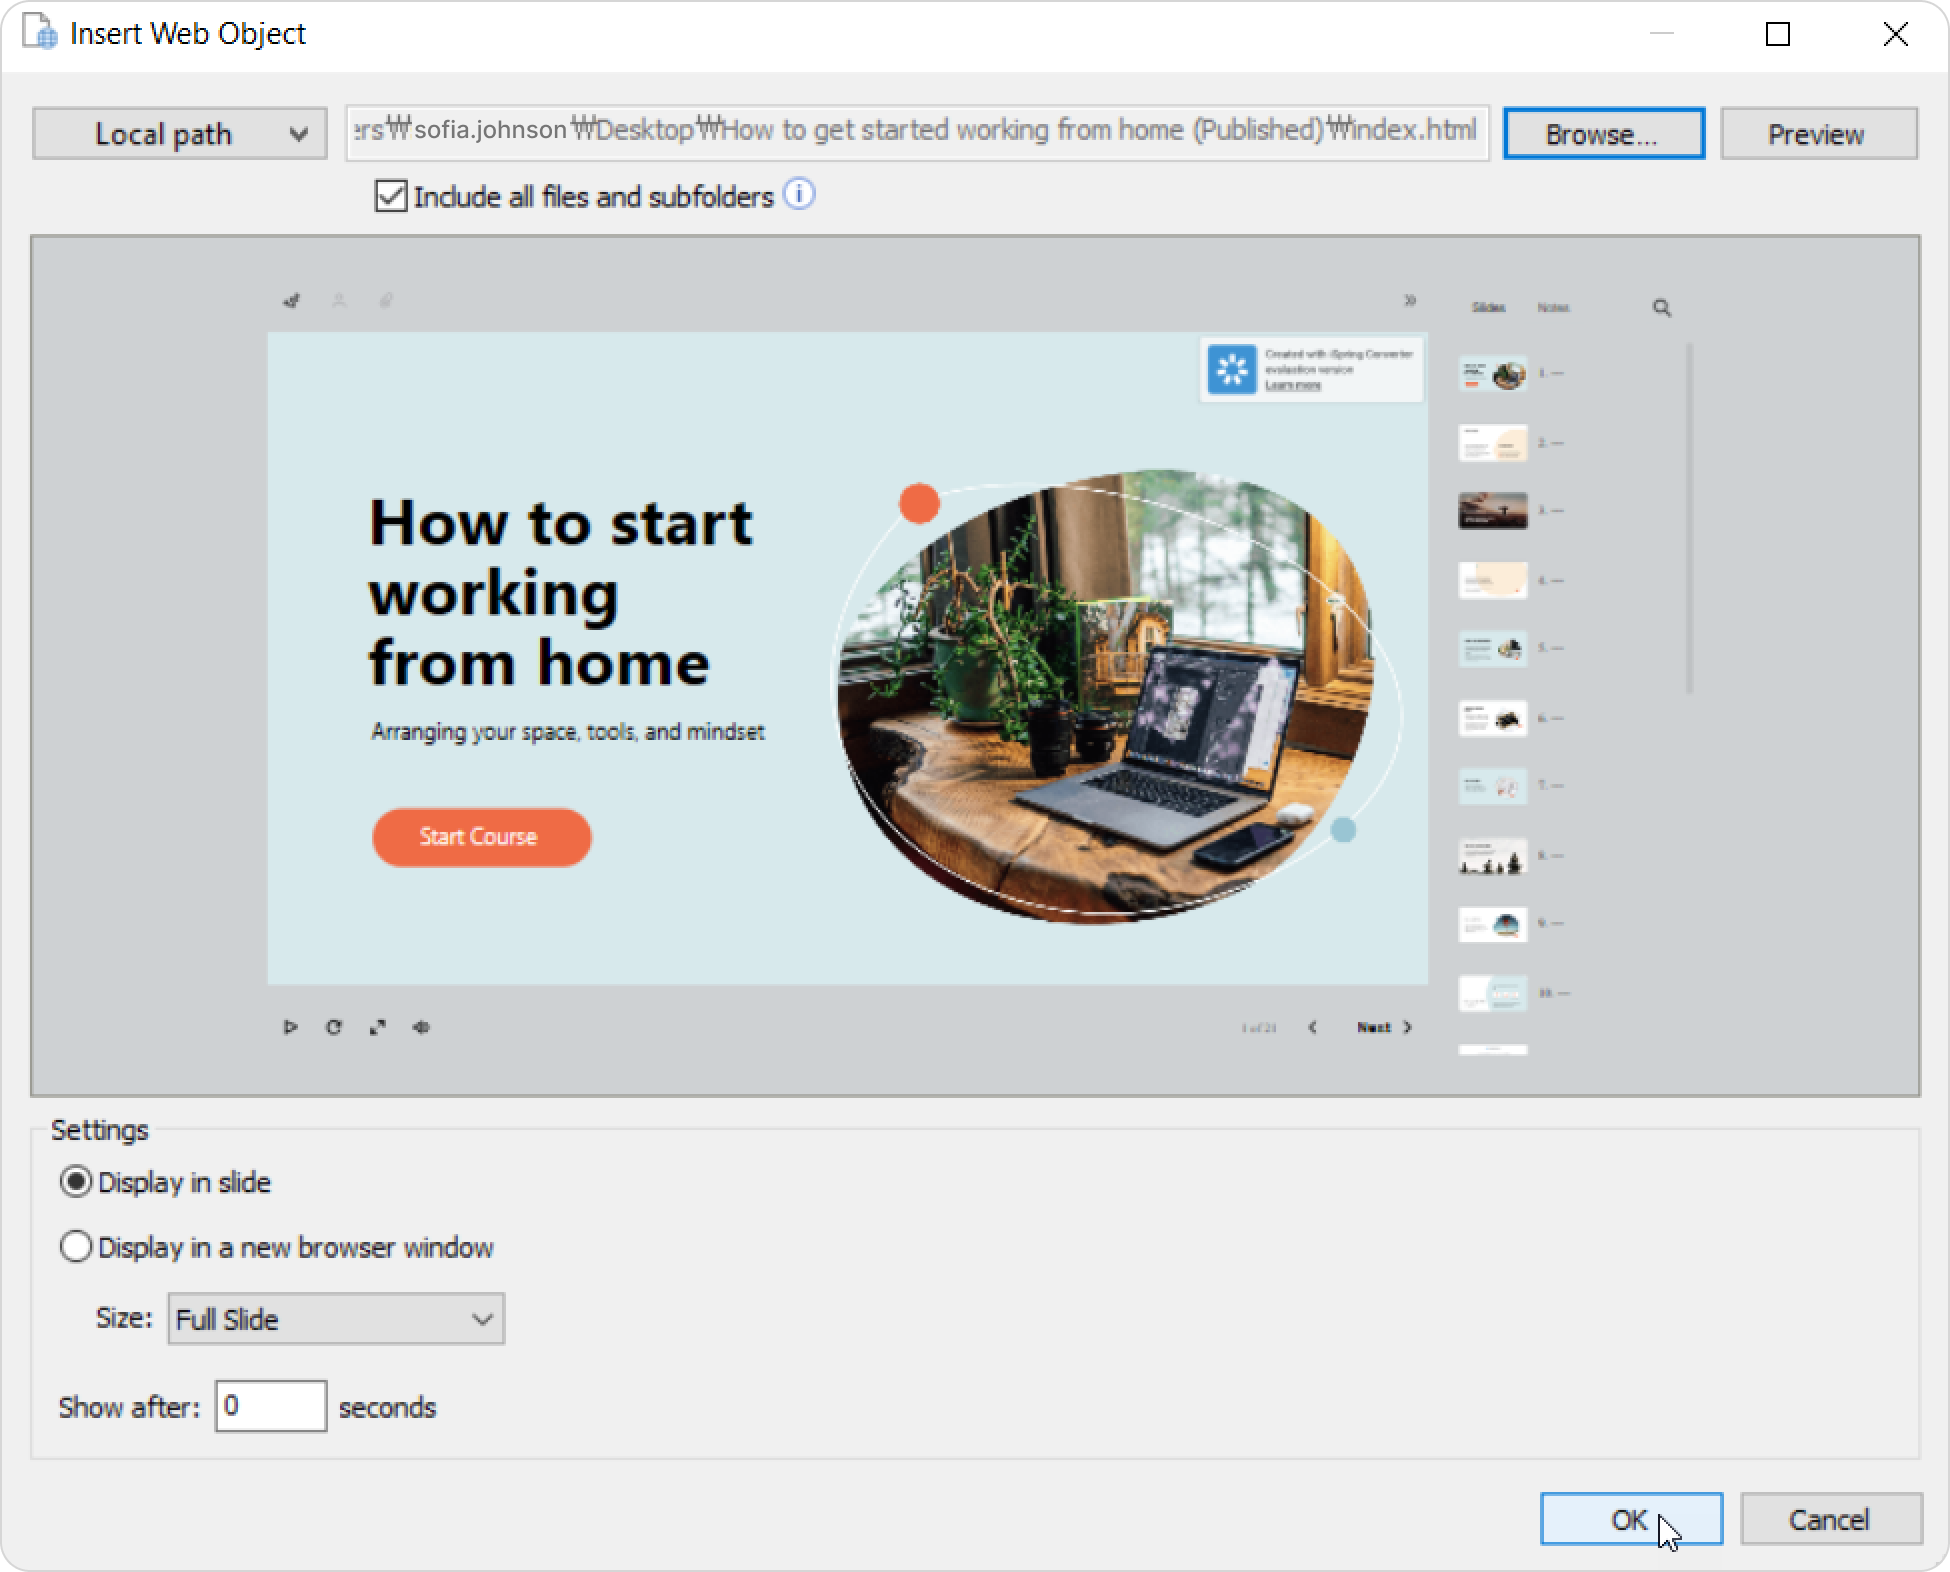
- Click the Web Object button on the iSpring Suite toolbar.

- Select Local path from the dropdown menu on the upper left.

- Browse for a file on your computer—it should be a web page. Open index.html.
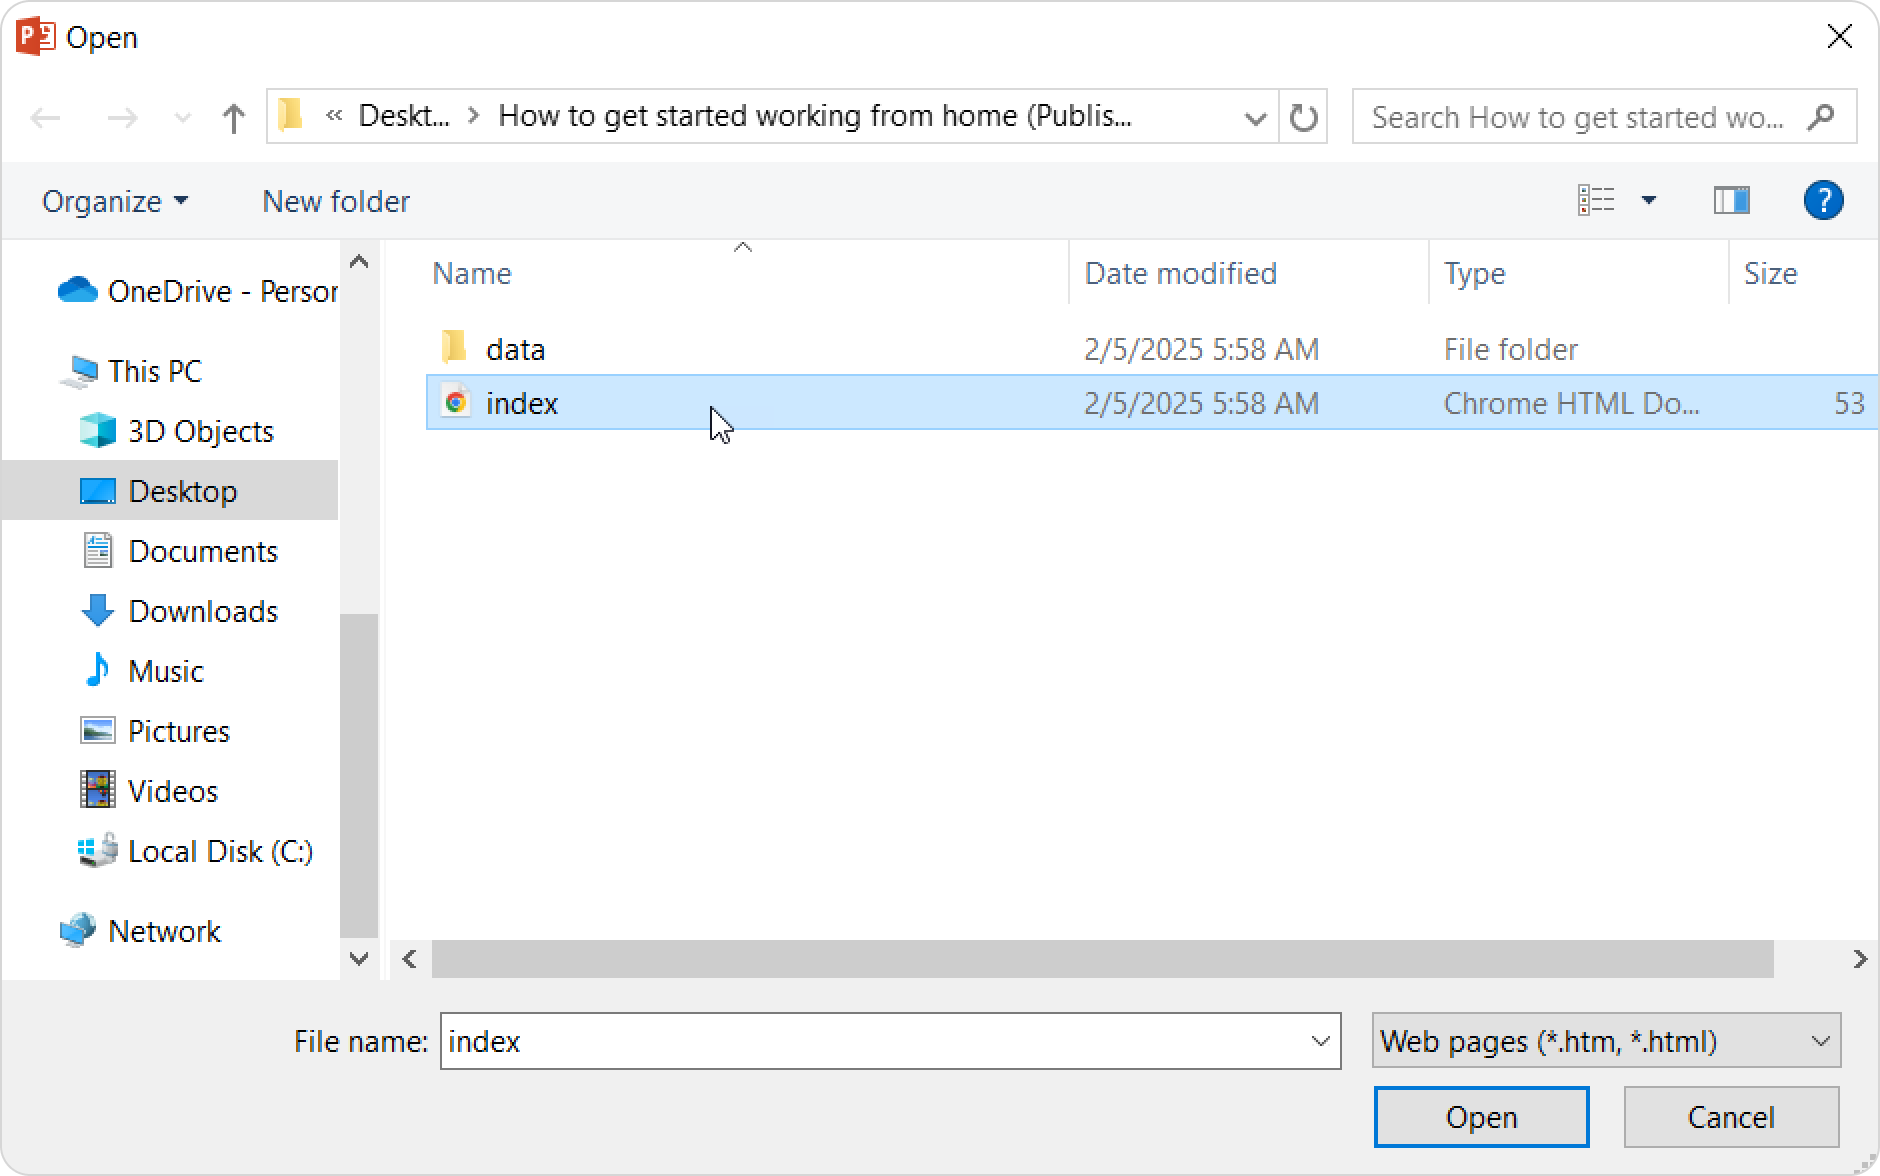
- Mark the checkbox Include all files and subfolders.

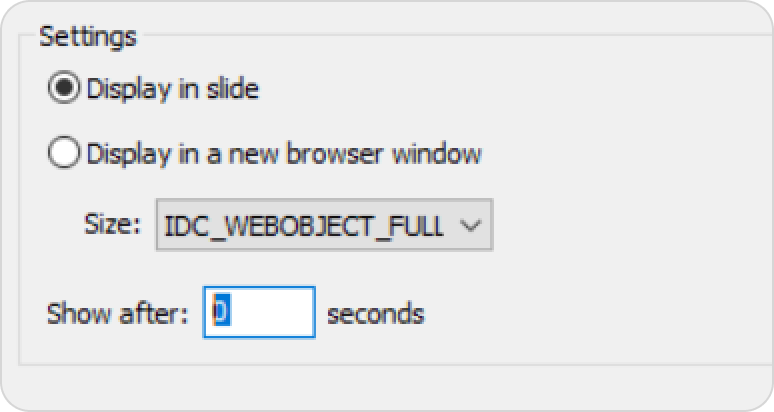
- Next, choose how your web object will be displayed.
- Display in slide
The web object will appear on the slide. You can change its size and position. - Display in a new browser window
The web object will be opened in a new browser window. Additionally, you can configure dimensions of the browser window or make a web object show in full-screen mode.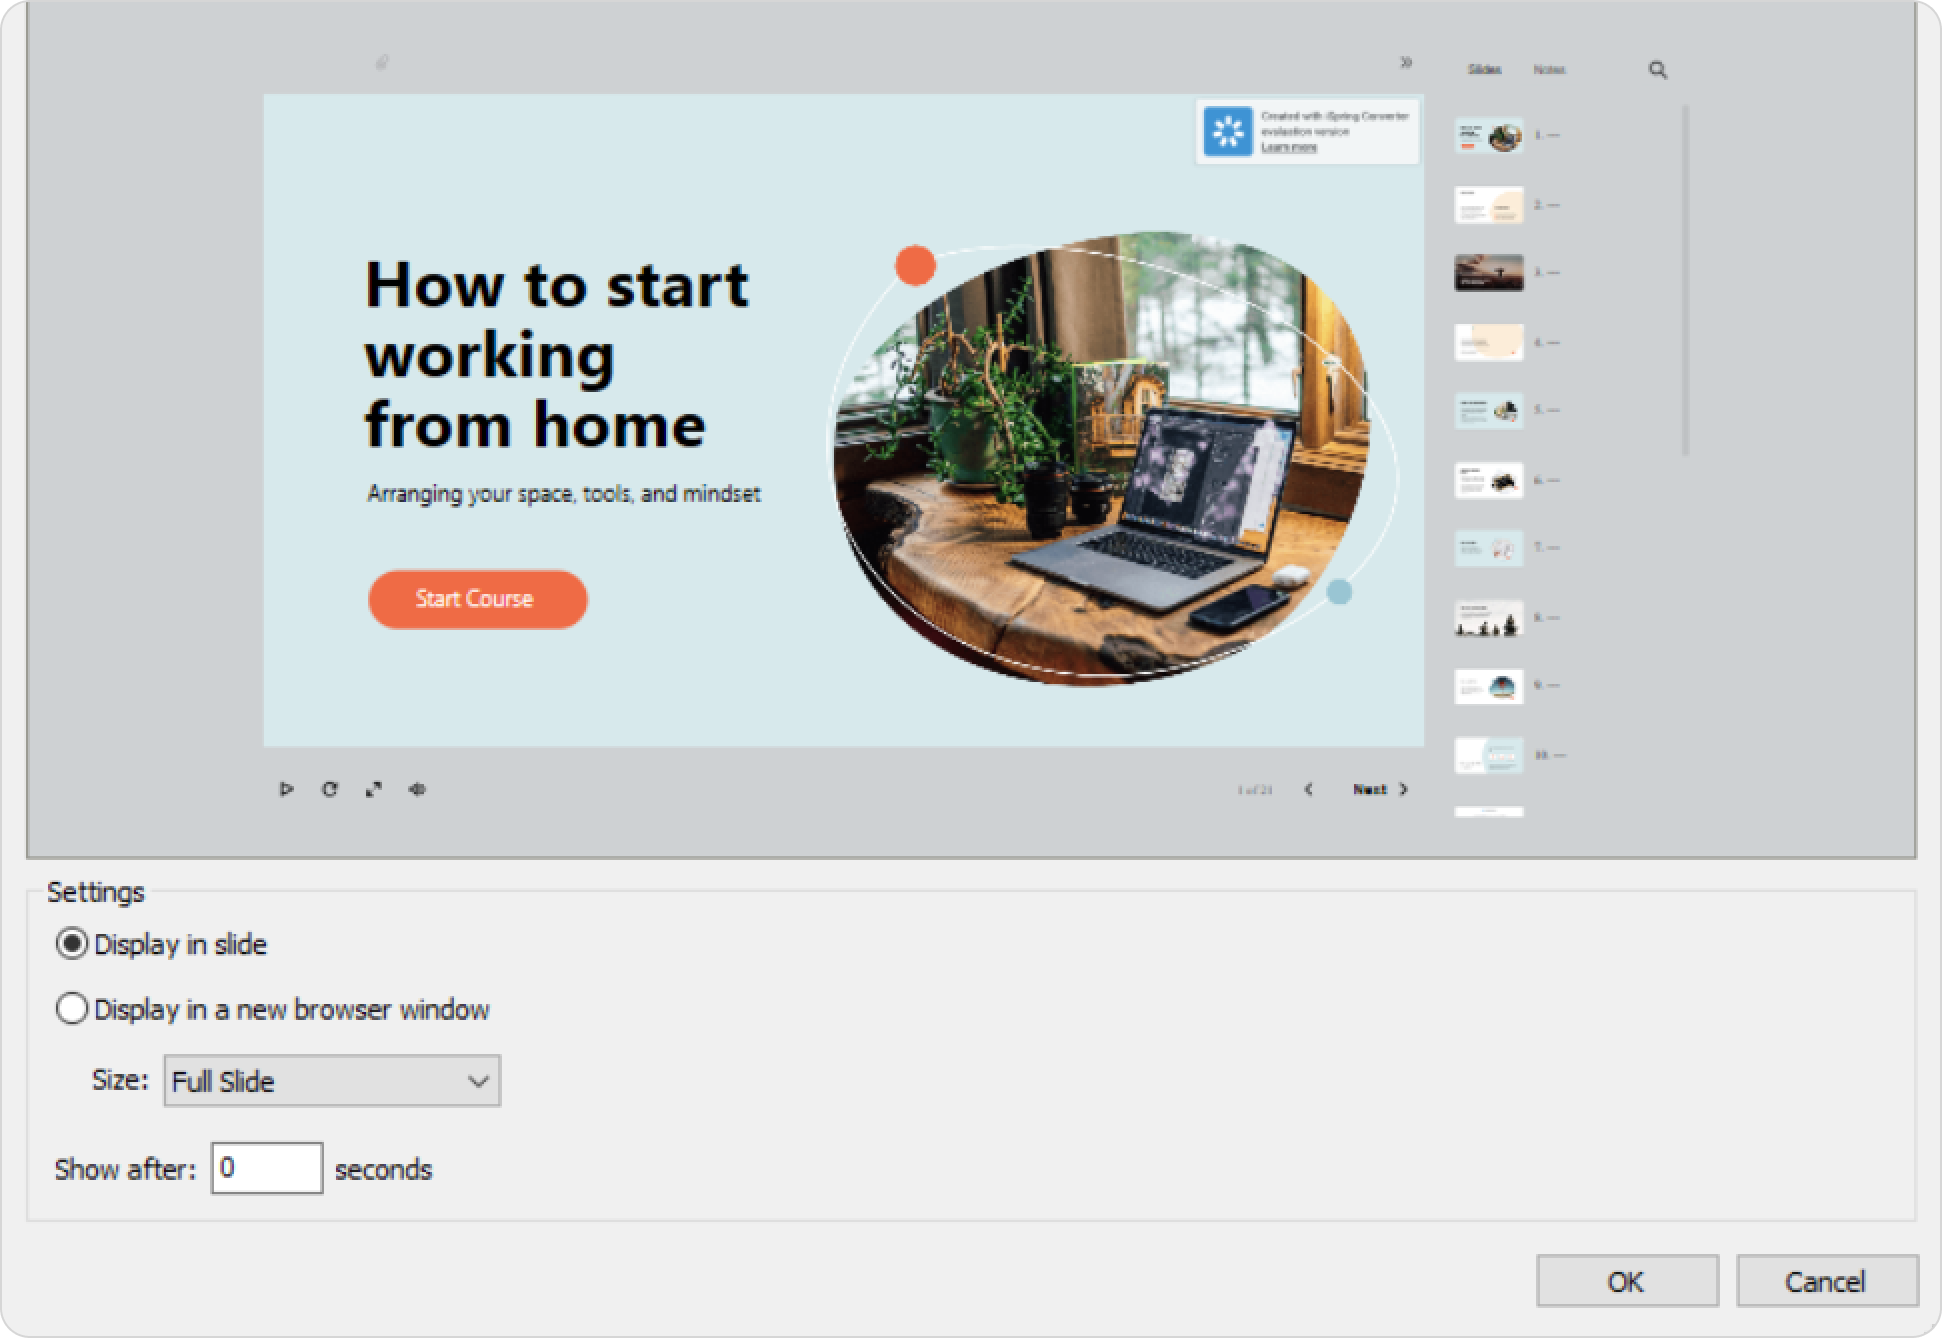
- Display in slide
- Specify when the web object will appear in the Show after field. The default delay is 0 seconds, which means the video clip will appear as soon as the slide is opened.
- Click OK to insert the web object into your slide.
Note:
Make sure you've saved the inserted HTML file in UTF-8 encoding. If the encoding is different, all the file texts might appear as unreadable characters.
How to save a file in the UTF-8 encoding
Let's outline how to save a Word file as a web page in UTF-8 encoding.
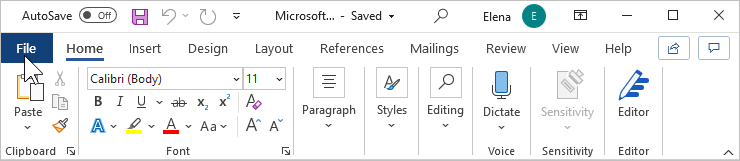
- Click on the File tab on the Microsoft Word toolbar.

- In the opened window, click Options.

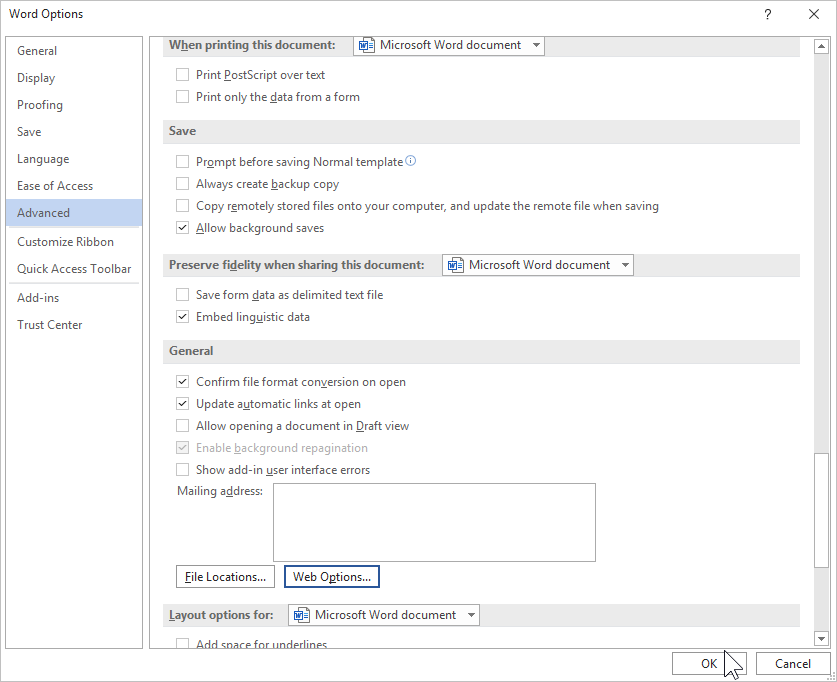
- In the Word Options window, click Advanced.
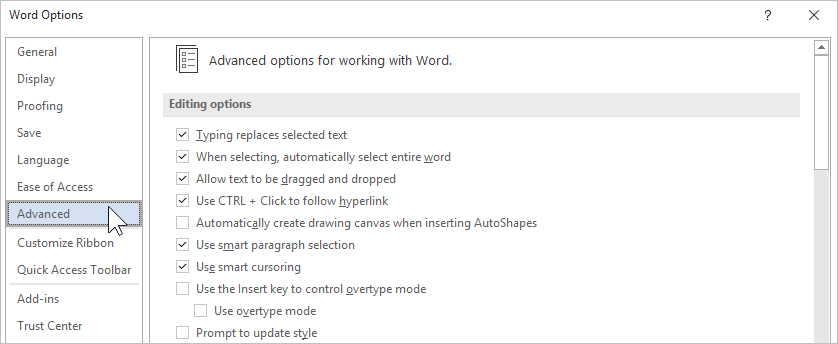
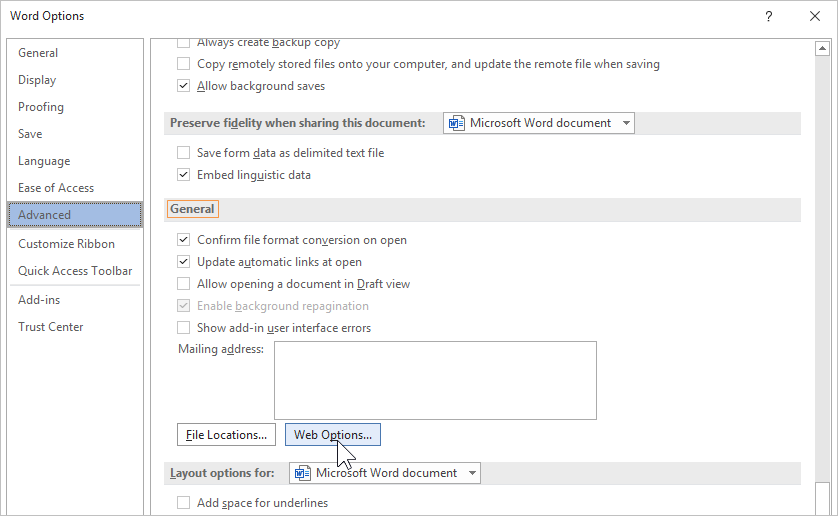
- Next, scroll the page down to the General section and click on the Web Options button.
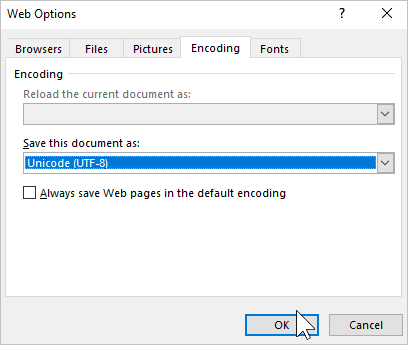
- In the Web Options window, select the Encoding tab. Next, in the Save this document as menu, select Unicode (UTF-8). Finally, click OK.
- In the Word Options window, click the OK button again.
- Now let's save the Word document as a web page. Click on the File tab on the Microsoft Word toolbar.
- In the opened menu, click Save As.
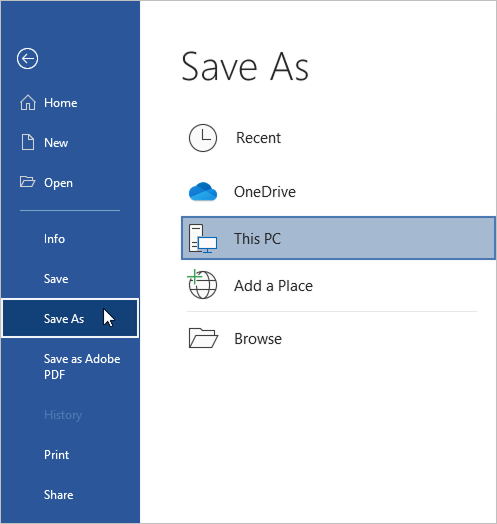
- Select the destination folder on your computer, enter the filename and select the file type: Web Page or Web Page, Filtered. Finally, click Save.
- The HTML file is saved to your computer. Now you can insert it as a web object into your iSpring Suite course.