How to Make Viewing the Entire Video in Your Course Necessary
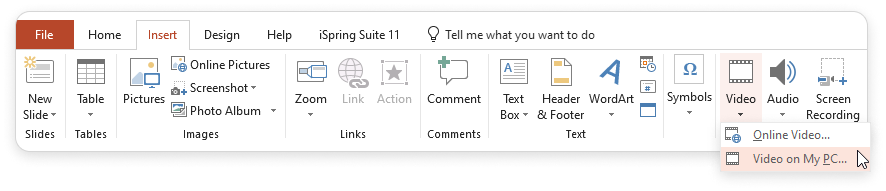
Insert your video into one of the slides of your presentation. To do this, click Video and select Video on My PC under the Insert tab.
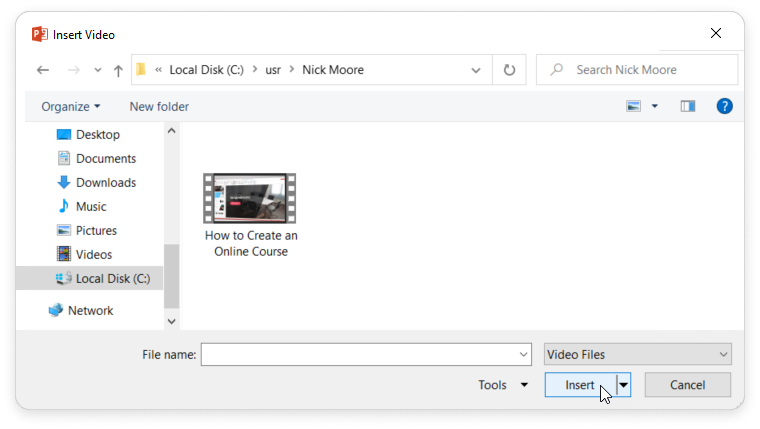
Next, choose a file on your PC and click Insert.
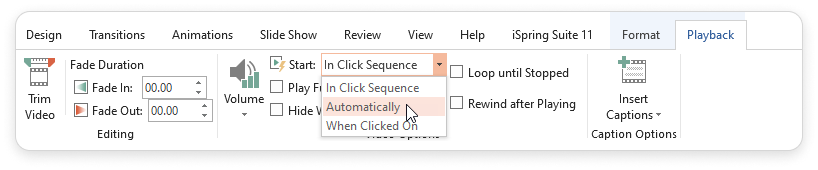
Select the video on the slide and, in the Playback tab, click Start: Automatically.
Then, disable the video controls. Go to the Slide Show tab and uncheck Show Media Controls.
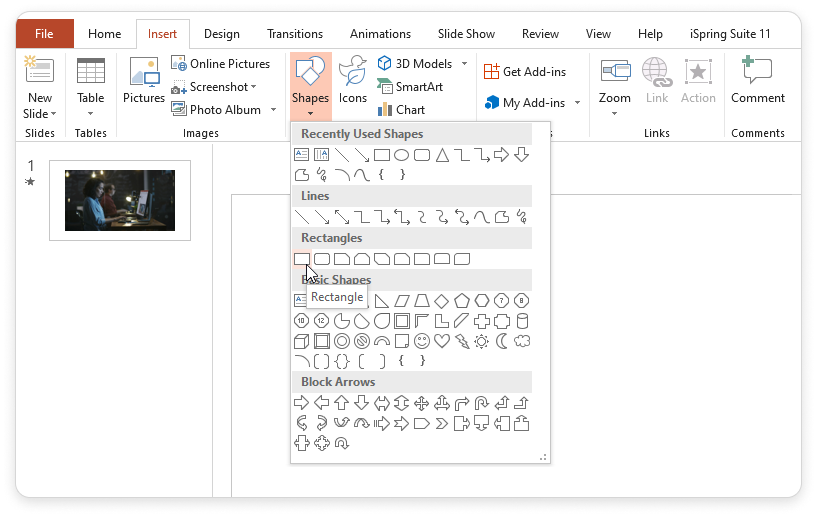
Now switch to the Insert tab. Add a rectangle shape that covers the entire video object. This will prevent viewers from clicking on the video to stop it.
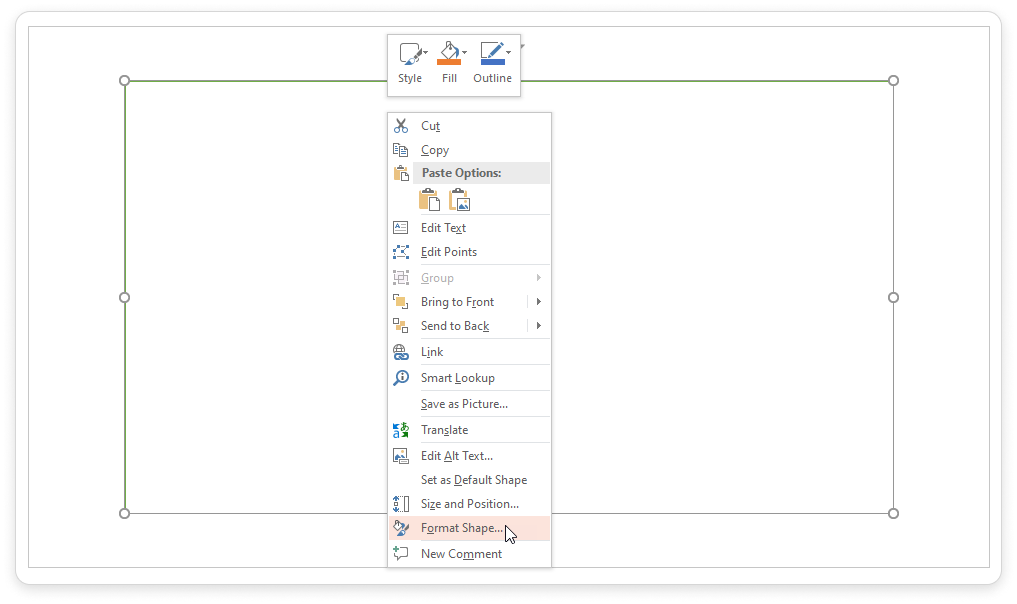
Right-click on the shape and select Format Shape.
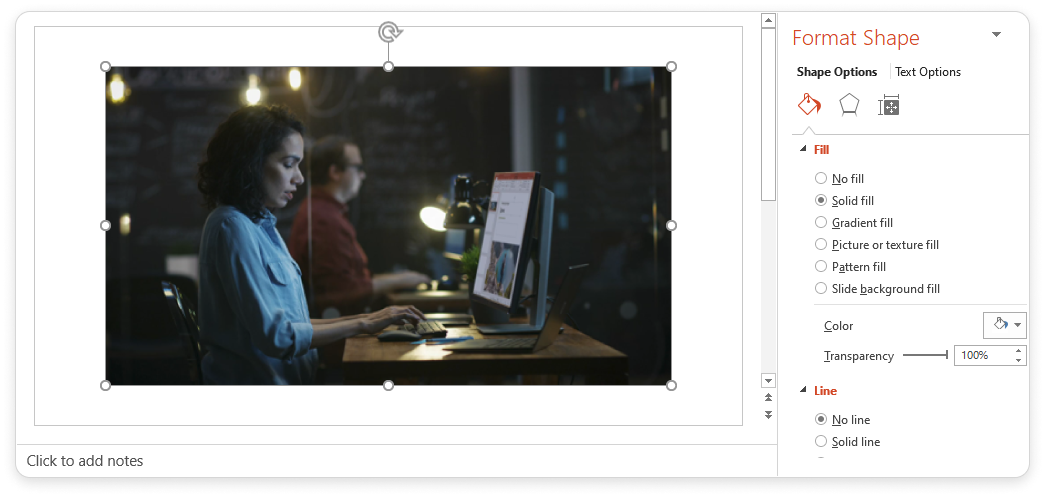
Set it to Solid fill, 100% Transparency, and No line.
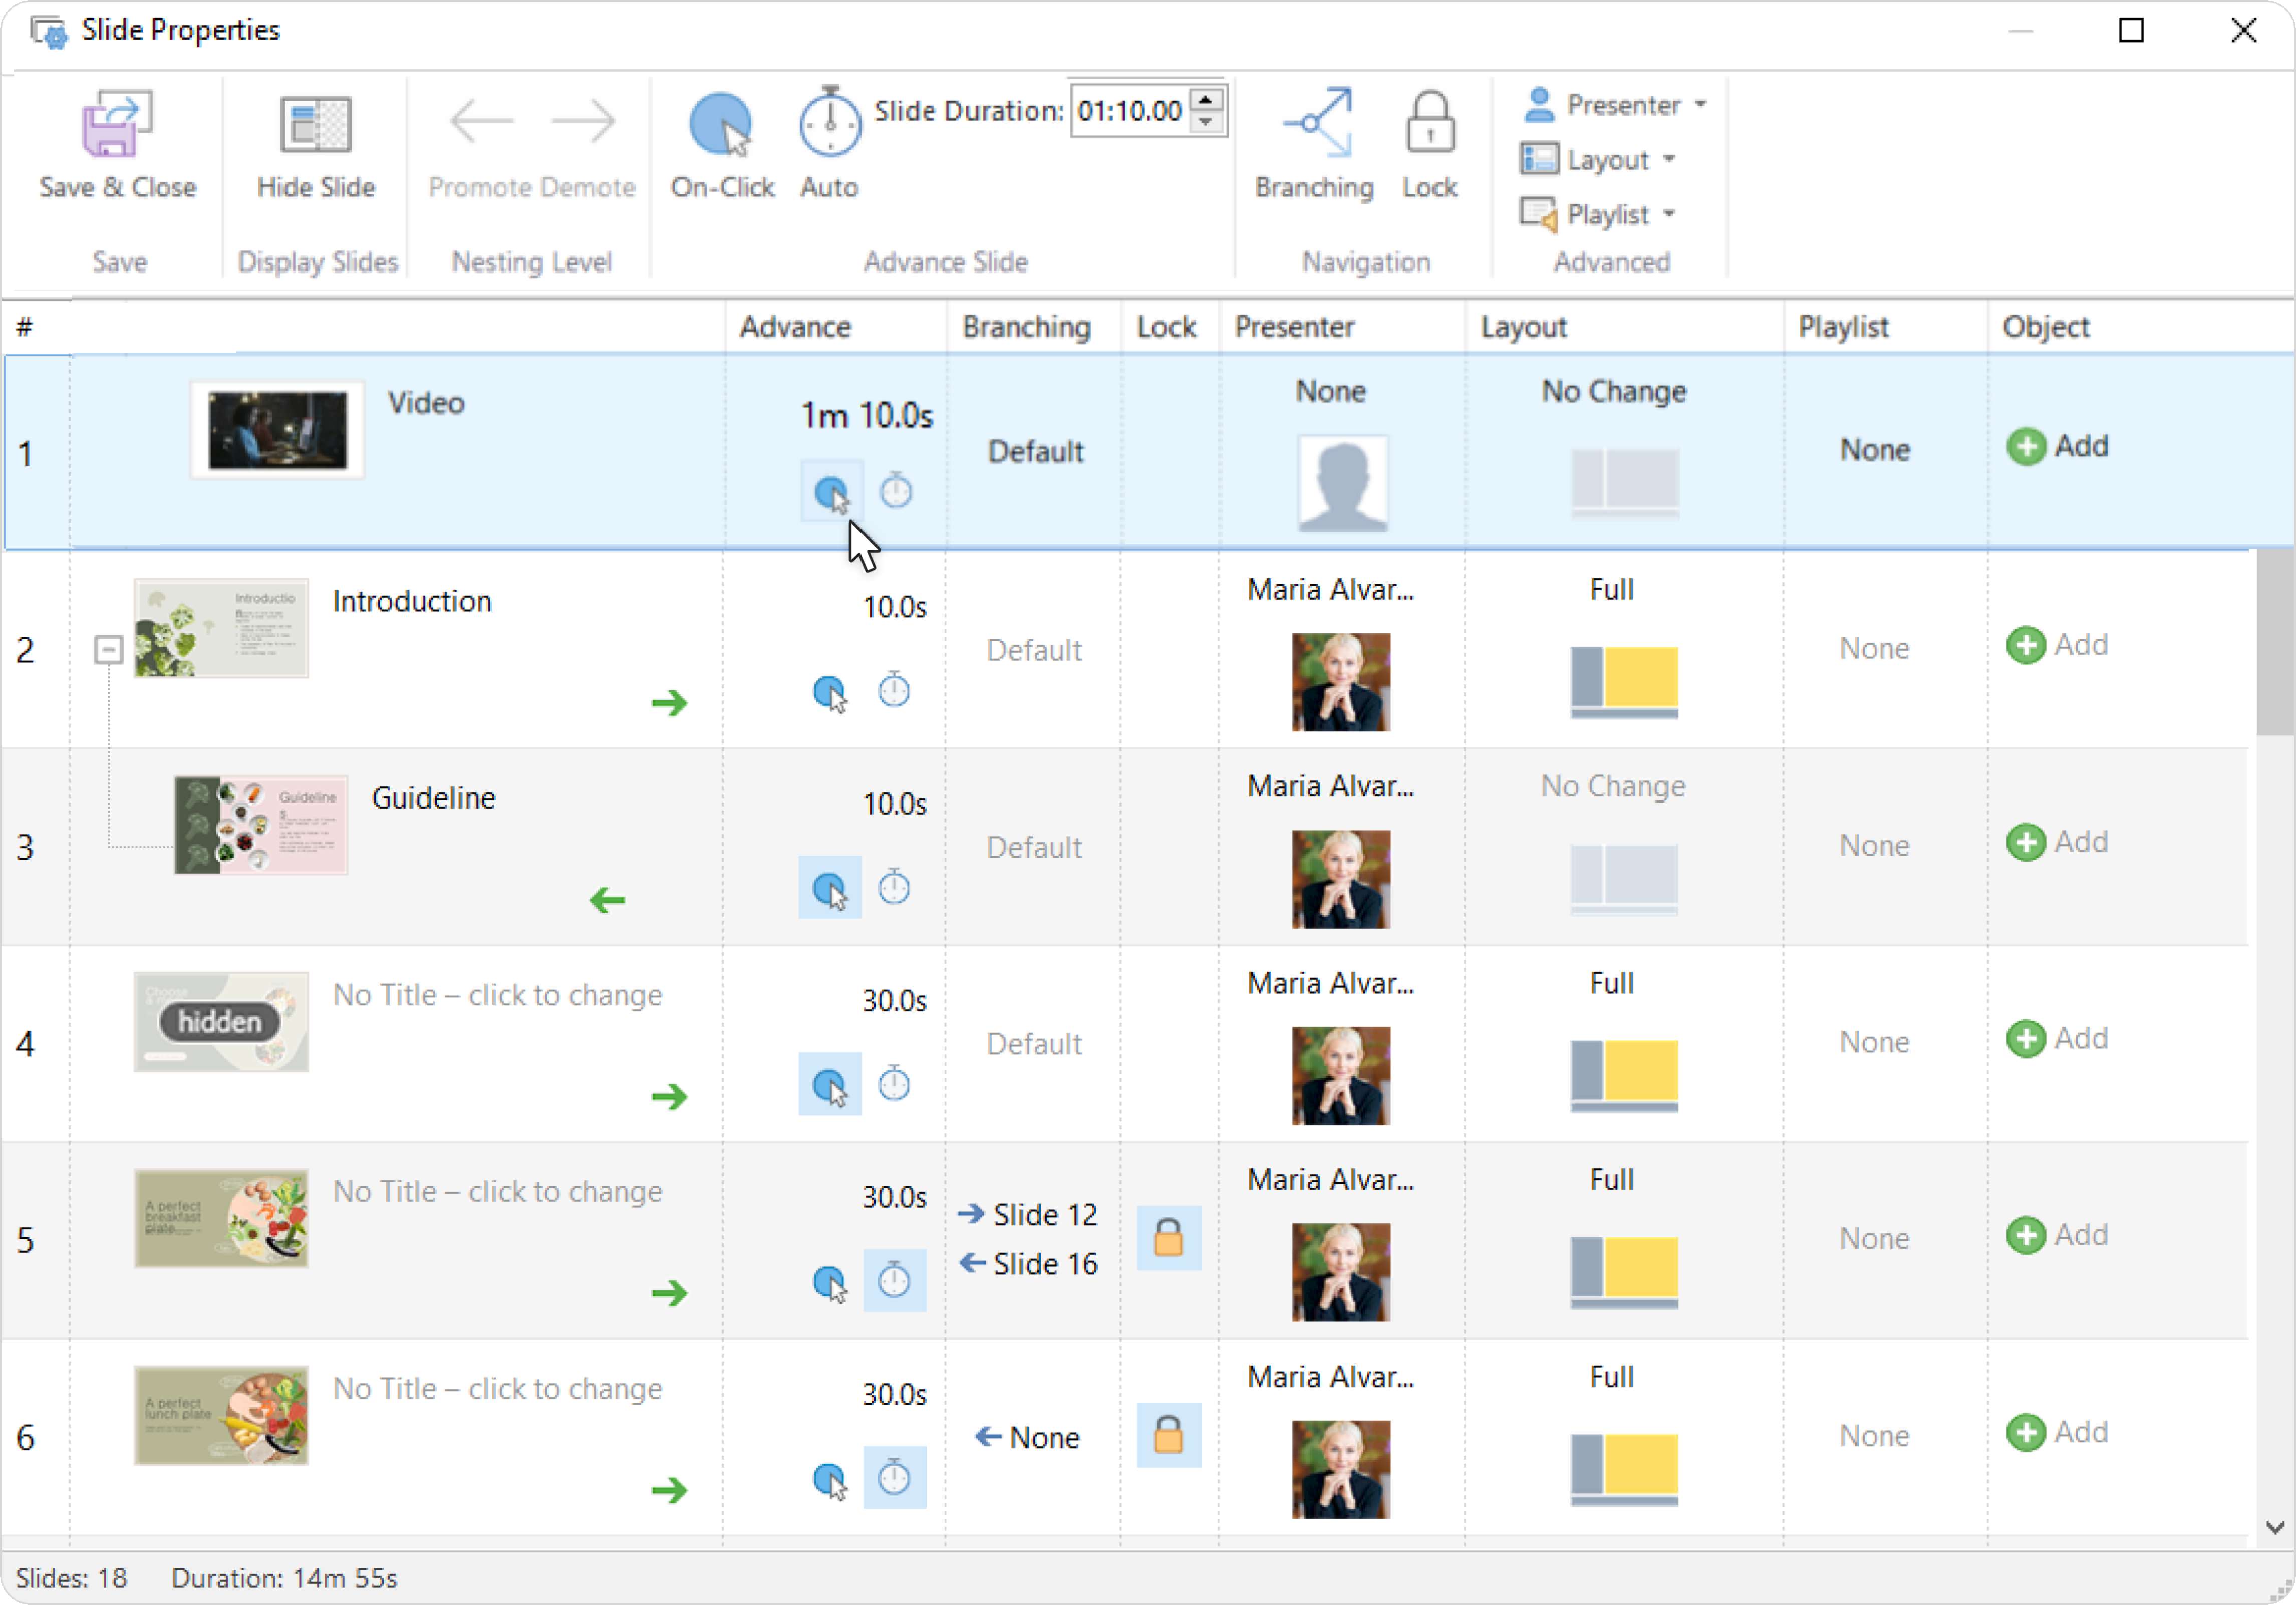
Click Slide Properties.
DisableAdvance On-Clickfor the slide with the video. The slide duration should match the duration of the video.
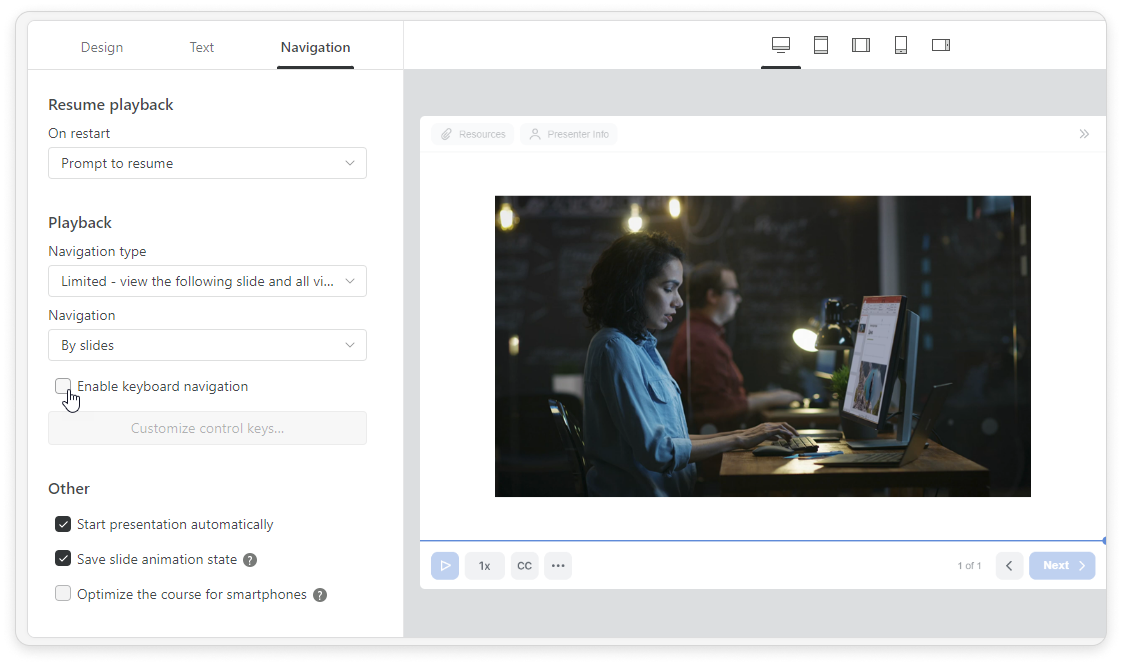
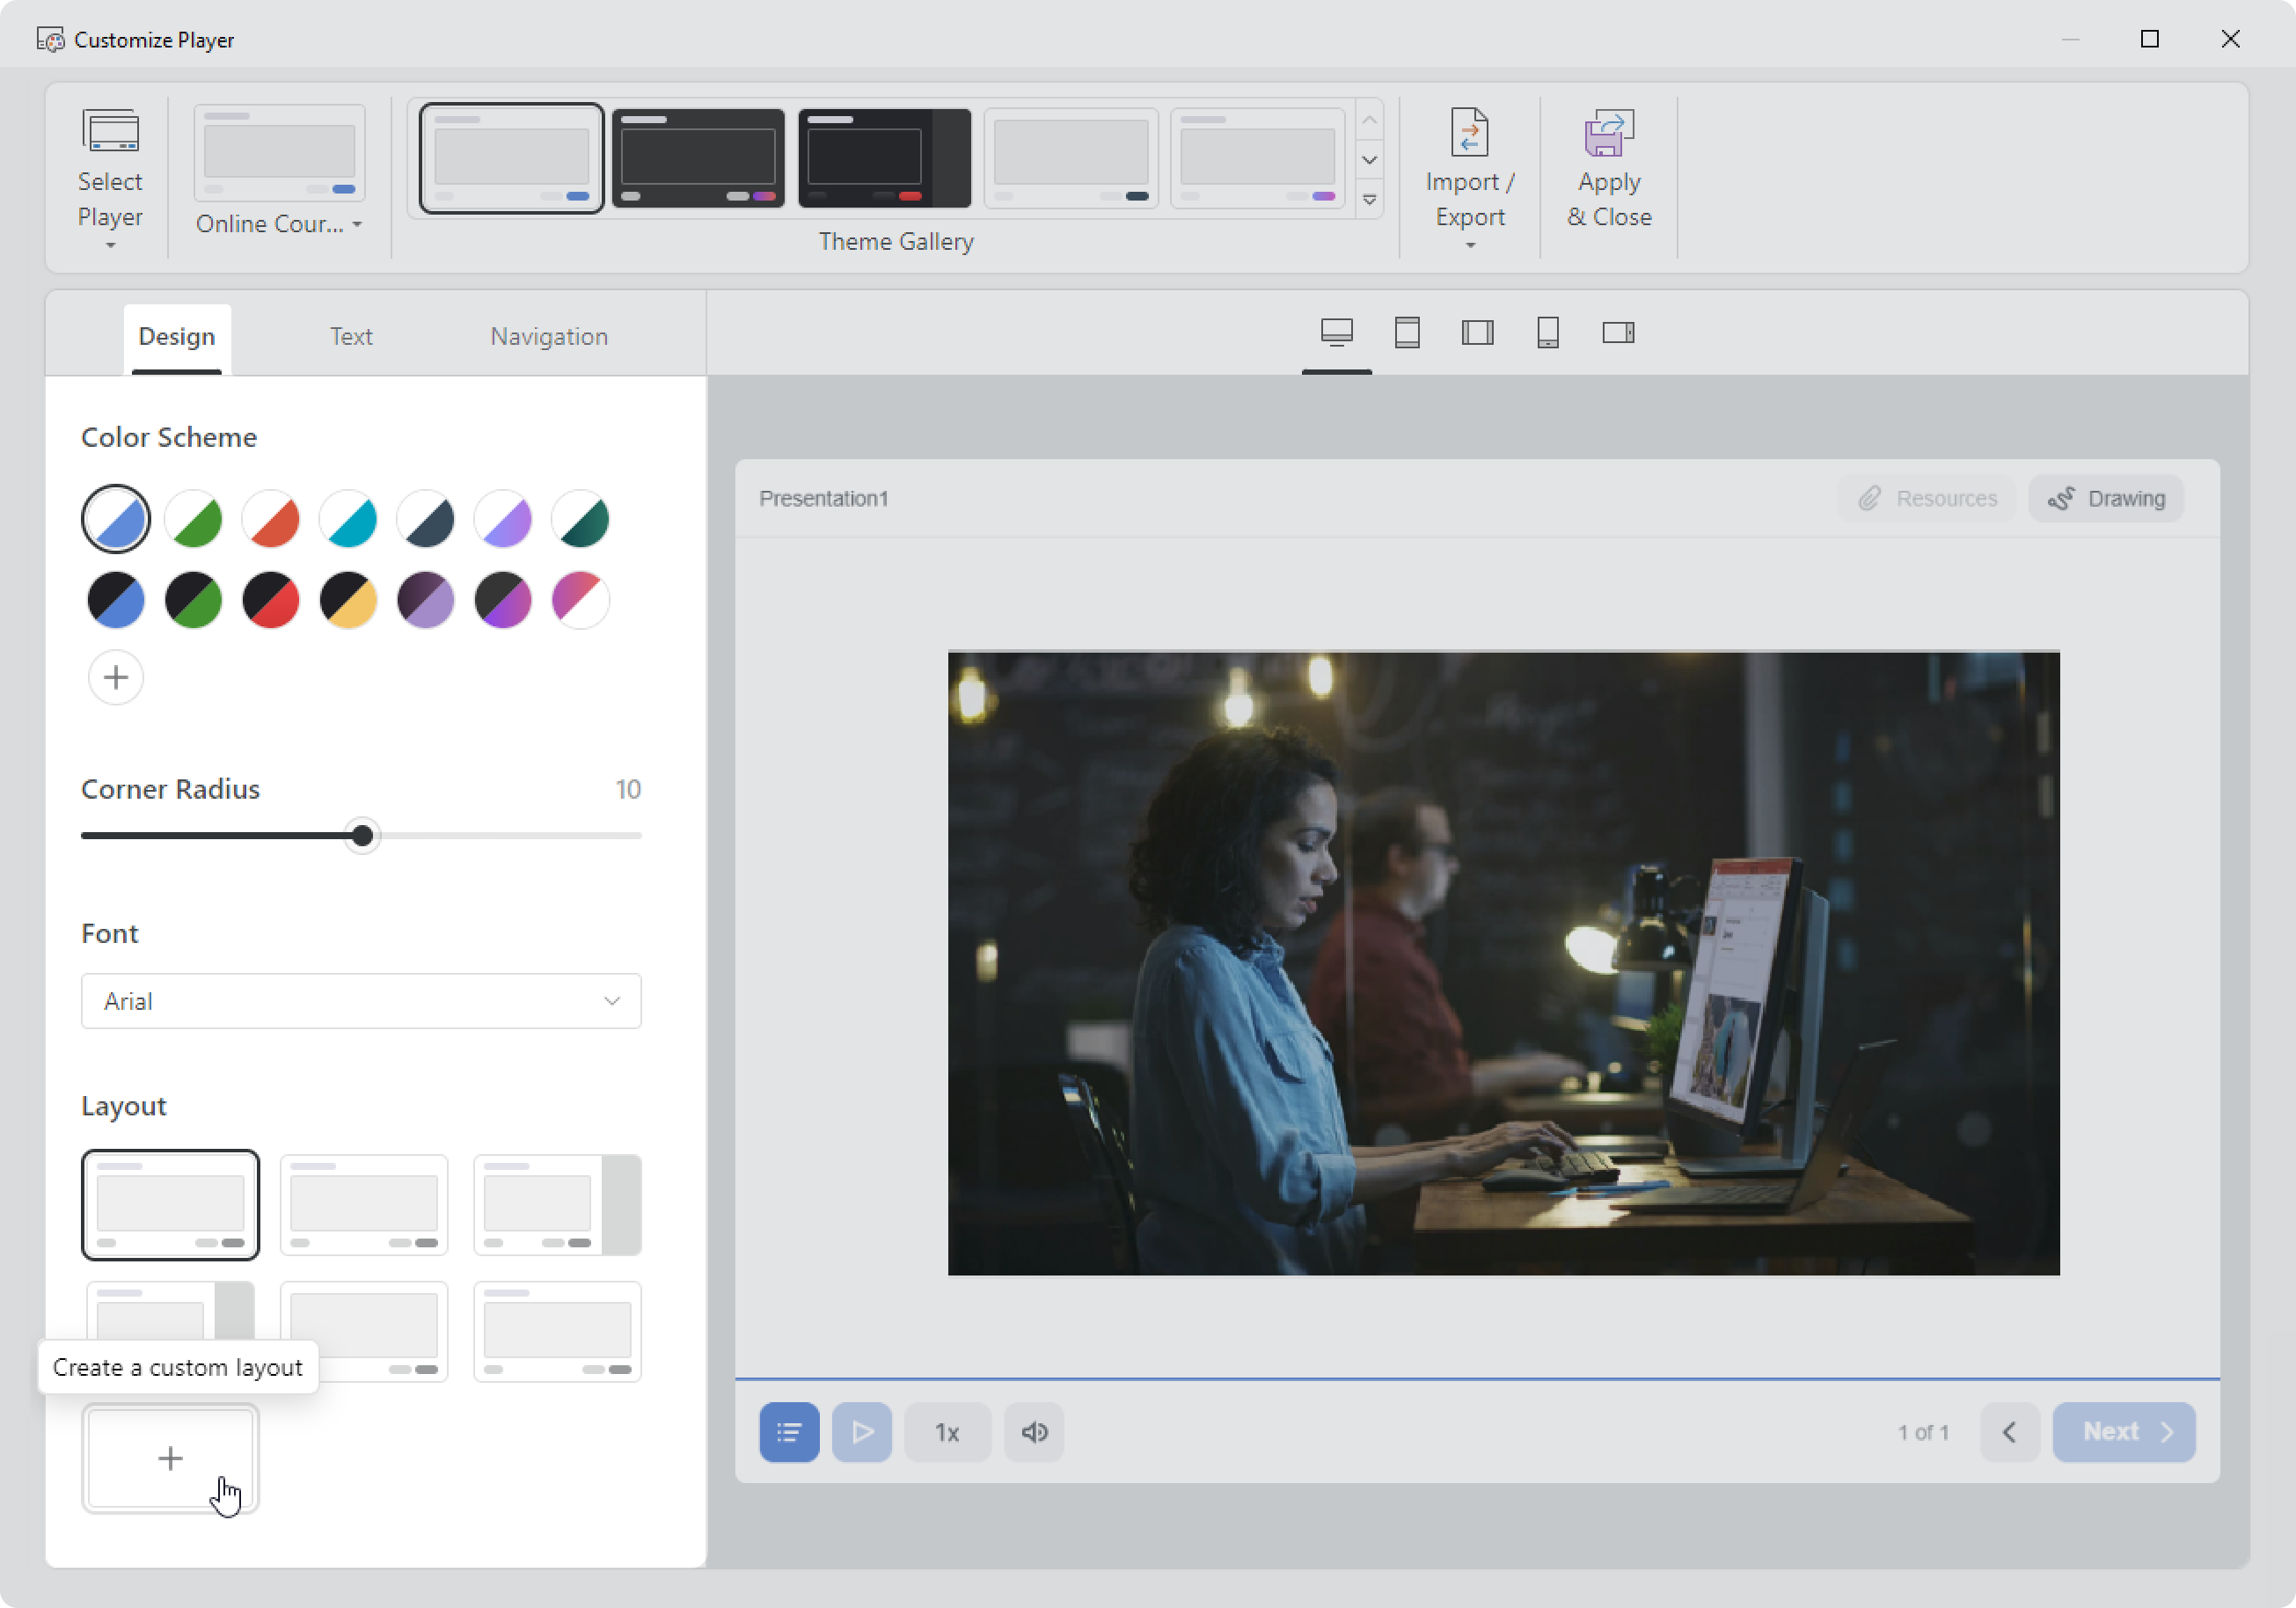
Select limited navigation. To do this, click Player.
Go to the Navigation tab. Select Limited navigation type and disable keyboard navigation.
Next, go to the Design tab → the Layouts section. Next, create a custom layout or edit a previously created one.
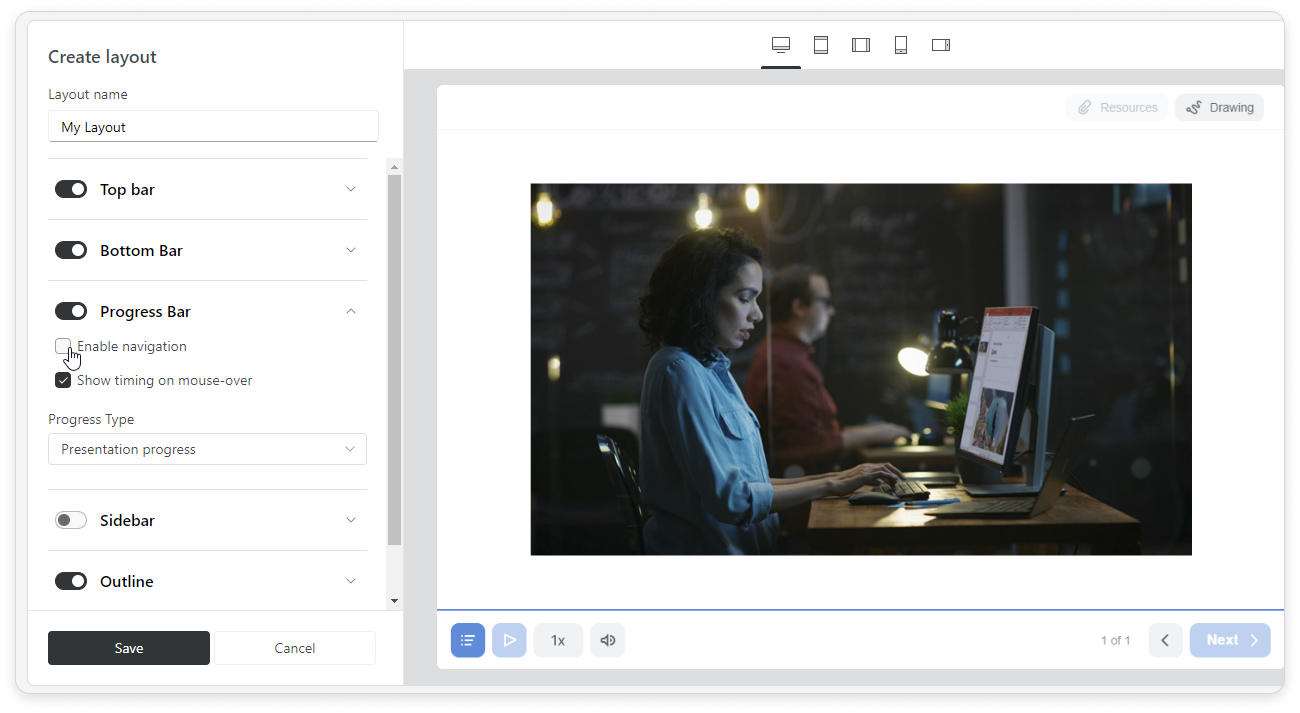
Then, go to your layout settings and click Progress Bar. Disable navigation and click Save.
Don't forget to save the changes you've made. Click Apply & Close.
Done! Now your course is ready to be published. Users will be able to advance the slide only after watching the video to the end.