If you need to send your iSpring Suite Project to iSpring Support, share it with a colleague, or back it up, you'll need to export it. This article shows you how.
Why you can't just email someone a PowerPoint file
A PowerPoint file on its own won't work when your recipient opens it — and neither will a link to your published course. You need to send your whole iSpring Suite Project: the .pptx plus everything you added to it (quizzes, audio, video, interactions, narrations, screen recordings). Exporting puts all of it into one zip file.
How to export your iSpring Suite Project
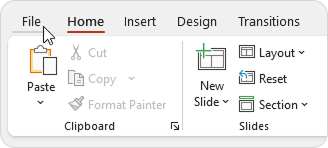
In PowerPoint, click on the File tab.
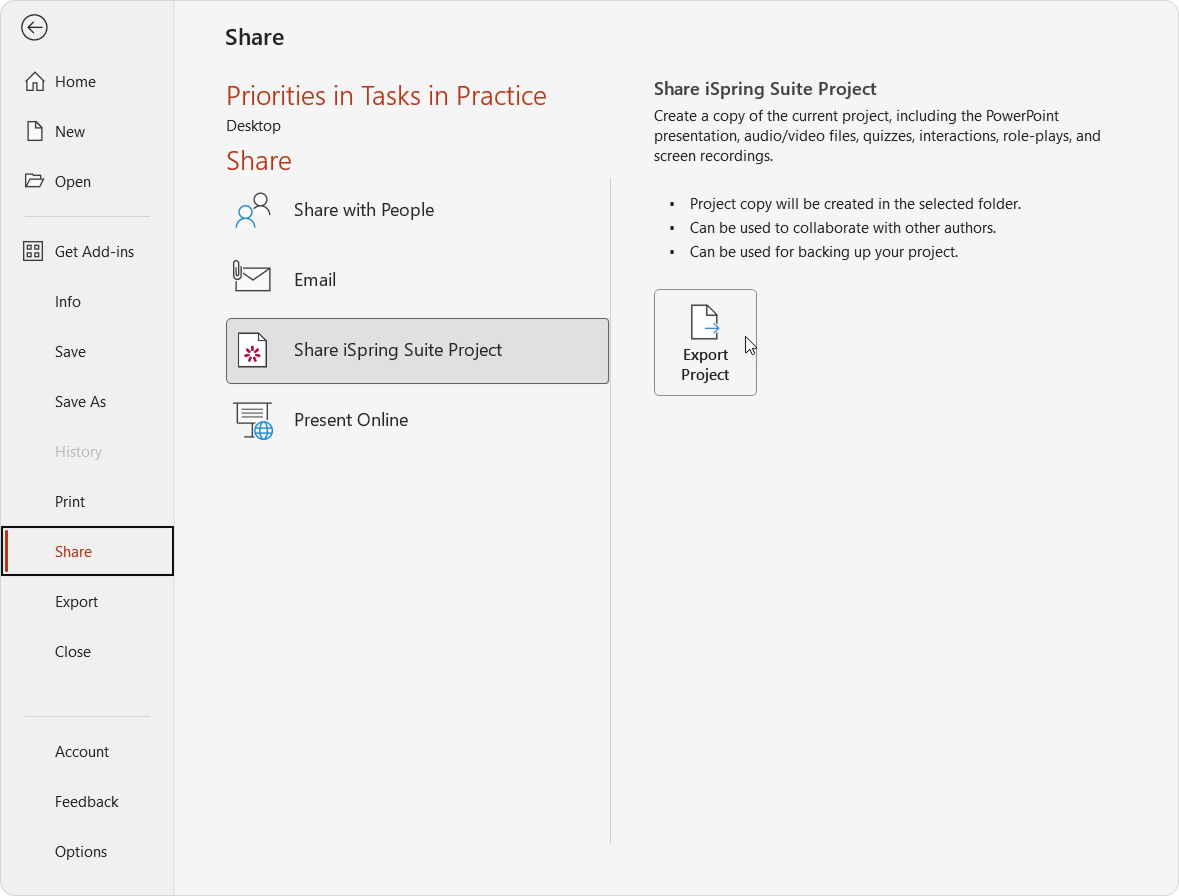
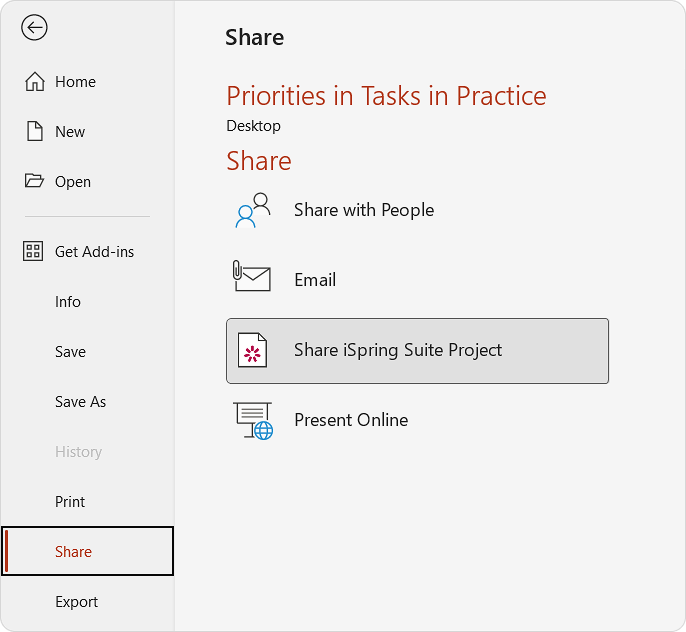
Then, click on Share > Share iSpring Suite Project.
Next, clickon Export Project.
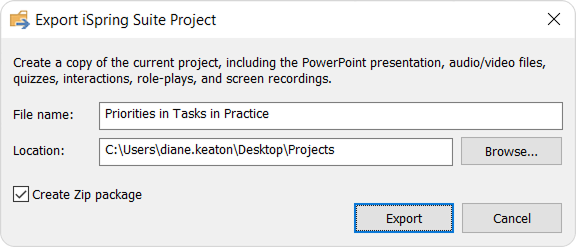
In the Export iSpring Suite Project window, choose where to save the file.
Check Create Zip package. This is what packages everything into one zip file you can send.
Click Export.
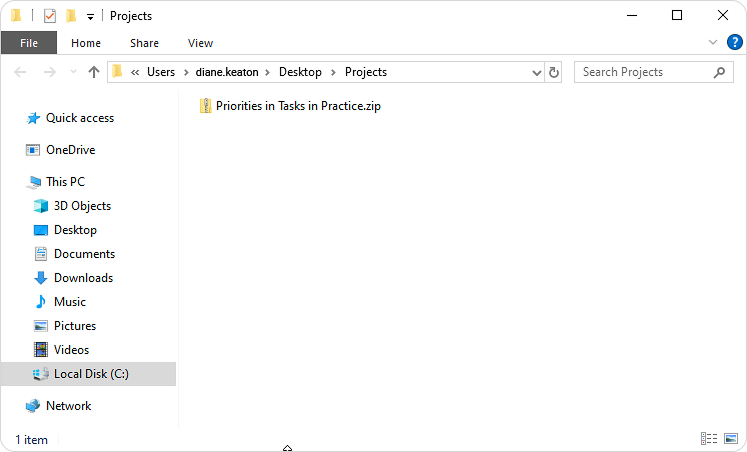
You can find the project in the folder you chose.
Please Note:
The File menu also has an option called Export in the left sidebar. That's not the one you want. The Export we need is inside Share > Share iSpring Suite Project.
What to do with the zip file
Sending the zip file
You can email the zip file if it's under 25 MB. Course files are often bigger than that, so if yours is too large to attach, share it through WeTransfer, Dropbox, Google Drive, or another file-sharing service.
Backing up your files—A note about OneDrive
Don't save your course only in a shared drive like OneDrive, Google Drive, or Dropbox folder — cloud syncing can corrupt the project folder while you work. Be sure to save the exported zip file to cloud storage if you want to back it up there, but keep the live course on your computer's hard drive.