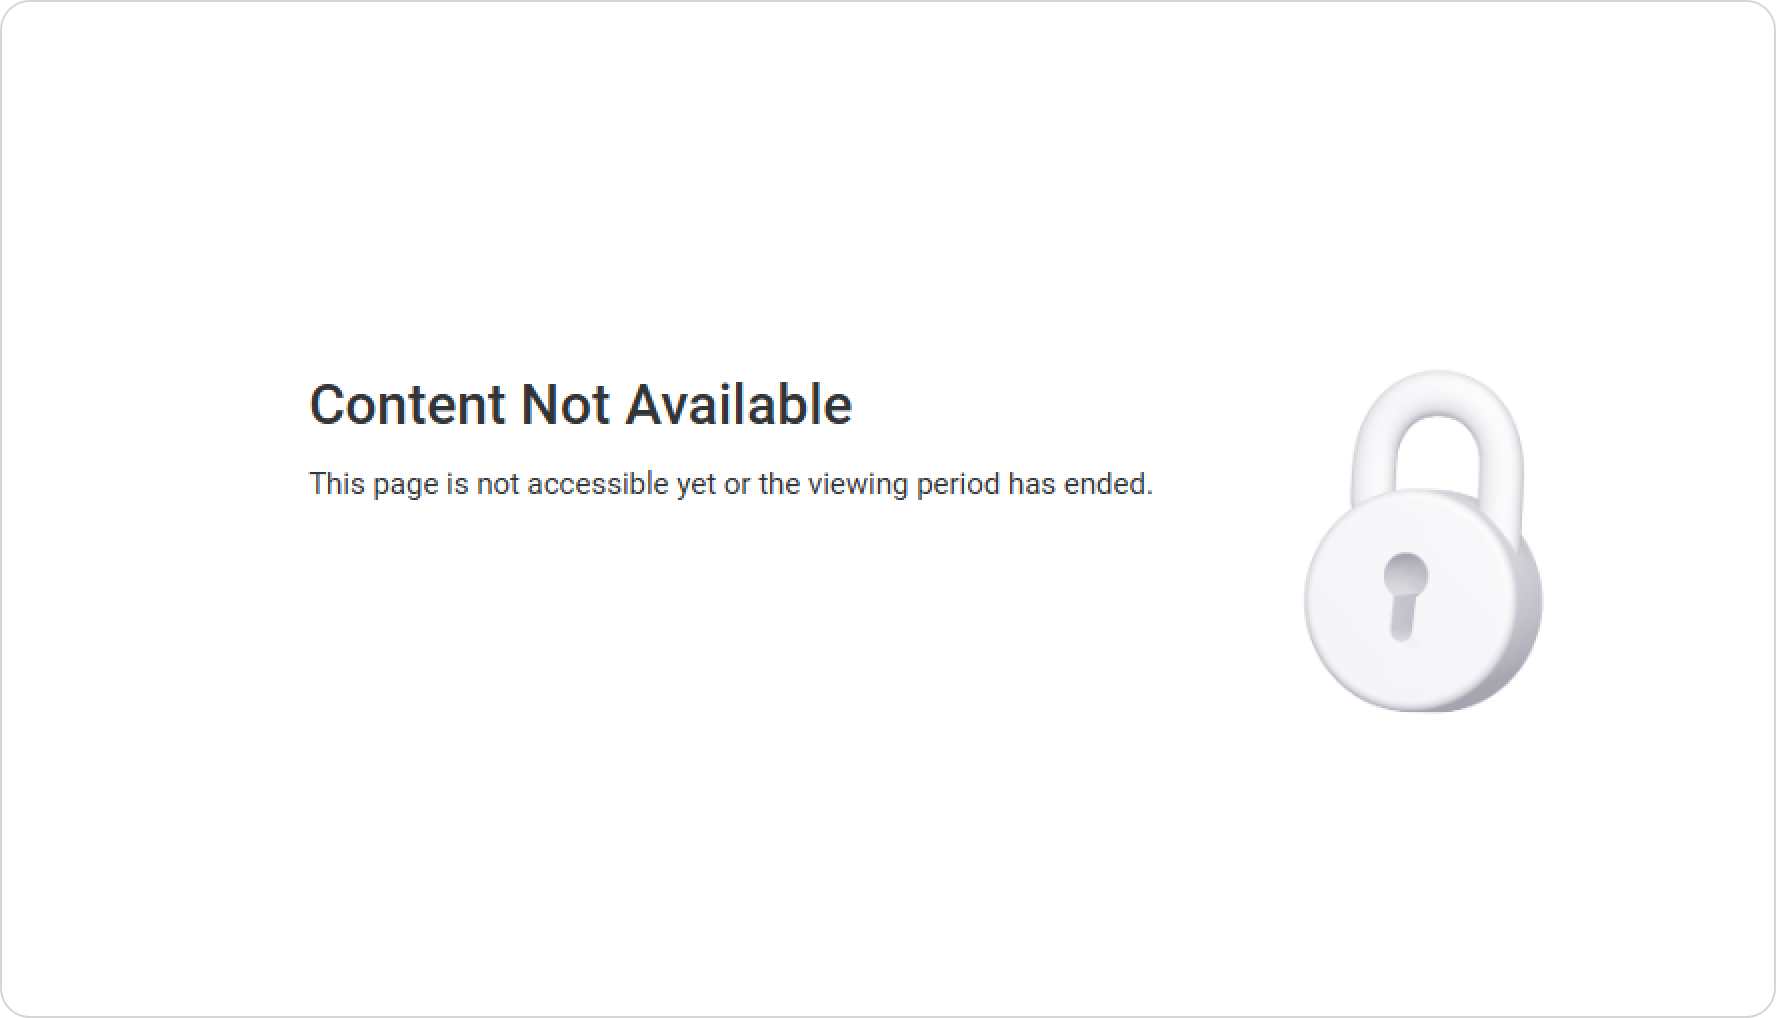
Now, course developers can give users access to exported pages just for a specific period. On the expiration day, access to the page will be automatically removed.
By default, access to pages is not time-limited.
How to set time-limited access to a page
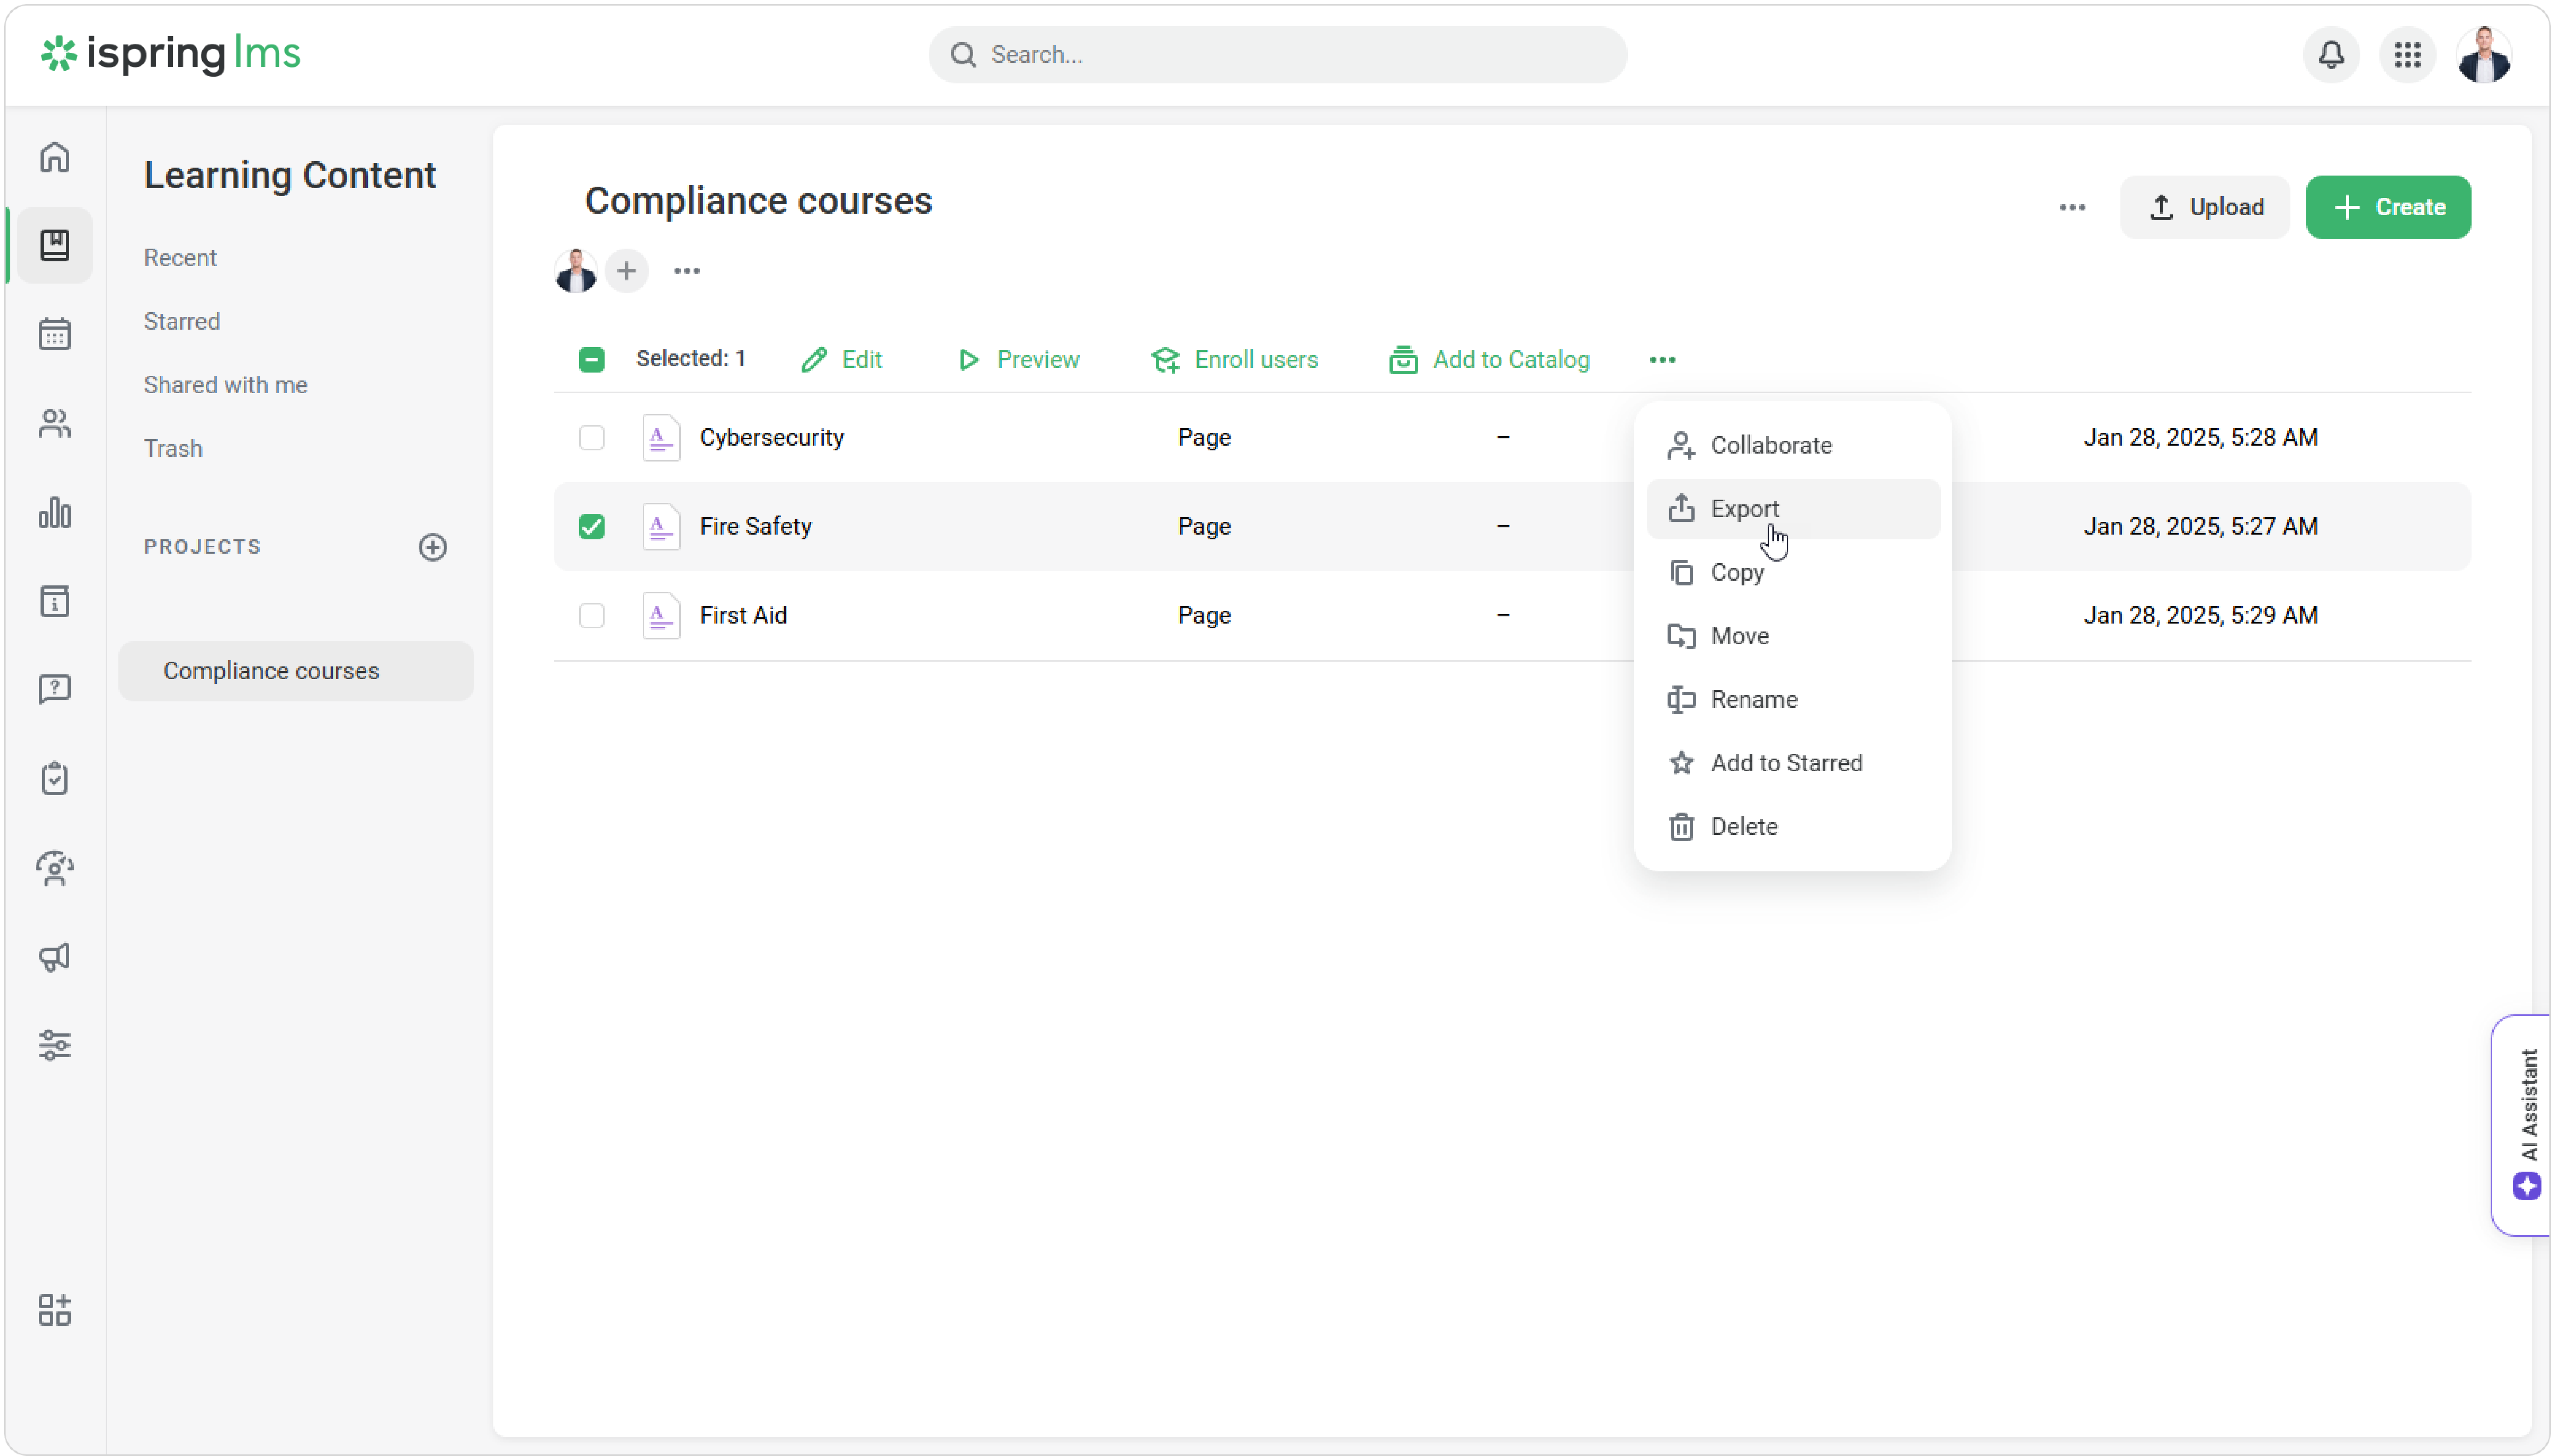
Go to Learning Content and select a page. Next, select Export.
Alternatively, you can open a page and click on Export > Export content.
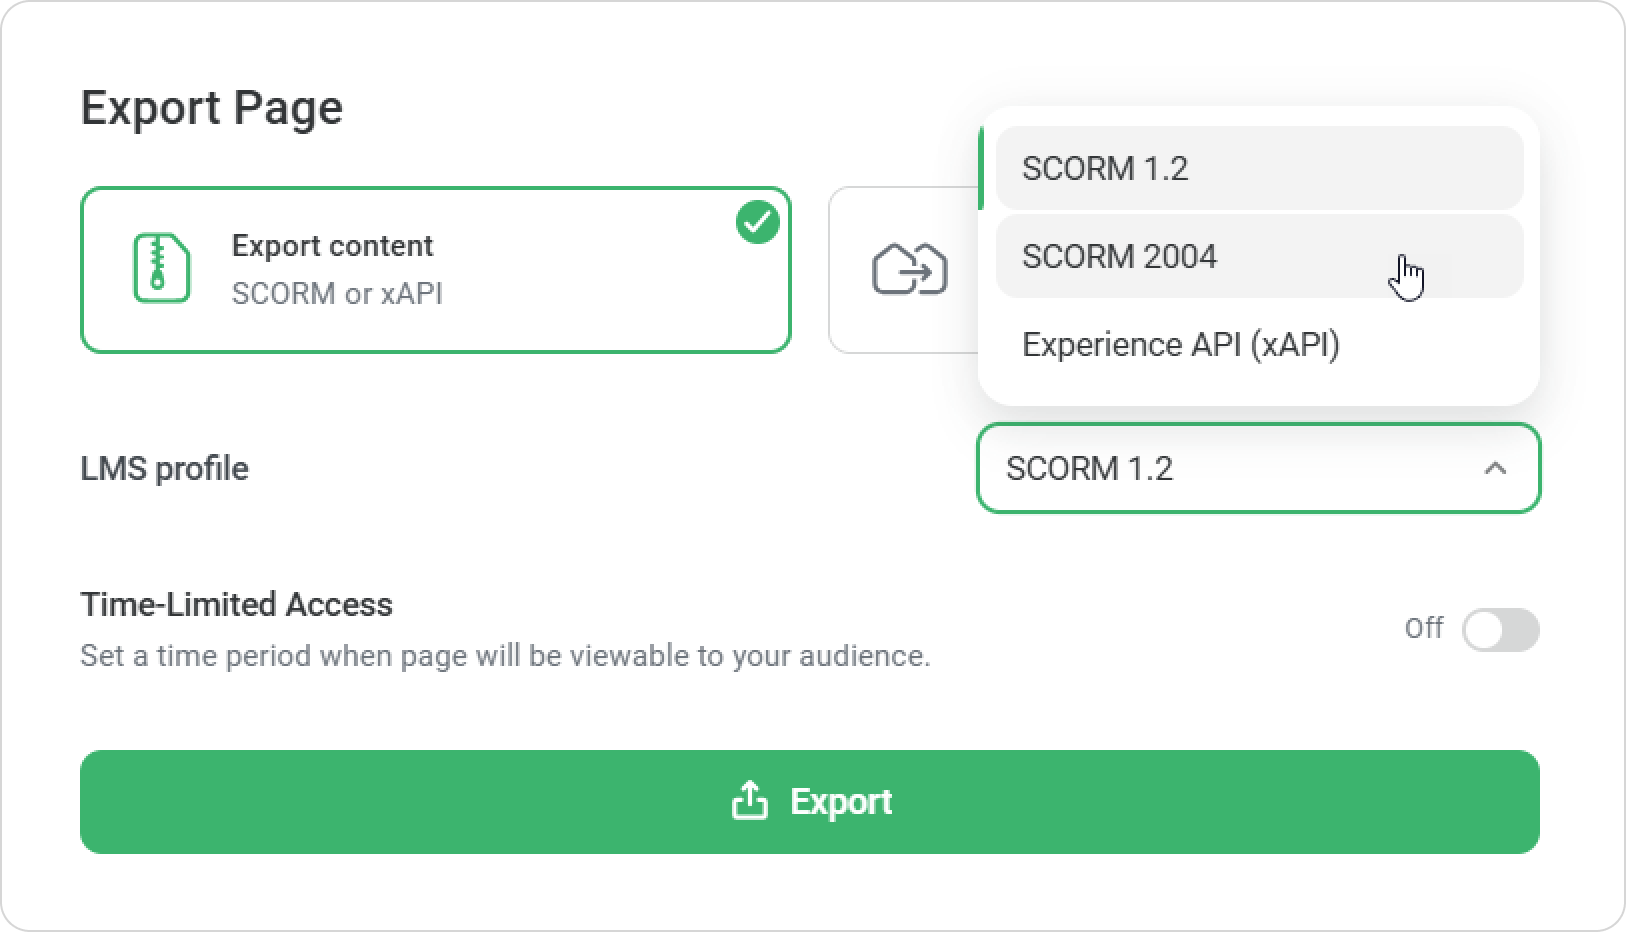
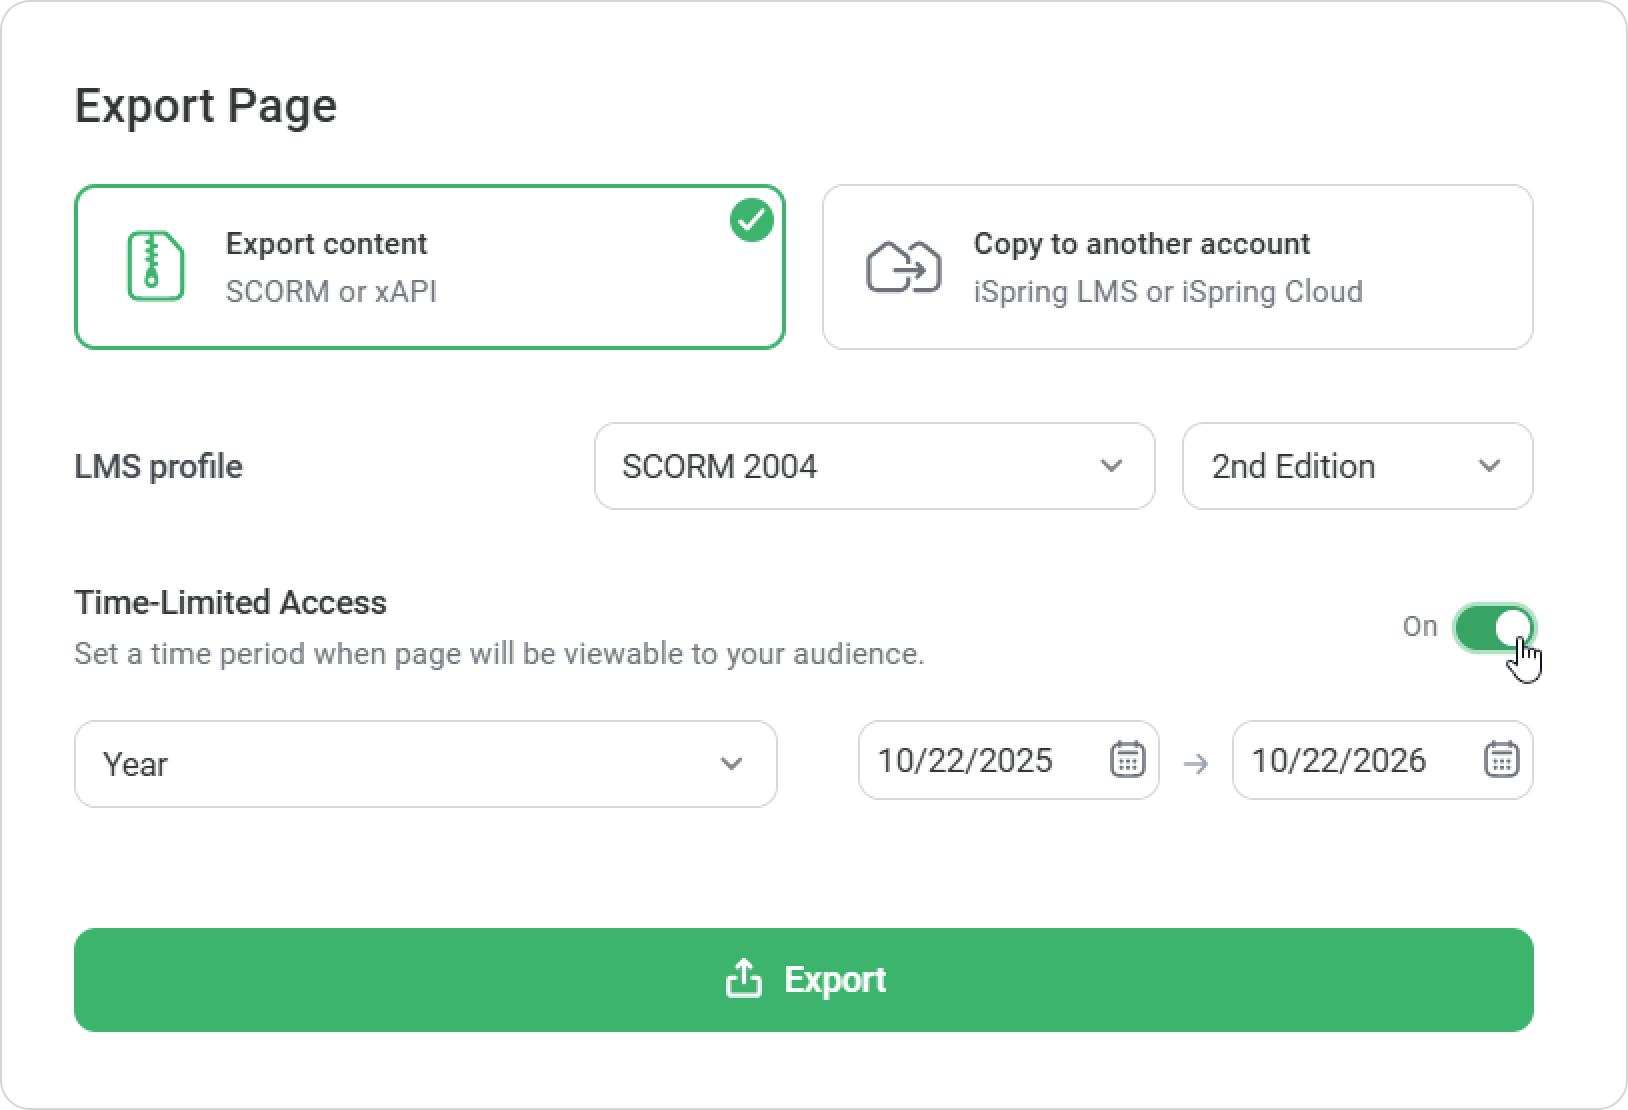
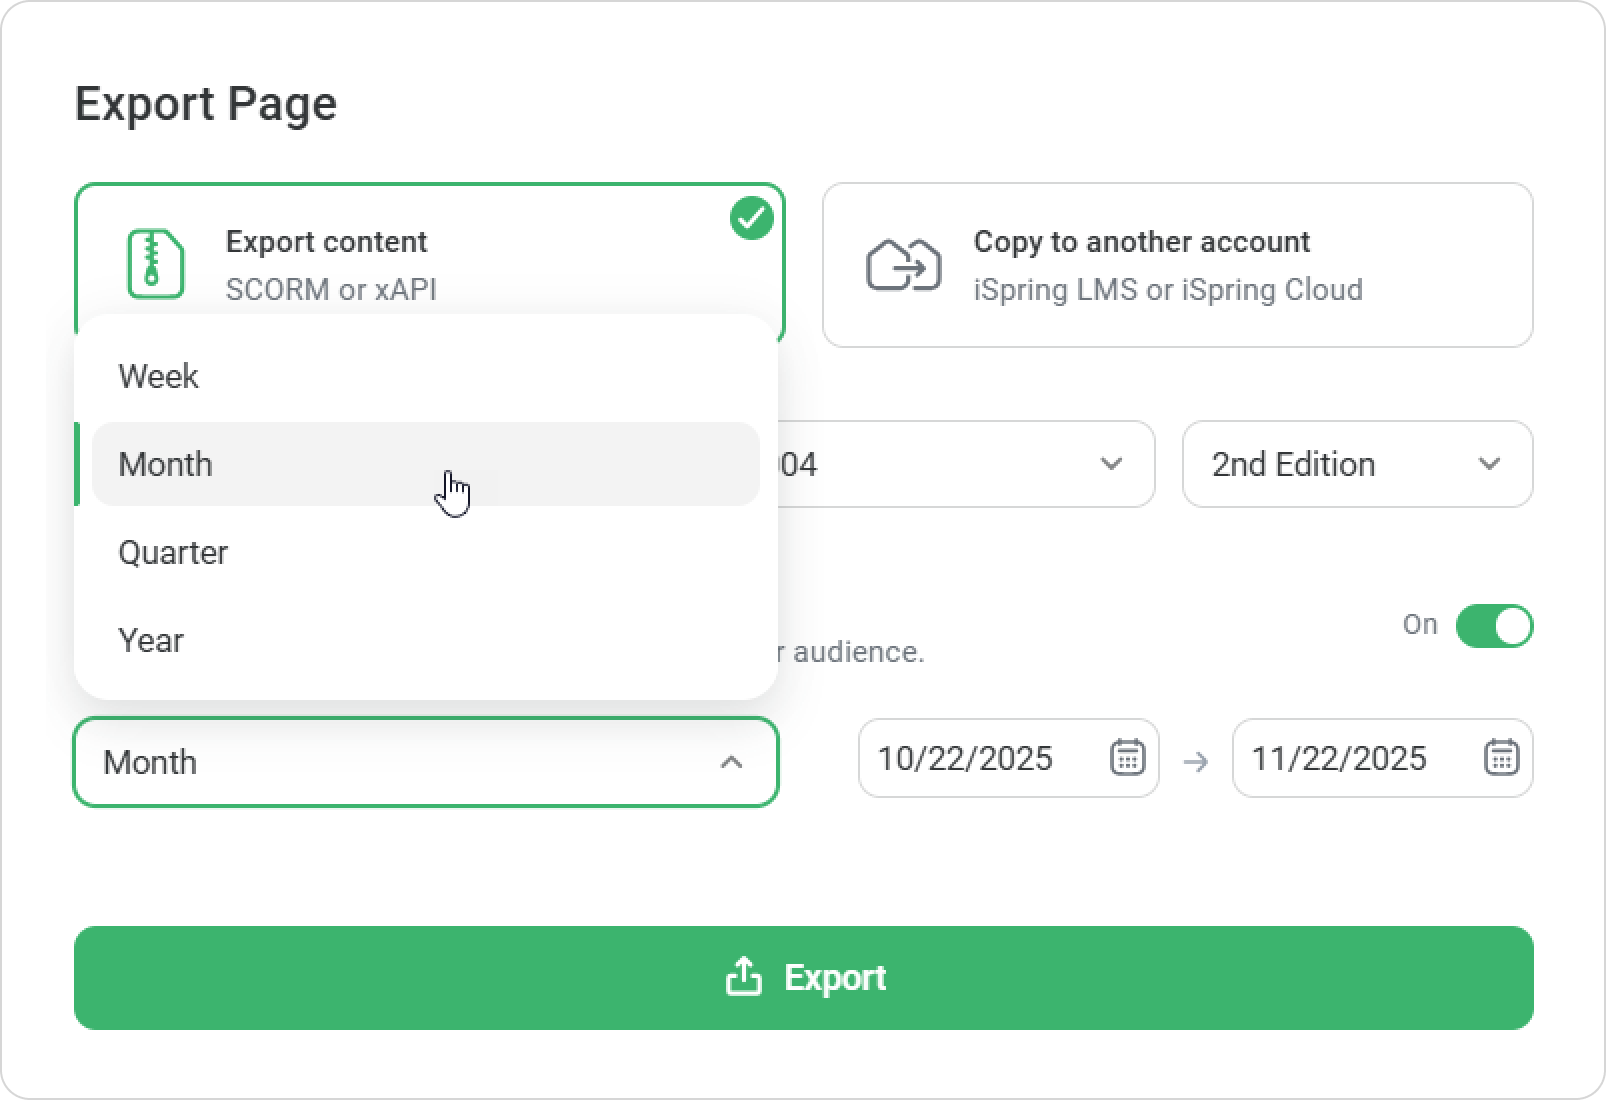
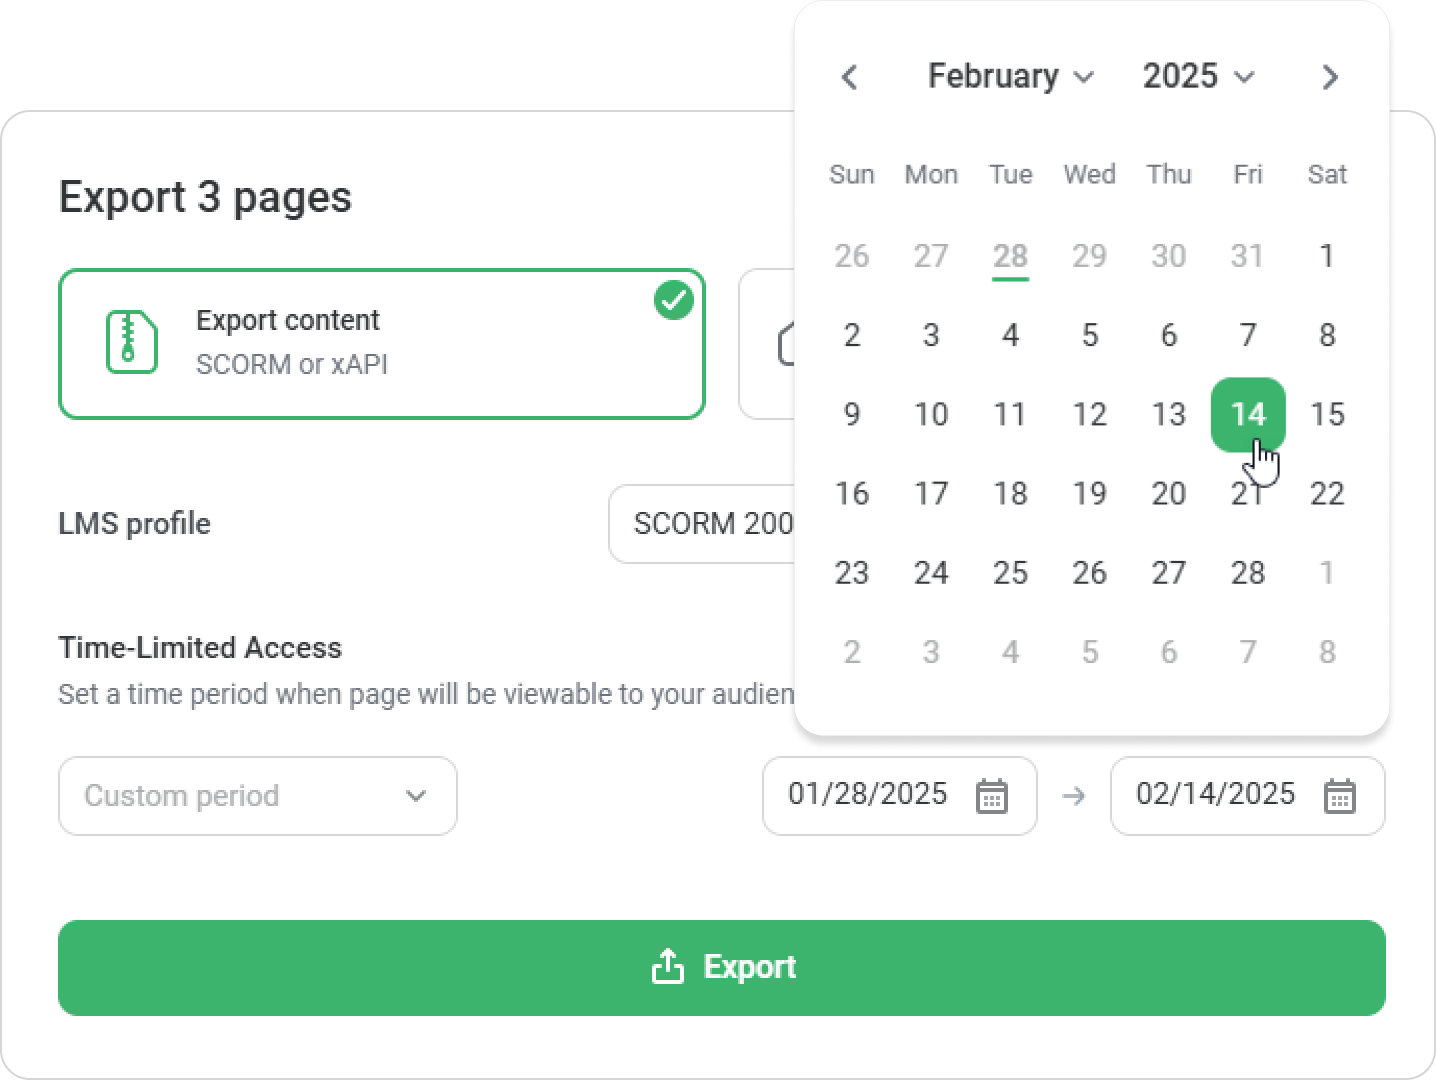
Then, select an LMS profile, e.g., SCORM 2004.
Toggle Time-Limited Access on.
Set a time period, e.g., one month.
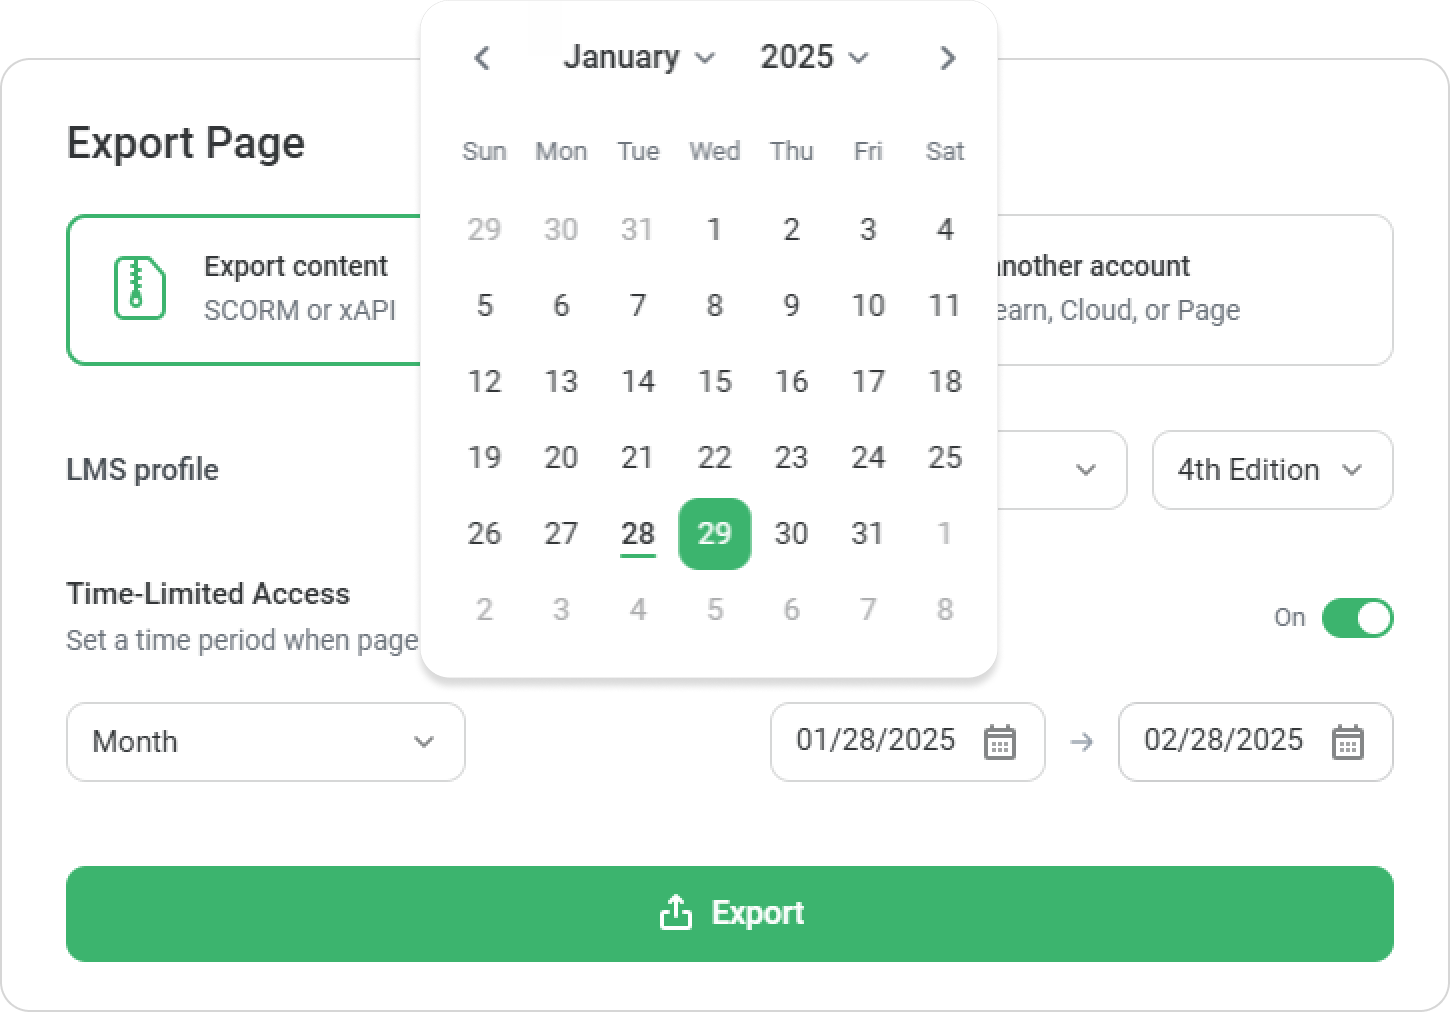
You can set the time limit manually. To do this, click on the calendar icon and select the access start and end dates.
You can select the start date as a day in the past. For example, if today is February 15, 2025, then the start date can be February 13, 2025.
Finally, click on Export.
Done! You've exported a page with a time-limited access.
How to set time-limited access to several pages
Now you can download several pages at once and send them to customers with a time-limited access.
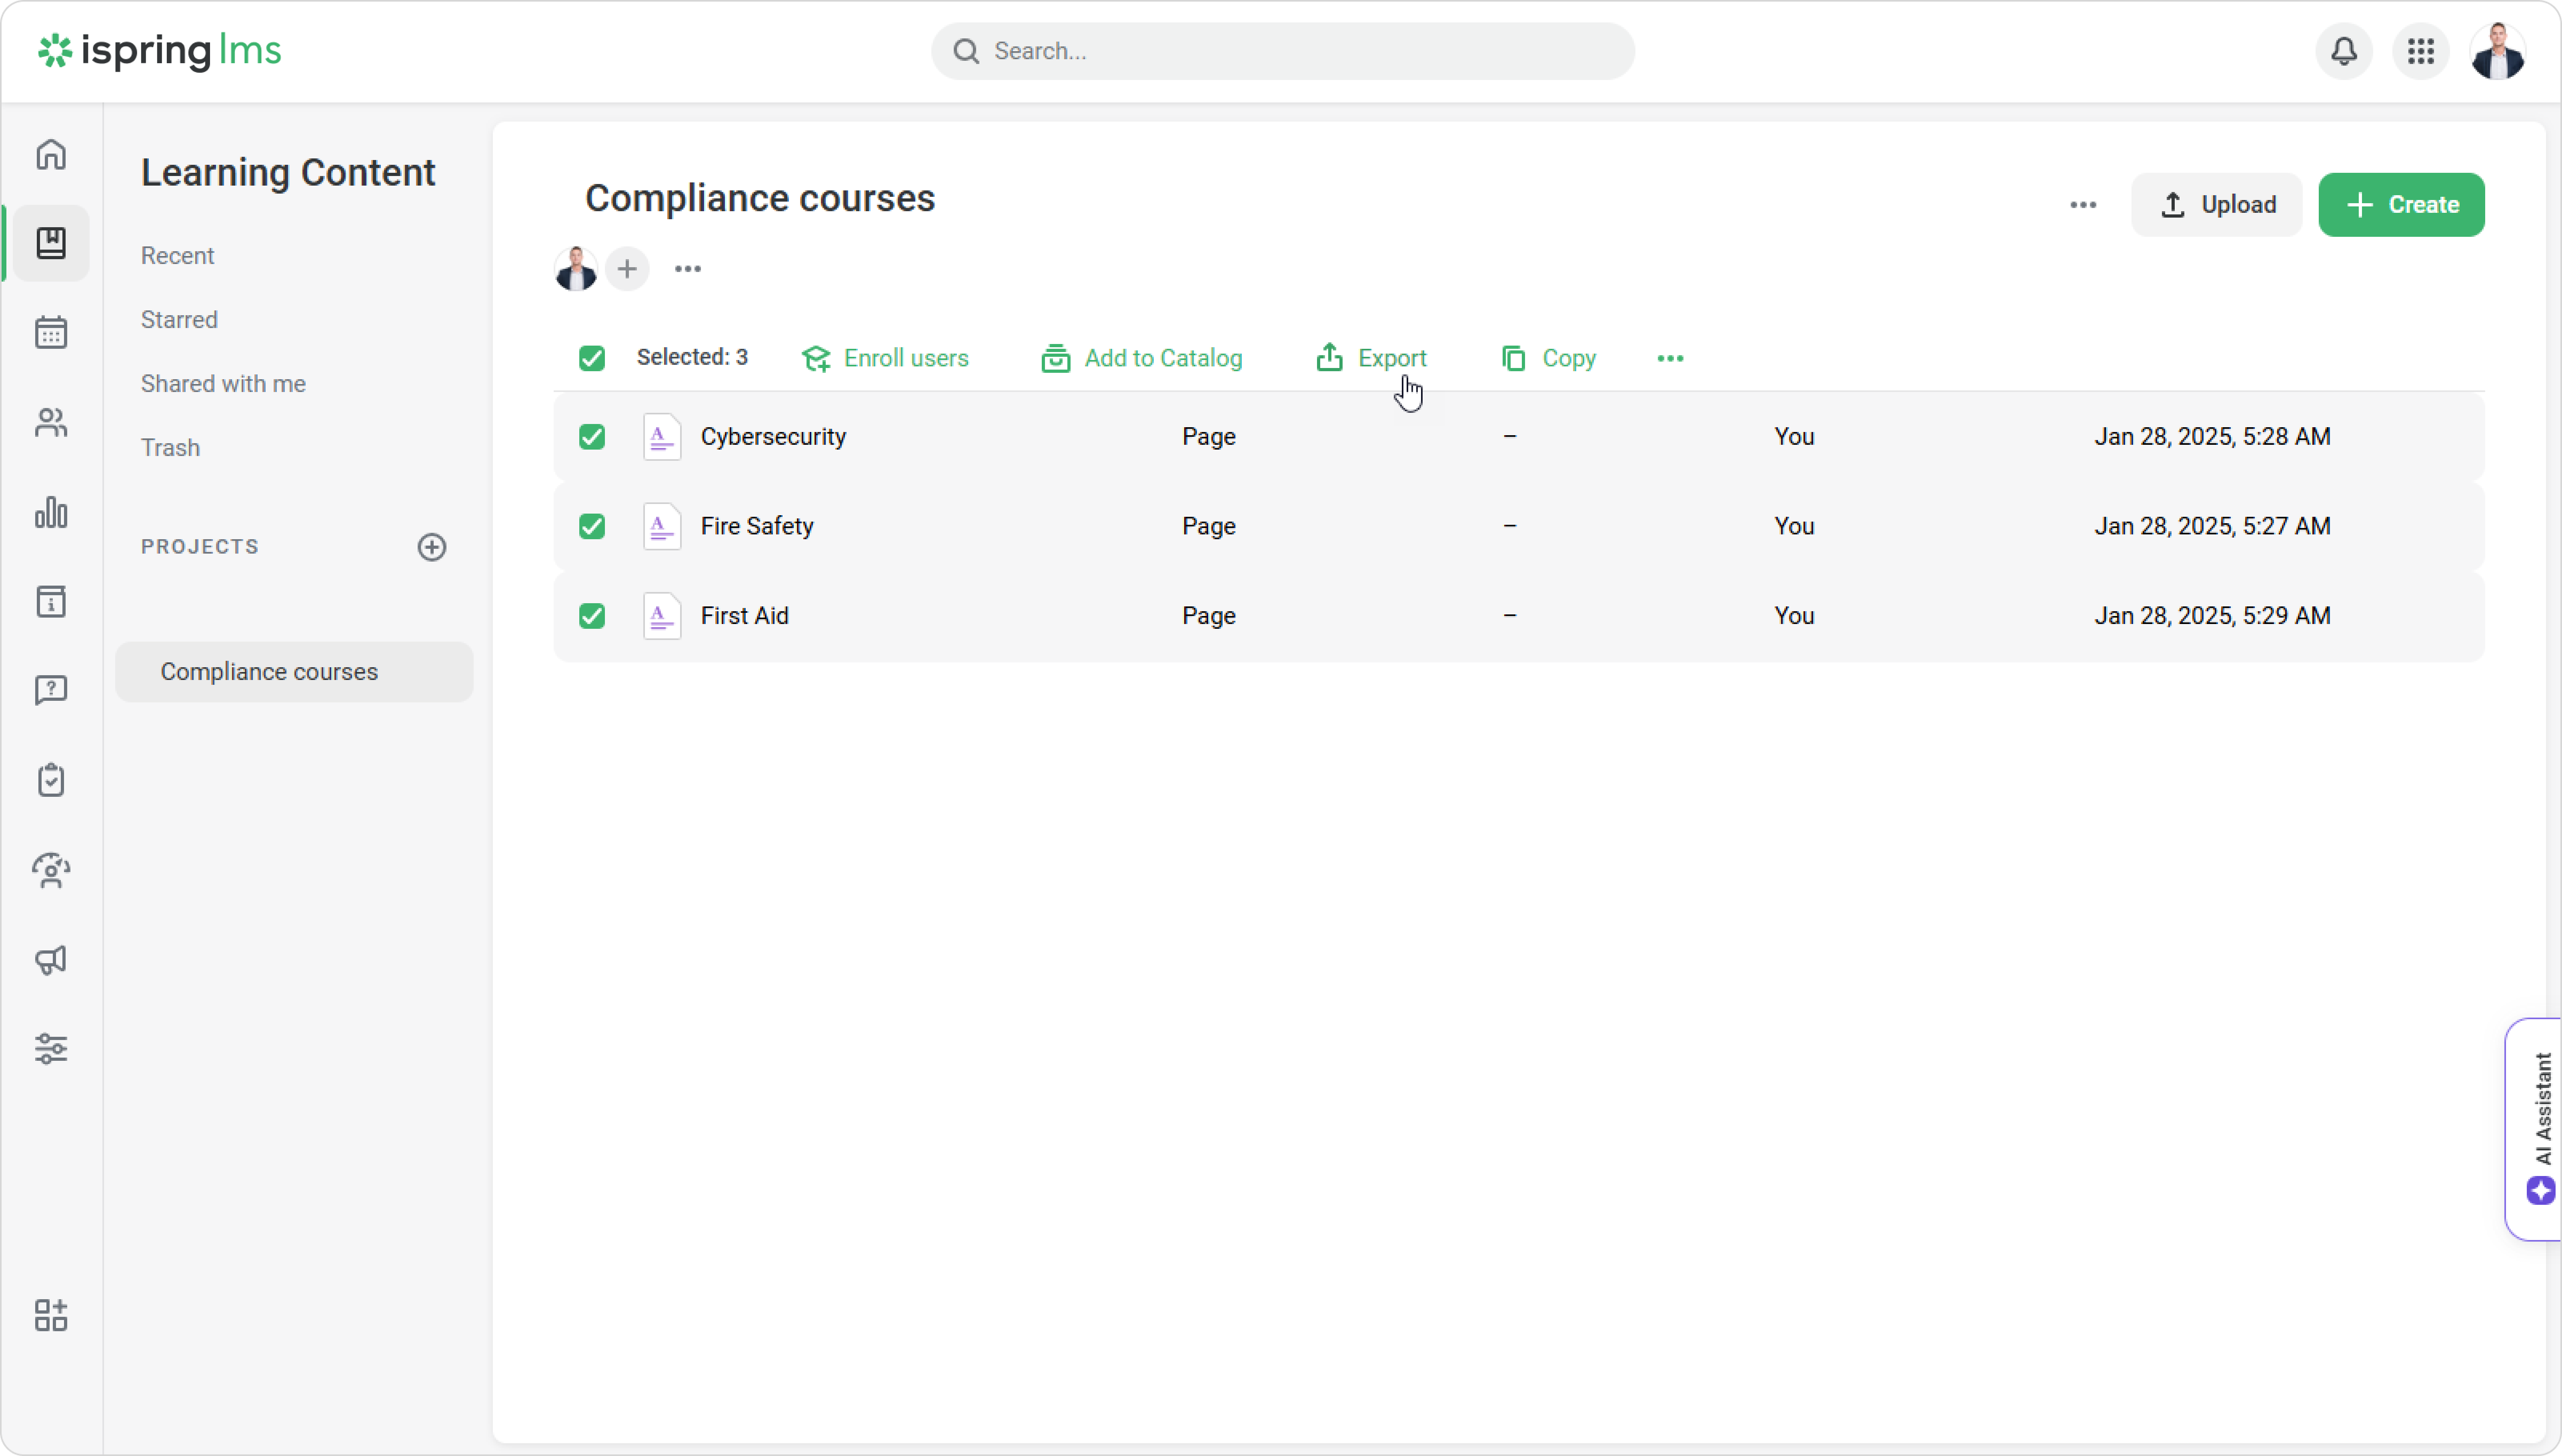
Go to Learning Content and select the desired pages. Next, click on Export.
You'll be sent to the Export content tab.
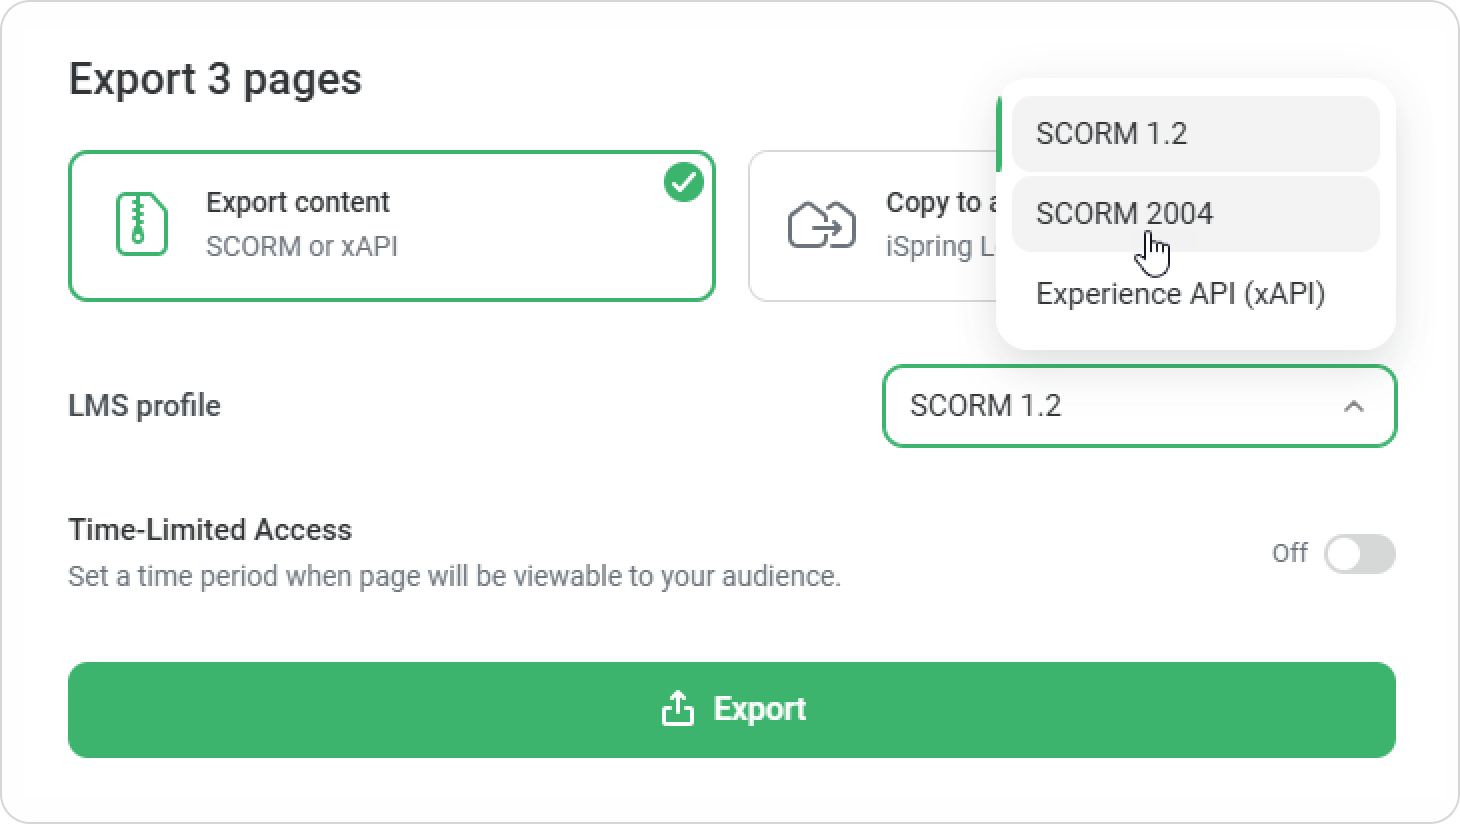
Next, select an LMS profile, e.g., SCORM 2004.
Toggle Time-Limited Access on.
Set a time period, e.g., one month.
Or you can set a custom period.
Finally, click on Export.
Done! Exported pages will now be available for a specific period of time.