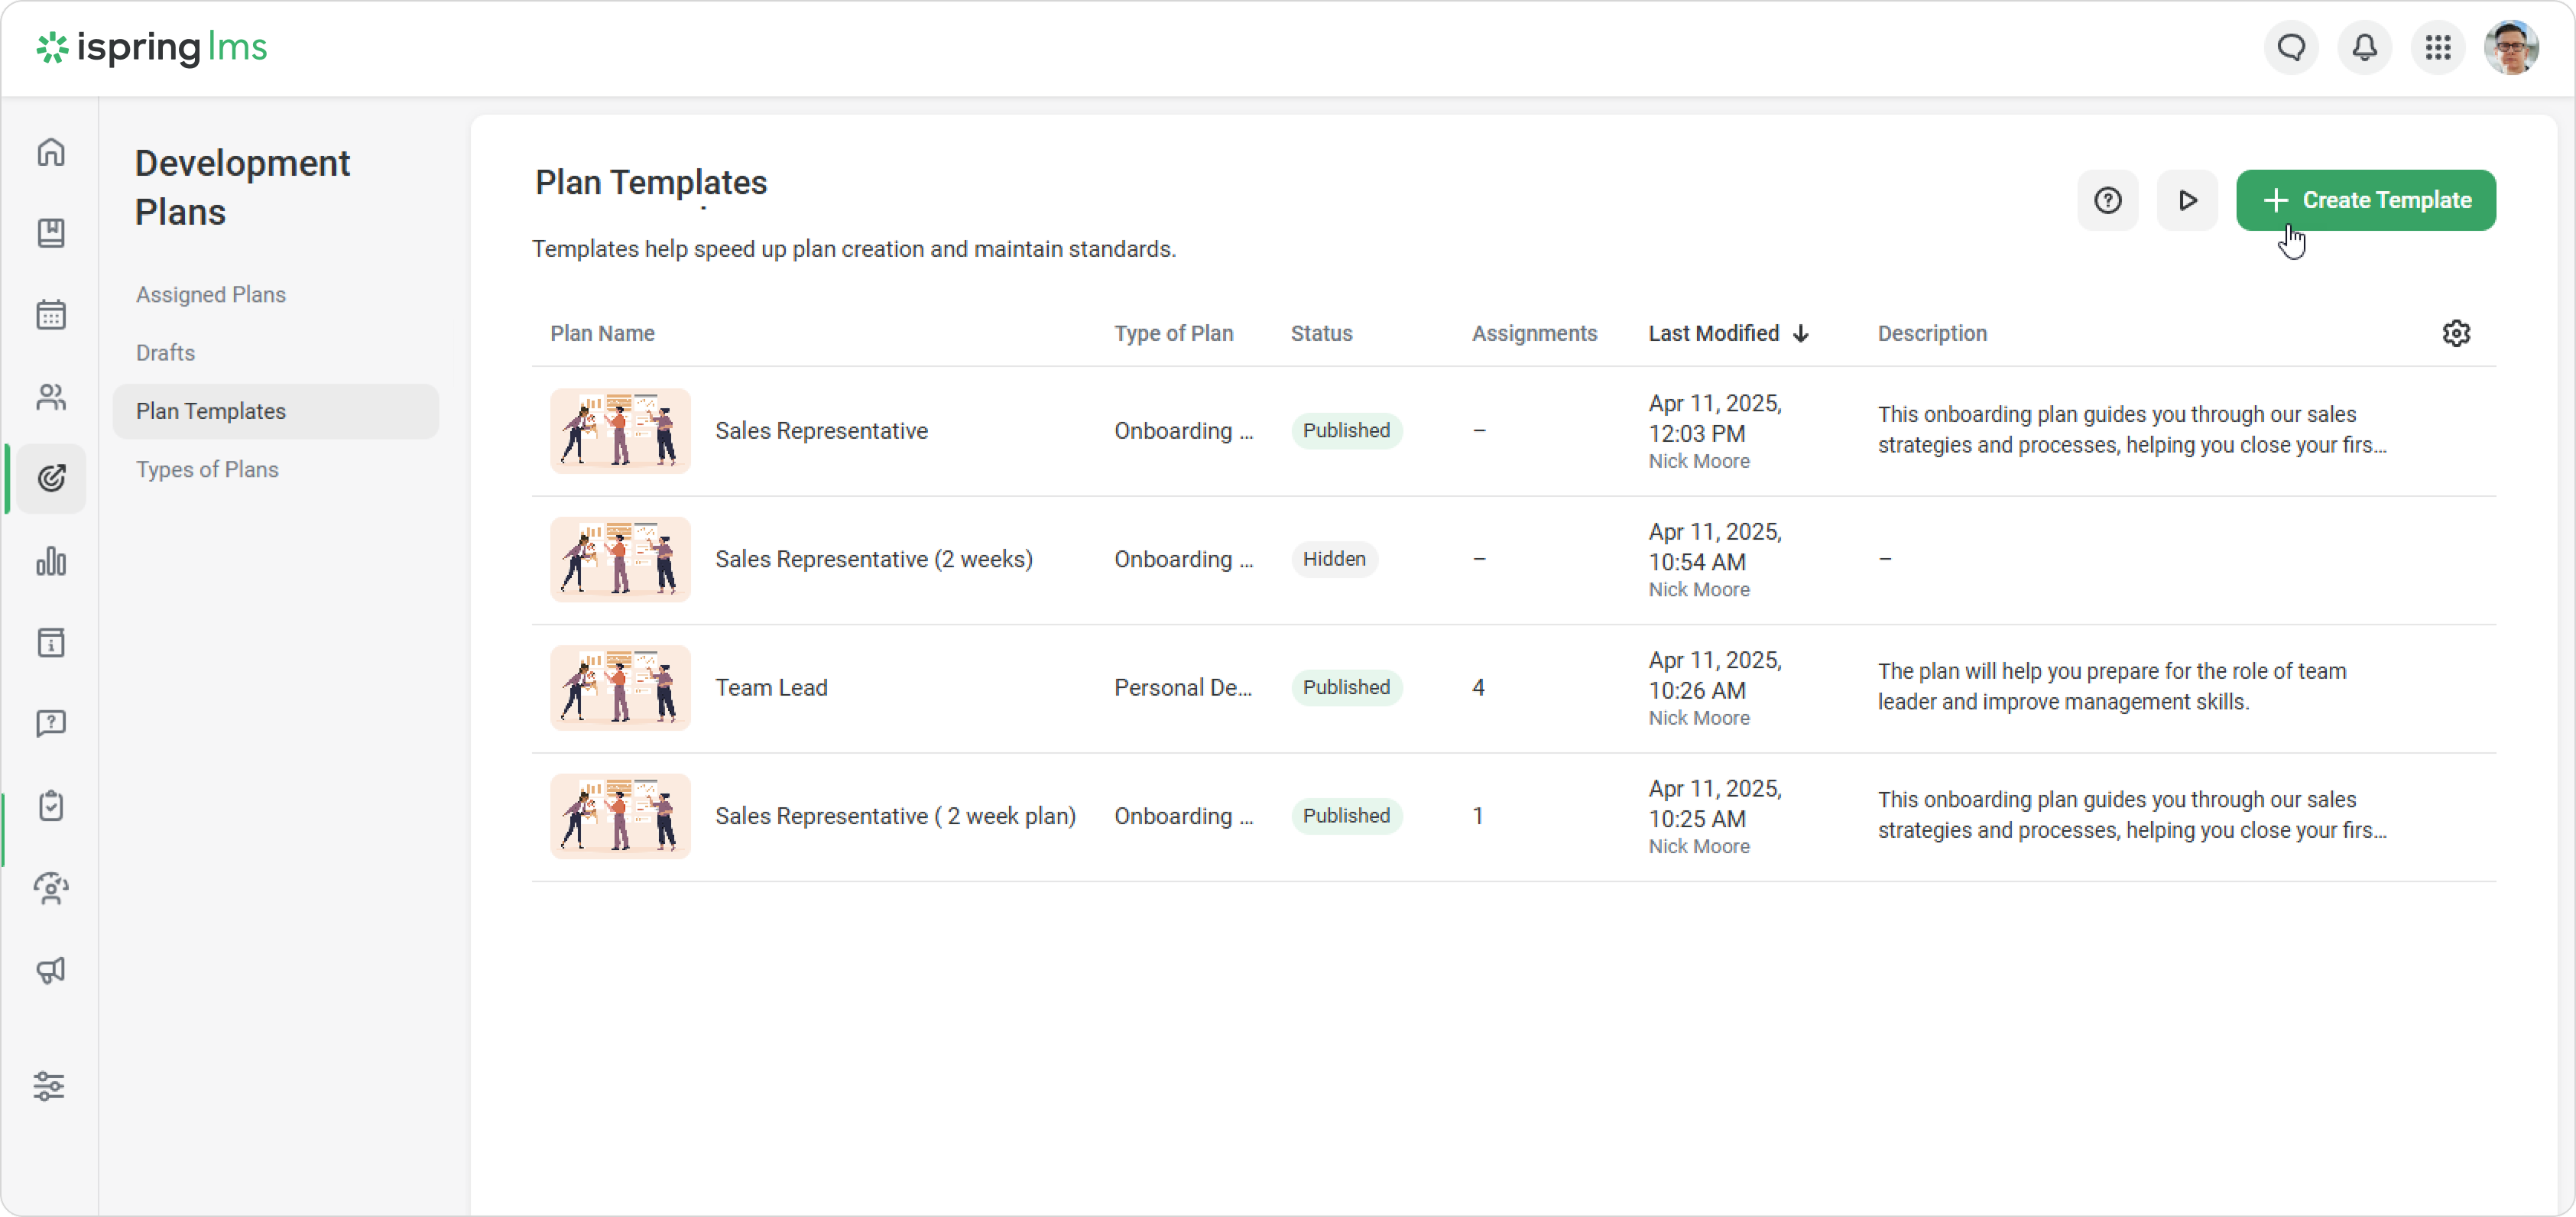
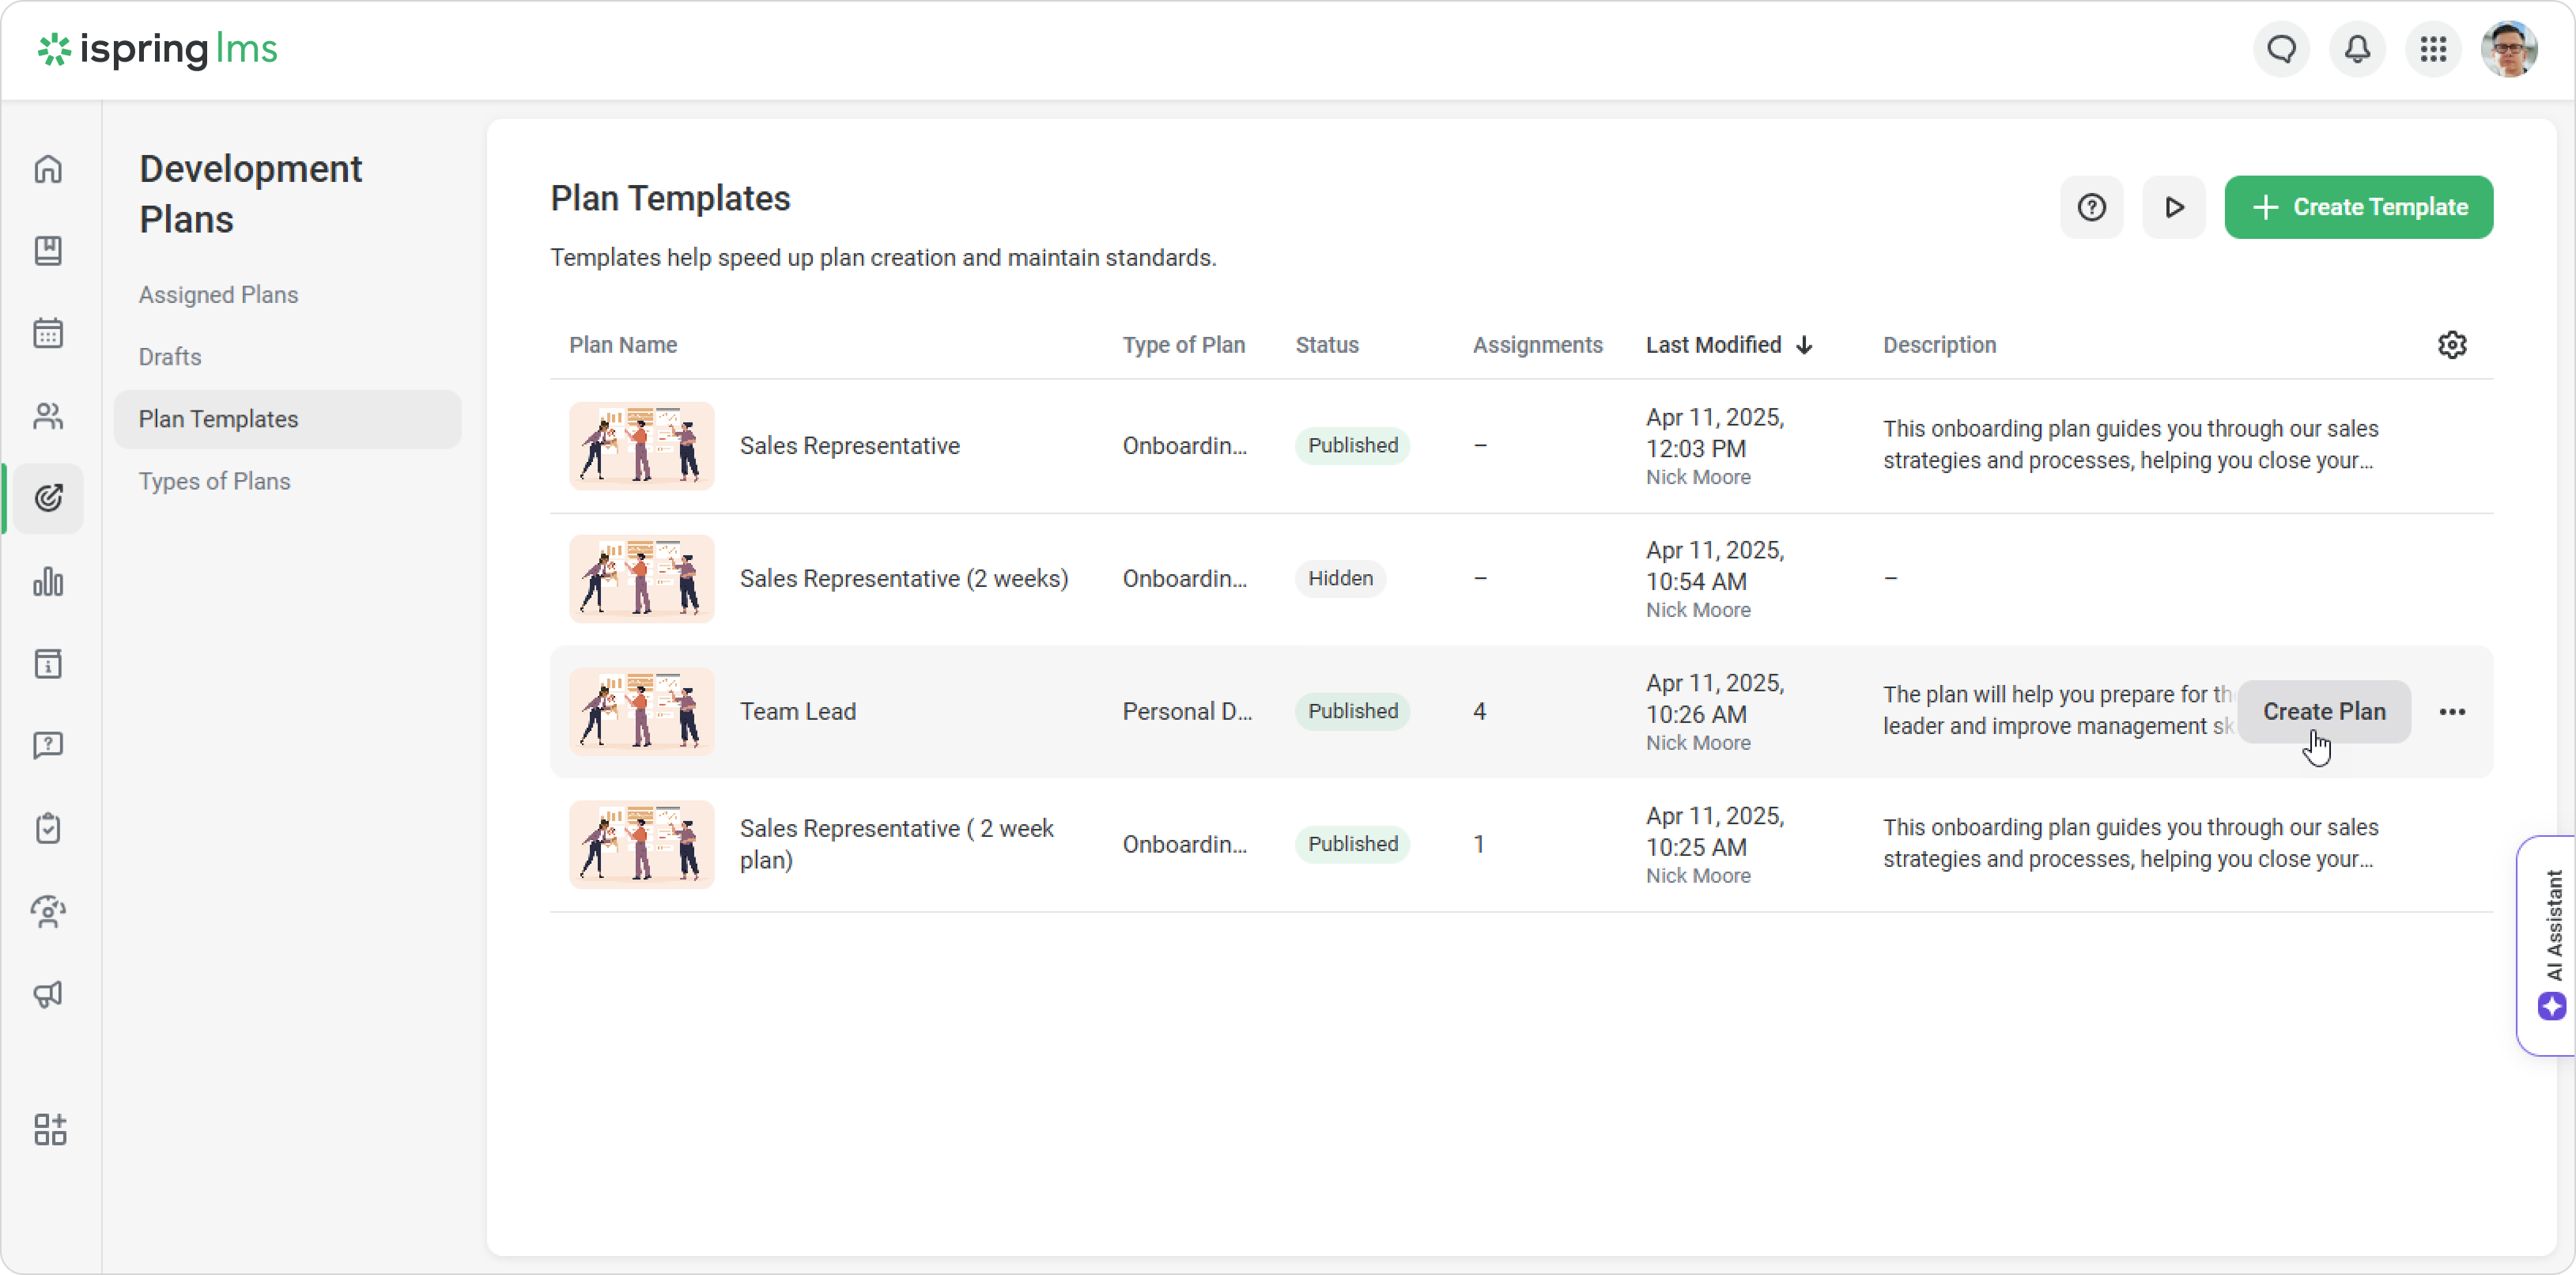
Plan Templates
The Plan Templates page contains pre-made development plans. This is a shared library that is accessible to users with permission to view and manage templates.
Plan templates save time for administrators and supervisors, allowing them to select and assign plans for different positions quickly.
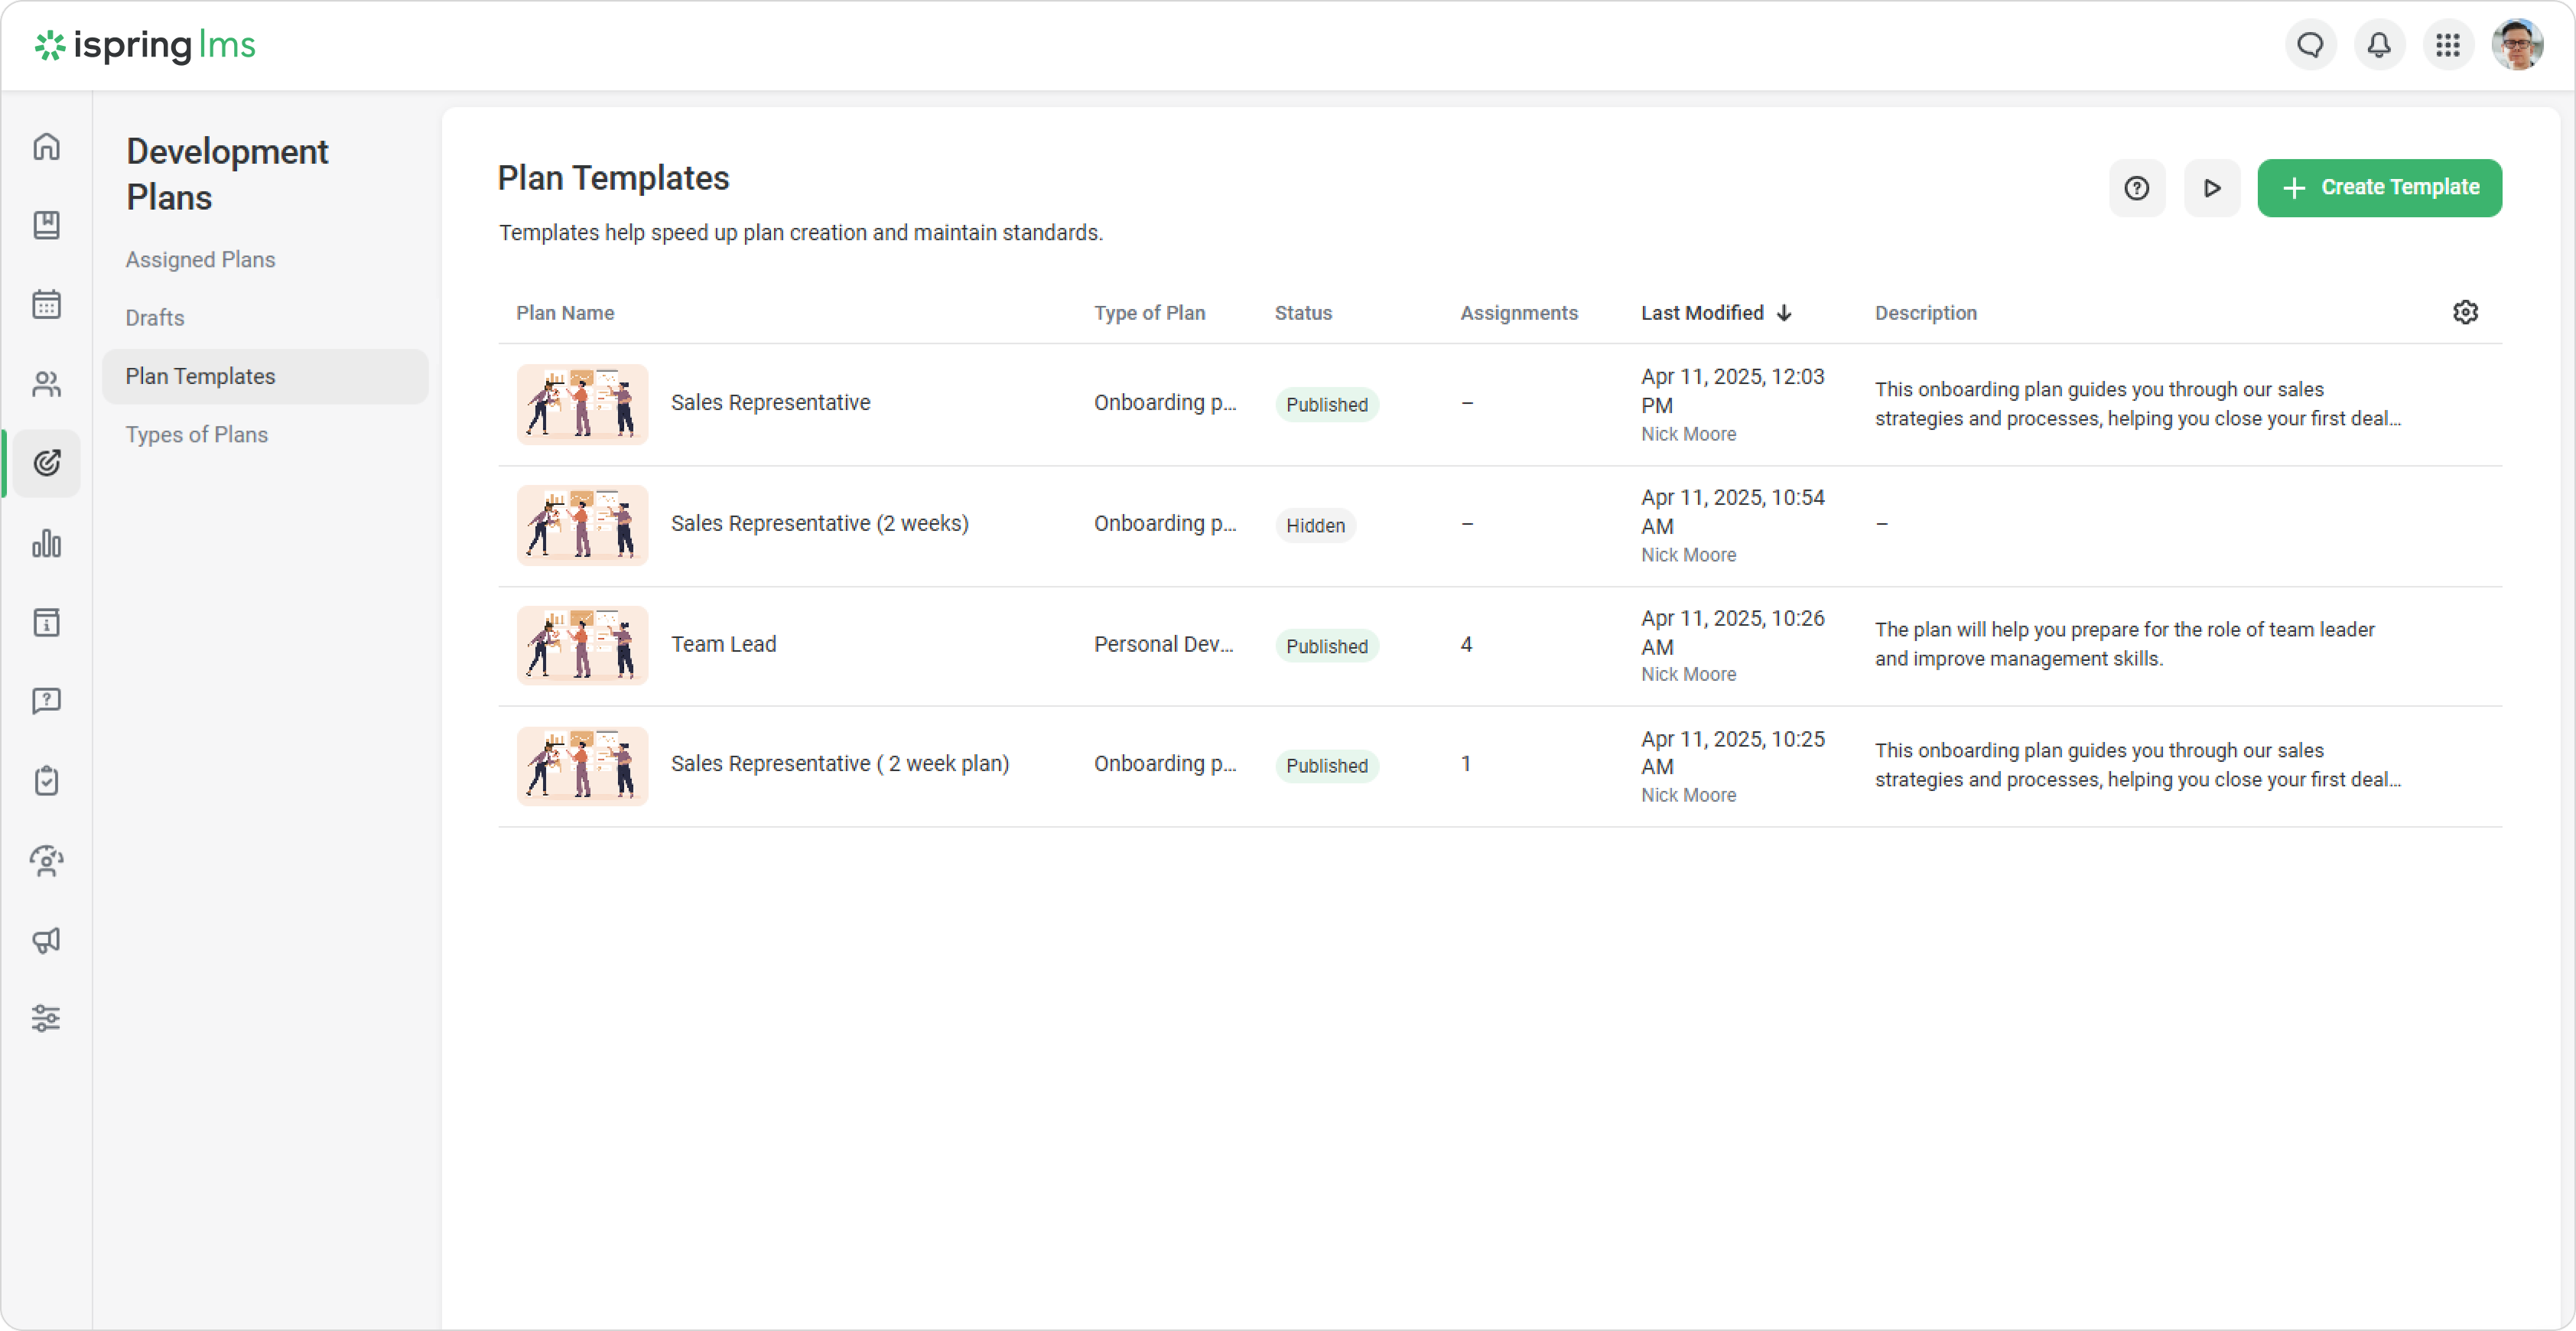
Each template will have a status: Published or Hidden. Published templates can be used to create new plans. You will see how many times a template has been used in the Assignments column.
You can track who edited the template last in the Last Modified column.
How to create a plan template
First method
You can save any development plan as a template.
- Create a new plan following the instructions and select Save as > Plan Template.
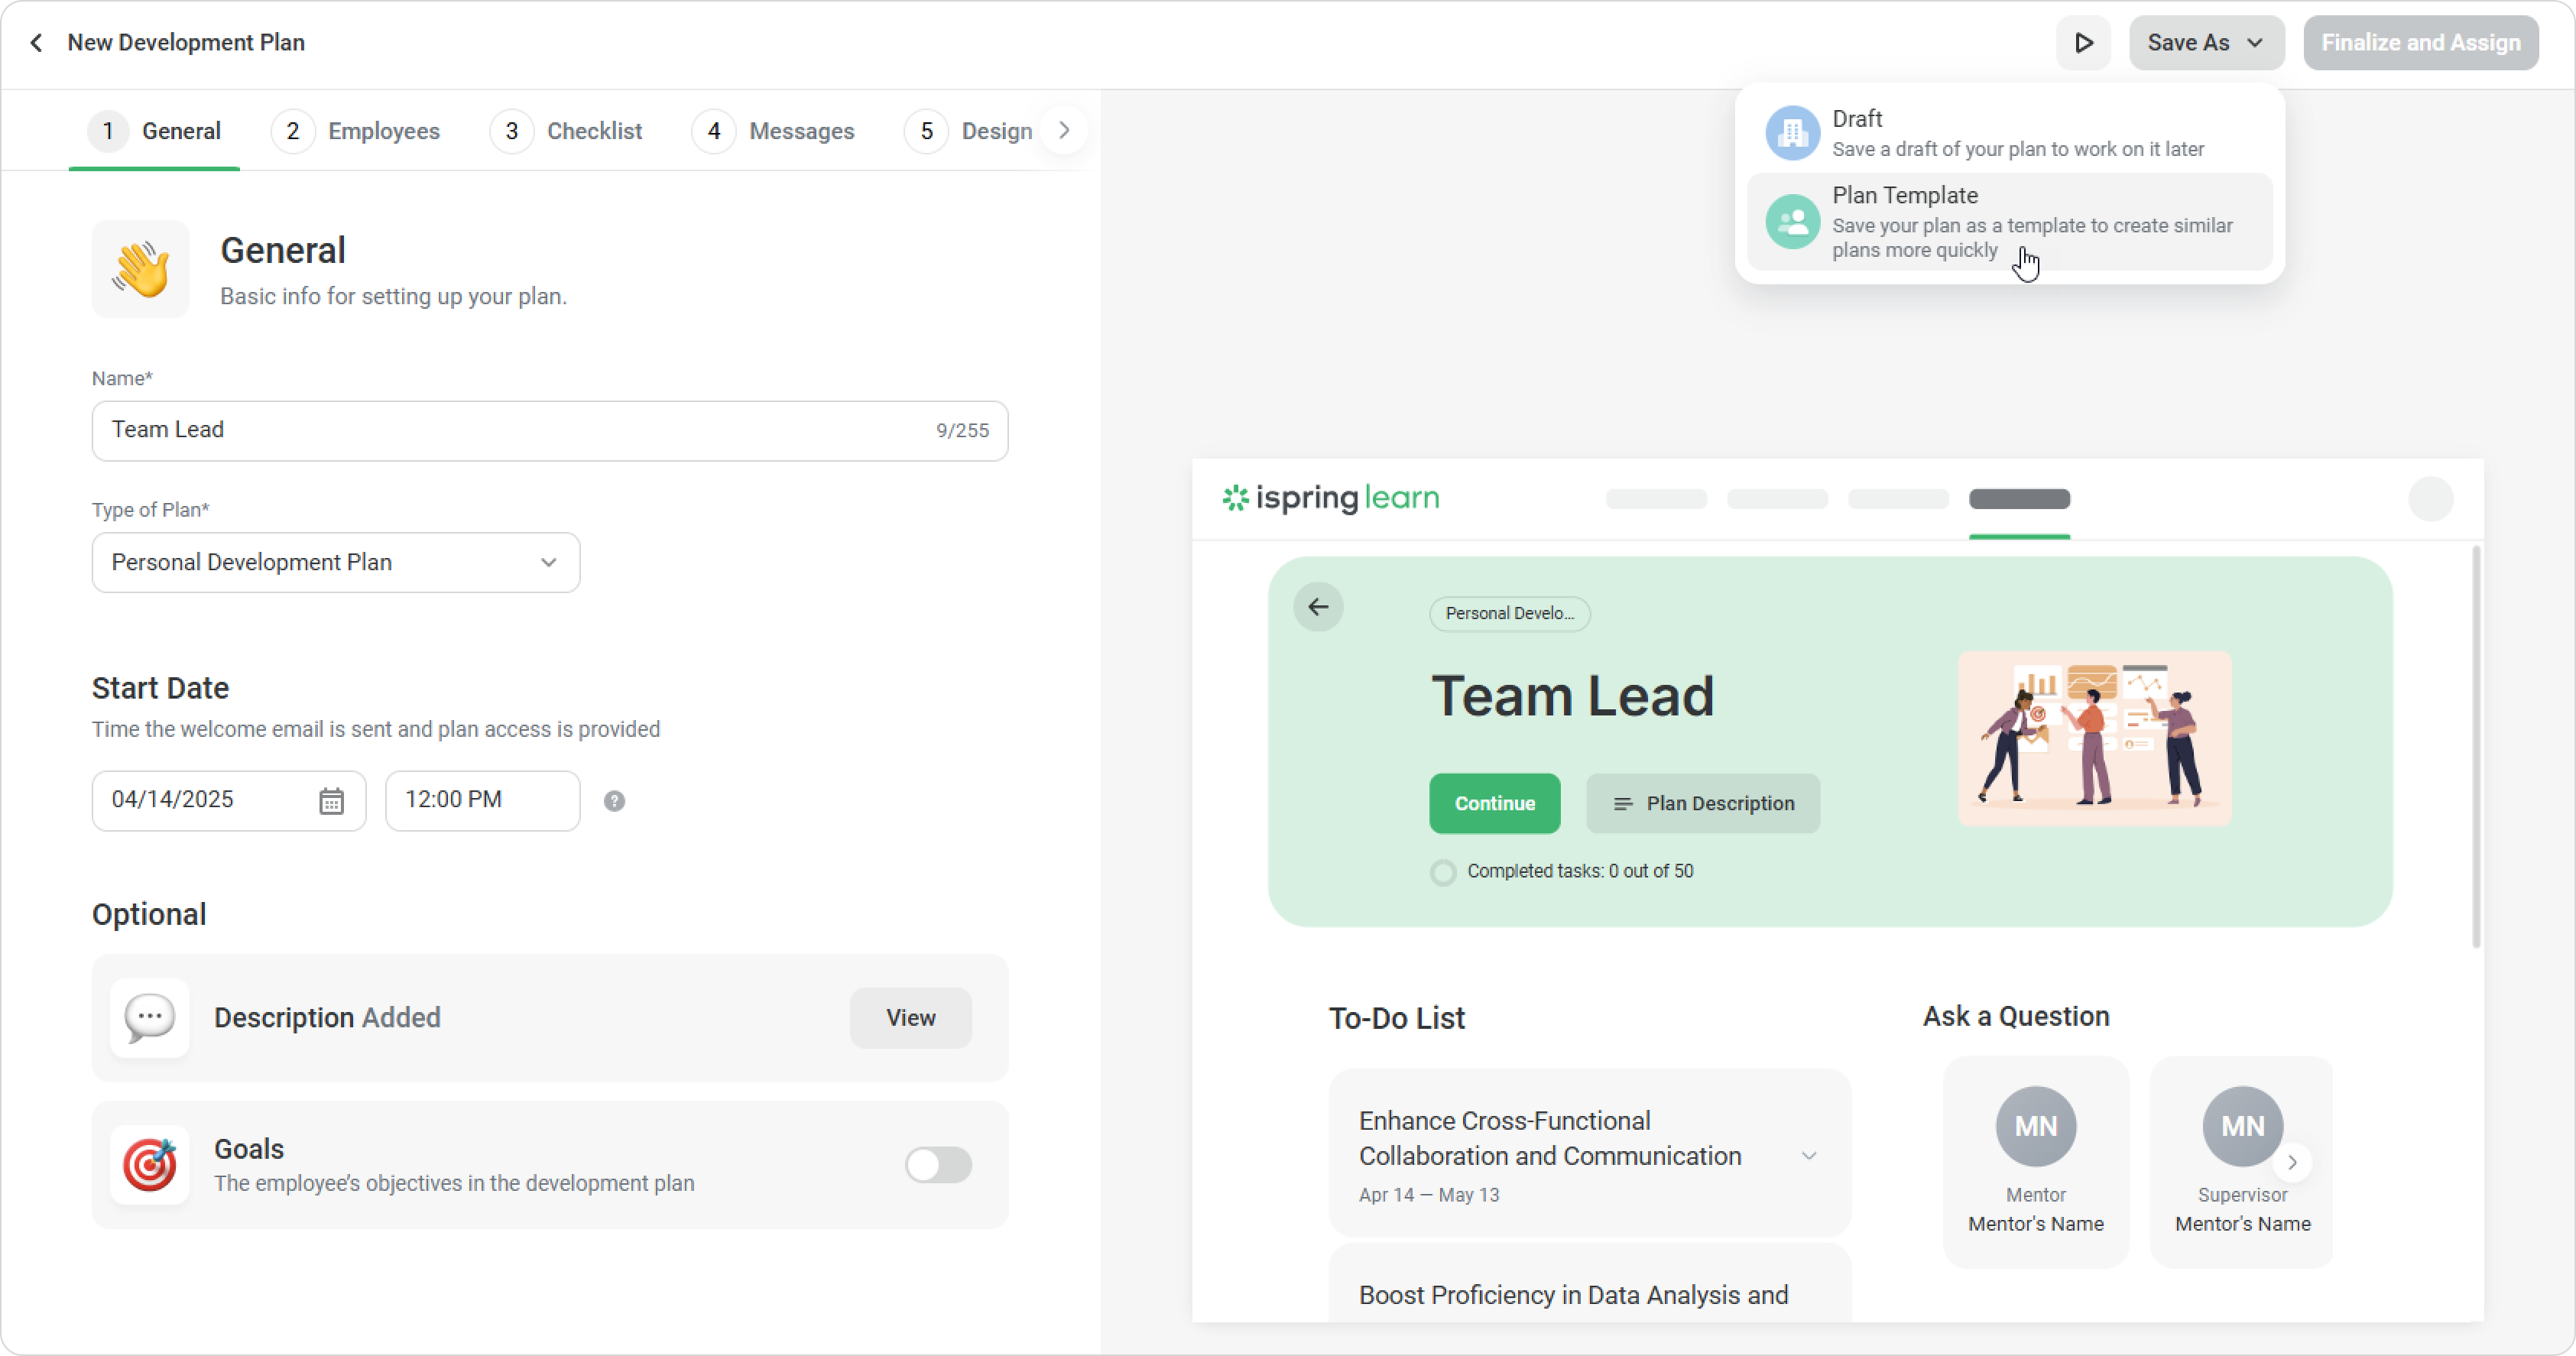
- Then, choose the type of plan, e.g., onboarding plan.
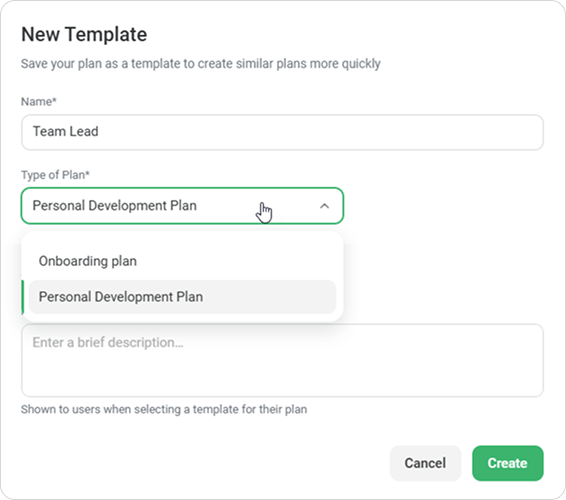
- Make the template published or hidden. A hidden template cannot be used to create new plans. Then, click on Create.
Second method
You can create a plan template from scratch.
- Go to Plan Templates > Create Template.
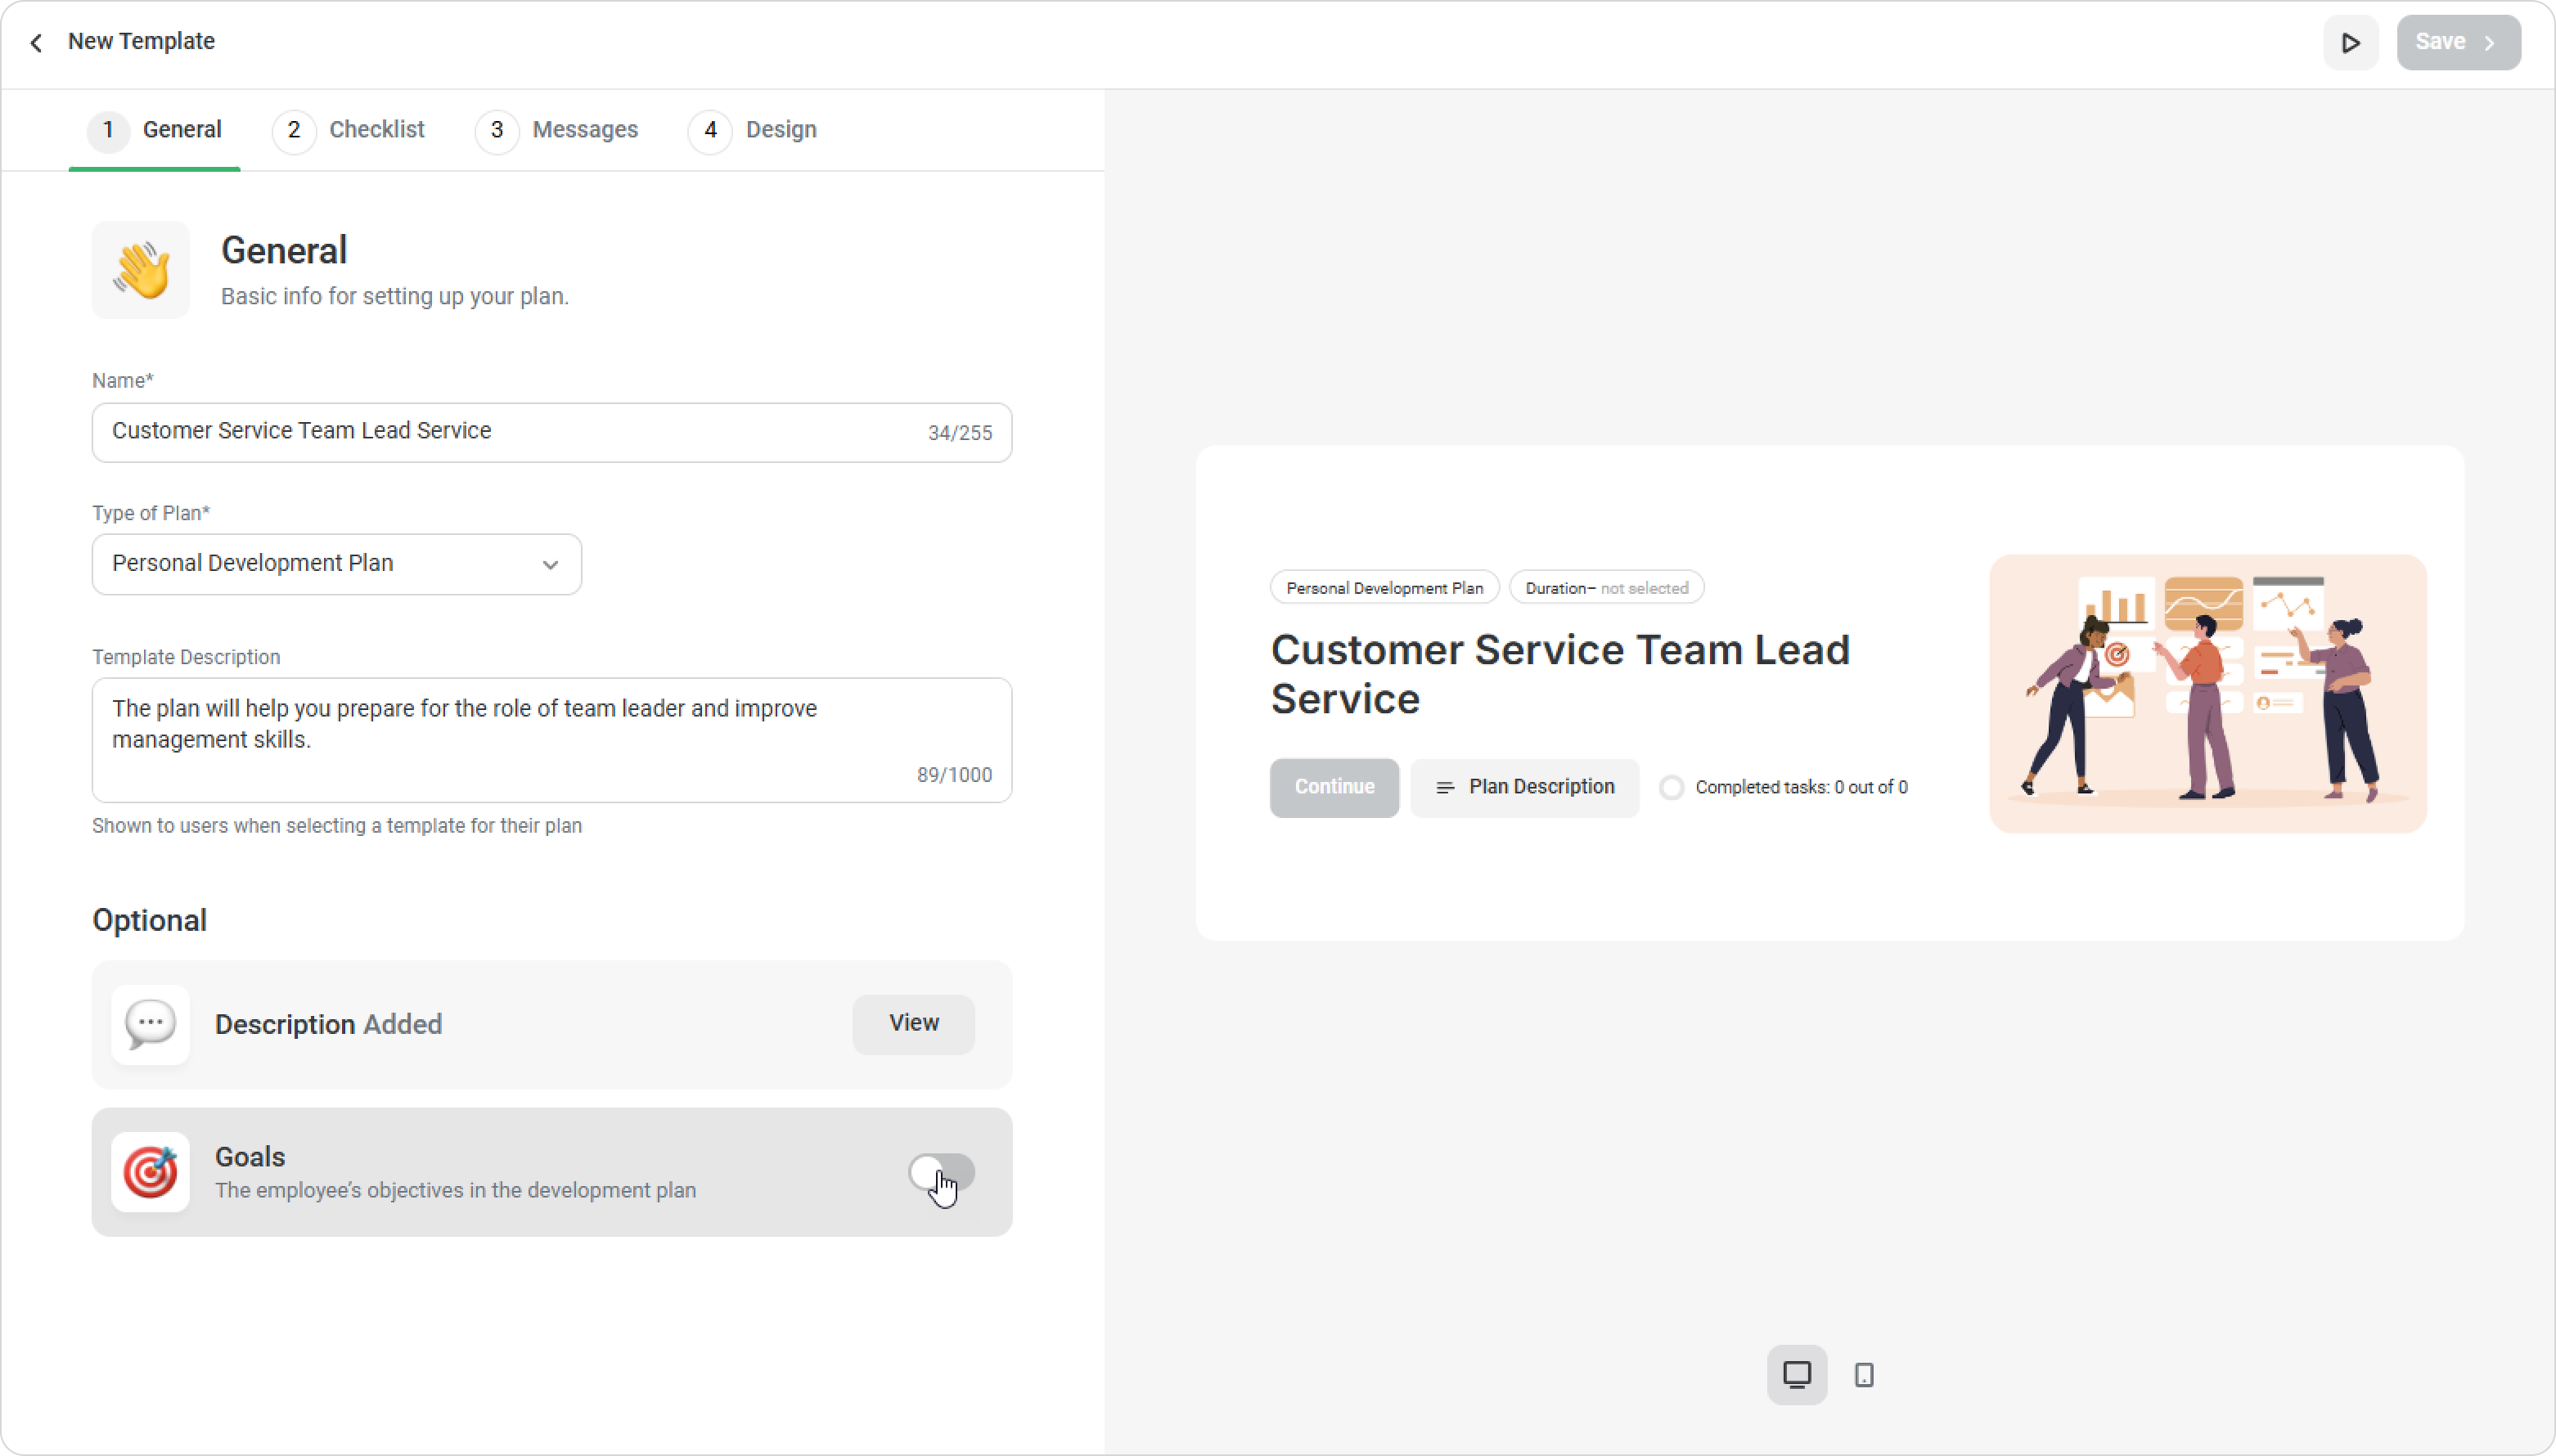
- On the General tab, fill in the name, type of the plan, and a brief description for your colleagues.
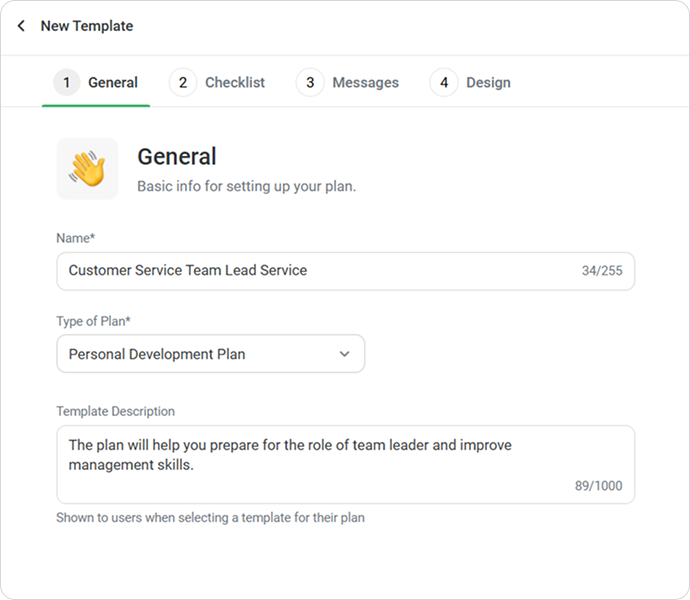
- Next, you can add a description for employees and define the plan’s goals.
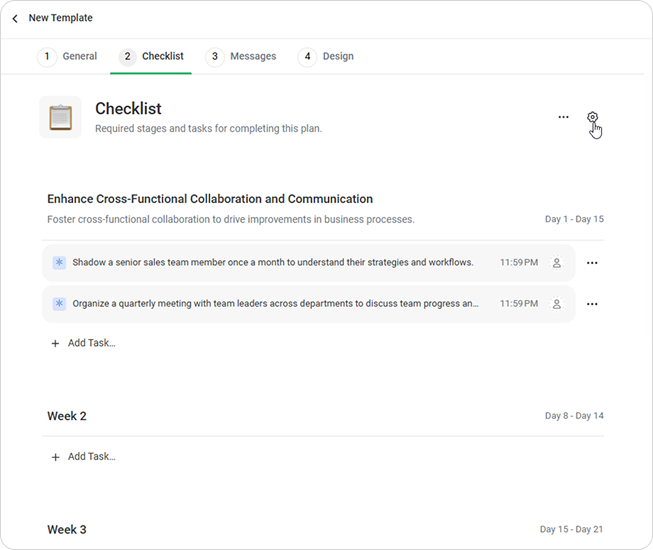
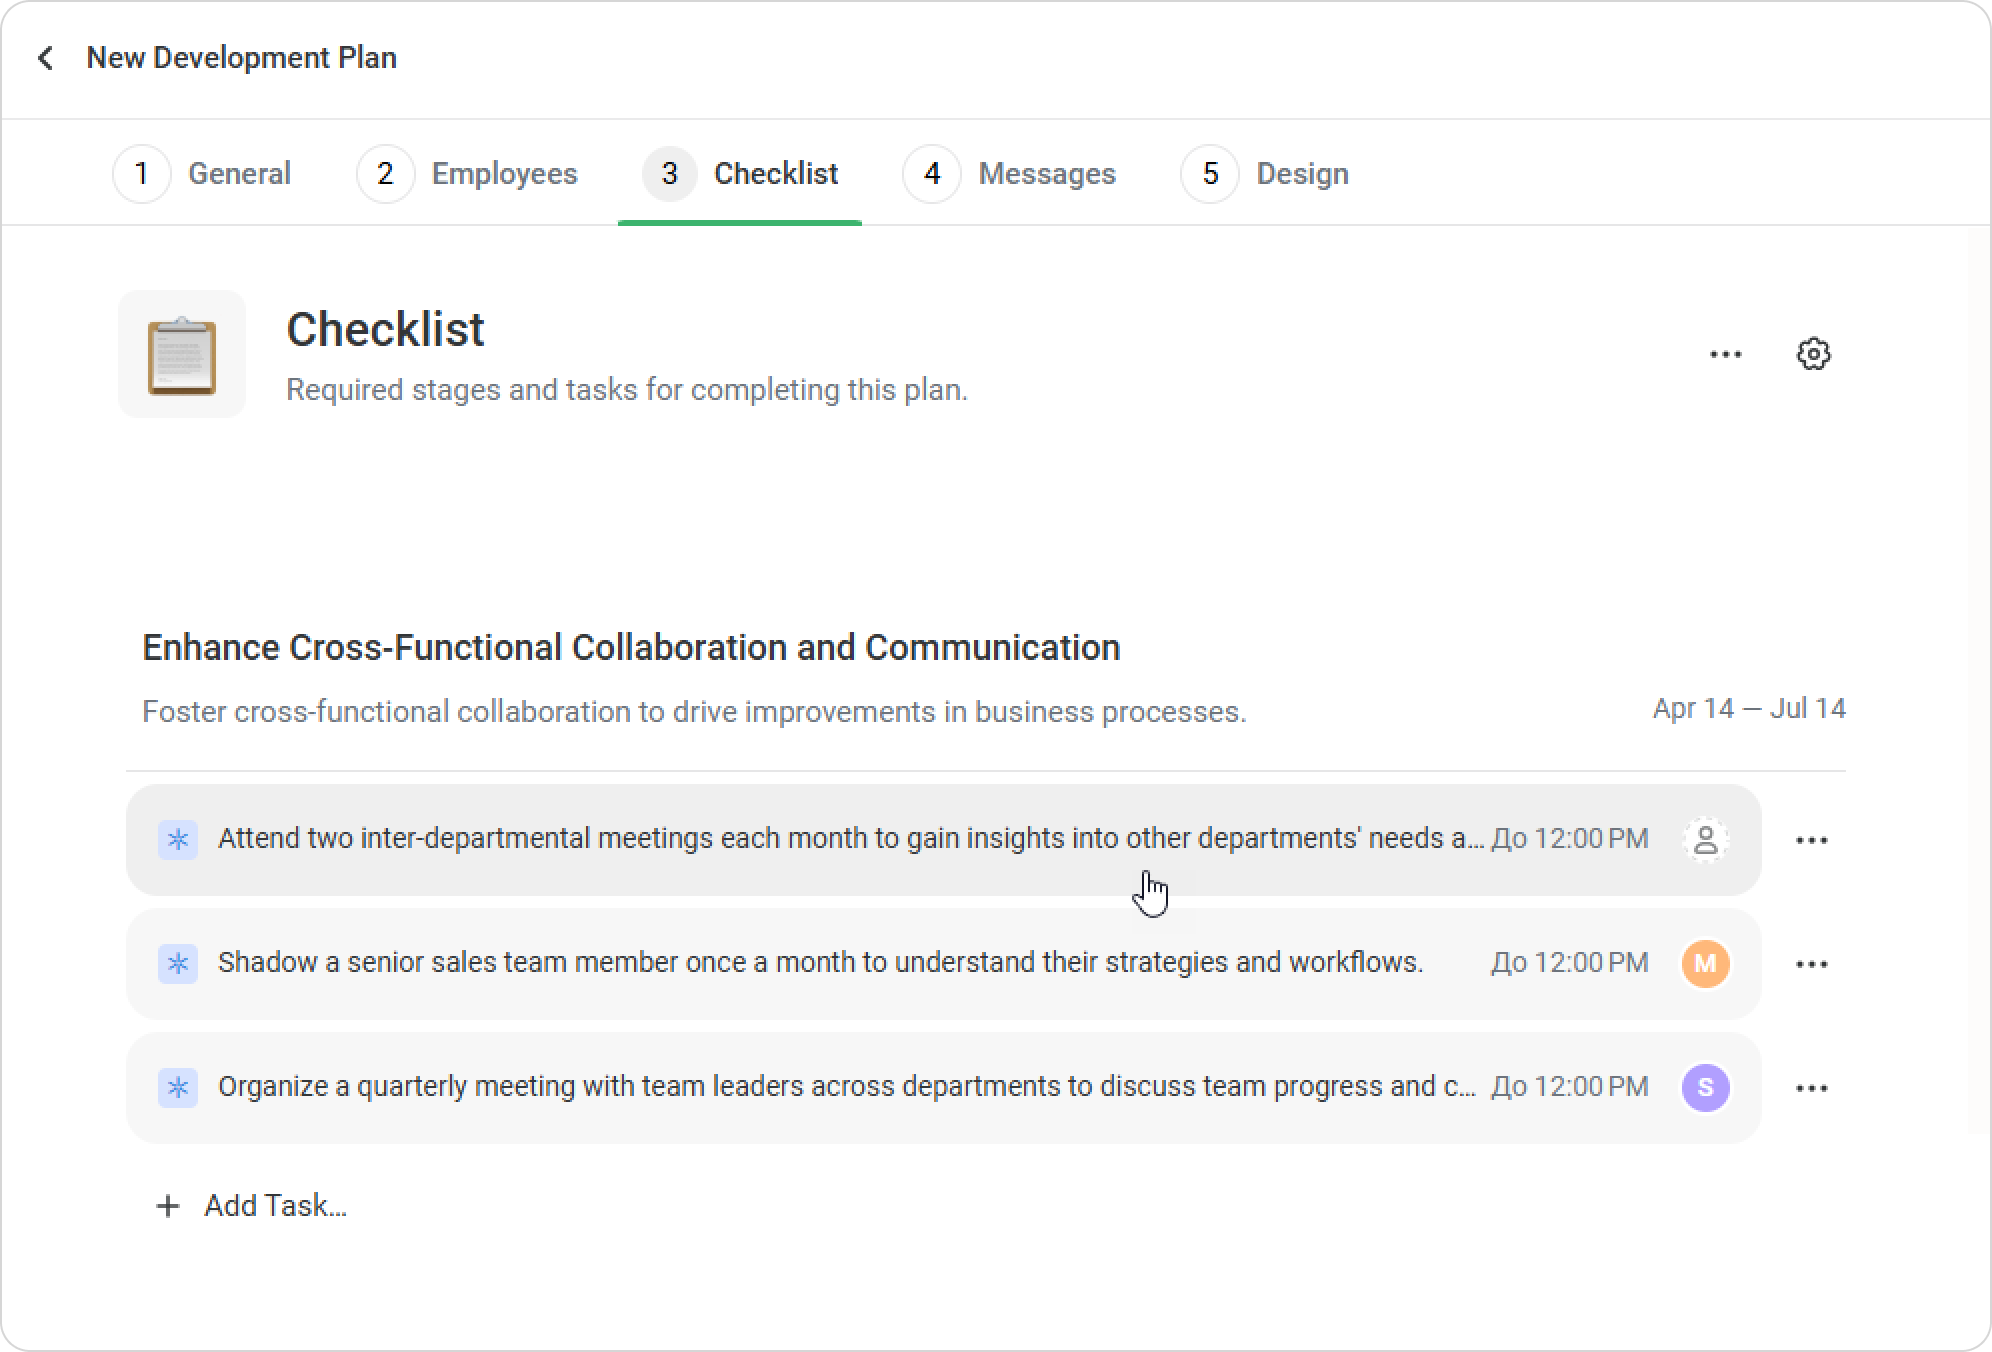
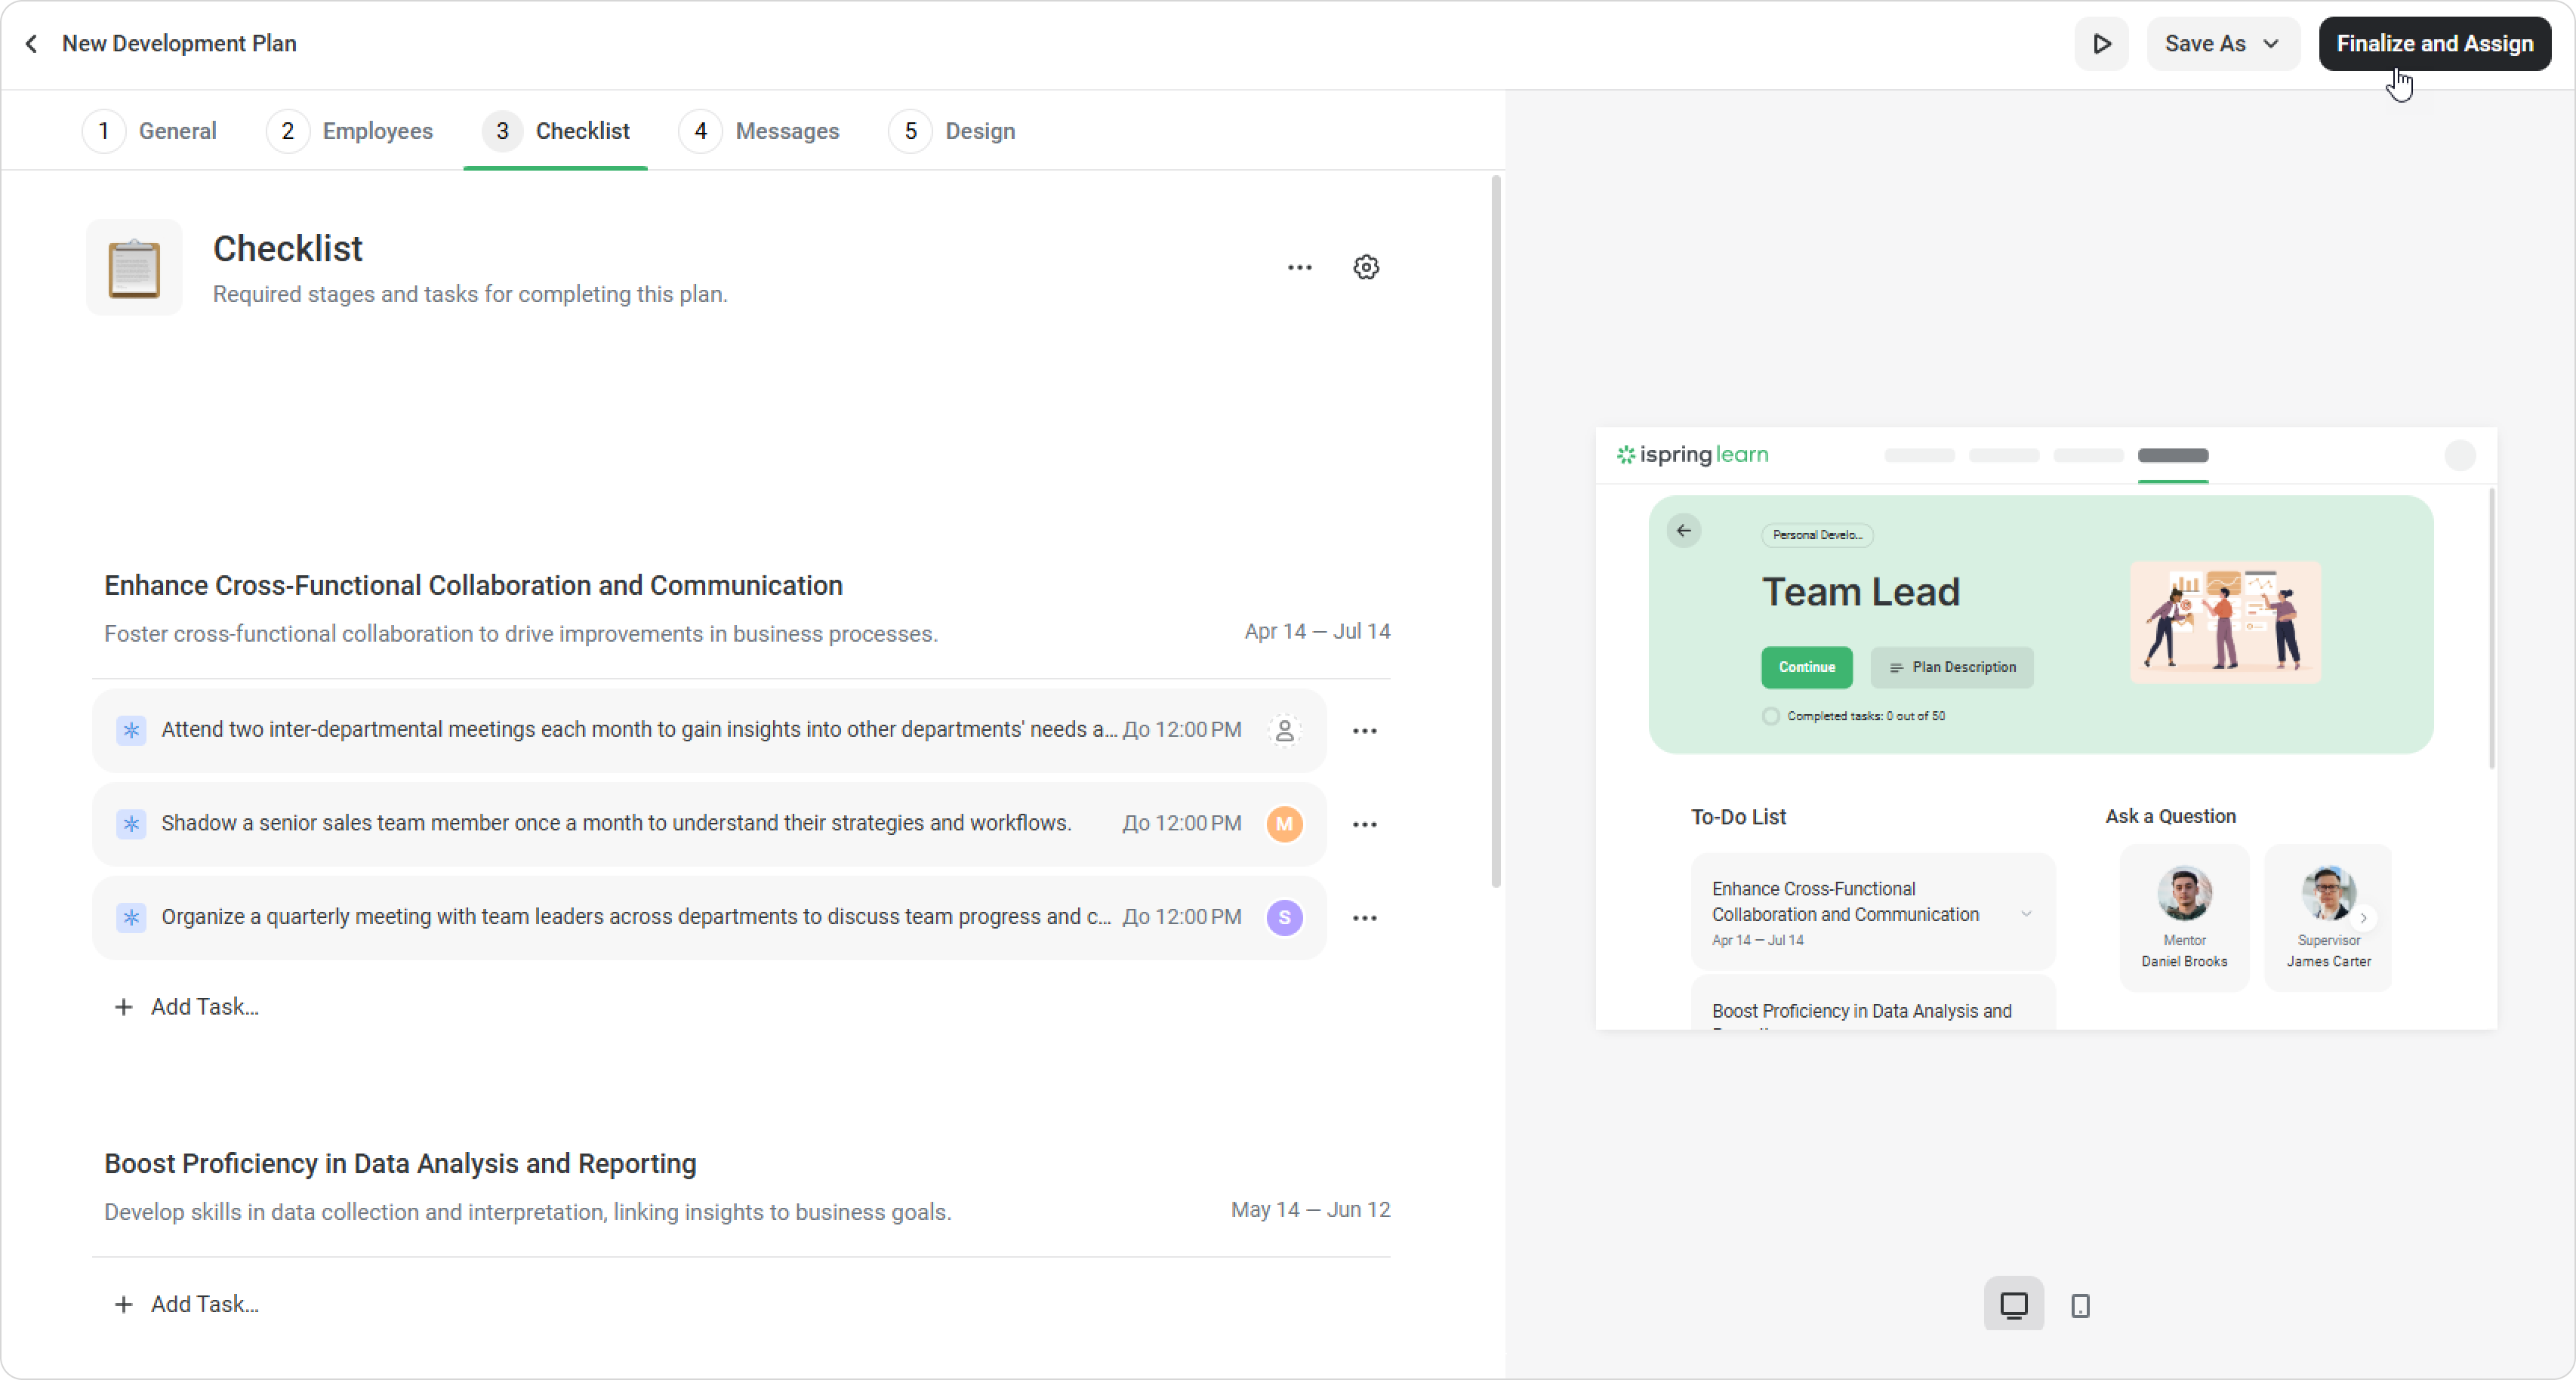
- Go to the Checklist tab. Click From Scratch, then set the duration and choose the structure. Click Continue.
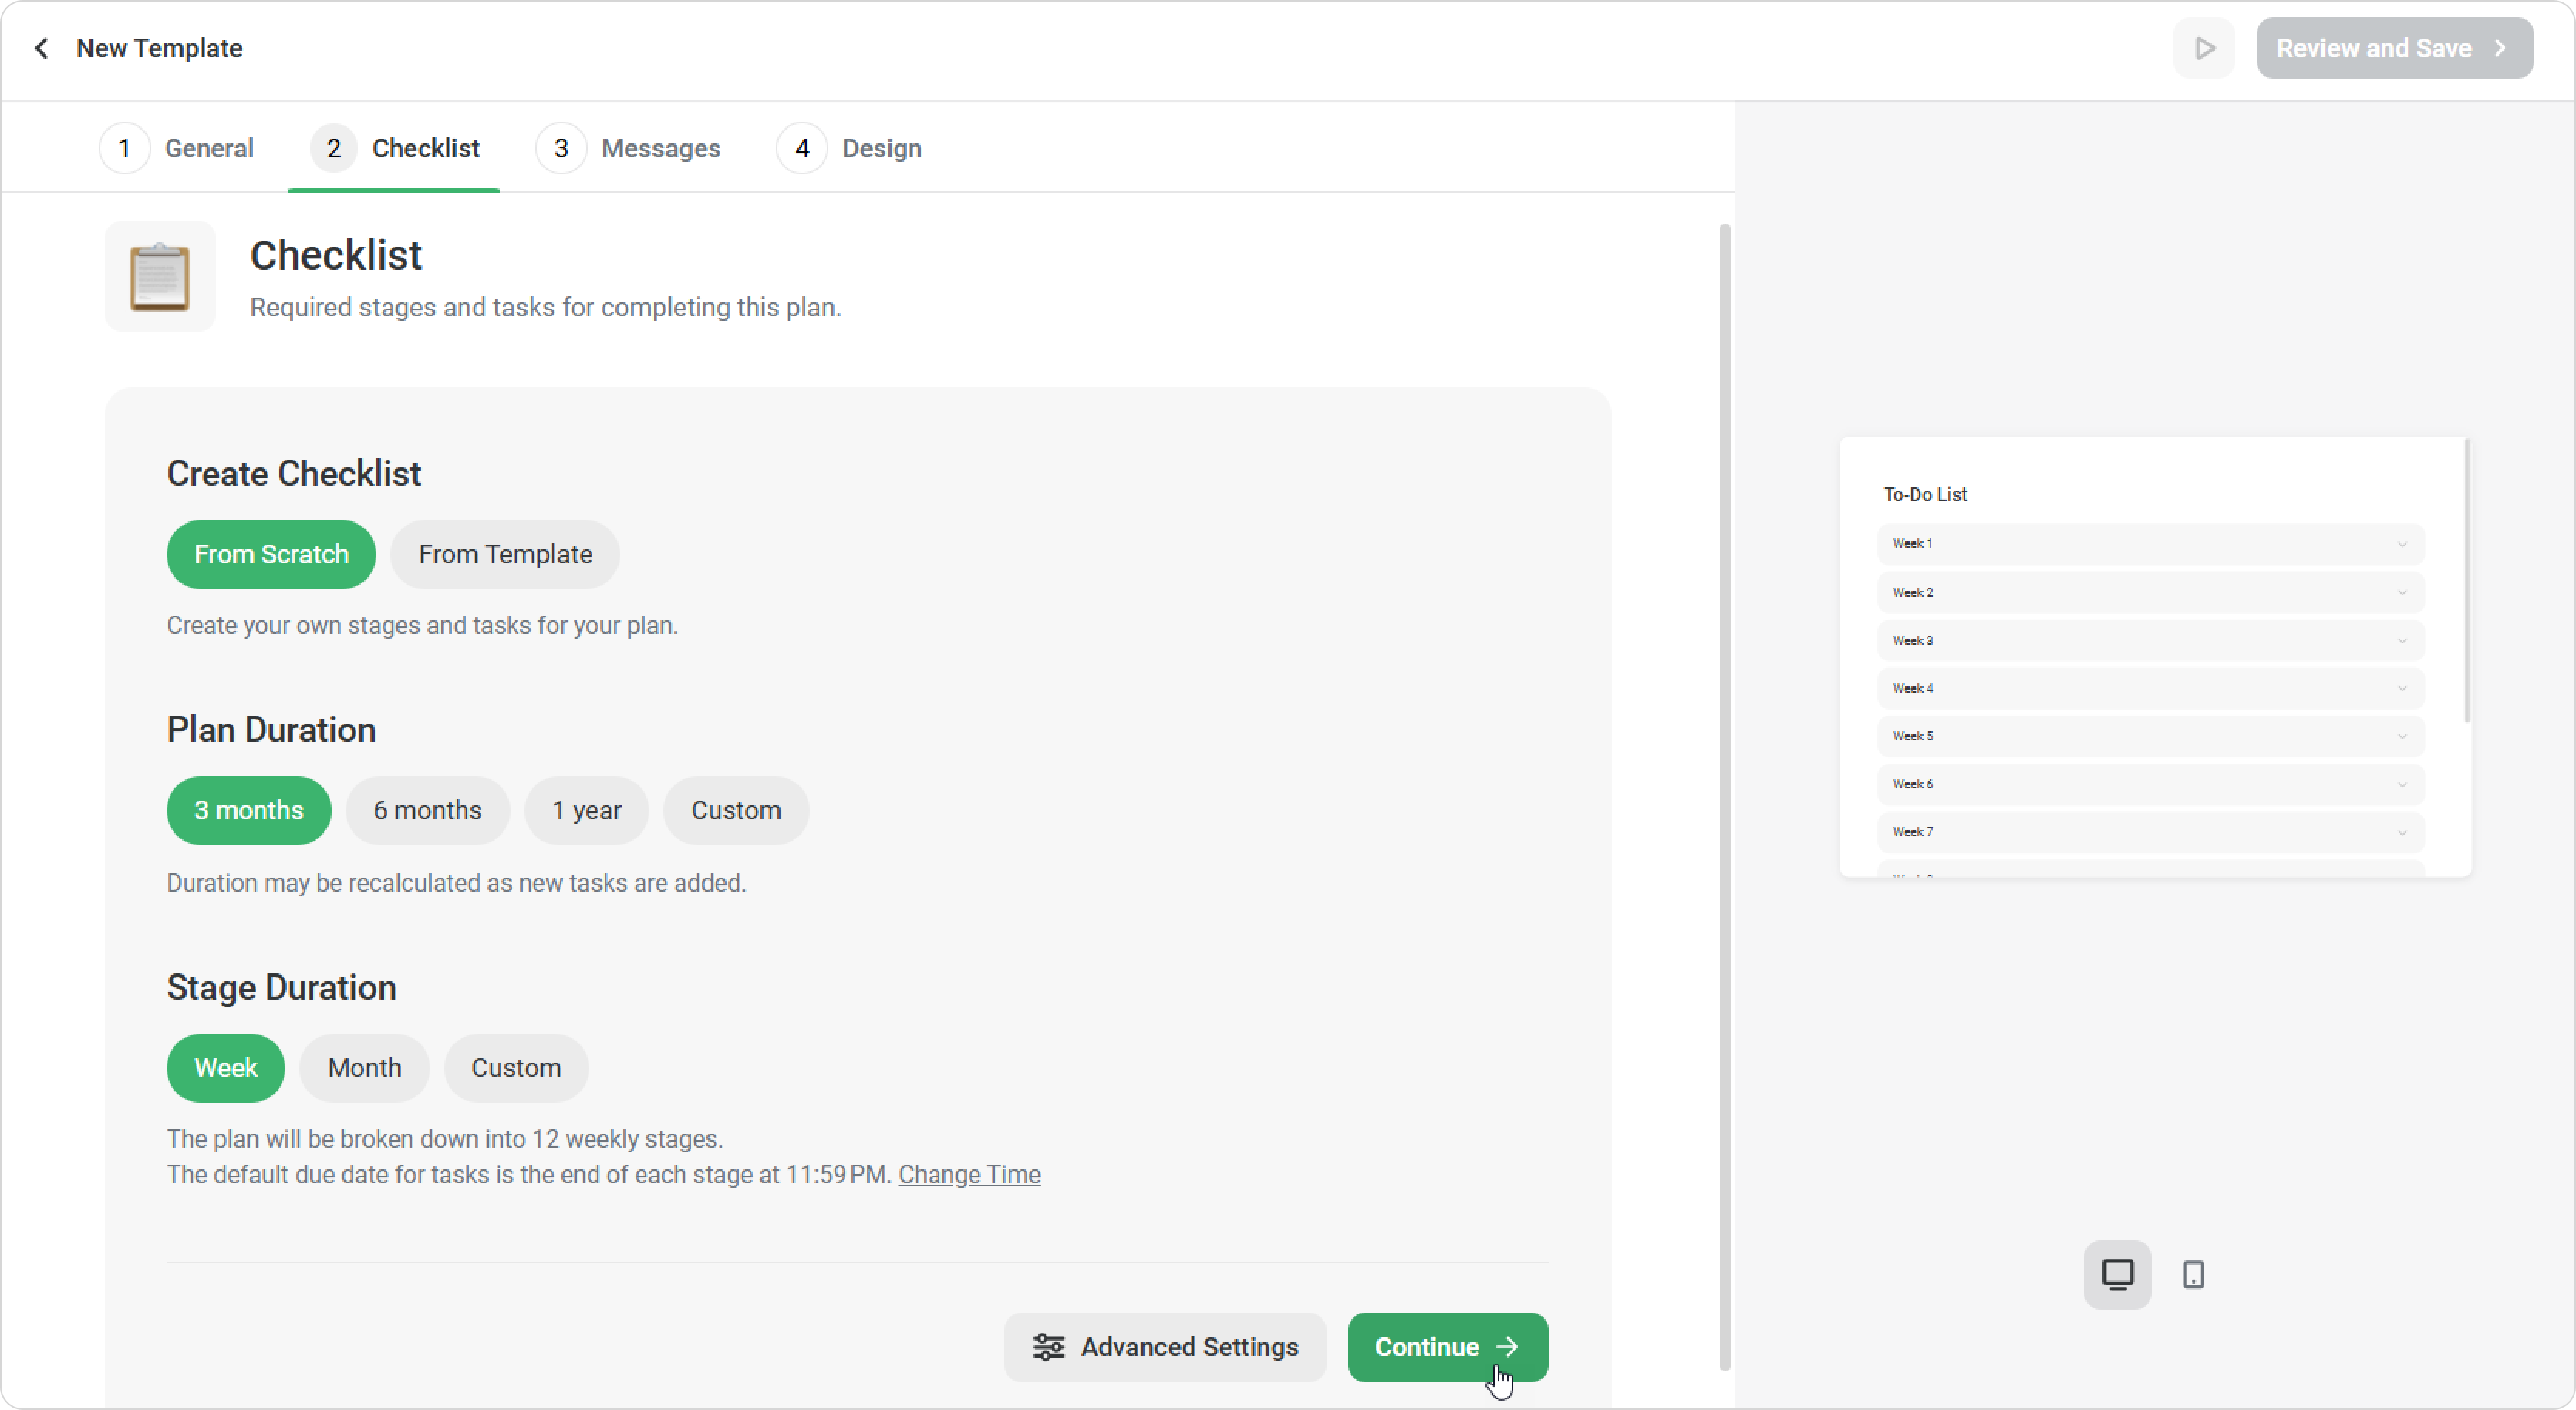
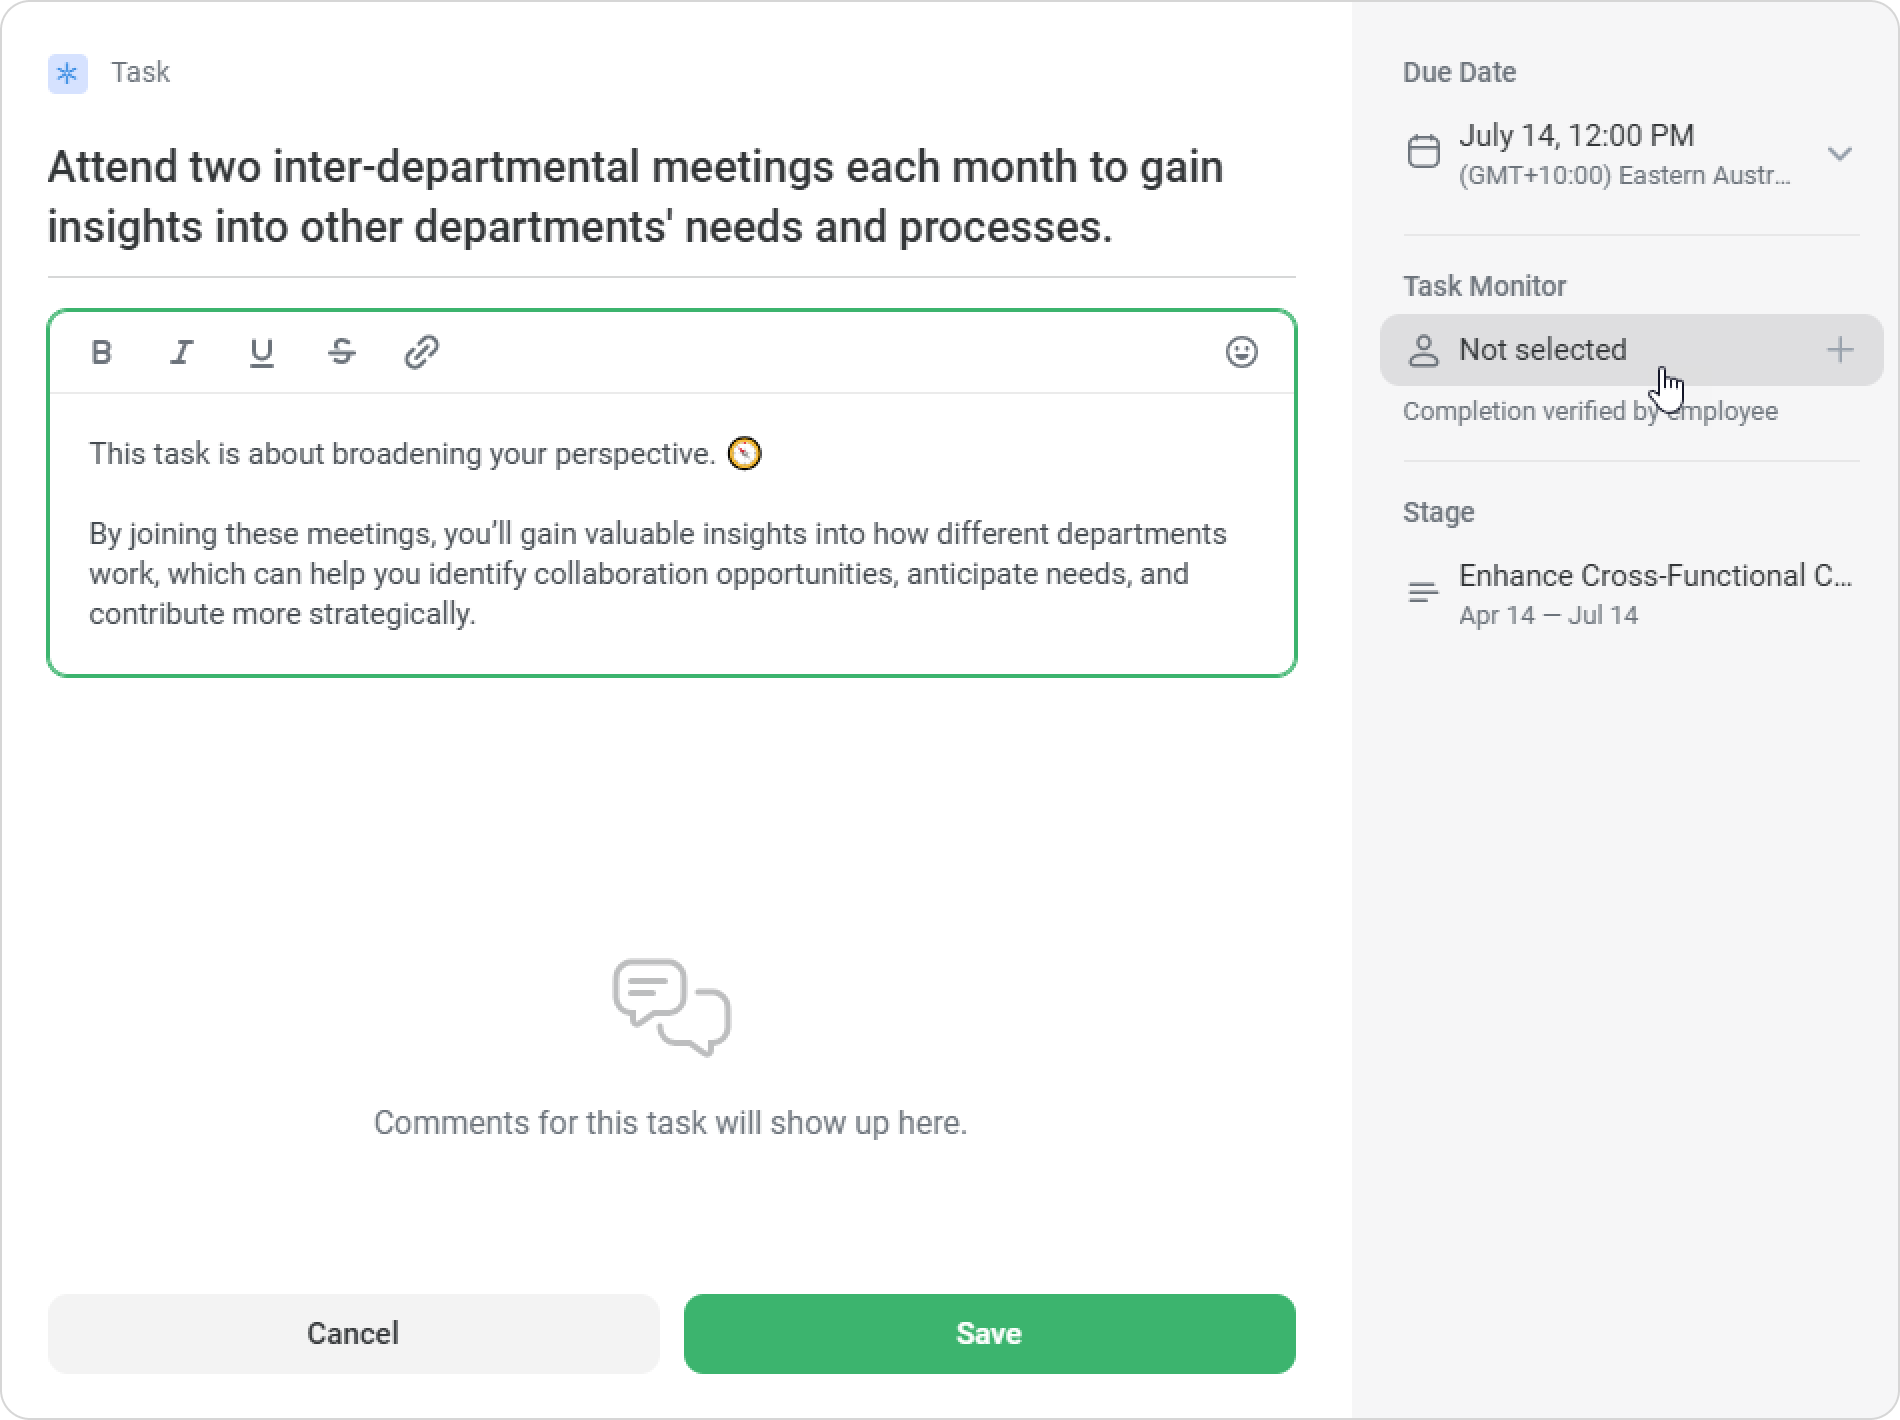
- Add tasks to the stages. To change the stage name and adjust its duration, click on ••• and then on Edit Stage.
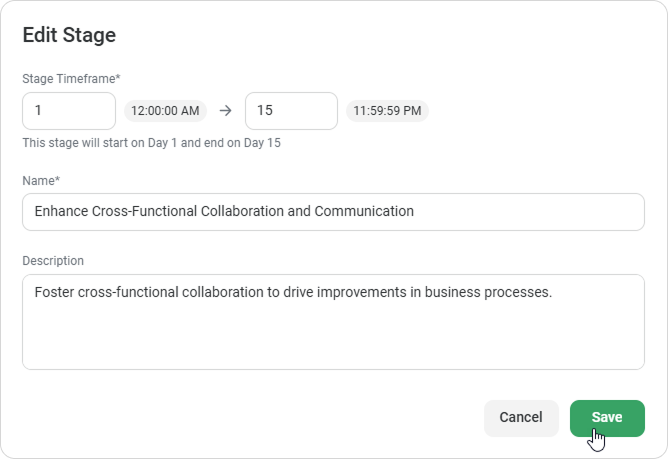
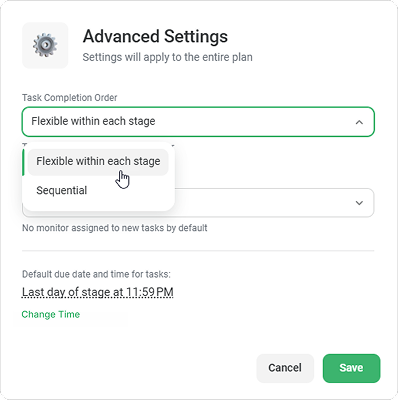
Set due dates and write descriptions if needed. Click on Save. - Next, click on Advanced Settings to adjust the plan’s progress.
Choose the order in which employees can complete tasks:- Flexible within each stage. Tasks can be completed in any order.
- Sequential. Tasks must be completed in the order they appear.
You can then choose who will verify task completion. By default, it's the employee unless the task has a task monitor.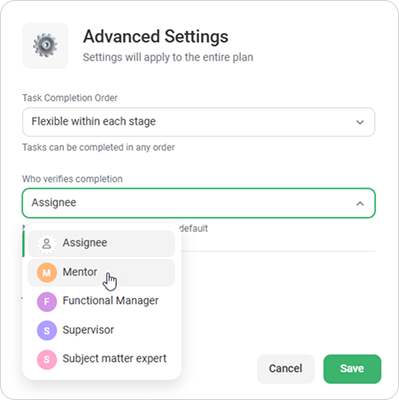
Finally, you can set the time that a task must be completed, e.g., by 12:00 PM.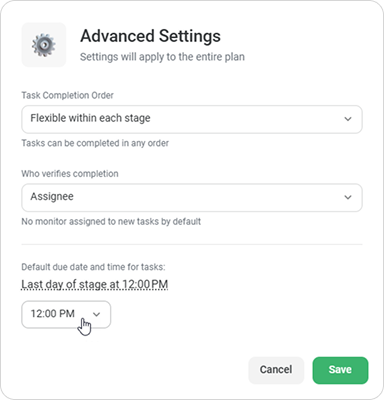
Click on Save.
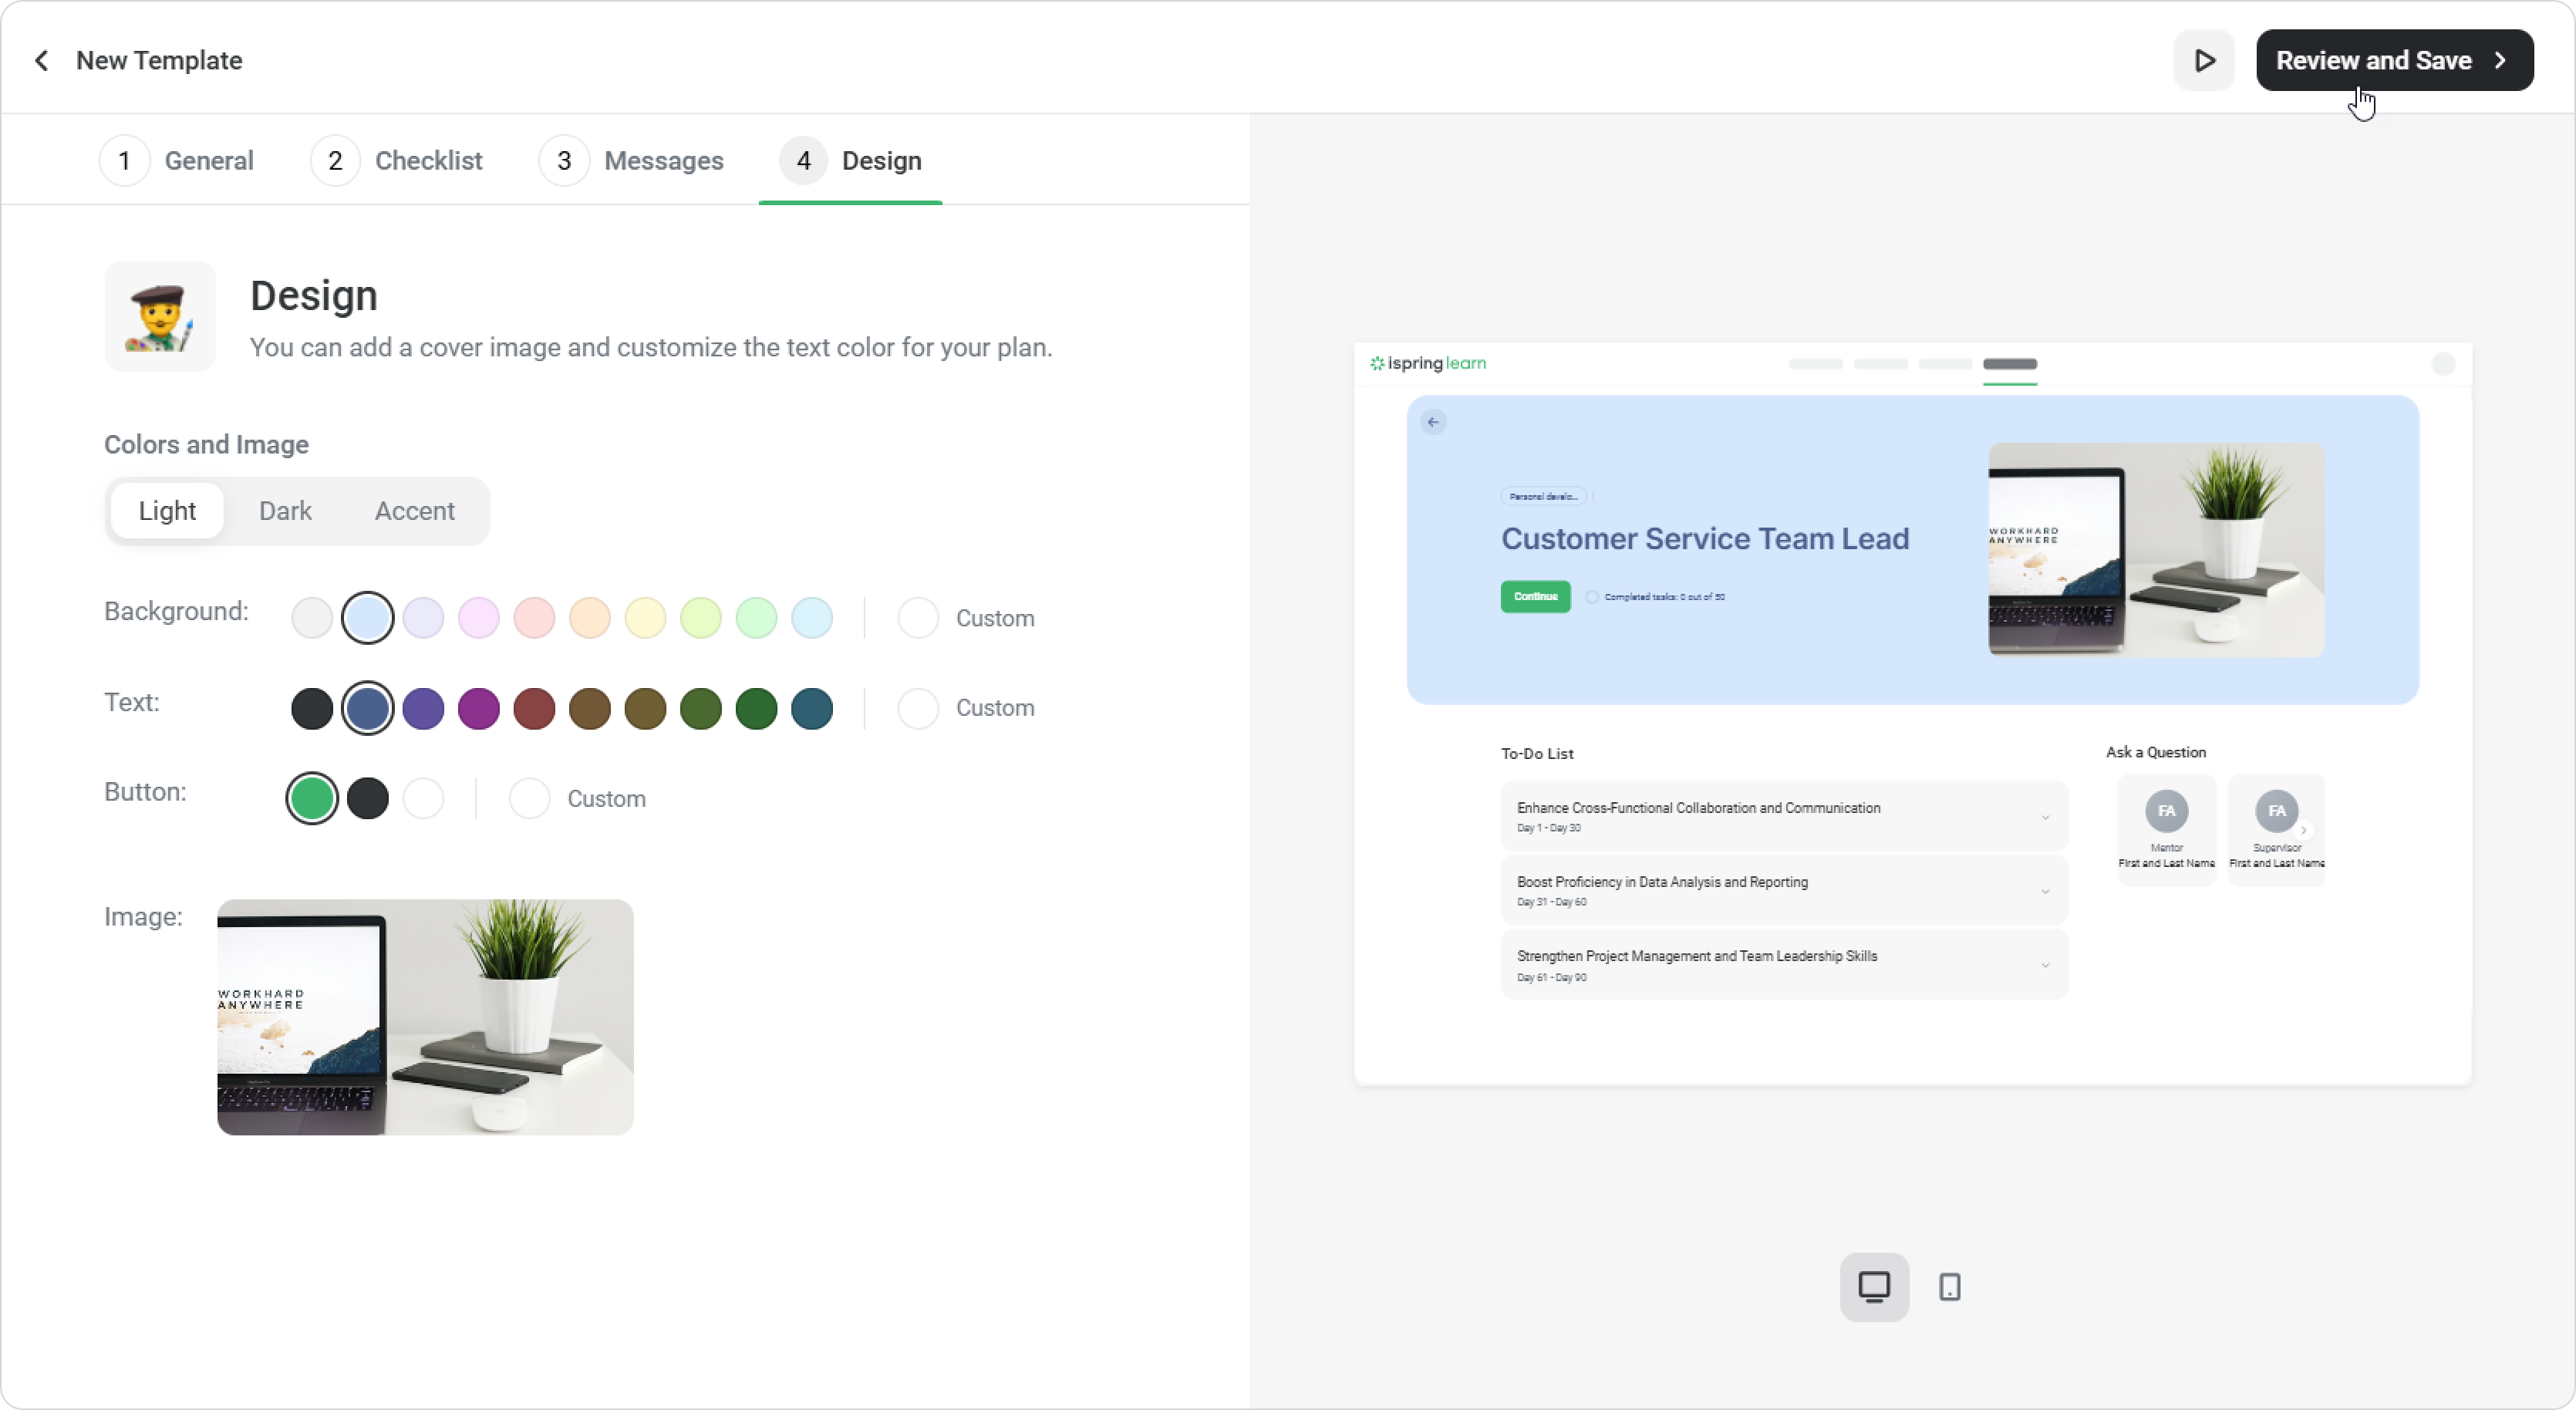
- Next, set up messages and customize the plan design as needed.
- Click on Review and Save.
You will then see the plan’s outline.
If changes are needed, click on Edit. You can also click on Back to Edit in the top-right corner. - Once the plan is ready, choose Save and Publish or Save and Hide.
Great! You’ve created a plan template.
How to assign a plan template
To assign a plan template, you need the appropriate role permissions.
- Select a template, click on ••• and then Create Plan.
- Choose the employees and mentors following the previous instructions.
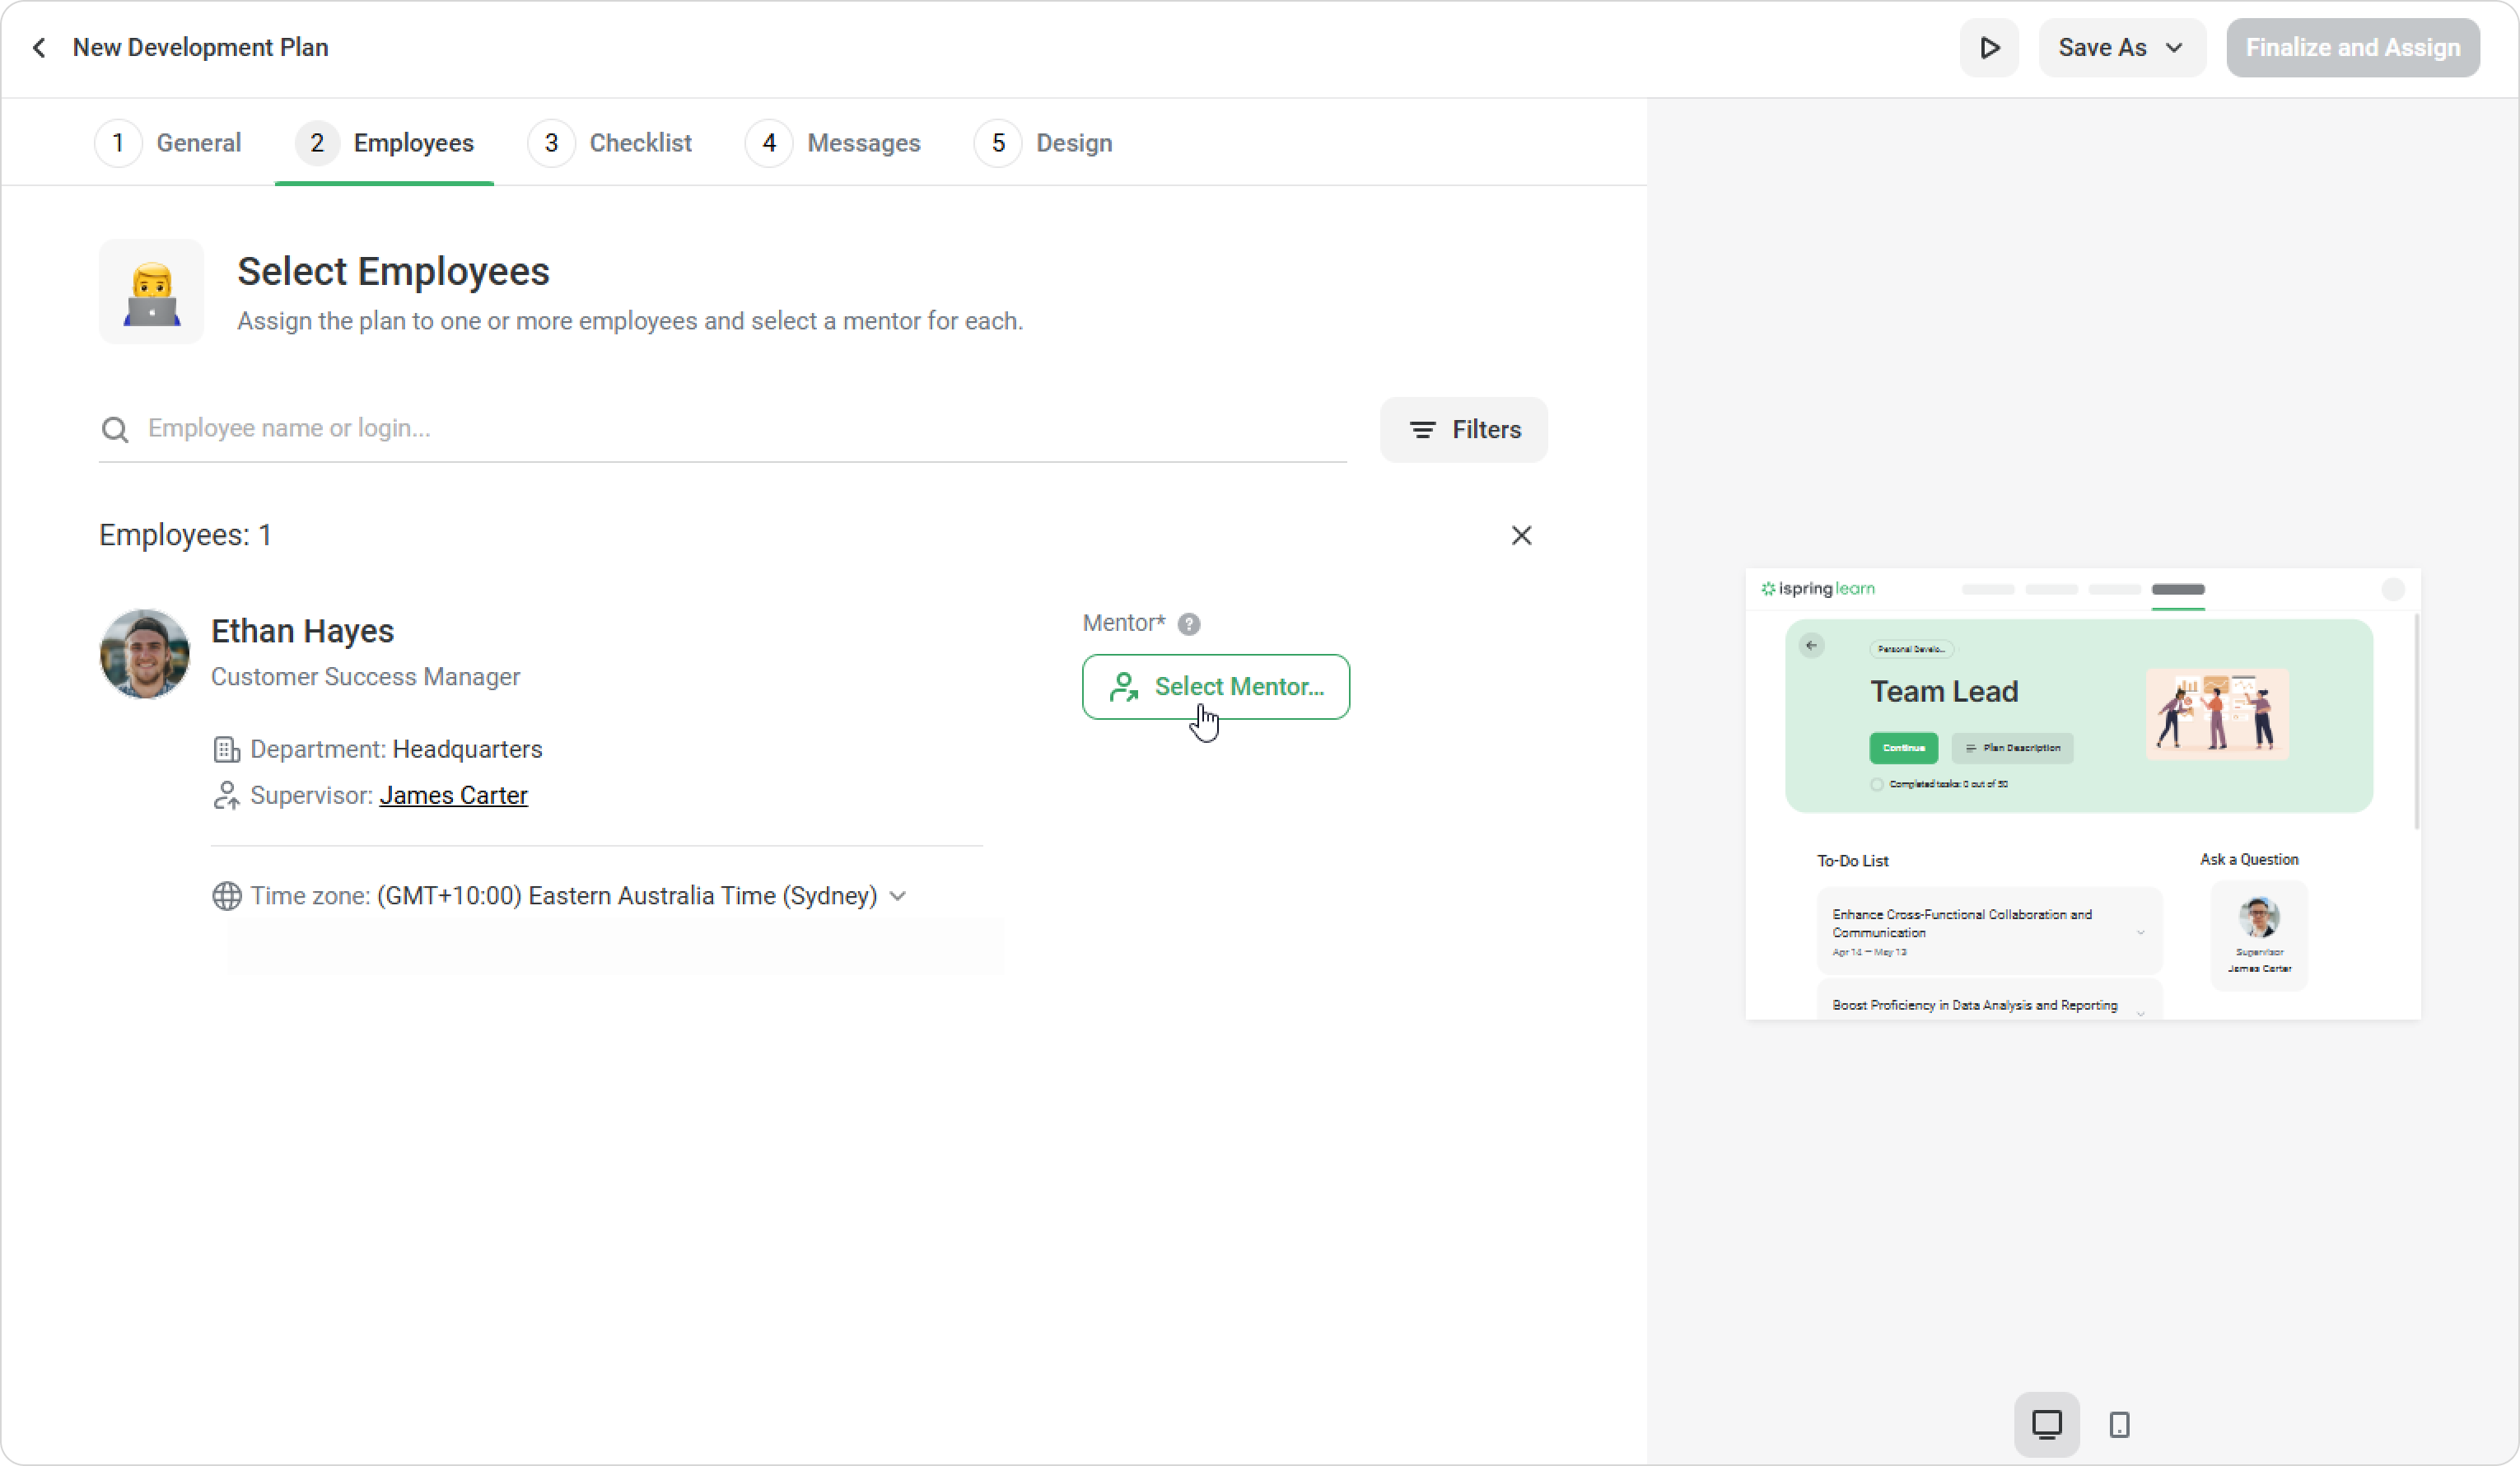
- Go to the Checklist tab, set task due dates, and assign task monitors.
- Once the plan is ready, click on Finalize and Assign.
Actions with plan templates
Select a template and click on ••• to view available actions.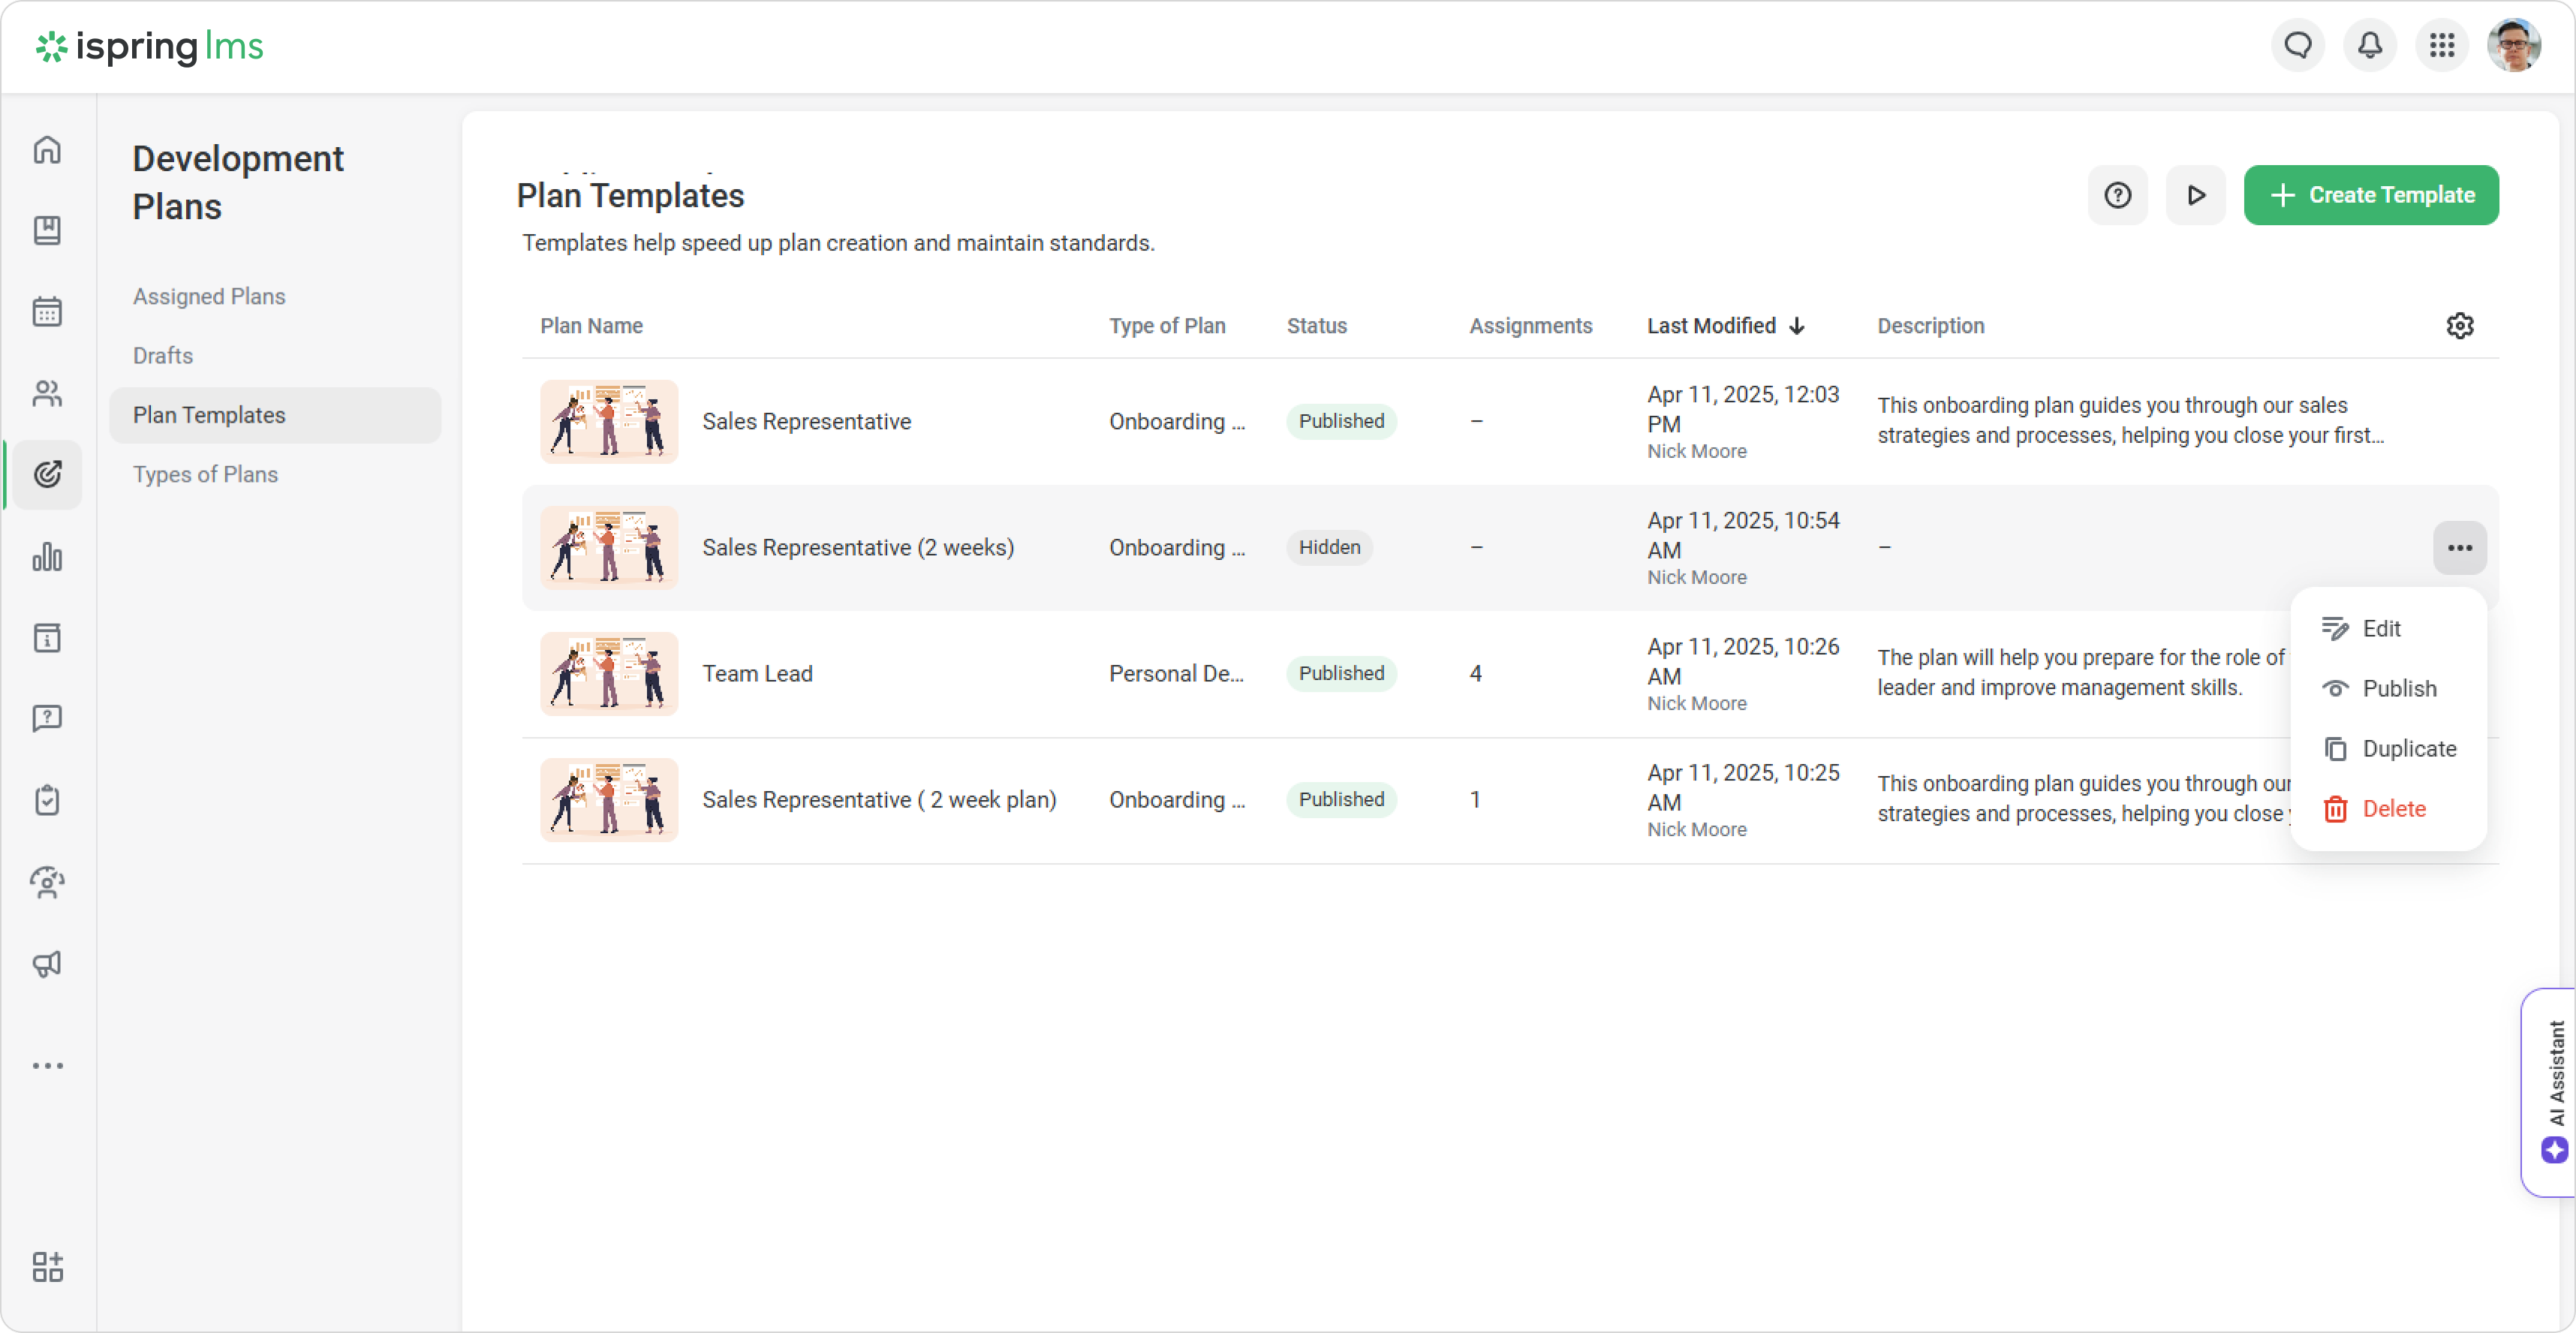
- To edit the template's content and settings, click on Edit.
- To create a copy of the template, click on Duplicate.
- To delete a template, click on Delete.
Additional options
- To make the template public, click on Publish.
- To restrict access to the template, click on Hide.