Image Markup in Online Quizzes
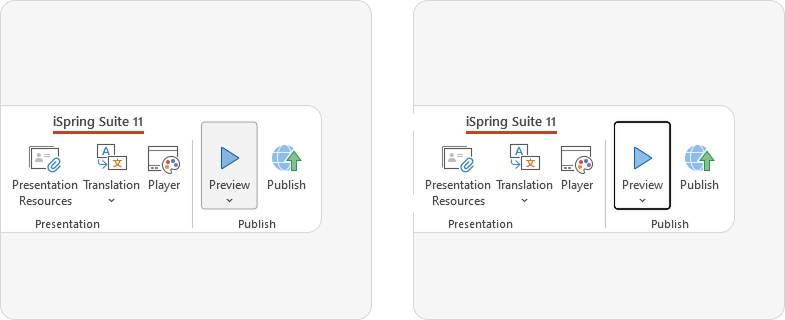
How to Edit an Image
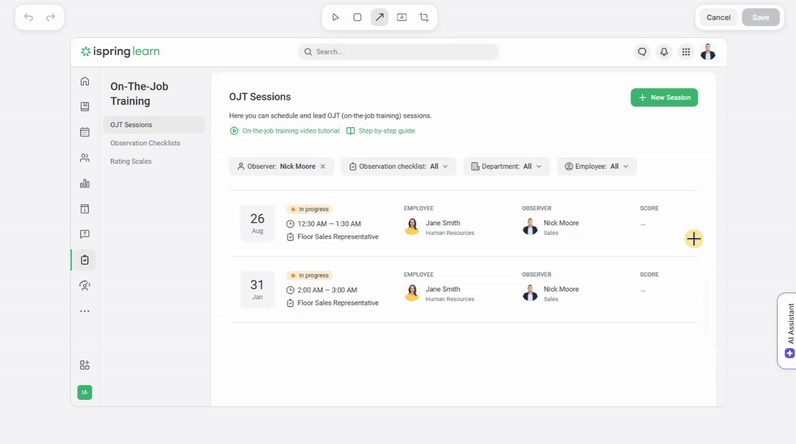
- Open your online quiz, choose an image and click Edit Image.
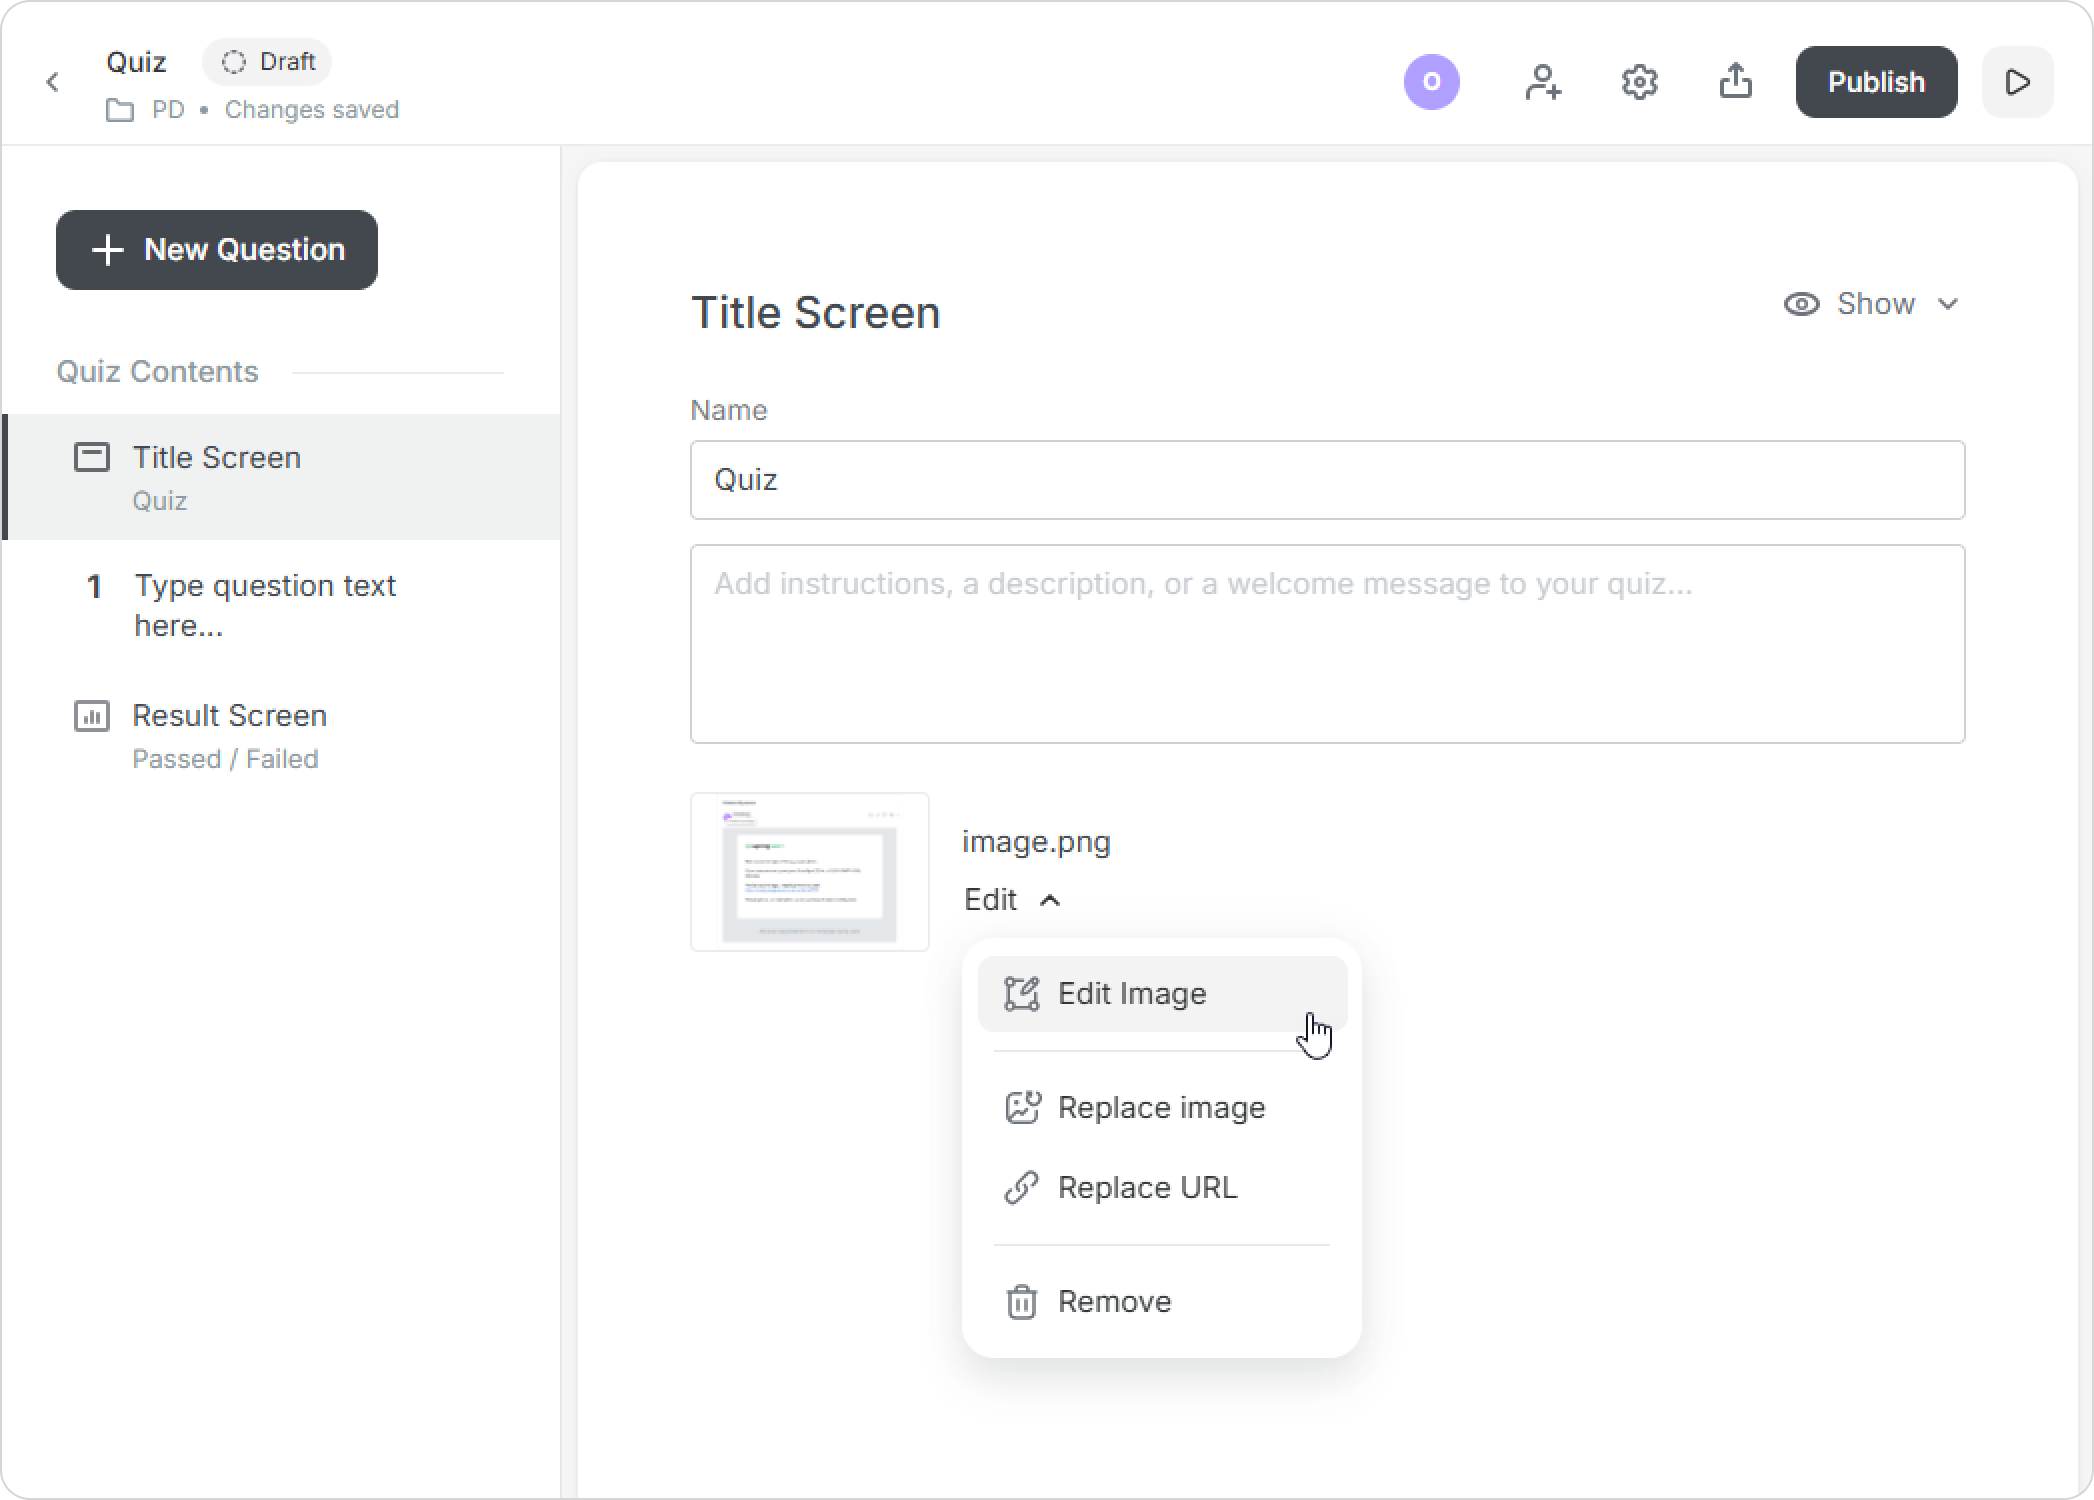
- An editing window will open. Here, you can add a rectangle, arrow, or text, and crop the image.
- When you're done, save the image.
Editing Tools
Let's take a detailed look at each editing tool.
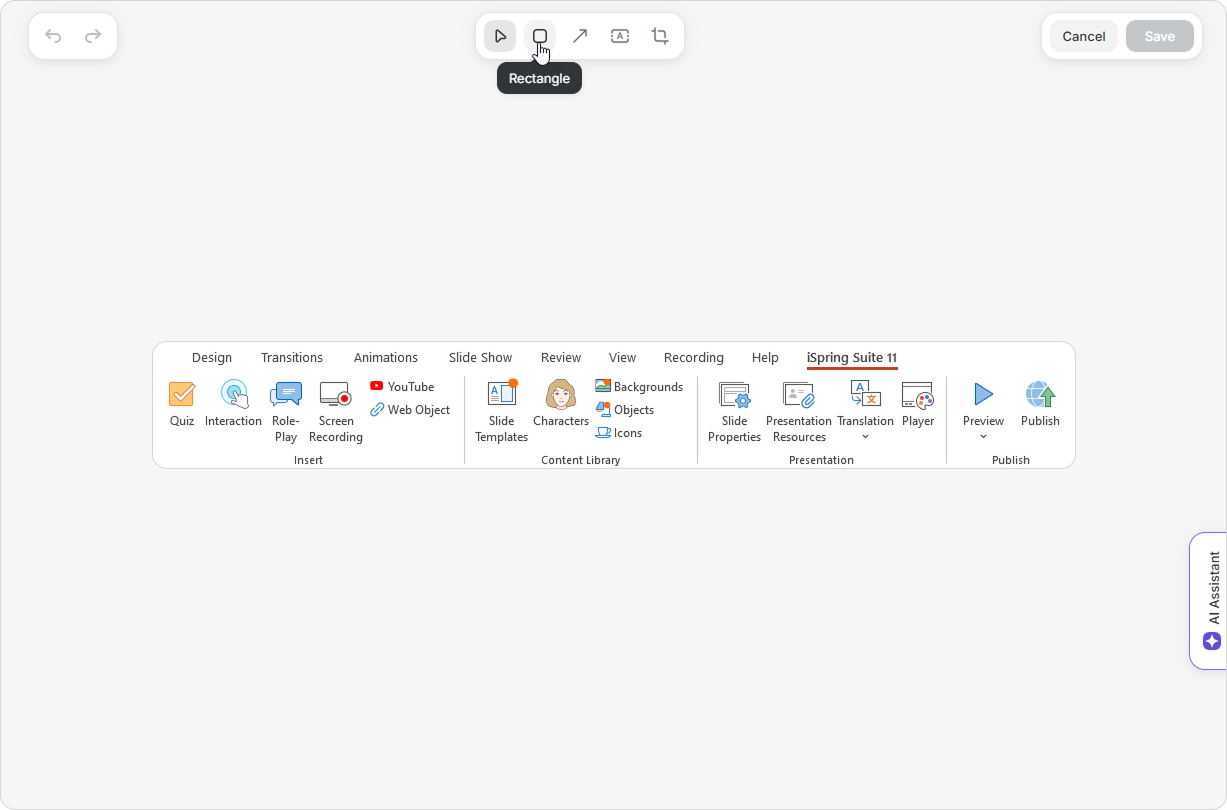
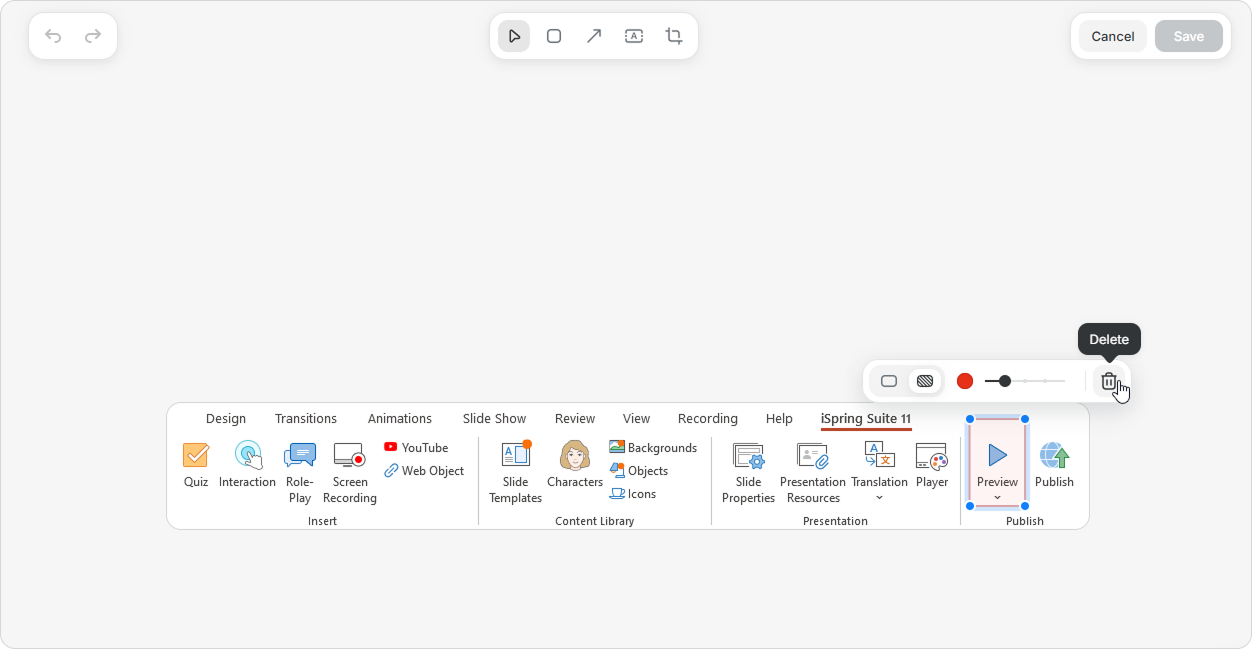
Rectangle
Use the rectangle tool to highlight objects in the image:
- Select Rectangle in the toolbar.
- Add a shape to the image. Drag the corners to resize the rectangle.
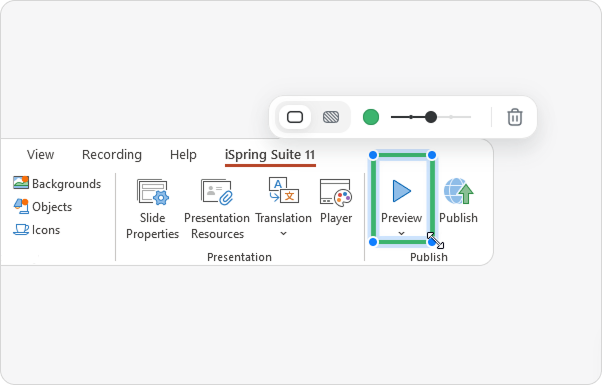
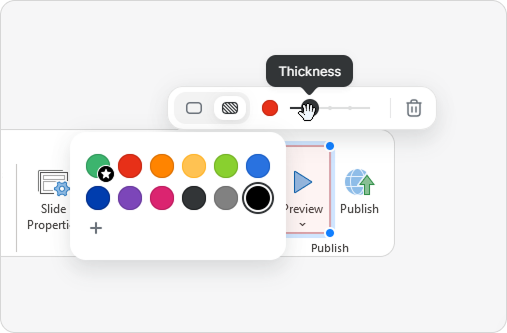
- Choose a design option: a color-filled rectangle or a rectangular outline.
- Select the color of the rectangle and the thickness of its border.
If you want to undo an action, click on the back arrow in the upper left corner.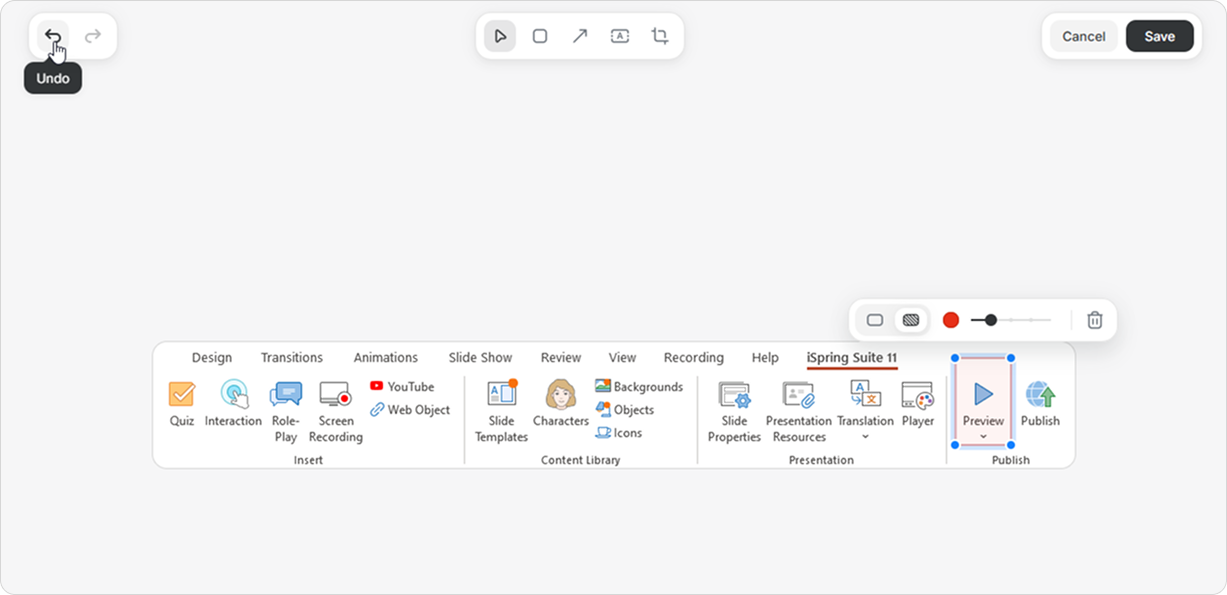
Arrow
The arrow tool allows you to point to specific objects in the image:
- Select Arrow in the toolbar.
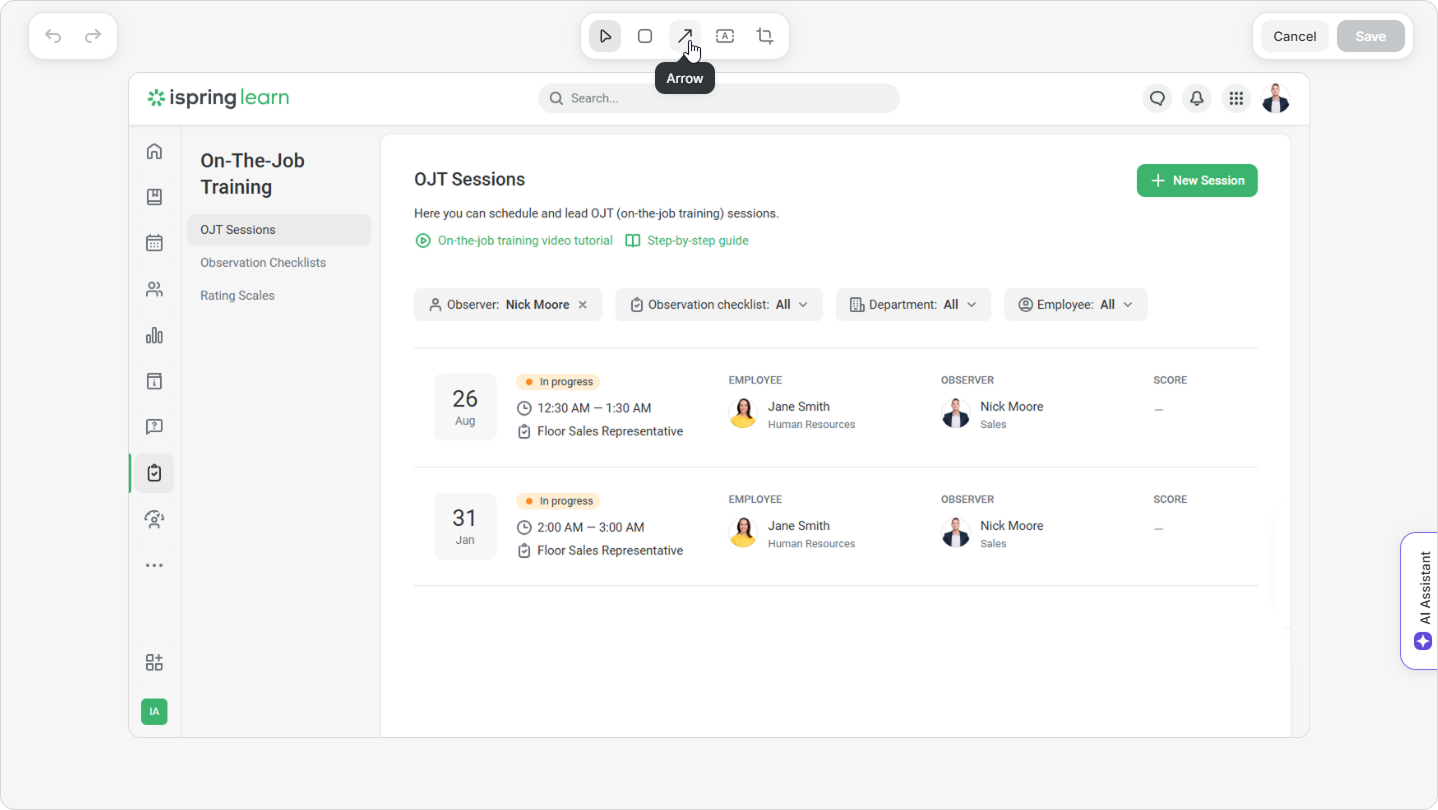
- Add an arrow to the image. Pull its end to stretch it to the desired length. To make the arrow curved, pull the point in the middle.
- Choose the color and thickness of the arrow.

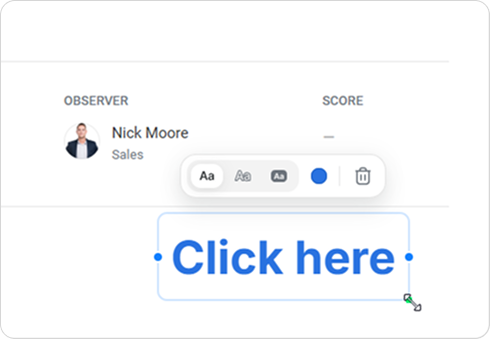
Text
Add text to the image for better clarity.
- Click on Text in the toolbar.
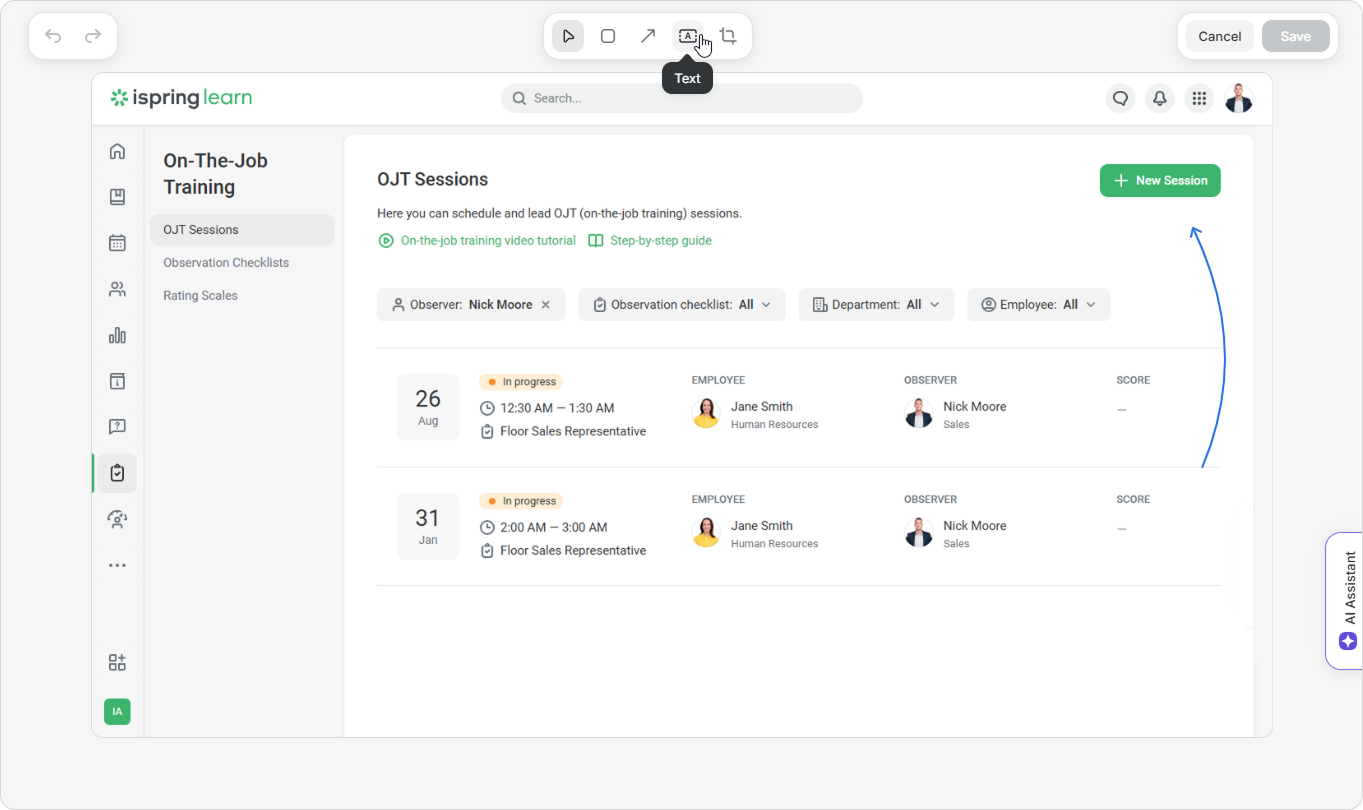
- Then, click where you want to place the text and start typing. Here you can select the text’s style and color.
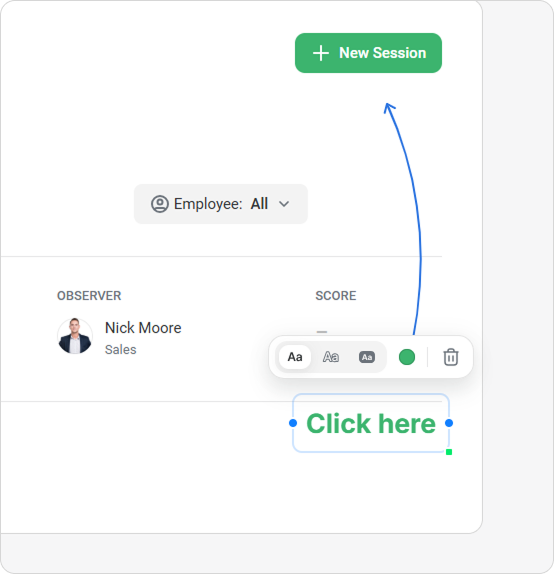
- Drag the corner of the text block to increase or decrease the font size. To increase or decrease the text block, drag the blue dots.
Press Enter if you need to move the text to the next line.
Hold down the text field with the left mouse button to move the text to another part of the image.
Crop the Image
To show readers only the important part of the image, you can crop it.
- Click on Crop in the top menu.
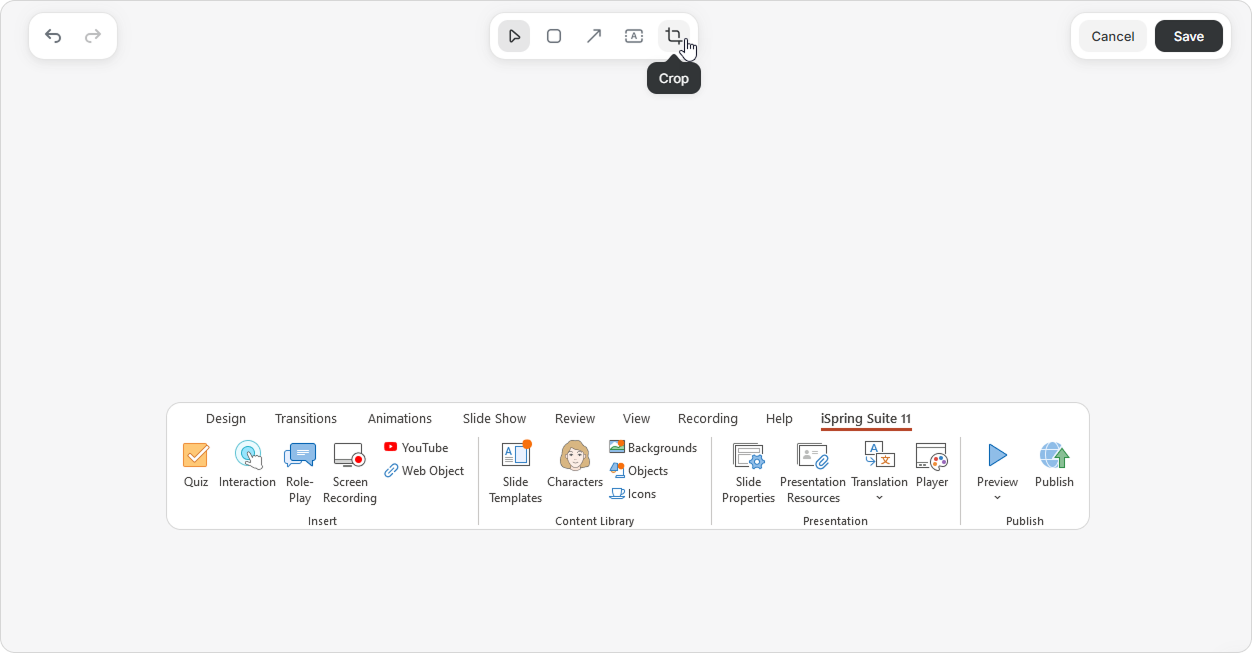
- Select the shape you want to crop the image to.

- Then, select the area you want to keep.

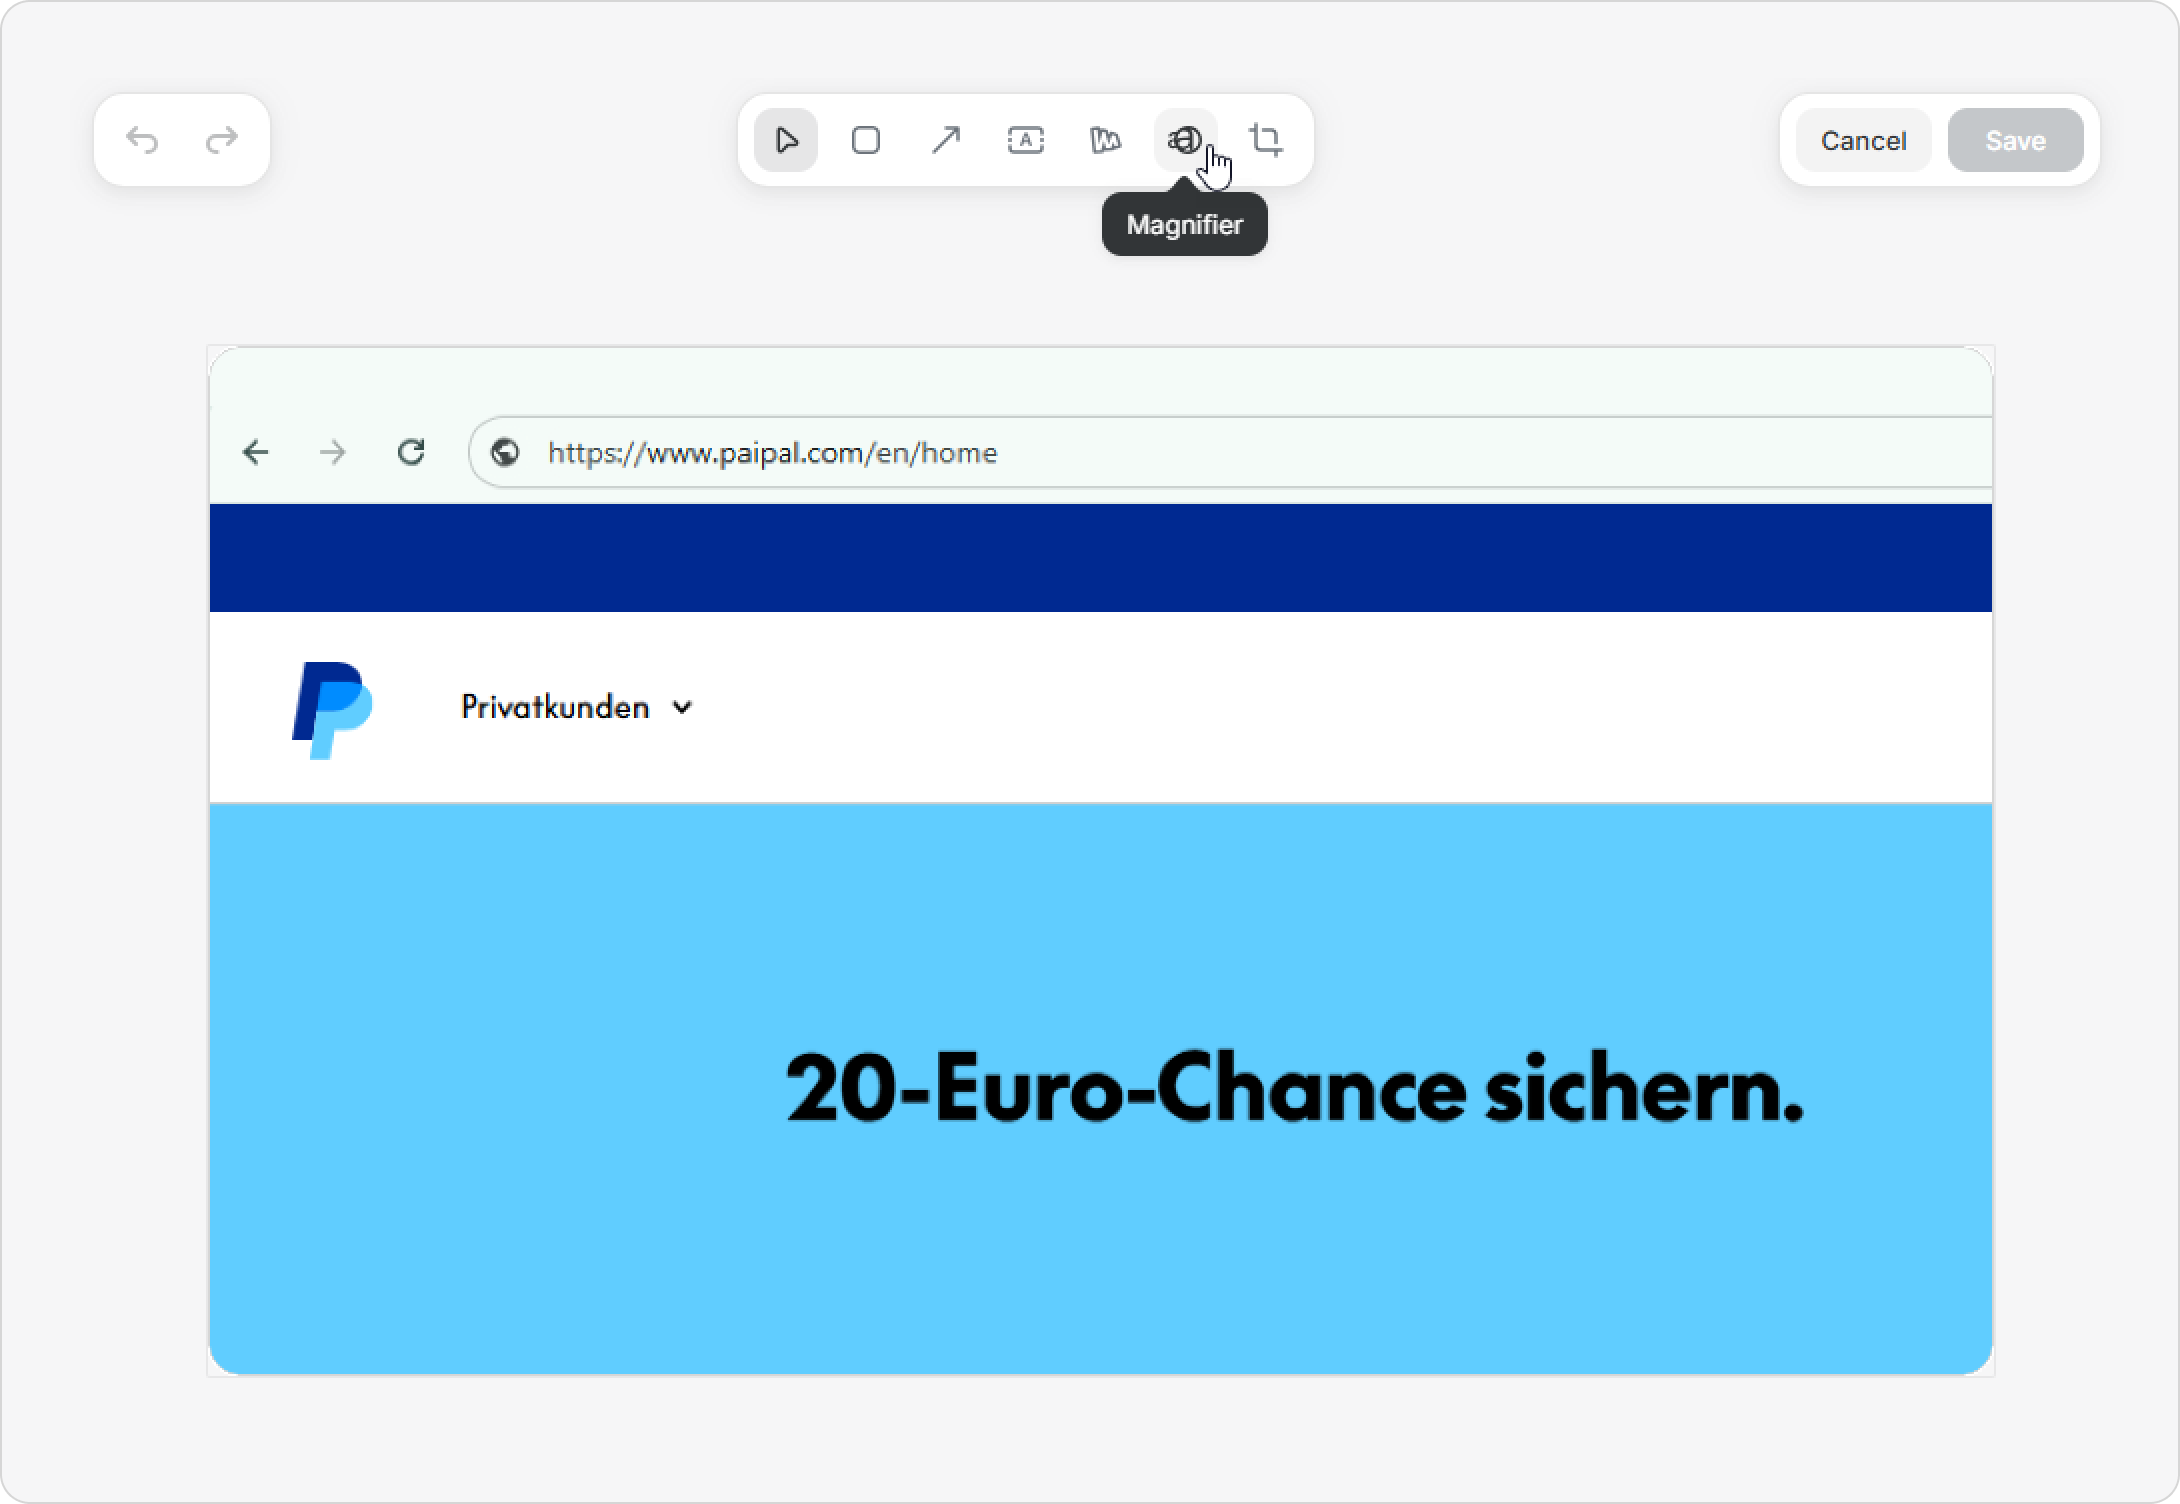
Magnifier
The magnifying glass is perfect for highlighting small elements like buttons or URLs that learners could easily miss.
- Click Magnifier to enlarge a specific area of the screenshot. For example, let’s highlight the (very suspicious!) URL.
- Make adjustments: Use the green dot on the edge of the circle to change the size of the magnified area and use the pink dot to change the zoom level. You can also tweak the border thickness (shown in blue below) to make the magnified area more defined.
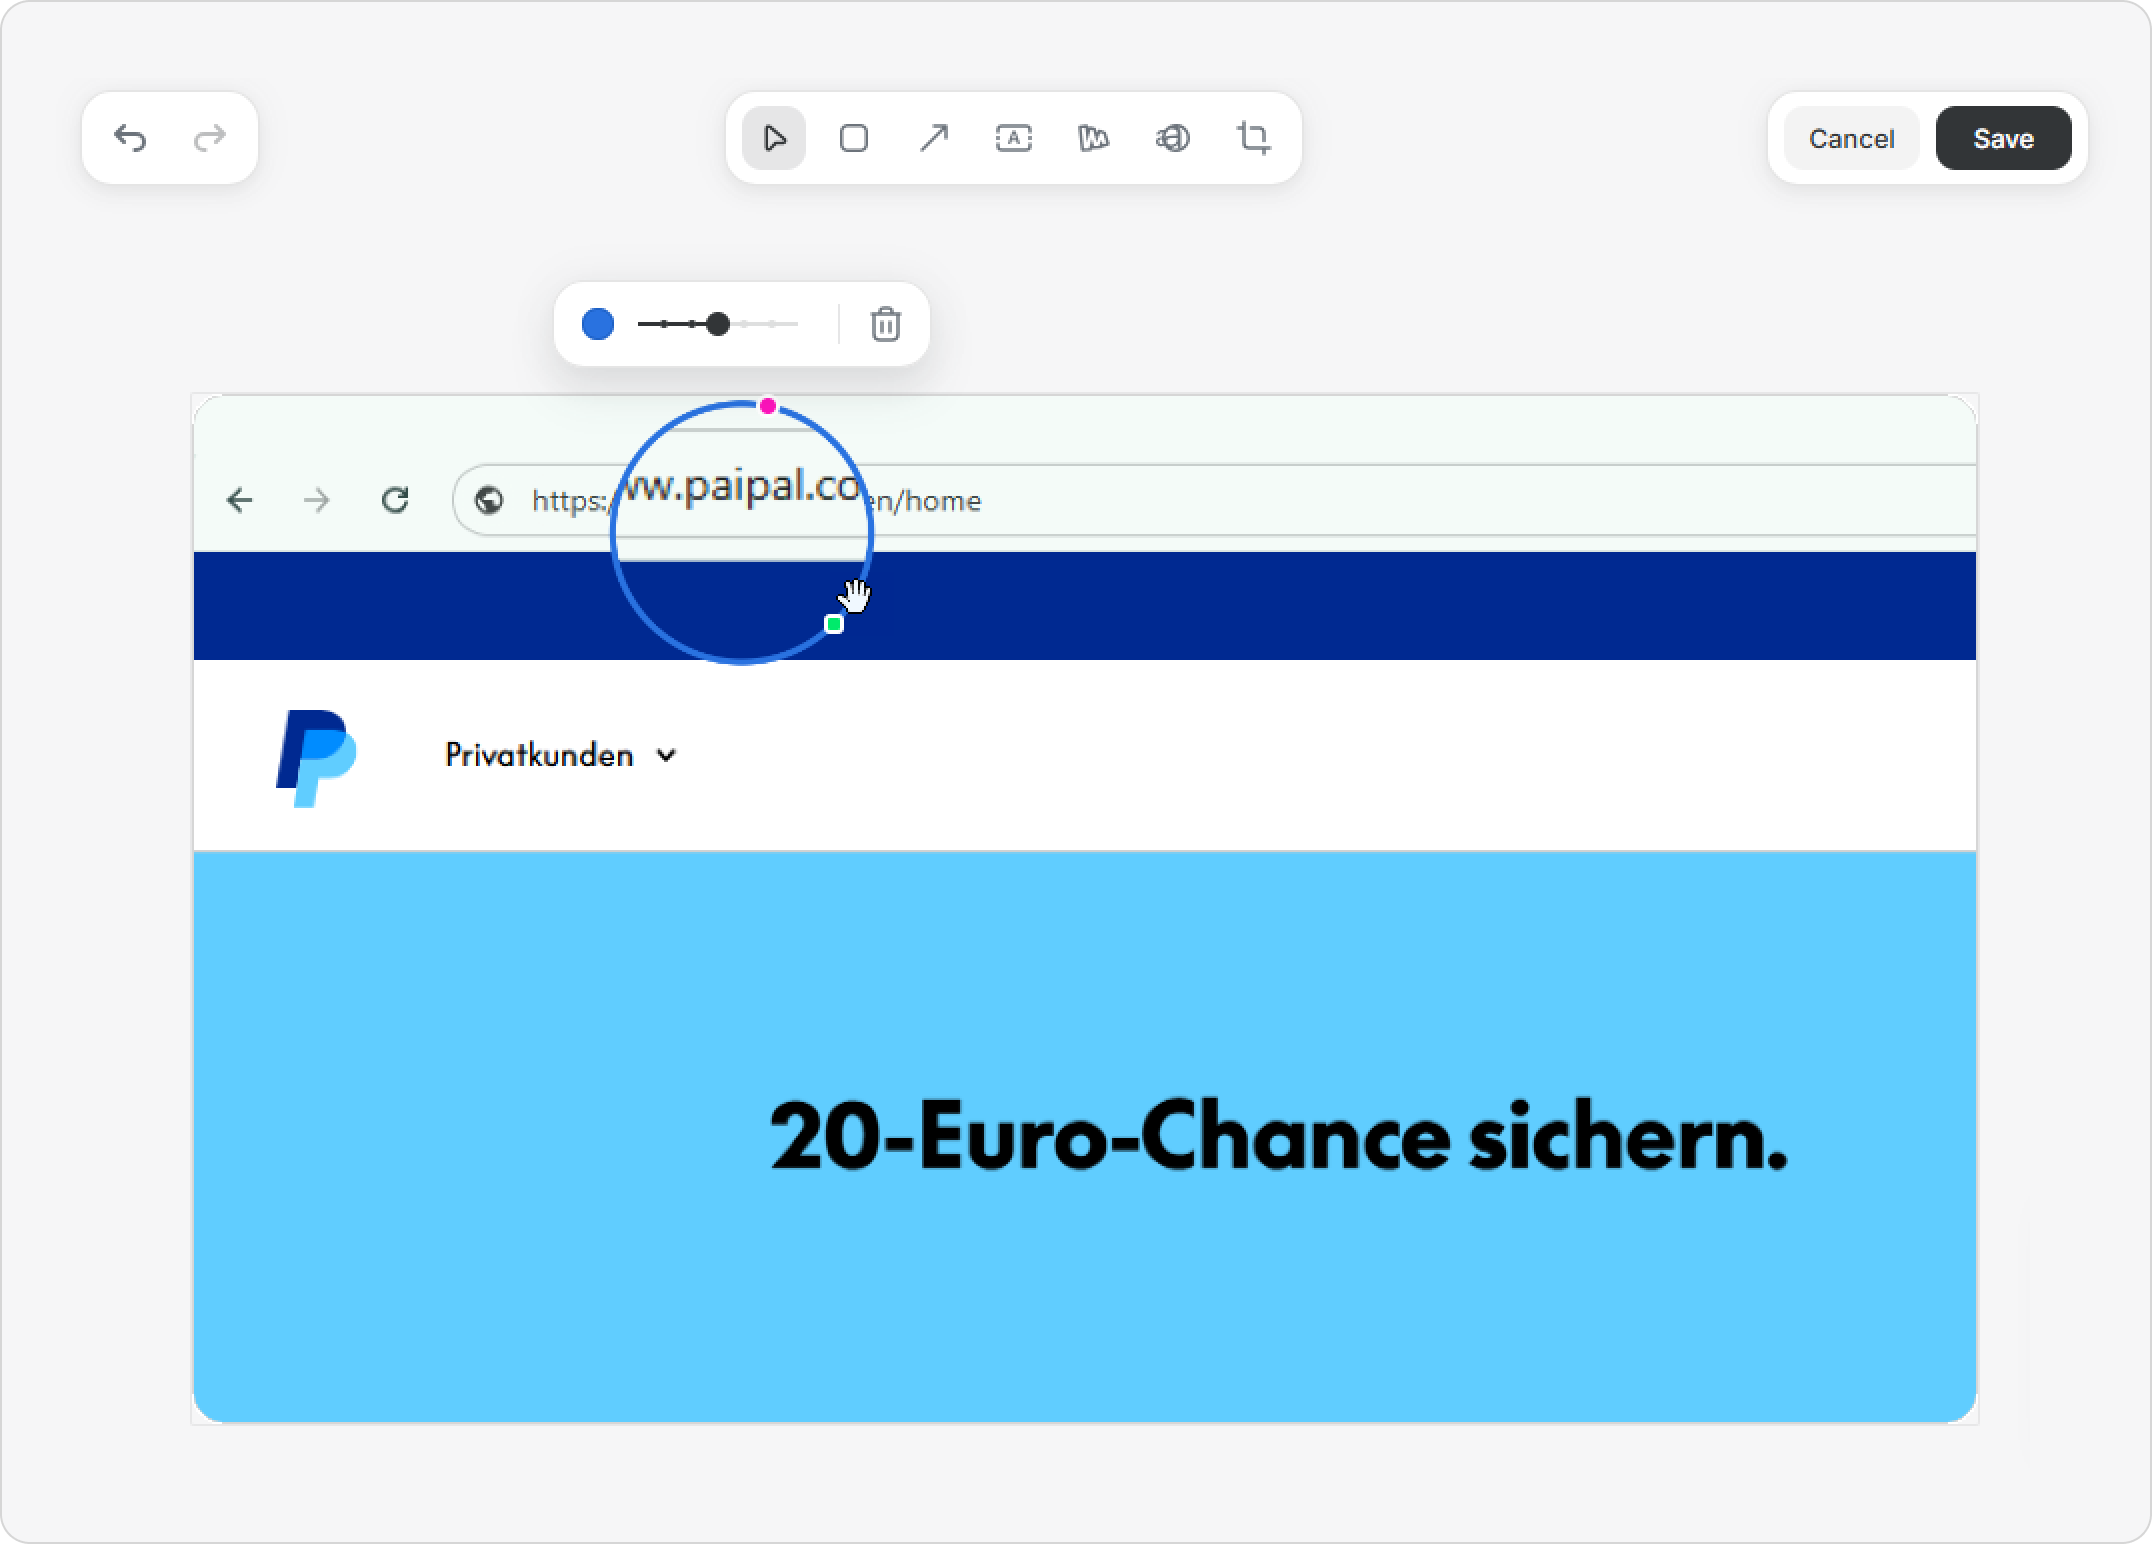
- Save your changes.
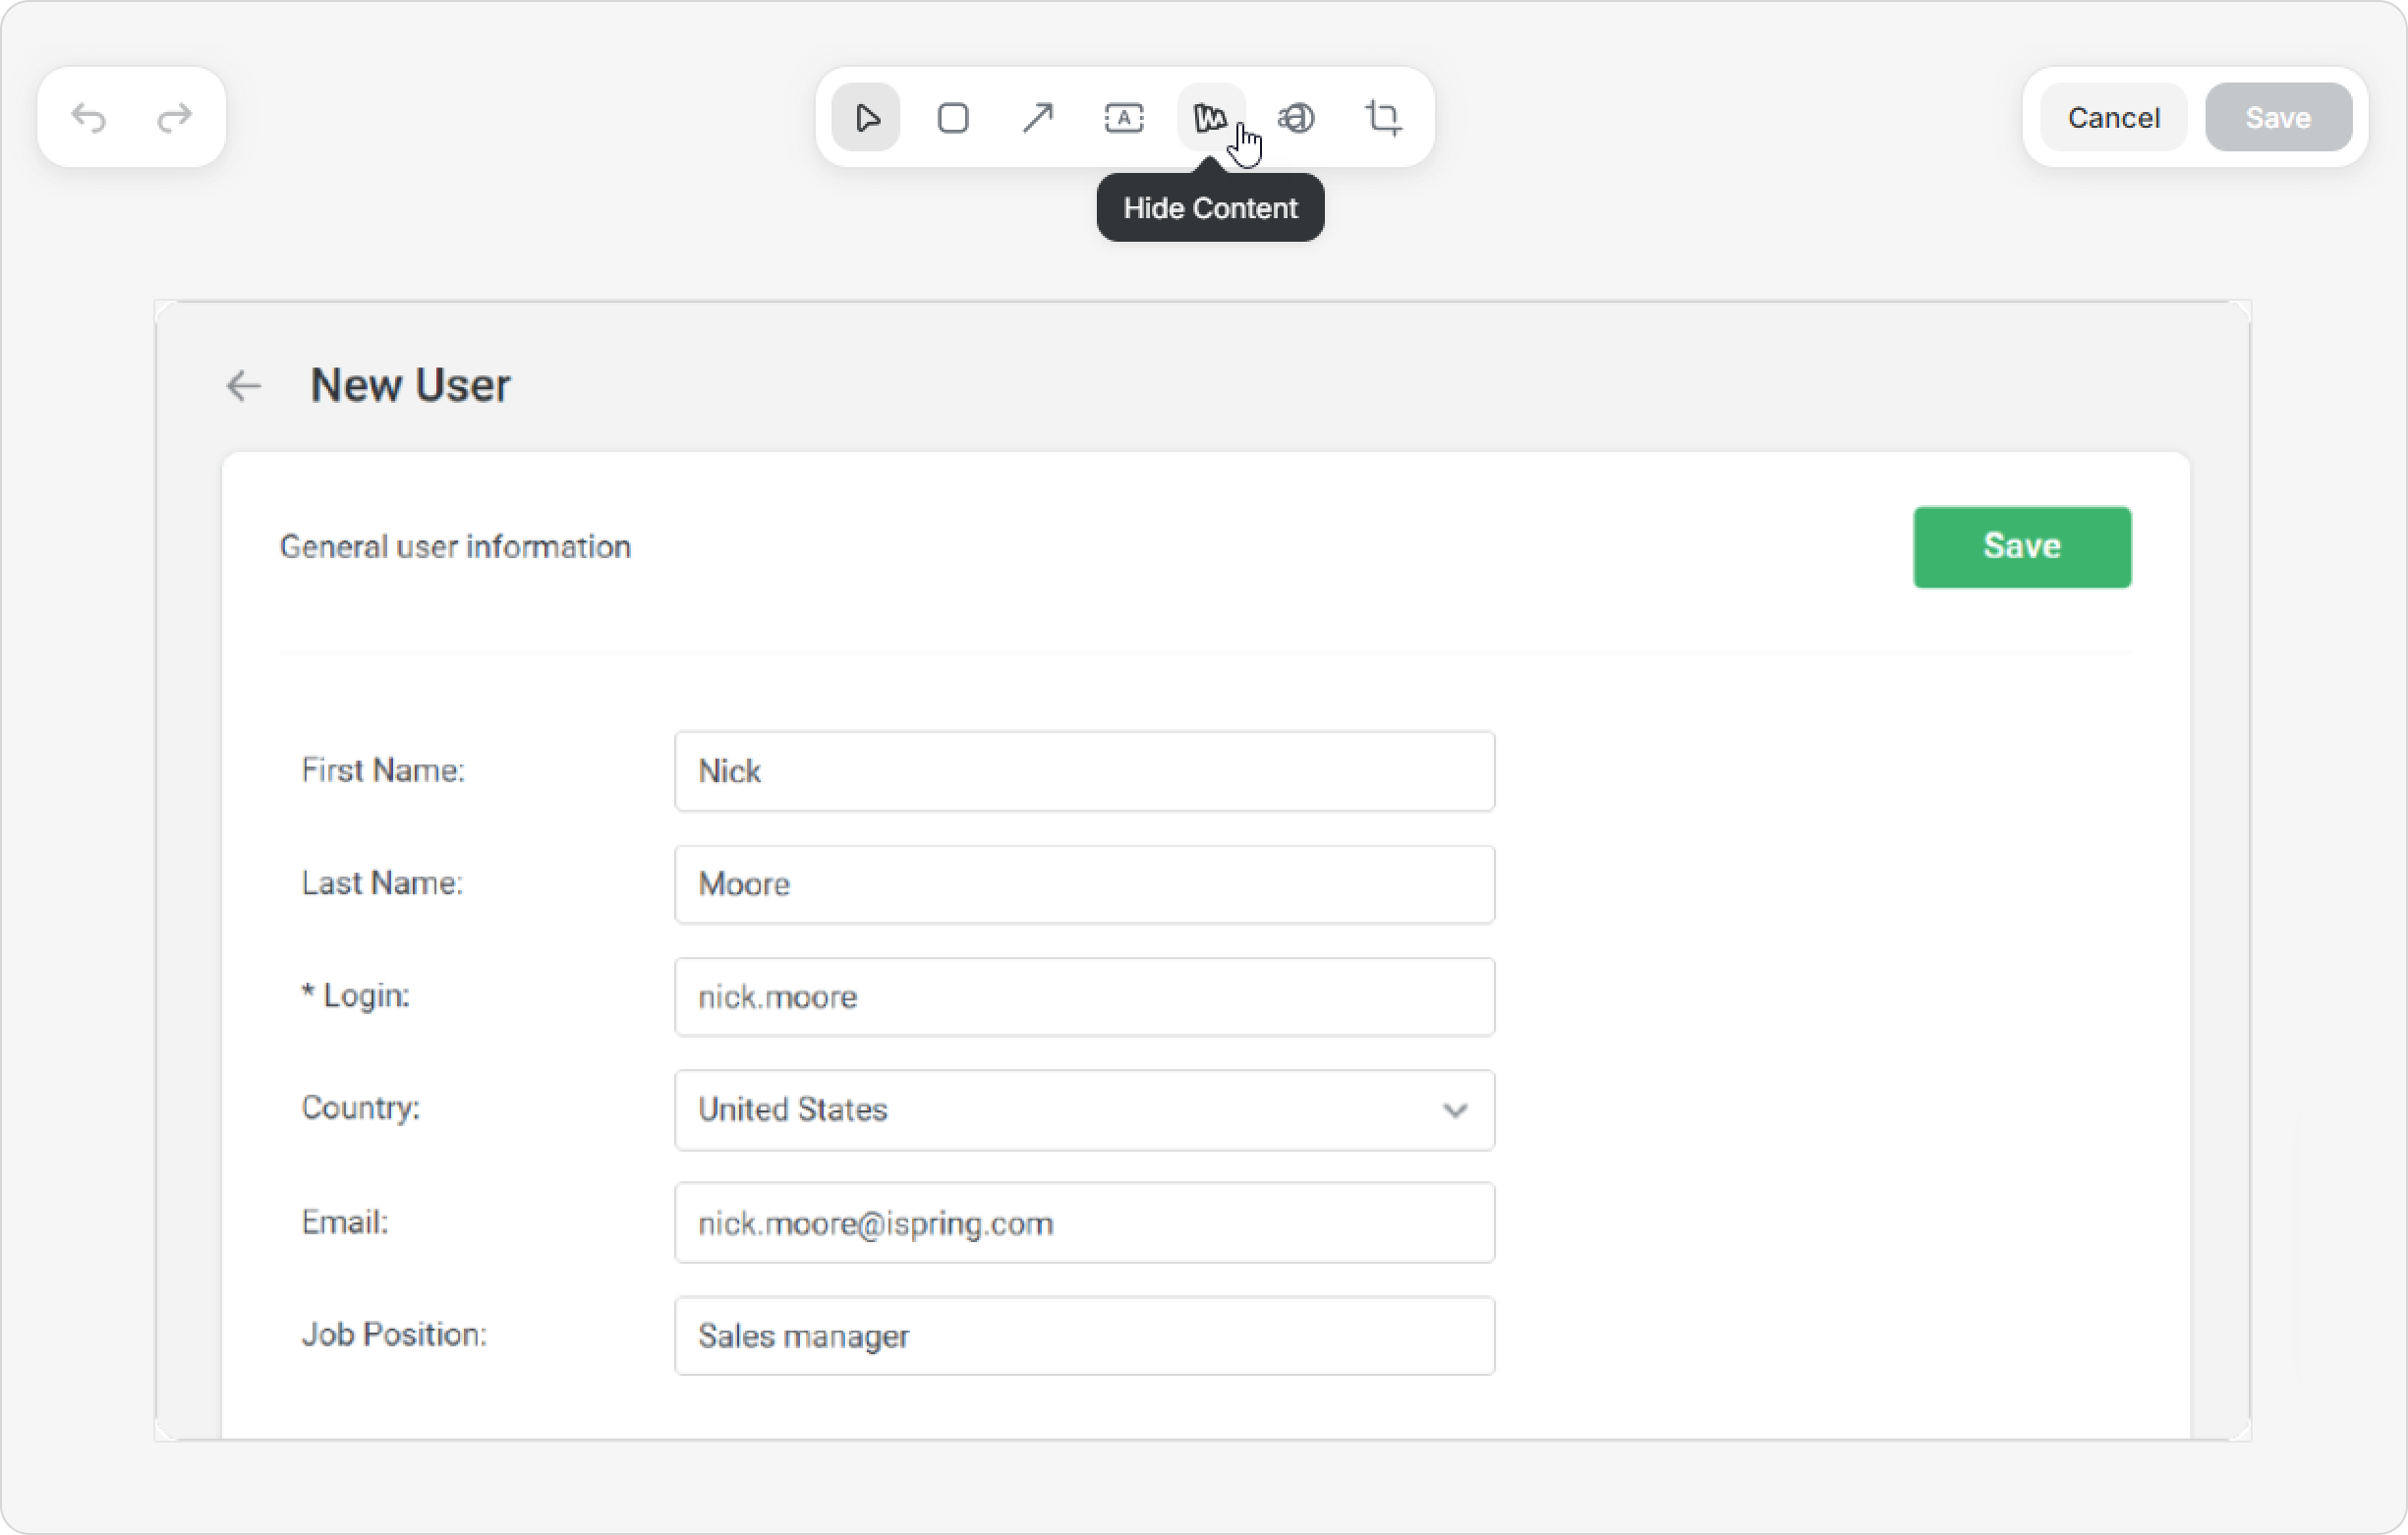
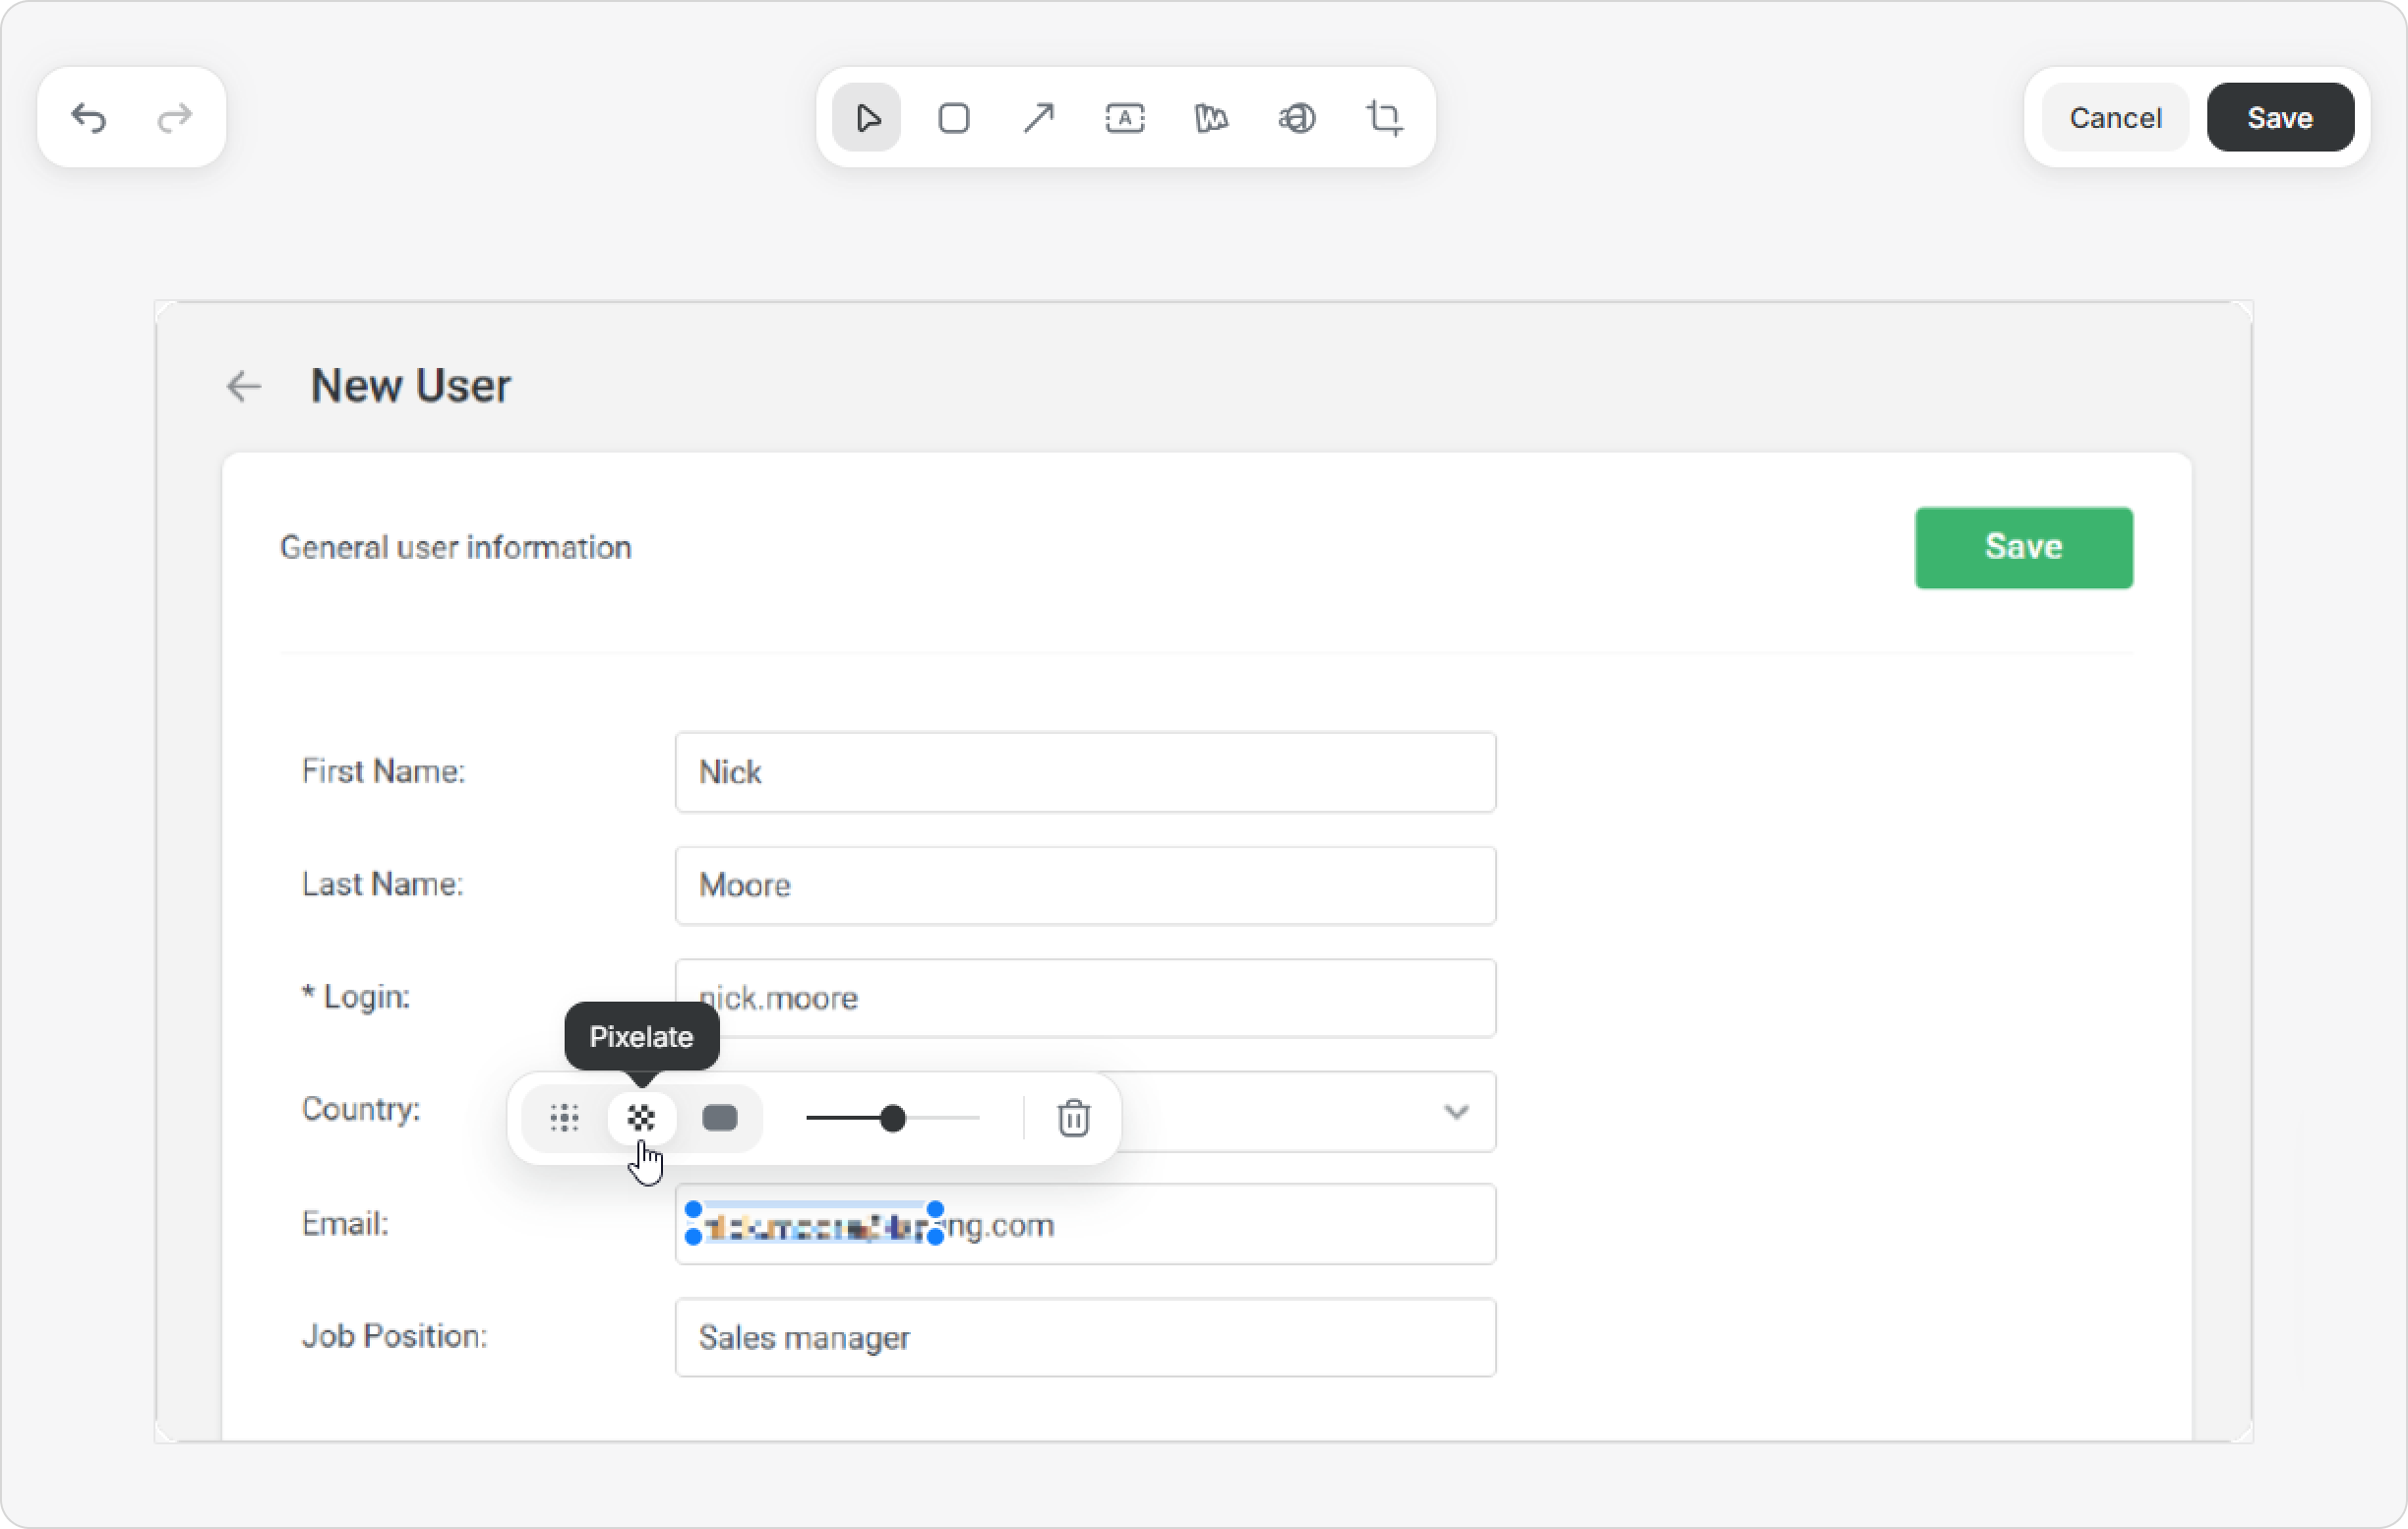
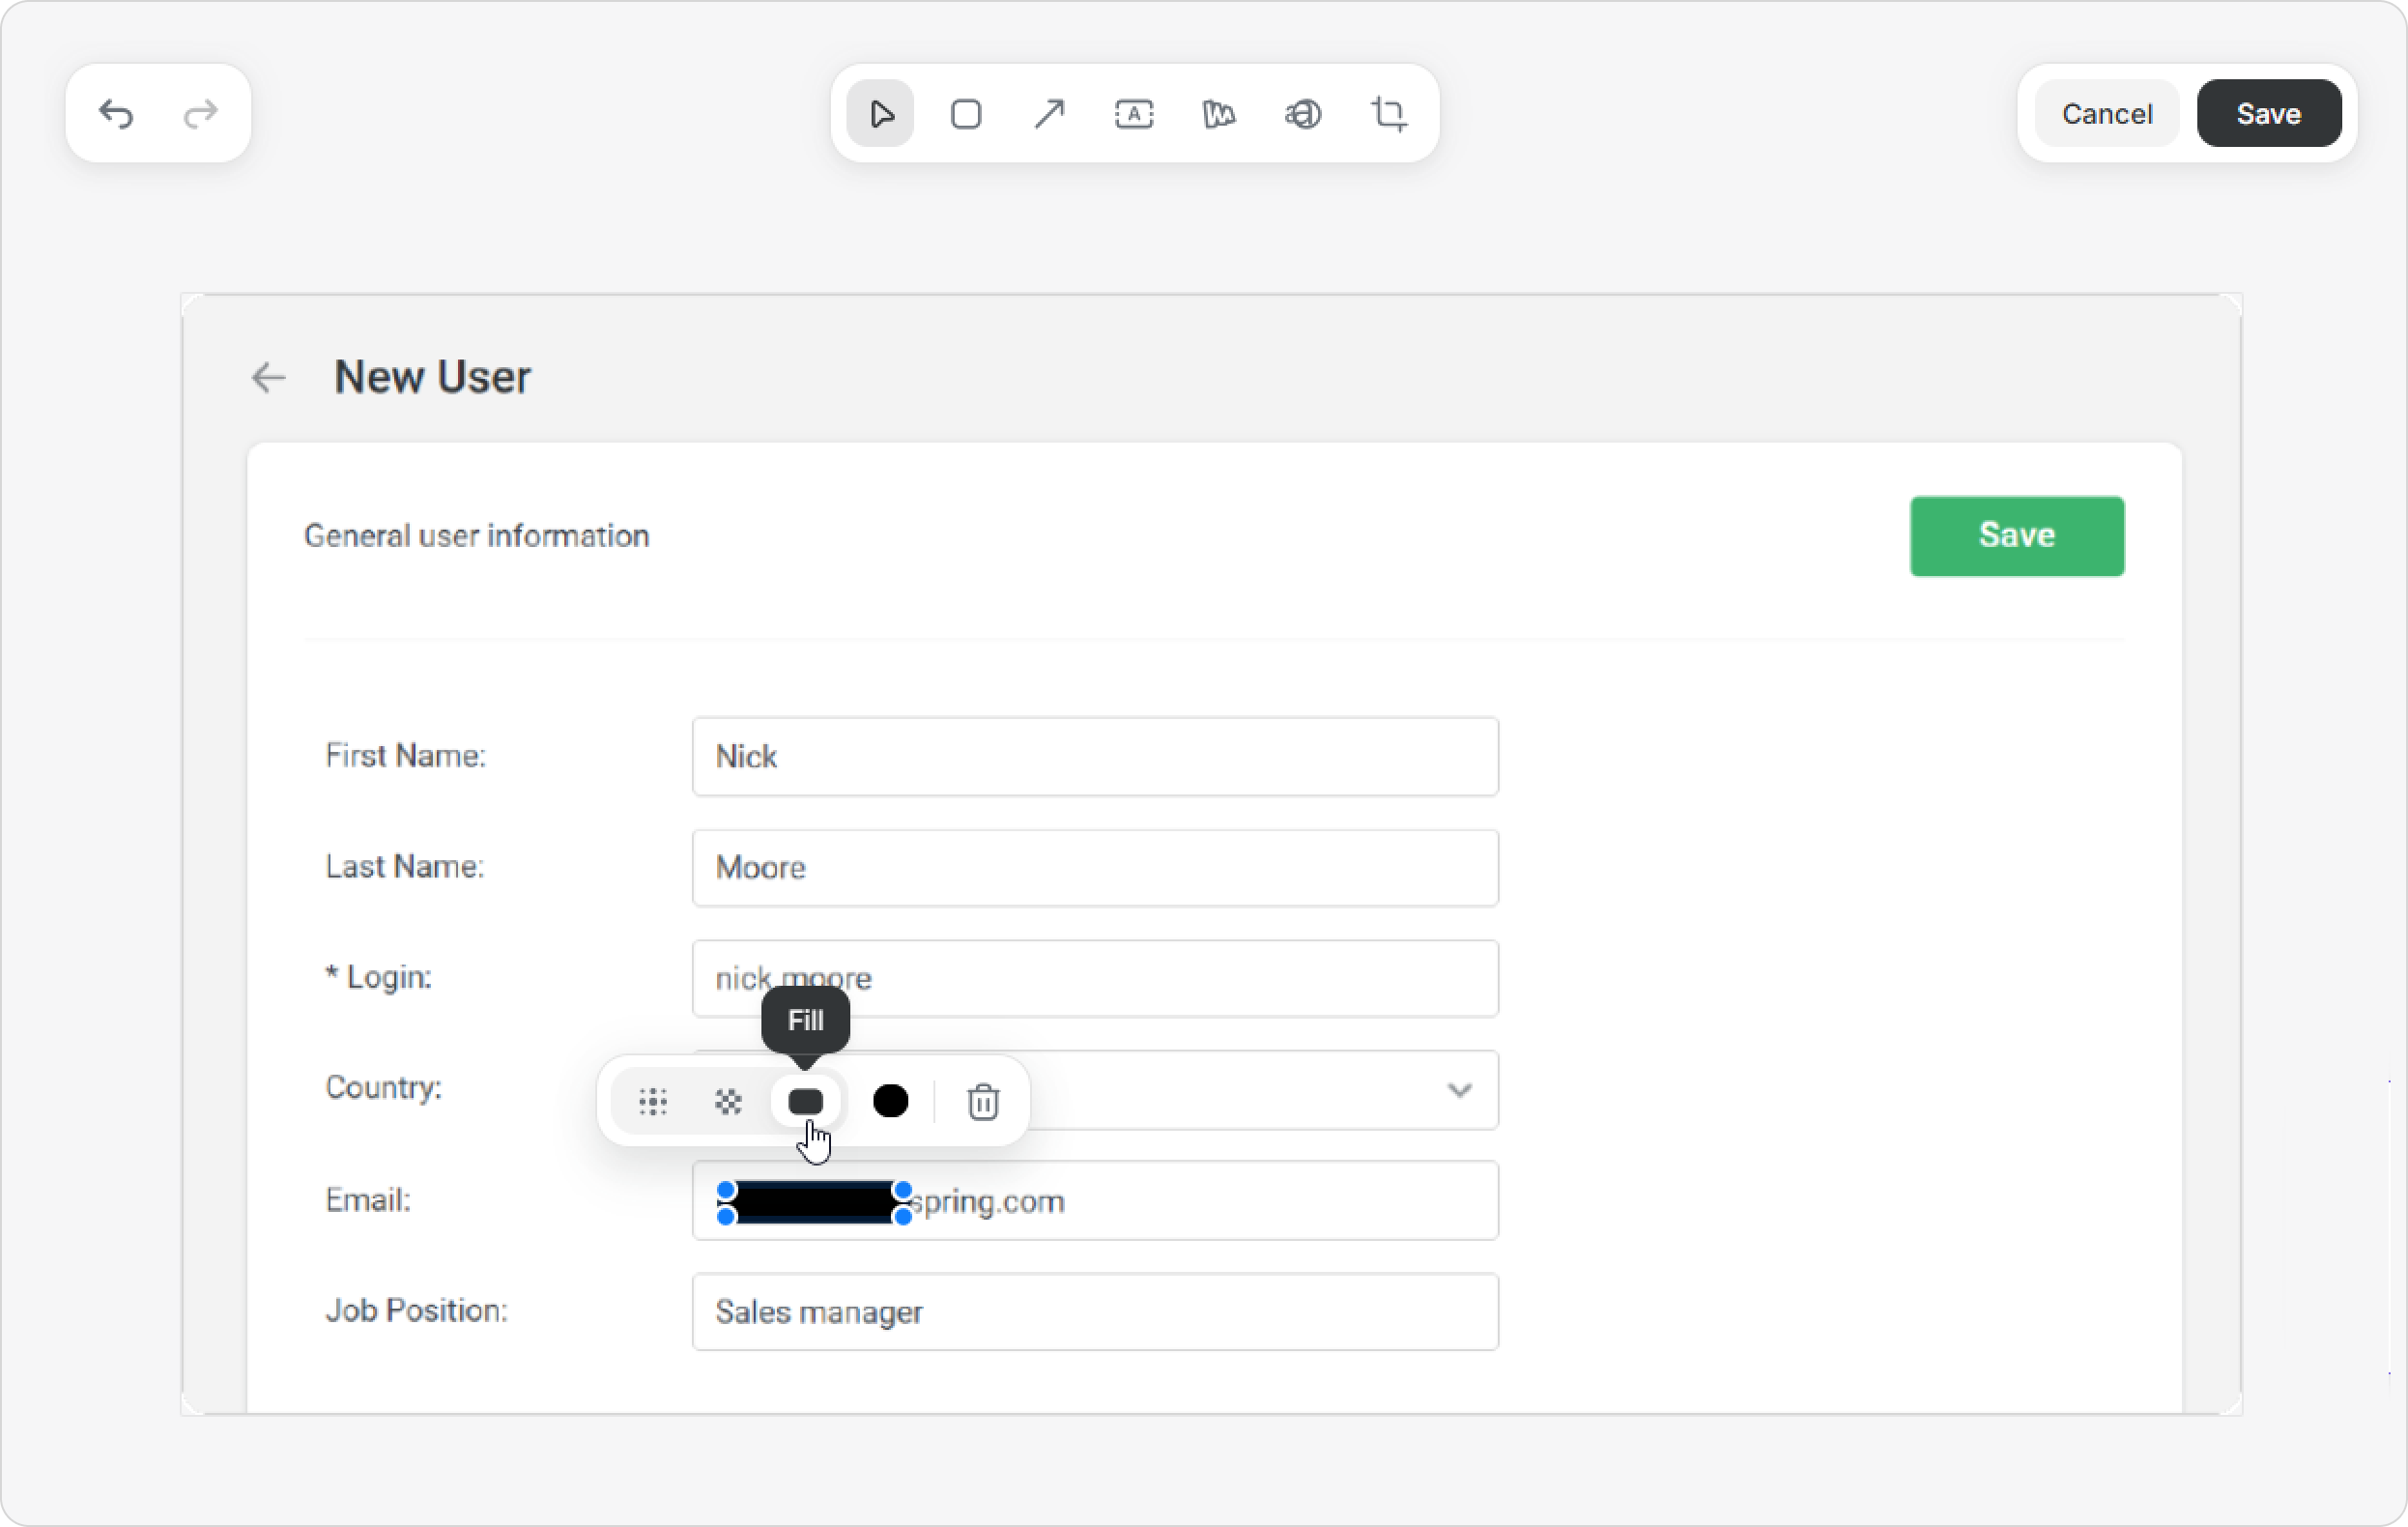
Info-Hiding Tool
The Info-hiding tool can be used to hide login details, photos, emails, phone numbers, or even unwanted text so the personal stays private. You can use blur, pixelation, or fill to hide confidential information in a screenshot.
- Click Hide Content.
Now your cursor is a plus sign and will hide whatever part of the screenshot you highlight. For example, let’s hide the user`s email. - Click your cursor and drag to create a box to highlight the section of the screenshot with the user’s email.
- Once the section is highlighted, a box appears with three options to conceal the information:
- Blur: Softens the selected area, making it unreadable. You can adjust the blur intensity.

- Pixelate: Turns the fragment into pixel blocks — also adjustable in intensity.
- Fill: Covers the area with a solid color. By default, it’s black, but you can pick any color you like.
- Blur: Softens the selected area, making it unreadable. You can adjust the blur intensity.
- Go ahead and choose the option you prefer and click save.
That’s it — quick and easy!
Numbers
The Numbers tool lets you show each step directly on the image, making it easier for readers to follow the instructions.
- Select an image and click on Image Markup on the toolbar.
- On the top panel, click on the Numbers icon.
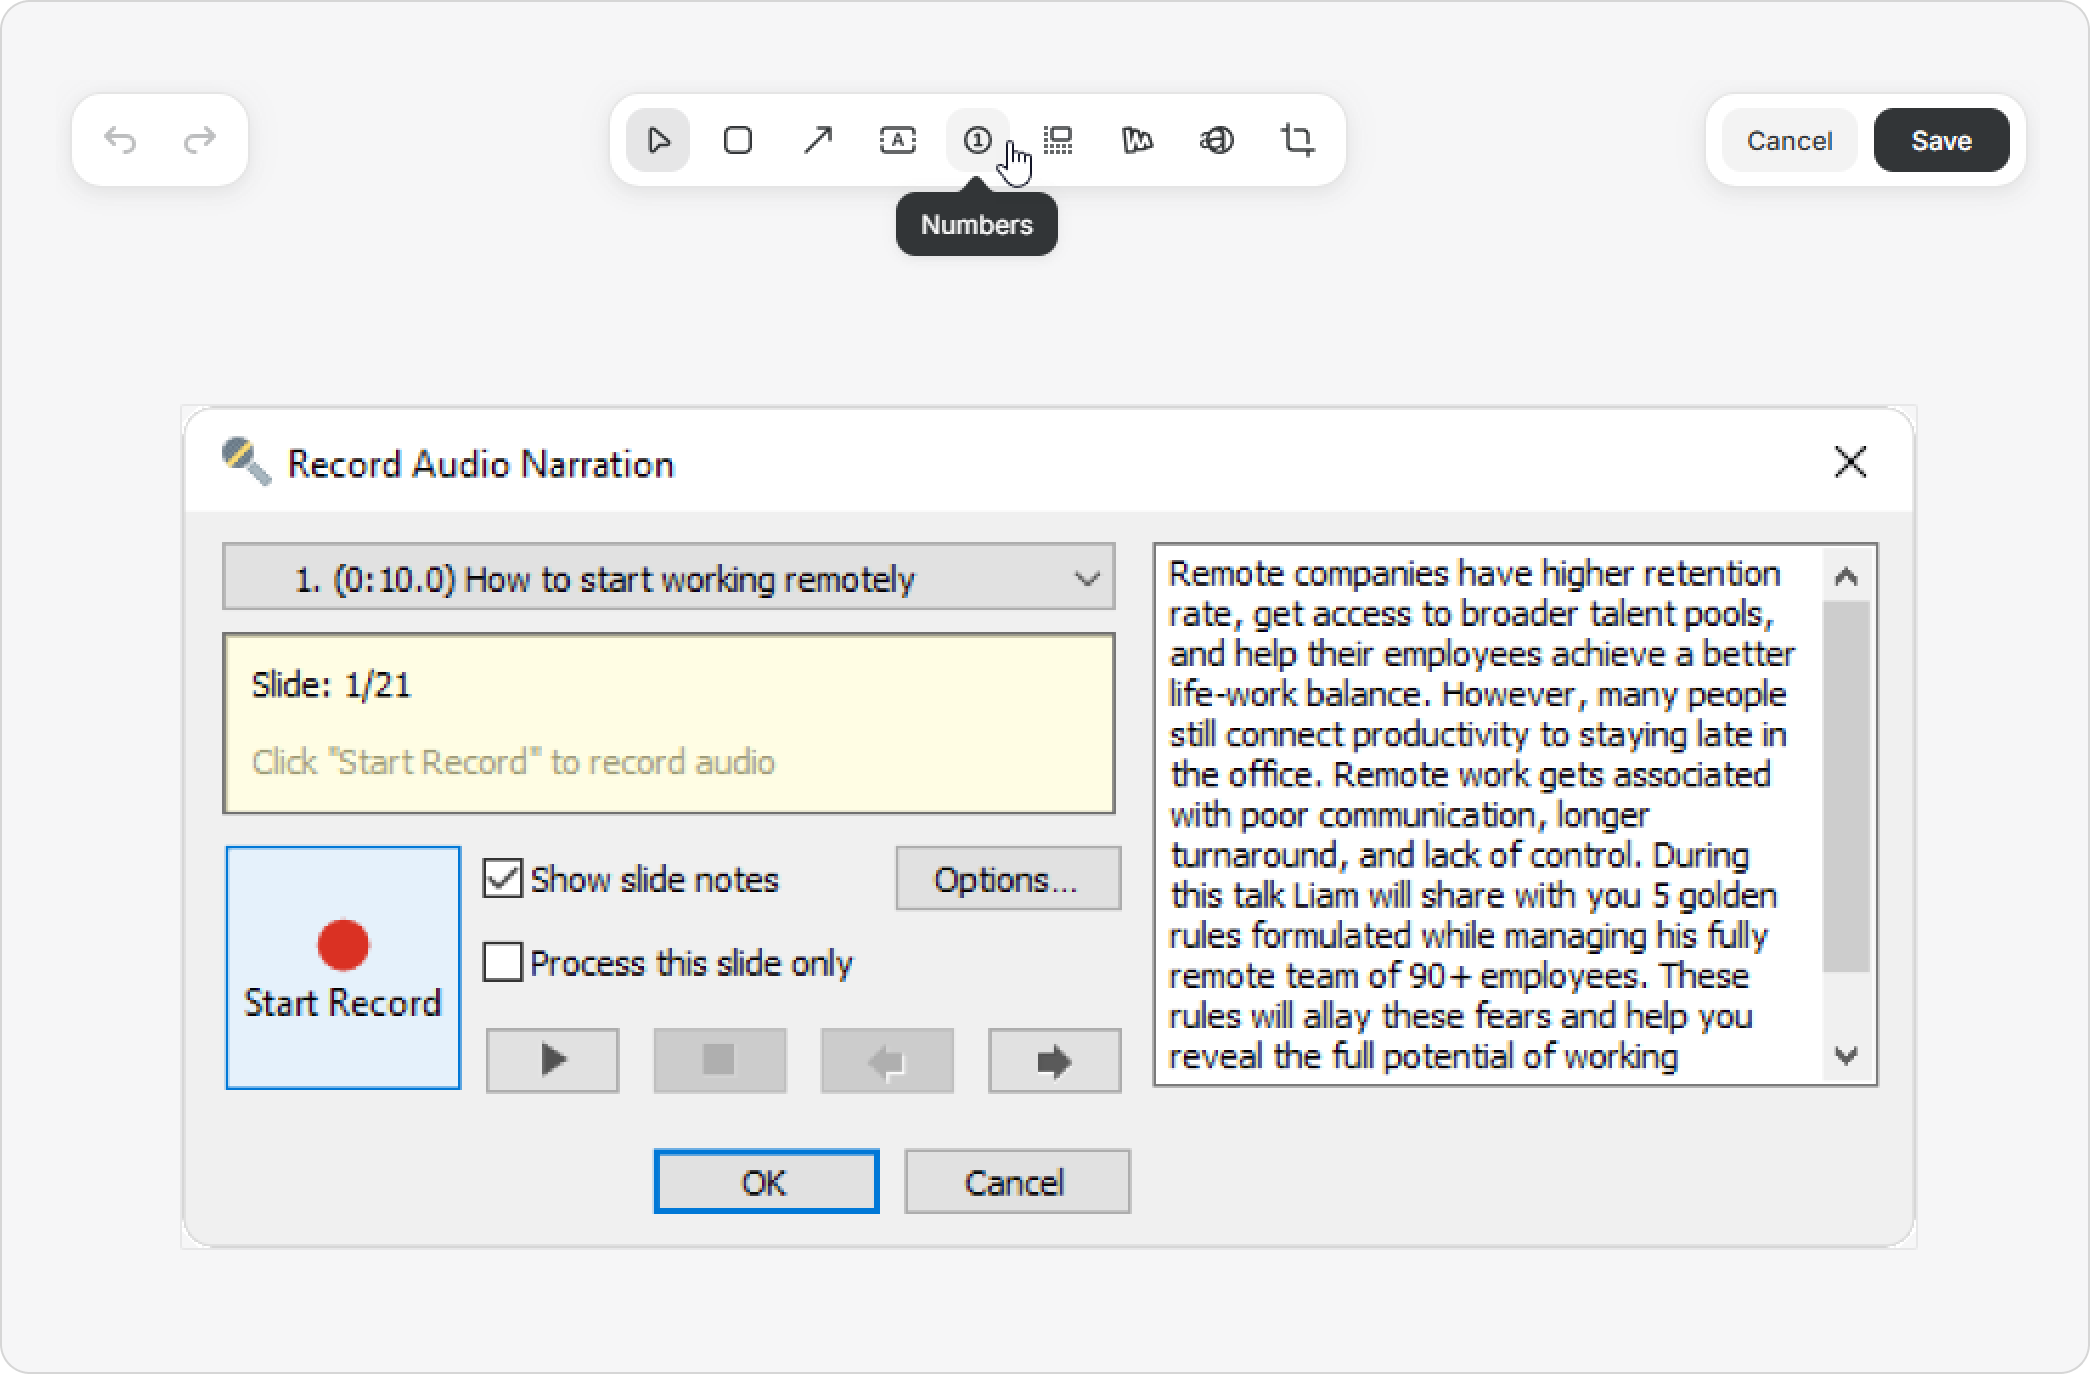
You’ll see a “+” icon — click anywhere on the image to insert a number.
You can adjust the size of the number.
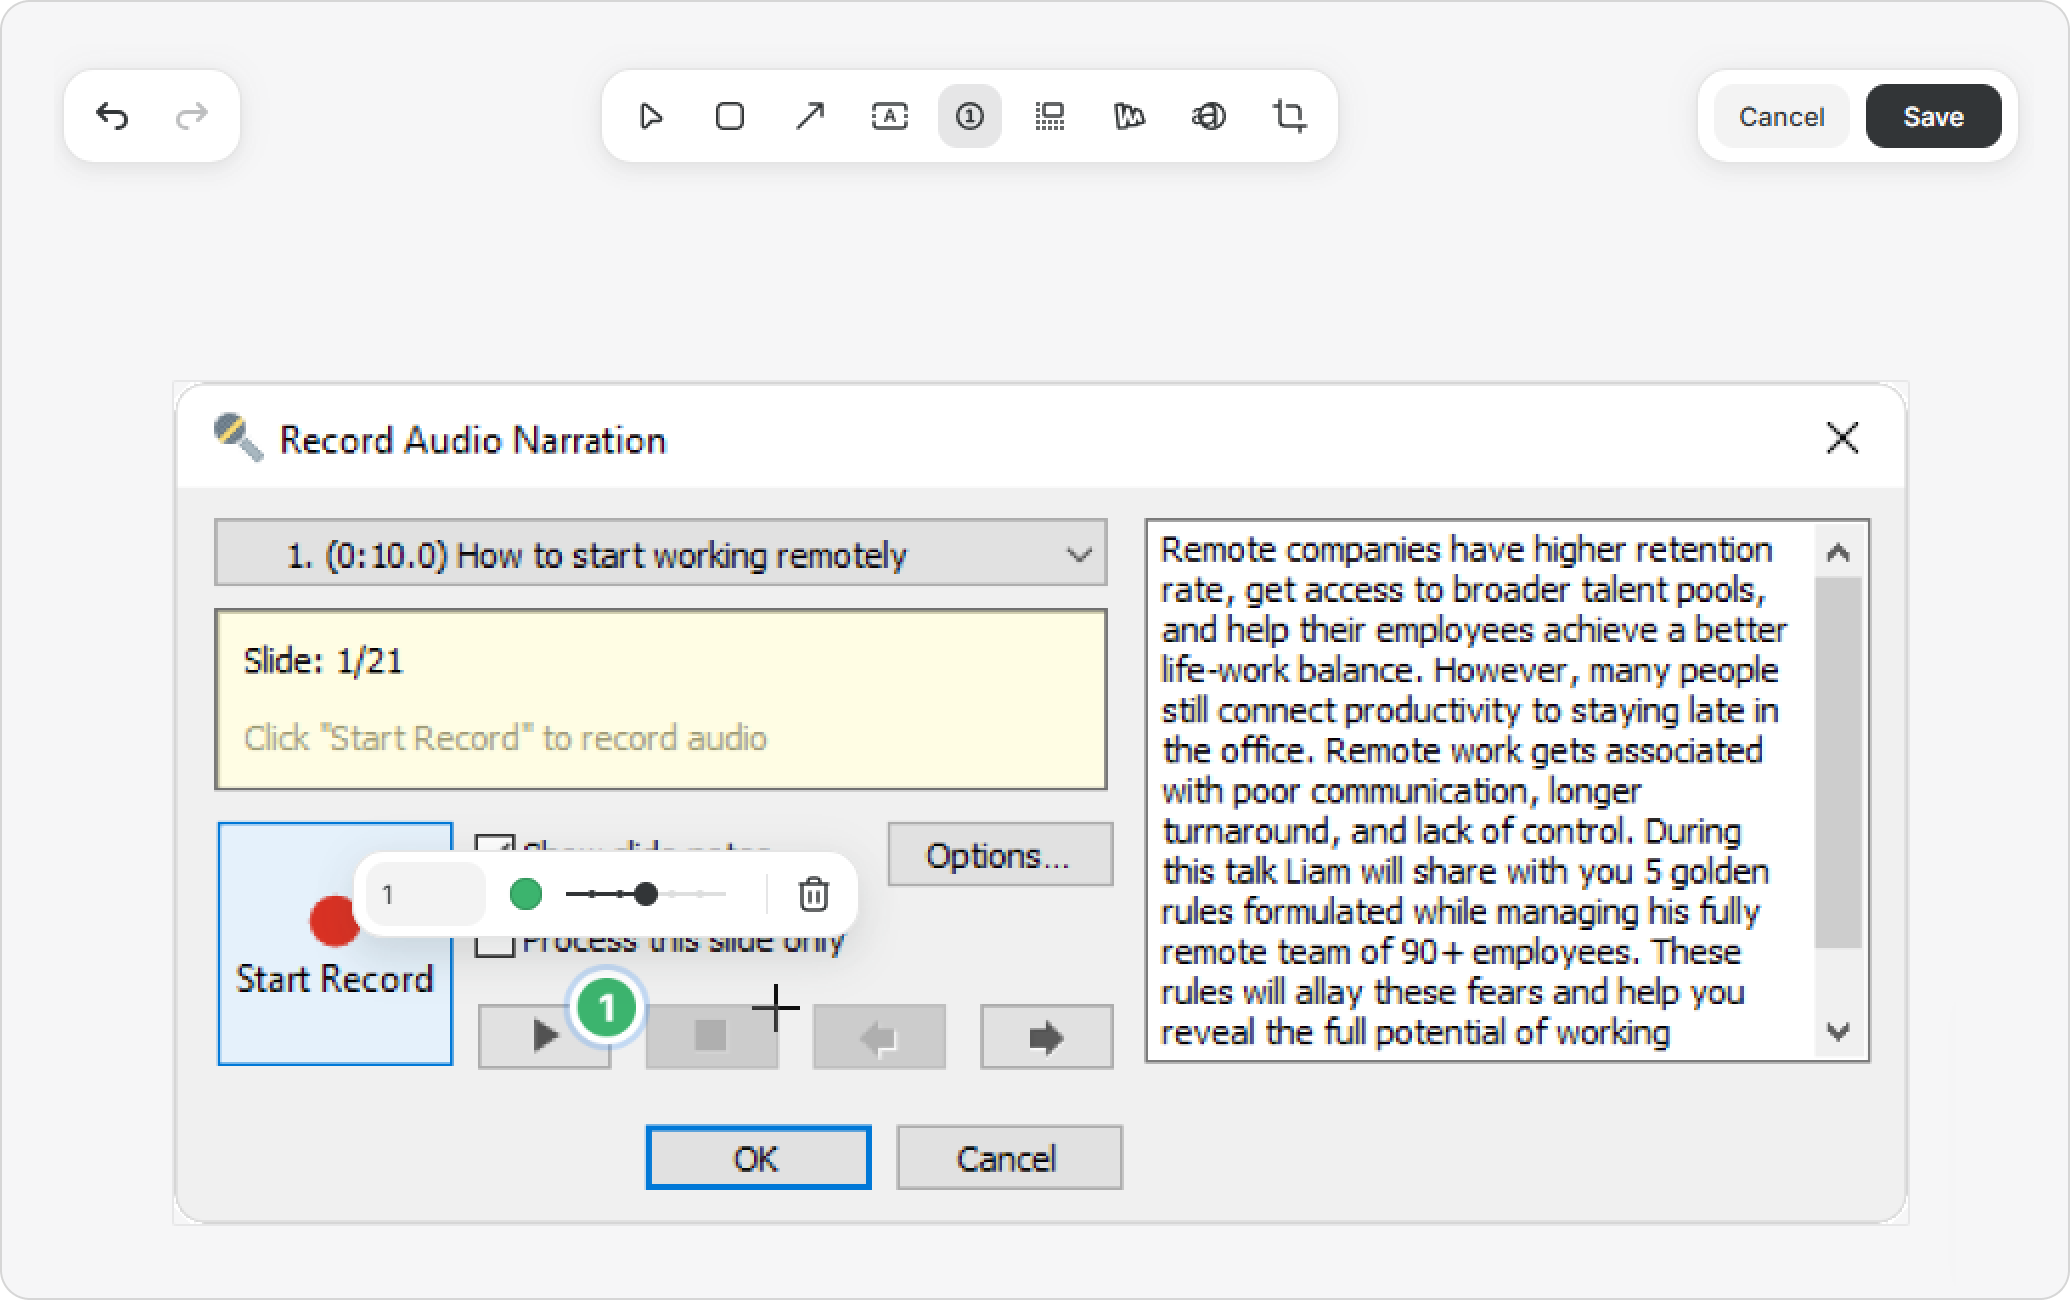
- Keep adding numbers in the desired order — each digit is added automatically.
You can also change the number manually. Finally, click on Save.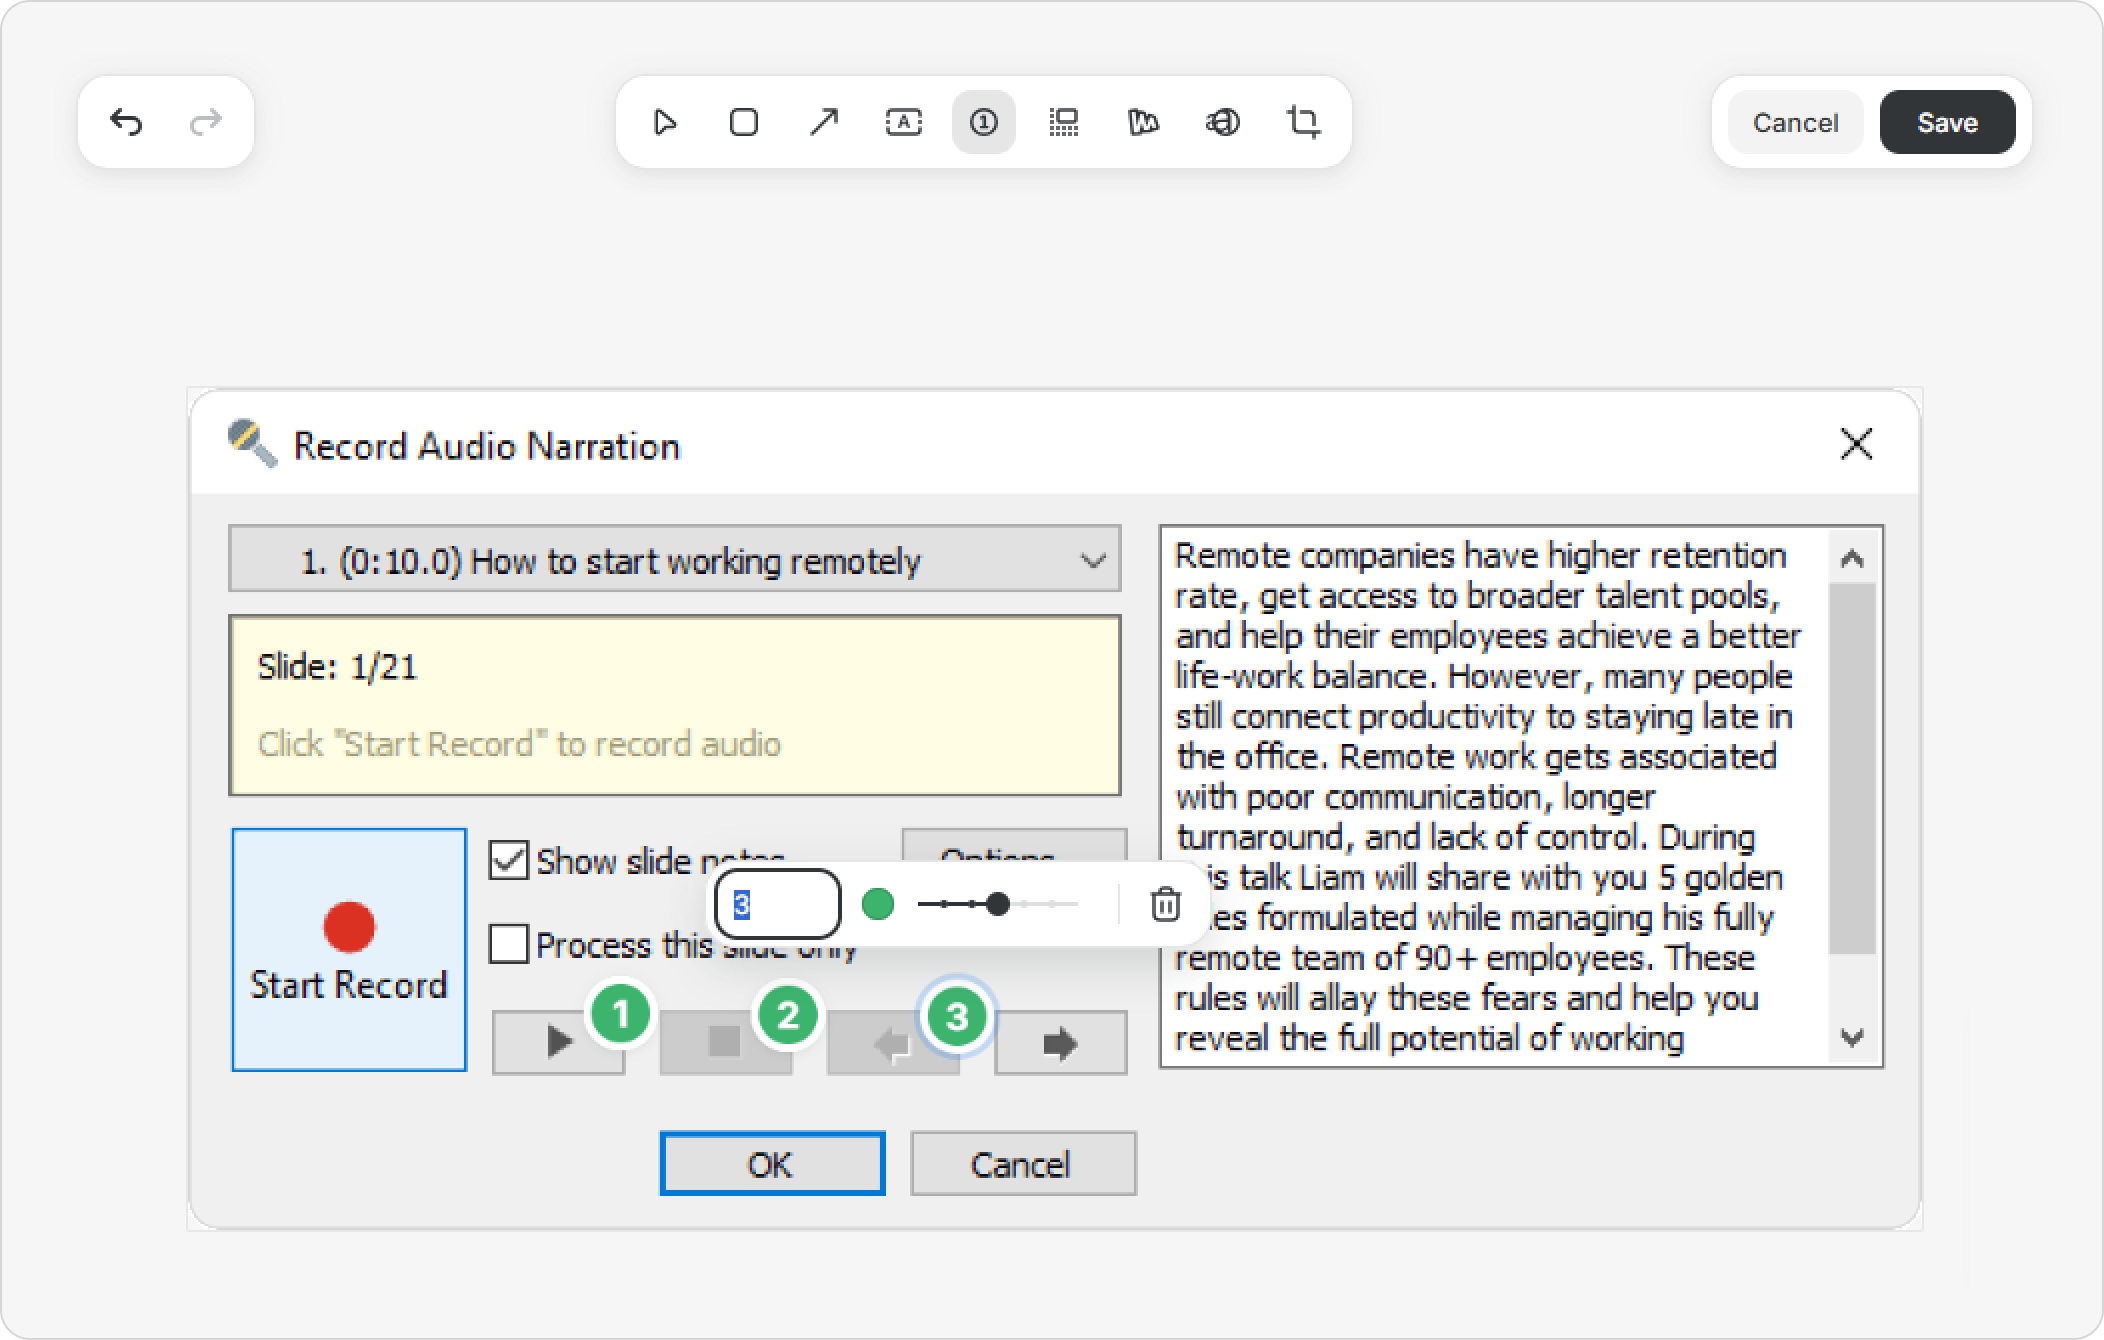
That’s it! The numbers on the image now make the instructions easier to follow.
Spotlight
- Select an image, click on Image Markup on the toolbar, and select Spotlight.
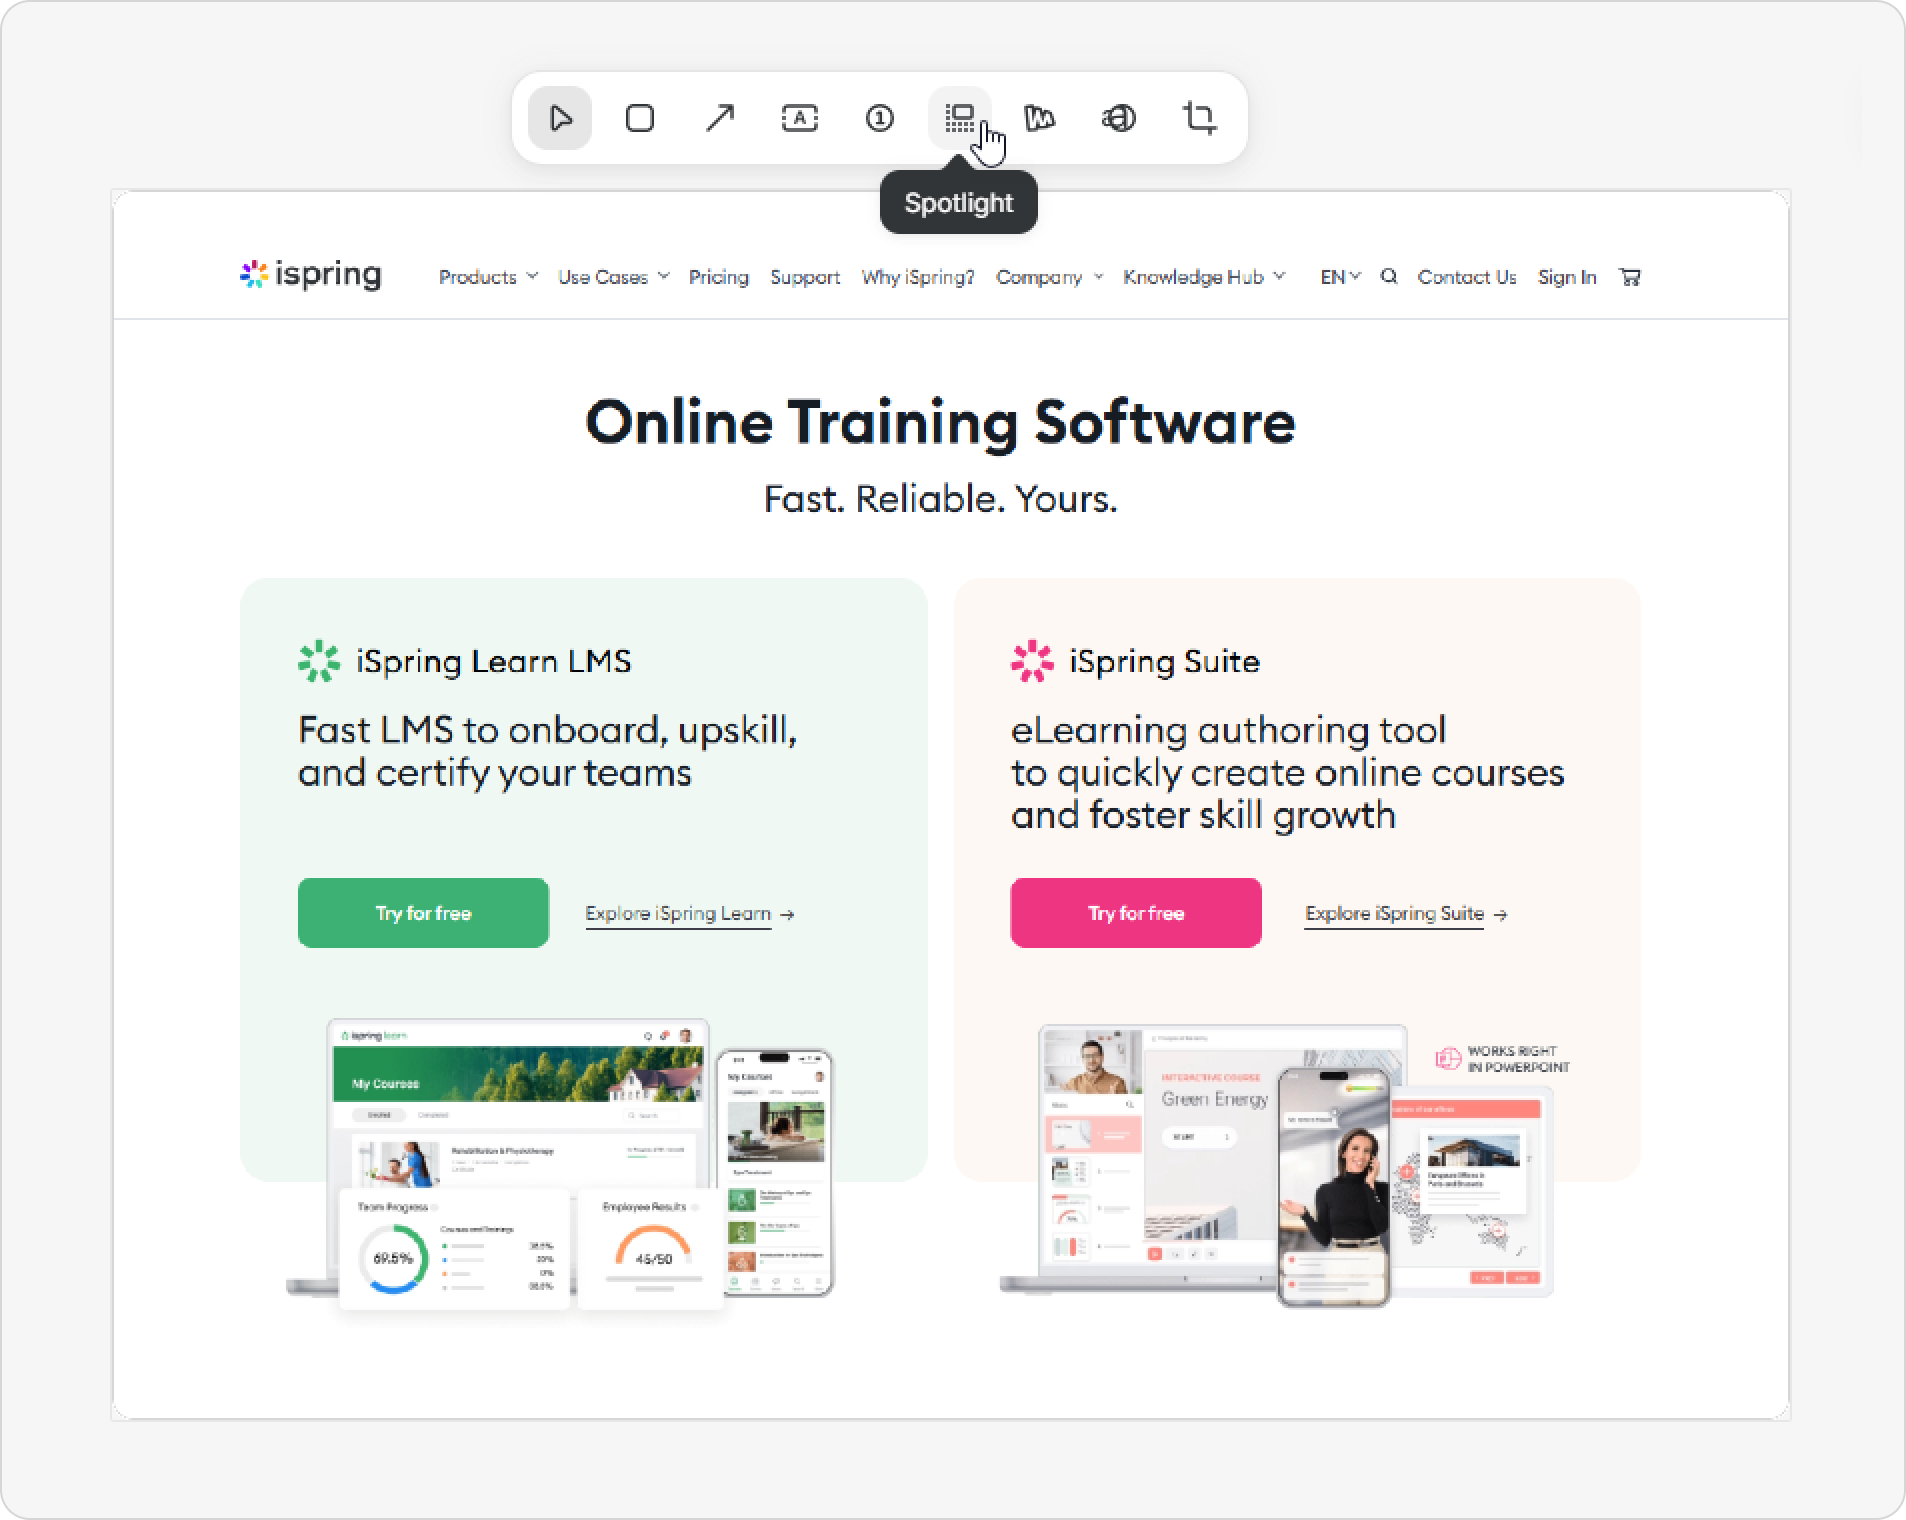
- Use the “+” icon to highlight the desired area on the image — you can select one or multiple objects.
Customize the corners, fill color, and opacity to match your style. Finally, click on Save.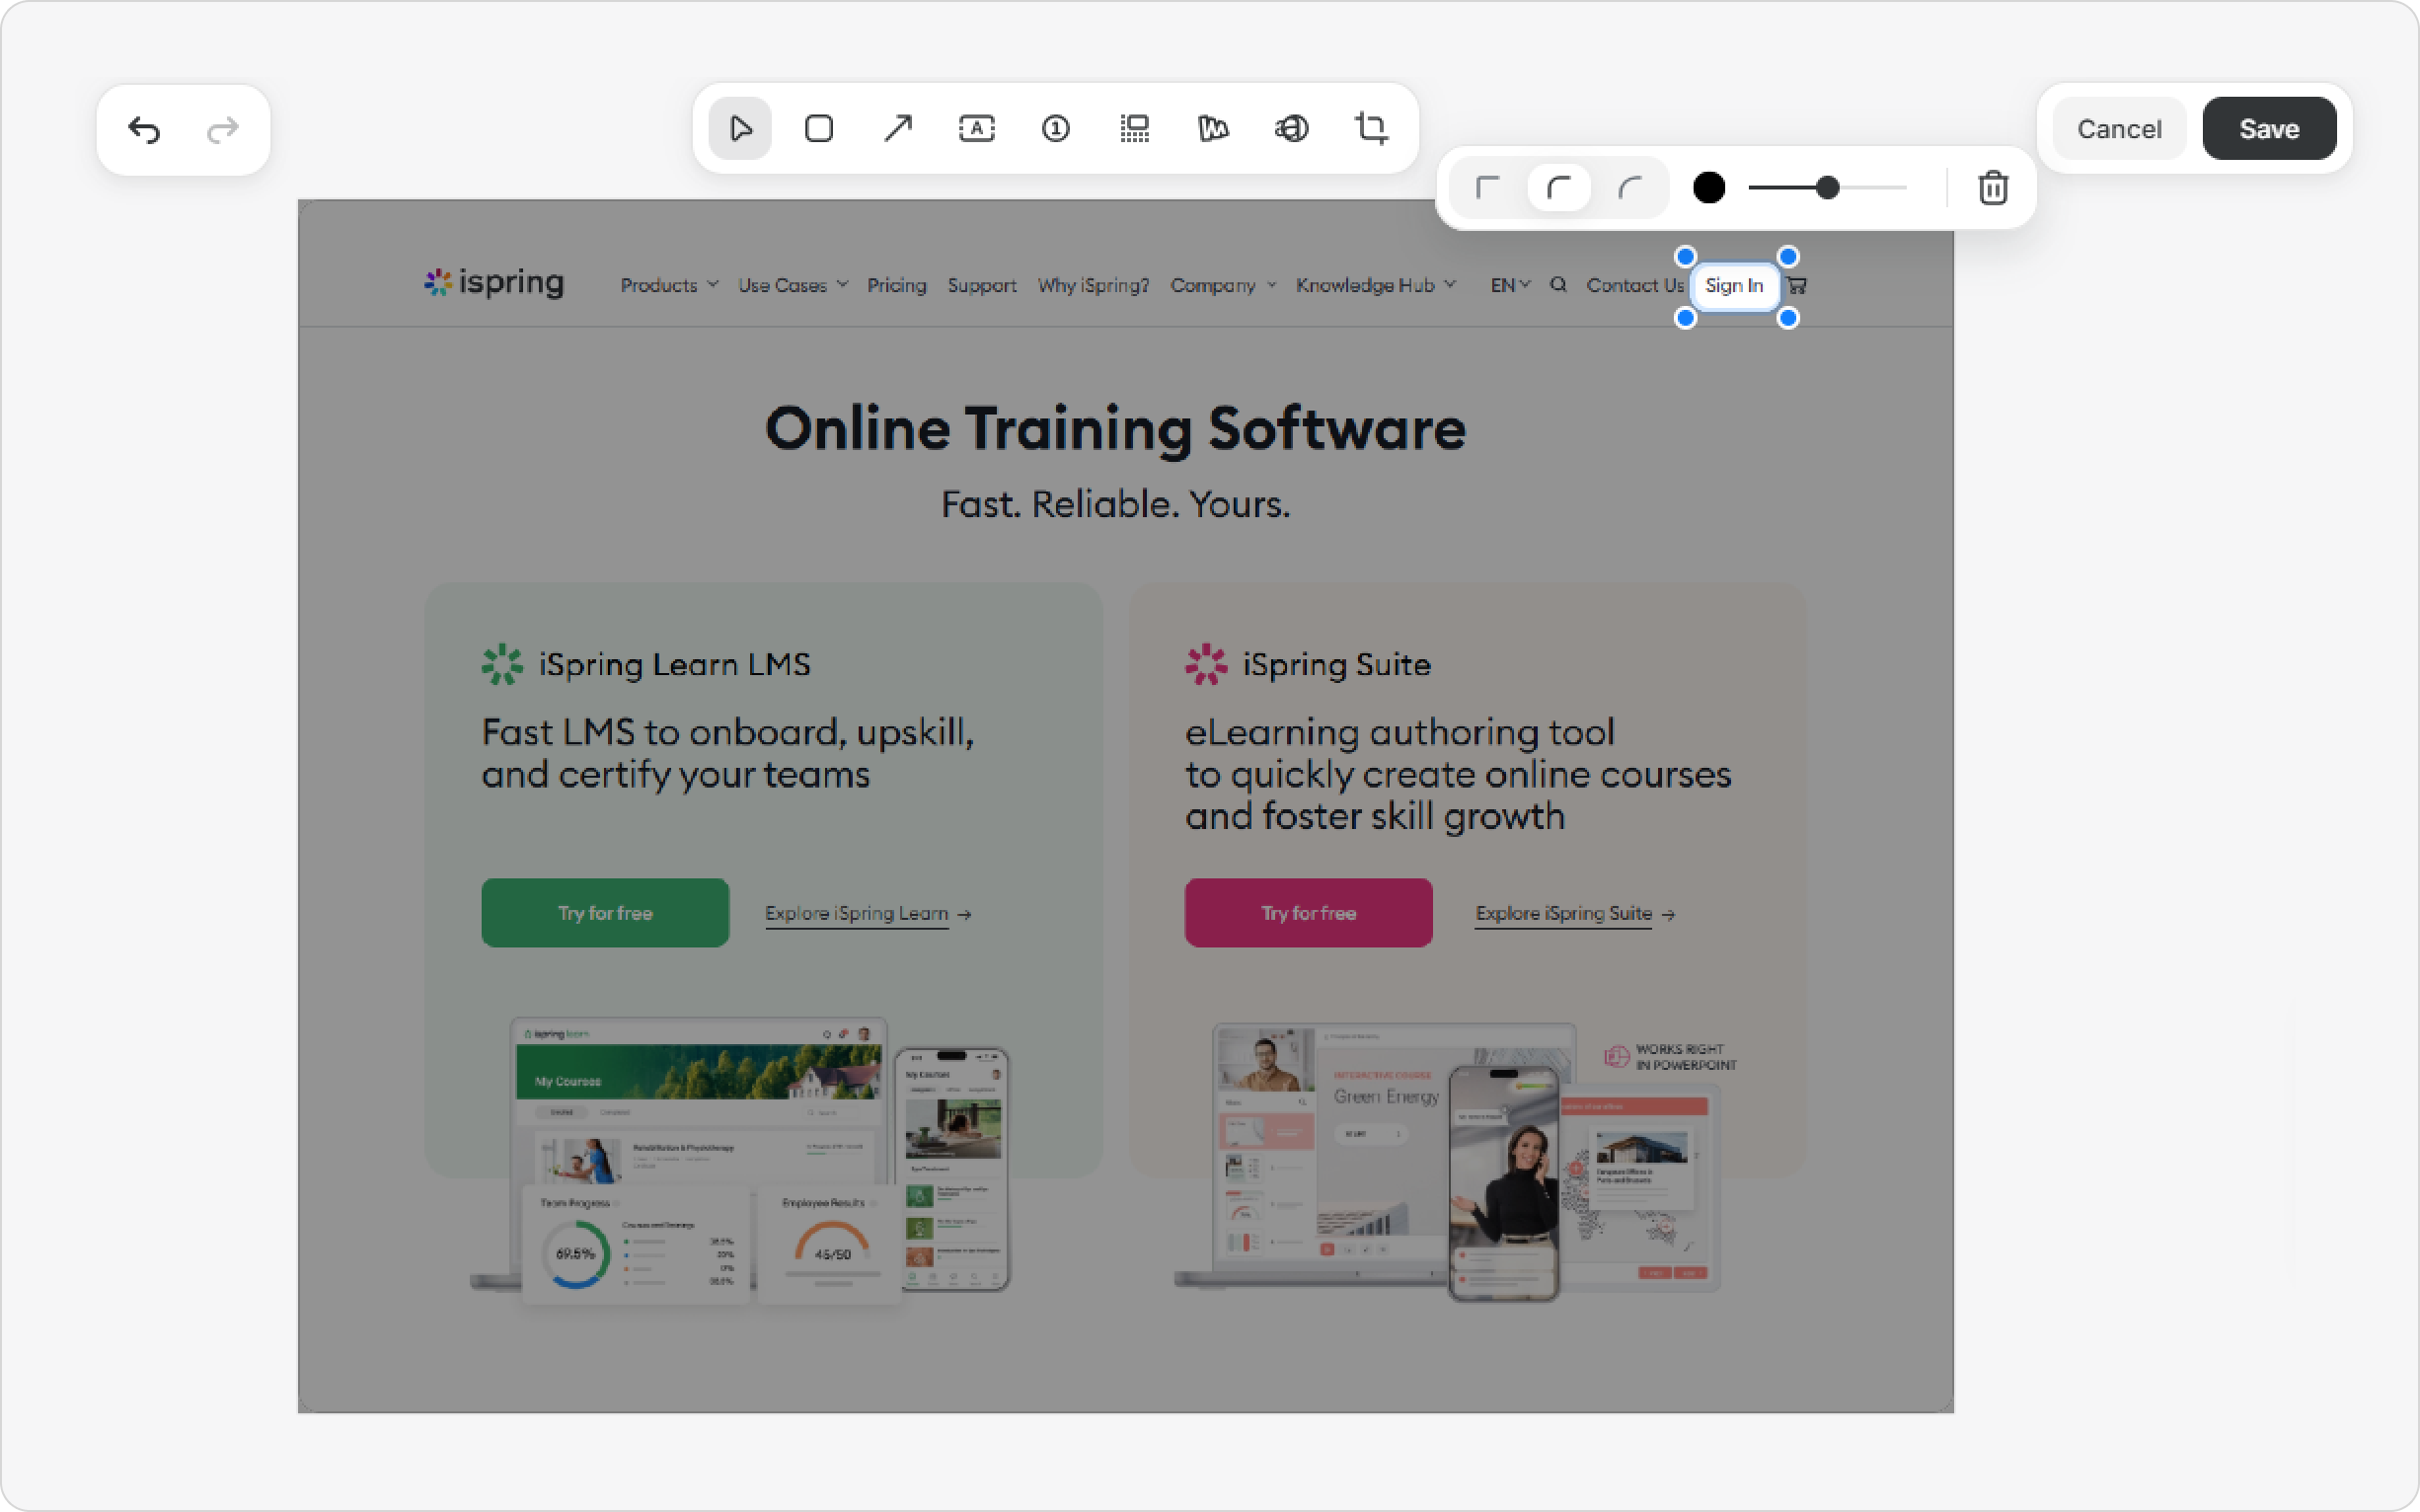
All set! Now, important details won’t go unnoticed.
How to Change Image Editing Results
- Click on the image and select Edit on the toolbar.
- The editing window will open. You can change parameters or delete unnecessary elements.
- Click on Save.
Done!