How to Create a Development Plan in the App
Here's how to create a development plan in the app.
- Tap on Development Plans > Team Development.
- Select Assign Plan > Create New Plan.

- Insert a name for the plan on the General tab.
- Next, select a plan type. The default plan types include onboarding and personal development plans.
Then, select a start date. Typically, this is the employee's first day at work. By default, the plan starts on the following Monday at 12:00 PM.
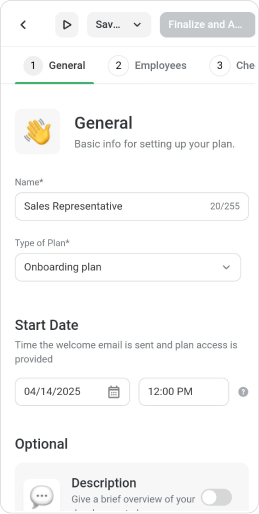
Be sure to add the new employee as a user to iSpring LMS in advance, using their work email.
In the Optional section, you can enable Plan Description and Goals to make them visible to the employee. Fill in the description and tap on Save.
Then, enter the plan's goals. If there are more than three goals, tap on Add Goal. Save your changes.
Next, we’ll select the employees who will receive a development plan.
How to assign a plan to employees
- Go to the Employees tab, where you can select new hires and their mentors.
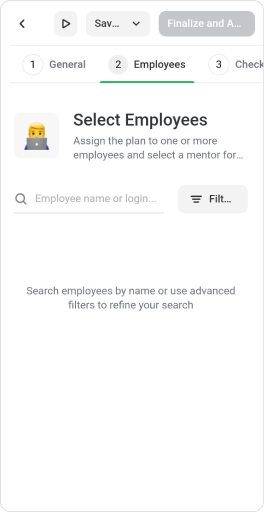
- You can search by name or use the filter. For example, if new employees have joined the customer service department, simply select it in the Department filter and mark the new hires.
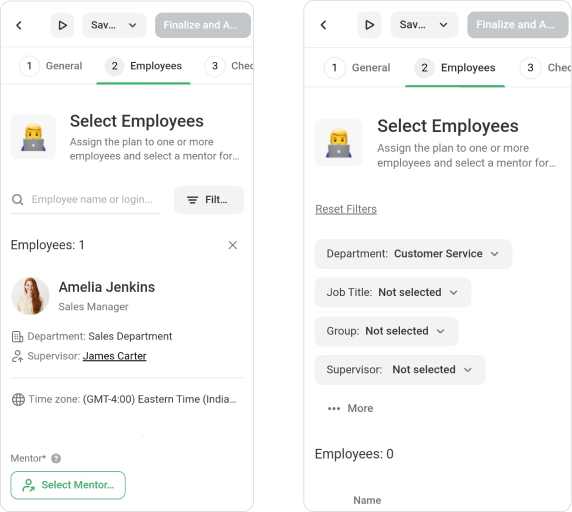
To clear the results, tap on the cross or hit Reset Filters. - You can choose the time zone in which the employee will follow the development plan. If an employee has chosen a different time zone in their account, the plan will adjust to match theirs.
- Next, assign a mentor. You can find a mentor by their name or job title.
How to fill out a checklist from scratch
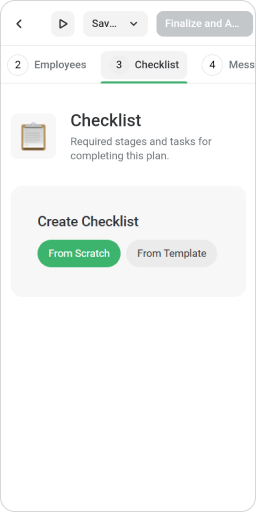
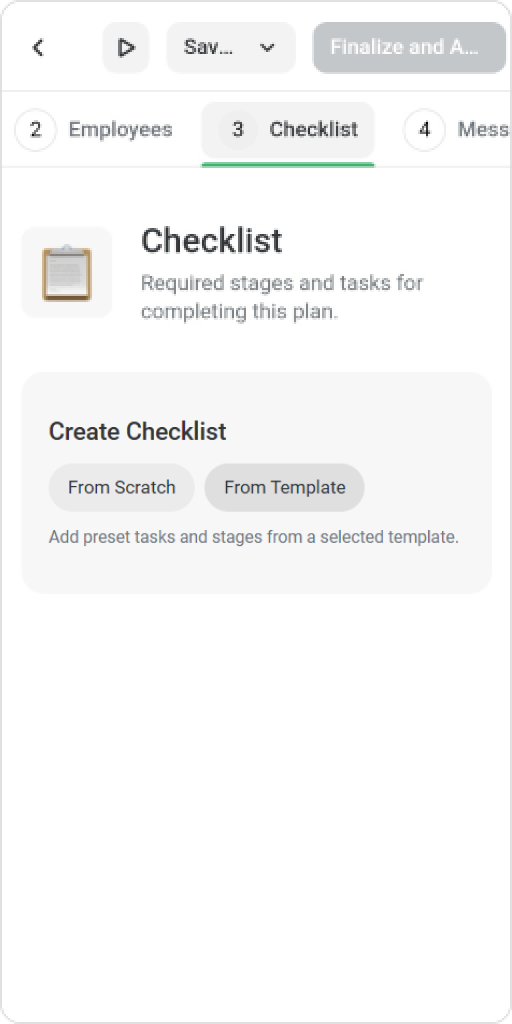
- Open the Checklist tab.
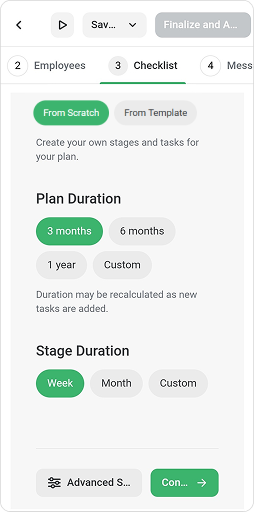
- Next, select From Scratch.
- Select the plan’s duration, e.g., 3 months.
- Then, set up stage duration. These can be tasks for each day, week, or month. You can also set up the stage duration from scratch. Tap on Continue.
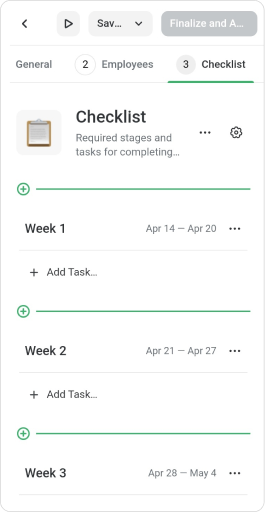
- You'll be sent to the Checklist window. You can add a 'First Day of Work' stage before the employee starts the main stages of the plan. To add a new stage, place the cursor between the stages and tap on
 .
.
- Set the stage dates, add a title and description, then tap on Save.
- By taping on •••, you can move the stage, make edits, or delete it.
- Next, tap on Add Task… > Task.

- Write in the task’s name and add a description. You can include links to resources, detailed instructions, and other relevant information in the description.
By default, tasks for the first day should be completed by the end of the day, and other tasks are due by the last day of that stage. In the Due Date field, you can set custom due dates, by midday, for example. Just choose Select date and time.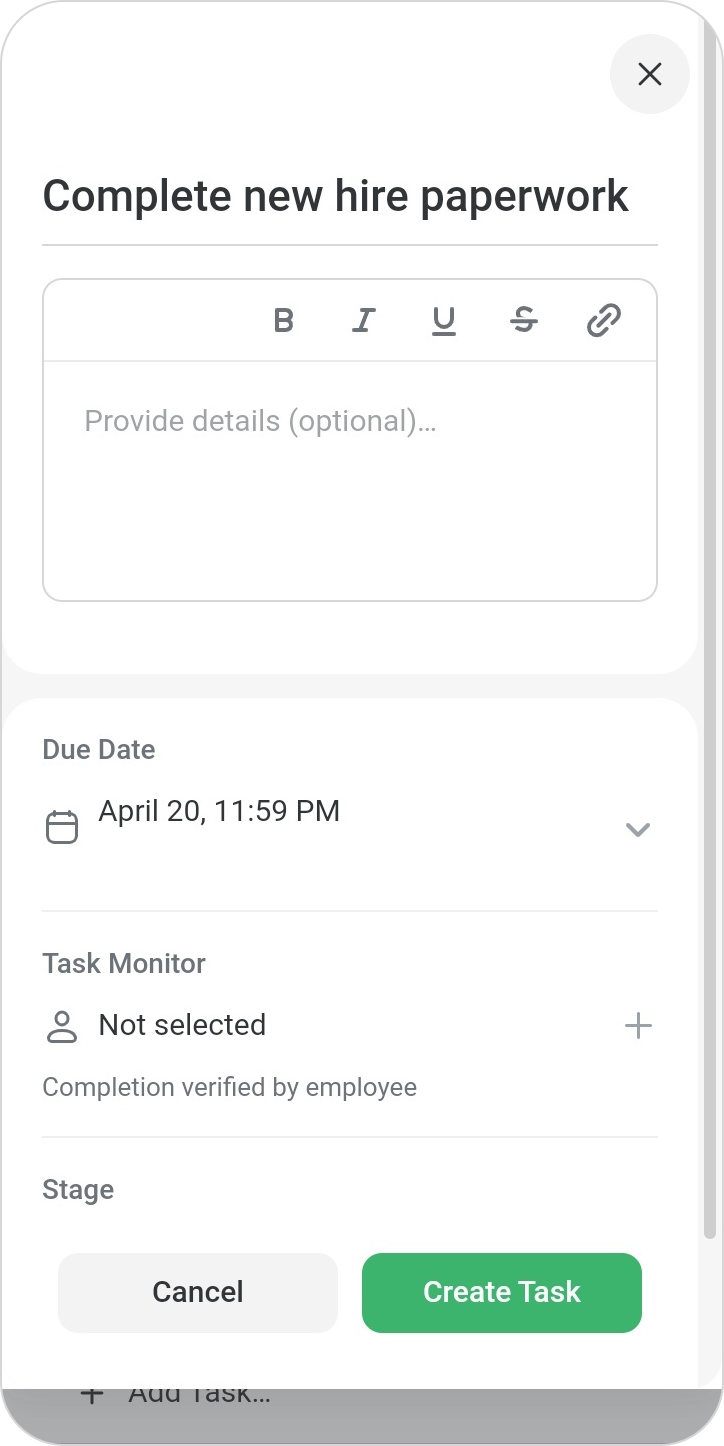
Next, assign a task monitor who will confirm that the task has been completed. - Finally, tap on Create Task.
Good job! You can follow the same steps to create tasks in other stages.
How to create a checklist from a template
- On the Checklist tab, tap on From Template.
- Select a template from those available in your account, such as a ready-made plan from iSpring. Tap on Continue.
- Edit the tasks and set new due dates.
- Edit the plan and save.
How to edit a stage
You can edit the names of stages, set deadlines, and add descriptions.
- Select a stage, such as Week 1, and tap on ••• > tap on Edit Stage.
- Set new deadlines for this stage. For example, 1 day.
- If necessary, change the name of the stage.
- In the description, you can outline the goals of the stage or skills it will help to develop.
How to add a new stage
You can always add a new stage to the plan.
- Tap on and select New.
- If your templates include a stage with relevant tasks, tap on From Template to bring it into the new plan.
- Then, find the stage you need, open the dropdown menu, and select the ones you want to add.
- Tap on Add.
The stages will retain their original due dates, so be sure to update them as needed.
Nice work! The plan structure and tasks are set. Now, let’s assign task monitors.
How to assign task monitors
You can assign a single or multiple task monitors to a task.
- Select a task and tap on •••, then tap on Edit.
- Or you can open a task and tap on + where Task monitor appears.
How to customize messages for employees
Welcome Email
Write a welcome email to introduce the onboarding plan to employees. You can customize the default text by sharing information on the company's or department's values, for example.
Onboarding Popup
You can enable the onboarding popup to let the employee learn about the plan’s goals, their mentor, and other details before getting started. The message texts can be customized.
Tap on Preview to see what the message will look like when the employee views it.
Completion Message
Turn on the completion message to let the employee know that the plan has been completed and what to do next. The default text applies to all plans, but you can customize it for this one.
How to customize the design
Once you have created the checklist and drafted the messages, you can customize the plan's design.
- Open the Design tab.
- Choose a color scheme: light or dark theme, or a single accent color for all content.
- Adjust the background, text, and button colors. We recommend using colors that align with your brand.
- Keep the default image or upload one that better represents the plan’s purpose.
- Tap on Preview to see what the plan will look like when the employee views it.
Great job! The development plan is ready. Save your changes and publish the plan as a draft. That way, you can always come back and make edits.
To use this plan as a template for subsequent plans, tap Save As > Template. This makes it easy to adjust the plan for different roles.
If you're ready to assign the plan, tap on Finalize and Assign.