Once you are done editing your video, upload it online to iSpring Cloud hosting and sharing service from the iSpring Cam Pro interface.
This option is available only if you launch iSpring Cam Pro separately from iSpring Suite. If you publish a video from the iSpring Cam Pro app included in iSpring Suite, upload to iSpring Cloud will not be available.
To publish your video project to iSpring Cloud, follow the instructions below:
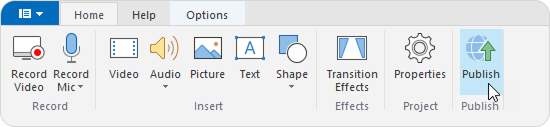
- Click Publish on the iSpring Cam Pro toolbar.
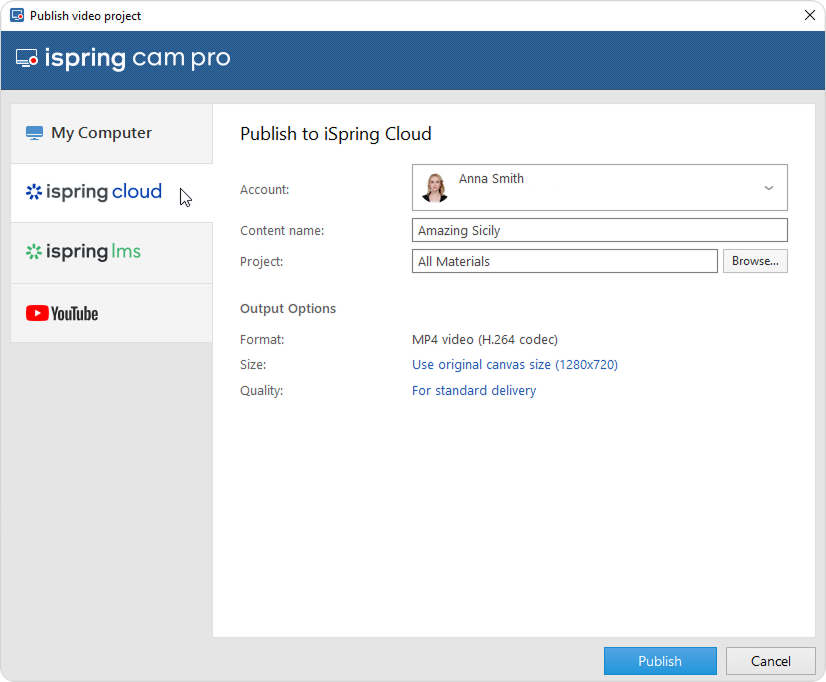
- In the Publish video project window, go to the iSpring Cloud tab.
- Click on the Sign in. You’ll be taken online.
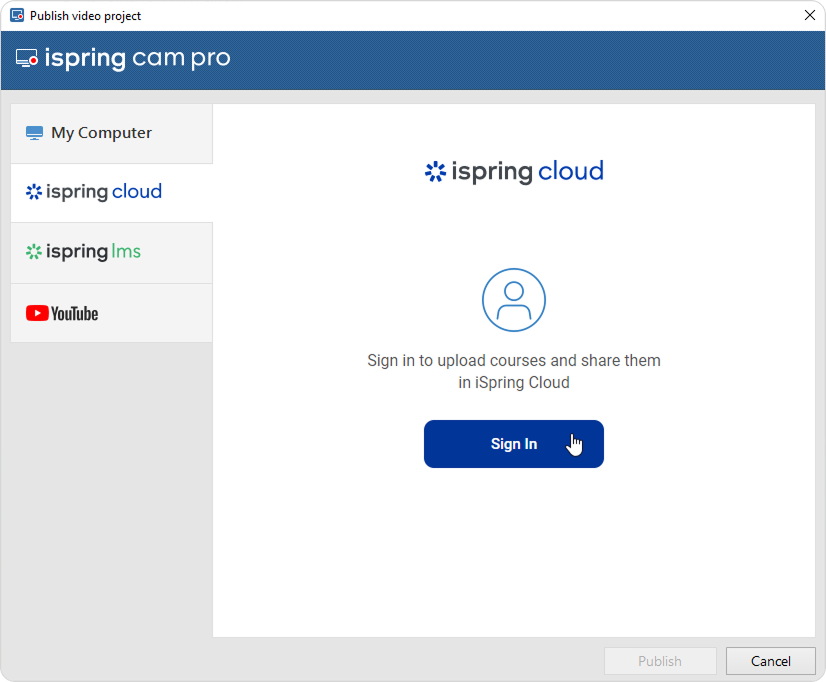
Enter your iSpring Cloud account credentials. Your login details will be saved in iSpring Cam Pro, so you won’t need to enter them each time you publish.
- Click Browse... to the right of the Project field, choose the folder to upload your content, and click Select. By default, your video will be uploaded to the general content list (Repository).
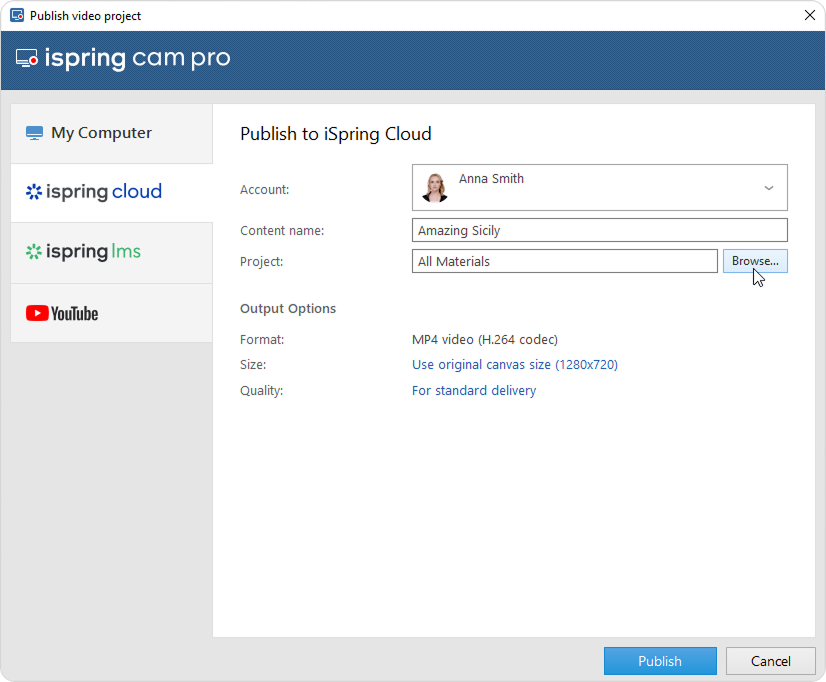
- Then, set up output options:
- Click the Publish button.
- iSpring Cam Pro will upload your video and it will appear in the iSpring Cloud Repository. When the publishing process is successfully completed, a new window will come up. To open the published video in the iSpring Cloud interface, click Play Video.
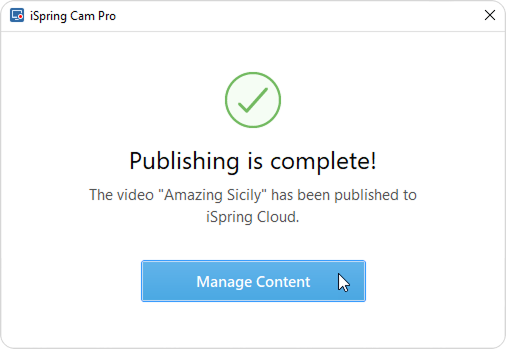
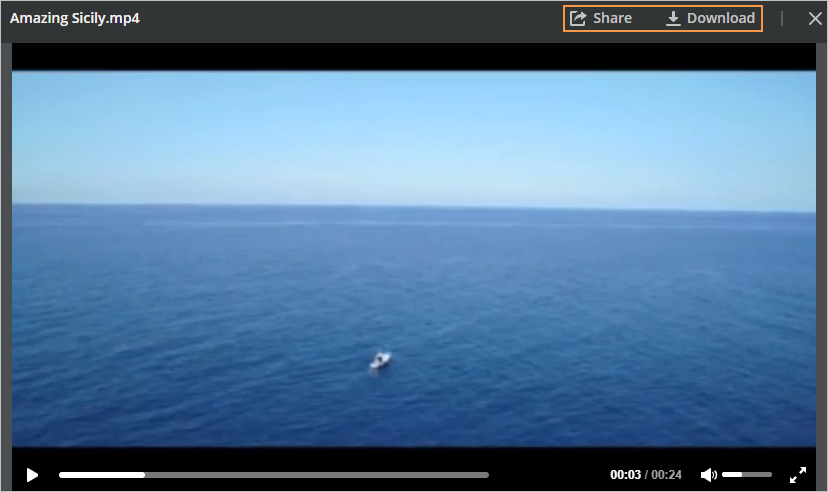
You will see your video preview in the iSpring Cloud account. From there, you can share the video with your students and colleagues or download it to your computer.